Your agent just helped you crank out a prototype. It runs on localhost, the UI looks good, and the core flow works. Now comes the part that always drags: turning “works on my machine” into a real environment. You open a hosting dashboard. Then a database dashboard. Then auth. Then analytics. You follow setup docs, create accounts, generate keys, paste them into a .env, and try to remember where each secret lives and who can see it. By the time you’re done, you’ve got resources scattered across providers and credentials spread across files, terminals, and tabs. It’s hard to make it repeatable, and harder to make it secure.
Provisioning a modern app stack is still too manual. Dashboard hopping, brittle setup guides, and copy/paste credentials slow teams down and create key sprawl. It’s even worse with AI agents, because agents need deterministic steps and real credentials, not screenshots and guesswork.
Stripe Projects is a new tool in the Stripe CLI, backed by an integration protocol co-designed with developer tool providers, that lets you provision real services from the terminal, keep resources in your provider accounts, sync agent-ready credentials safely, and upgrade to paid tiers when you need more, without rebuilding your stack or leaving your terminal.
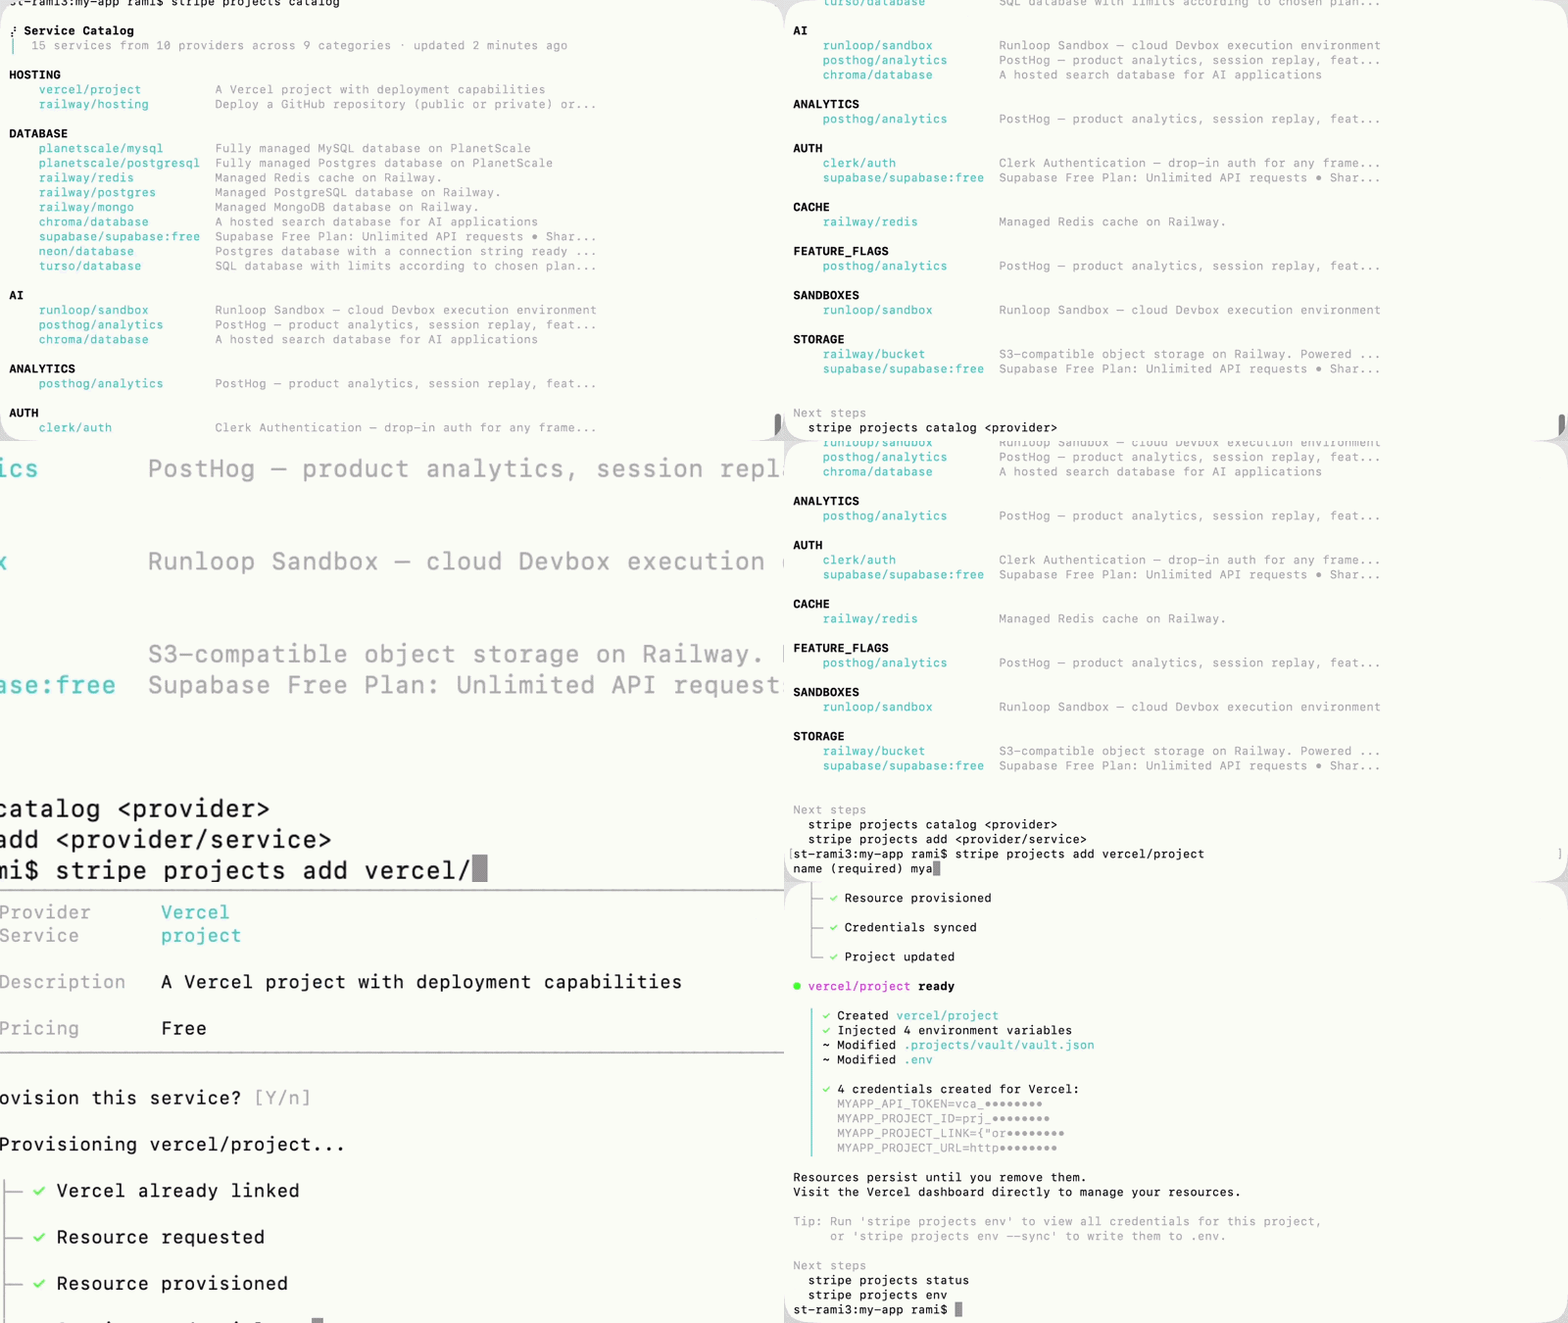
Try it yourself
In about 10 minutes, you’ll go from a local repo to a working stack backed by provider accounts you own. You’ll attach hosting, a database, auth, analytics, and AI-friendly building blocks, then sync real credentials back into your environment safely. Finally, if your load demands it, you can upgrade a service to a paid tier and have Projects handle payment without re-entering payment details across provider dashboards.
Step 1: Install the Stripe CLI and create a Project
Install the Stripe CLI and the Stripe Projects CLI plugin. In your local project directory, initialize a project:
brew install stripe/stripe-cli/stripe && stripe plugin install projects
stripe projects init [my-app]
What you should expect:
- A project named
my-app(or the same as your directory name) is created and populated with.projectsconfigurations, a blank.env, and relevant agent skills. - You’ll be guided to add new services or link existing provider accounts.
- Your project is configured with a secure place to keep credentials, and can sync them into local development, CI, or a team secret manager depending on your workflow.
What is a project?
A project is the unit Stripe Projects manages. It’s a lightweight manifest plus a Stripe-backed record of the services you’ve attached, the provider accounts you own, and the credentials those services require. It’s designed to make your setup repeatable across machines and teammates, and deterministic enough for agents to operate safely.
Step 2: Add services from co-design partners
We’re co-designing the integration protocol with some of the most popular providers developers use when building a production-ready stack. The protocol standardizes provisioning, plan selection and upgrades, and credential handoff so the Stripe CLI, and your agents, can do this reliably across providers.
Services available in the developer preview:
| Provider | Categories |
|---|---|
| Vercel | Hosting |
| Railway | Hosting, Databases, Storage |
| Supabase | Databases, Auth |
| Neon | Databases, Auth |
| PlanetScale | Databases |
| Turso | Databases |
| Chroma | Vector database |
| PostHog | Analytics |
| Clerk | Auth |
| Runloop | Sandboxes |
Example flow:
stripe projects catalog

stripe projects add vercel/project
stripe projects add neon/postgres
stripe projects add clerk/auth
stripe projects add railway/bucket
stripe projects add chroma/database
You should expect:
- Resources are provisioned in the provider account you own, with normal access and dashboards.
- Credentials are returned in a format that works for humans and agents.
- Changes are auditable and repeatable.
Step 3: Upgrade to a paid tier when you’re ready (with payments handled securely)
A common flow is to start on a free tier, then upgrade once your app is real.
# See what you’re running
stripe projects status

# Upgrade to a paid tier
stripe projects upgrade <provider>/<service>
When you upgrade, Projects will handle the payment step without you re-entering payment details across provider dashboards. You add your payment method to Stripe once. Then, when you select a paid plan in the CLI, Stripe tokenizes your payment credentials into a Shared Payment Token and securely grants the provider a scoped payment credential for that upgrade. The provider will charge using that token, while your underlying payment credentials stay protected and are not manually copied around.
In the developer preview, this payment handoff is only available in the US, EU, UK, and Canada, for supported providers and plans.
Step 4: Sync credentials to your environment
stripe projects env --pull
This is where Projects earns its keep. The biggest security footgun in developer workflows is still key sprawl: keys living in Slack messages, old .env files, random notes, and half-rotated tokens that nobody wants to touch. Projects treats credentials like first-class infrastructure, not strings you paste into random places.
That has a huge side benefit for teams. Onboarding a new engineer onto an existing project becomes a predictable, auditable step instead of a scavenger hunt. If someone gets a new laptop, switches dev boxes, or you spin up a fresh environment in CI, you can re-sync the right credentials in minutes with the same flow every time, without exposing secrets more widely than necessary.
Here’s what that can look like after a sync, with values redacted:
VERCEL_PROJECT_ID=...
NEON_DATABASE_URL=...
CLERK_SECRET_KEY=...
POSTHOG_PROJECT_API_KEY=...
CHROMA_API_KEY=...
Get started from the CLI or through your coding agent
If you want the direct path, install the Stripe CLI and initialize a project:
brew install stripe/stripe-cli/stripe && stripe plugin install projects
stripe projects init [my-app]
When you initialize a project, Stripe Projects writes coding-agent skills into your local project directory. Those skills give your agent the context and actions it needs to work against your project locally.
From there, you can either use the CLI directly or ask your agent to achieve outcomes like: “Set up Railway hosting and a Neon database for this repo, sync credentials, and add PostHog on the free tier.” Your agent uses the same Stripe Projects CLI workflow under the hood, so provisioning, upgrades, configuration, and credential sync all happen in a deterministic, auditable way without leaving your terminal.