# Stripe Dot Dev > Stripe's developer blog and community hub featuring engineering deep-dives, product announcements, developer events, and technical tutorials on payments, fraud detection, machine learning, and infrastructure. Stripe Dot Dev (https://stripe.dev) is the engineering blog and developer community site for Stripe. Content is organized into long-form blog posts and developer events. ## Blog Posts Watching an agent build a payment integration is impressive. It is fast, and building has become almost easy. A few prompts, and the `PaymentIntent` is created, the Payment Element renders, the flow runs end to end. The demo passes. That speed is what developers tell me constantly now: building on Stripe has never been this quick. And they are right. The next step is helping the integration understand what the money is supposed to do, not just how to move it. I am the Technical Advisor to the Head of Professional Services EMEA, and reviewing integrations for large users is most of my job, so I see where the gaps are. Someone builds an integration, it looks correct, and most of it is. Then they come to us saying it’s not working as expected, even though on paper it should be. The code ran, but the result did not match the business intent behind it. When the business intent is missing, nothing throws and nothing is logged. The integration simply starts sending signals, money rests in states it should not rest in, and a week later a support ticket lands: "I was charged and got nothing." The code was correct. The business intent behind it had not been made explicit yet. The good news is that these signals are readable, and once you can read them, you can get ahead of them. ## Why payments are different Payments are different from most software a team builds. The developers usually have strong development skills, but not always payment skills. They work from the API reference and build against it the same way they would build anything else. Two things are usually missing at once: the payment knowledge, and the business intent behind the money. Put those gaps together and you get code with correct syntax that passes tests, but then behaves in ways nobody decided on in production. It does not crash. It moves money along paths the business never chose. The model was never the constraint. Knowing what the money is supposed to do is the part worthy of your attention, and the part you can add. That knowledge rarely announces itself as an error. Instead the integration emits signals, small clues in the data that something is off. Each looks minor and unrelated on its own. Read together, against what the money was supposed to do, they point at a single source, the part a developer cannot see without payment knowledge. That is where a review begins, and it is exactly what you can teach the integration to check for itself. This post walks you through how to read those signals, encode the business intent, and validate every build against it, whether the build came from a person or an agent. ## The PaymentIntent and the business intent When I start an integration review, I ask for the first fifteen minutes with no code, just the business: what should happen to the money, and what must never happen to it. If I read the code first, I get biased and start reasoning from code to code. I would rather build the end-to-end business version in my head, find the payment pattern that fits it, and only then look at how it becomes a `PaymentIntent`. That order matters, so enforce it within your team: define the business intent before the payment intent. The two share a word for a reason. The `PaymentIntent` is the Stripe object that tracks the payment through its lifecycle. The business intent is the set of decisions behind it, the rules the money has to obey. An agent is very good at producing the first. It cannot know the second unless someone tells it. Here is what that gap looks like in code. A `return_url` is required for any redirect-based payment method, so on its own it tells you nothing. The signal is a flow that redirects every customer away, even card payments that never needed a redirect: ```javascript // Client. redirect: "always" bounces every customer to the return page, // even card payments that never needed a redirect. // redirect: "if_required" would keep those on the page. Why always? And what runs there? const { error } = await stripe.confirmPayment({ elements, confirmParams: { return_url: "https://example.com/order/complete", }, redirect: "always", }); ``` The syntax is correct. But the object cannot tell you why every payment leaves the page. Is fulfillment meant to happen on that return page? Was redirecting everyone a deliberate business decision, or just the default nobody questioned? The business intent behind it is nowhere in the code, and neither the object nor the model can enforce a rule it was never given. ## Signals that the business intent is missing You have probably seen at least one of these. On their own they look like small, unrelated bugs in different parts of the stack. Put them next to the business intent and they turn out to be the same failure wearing five faces. **An authorization rate of 43% that was really above 90%.** A retry loop was resubmitting hard declines, `authentication_required`, `incorrect_number`, or `expired_card`, none of which passes on a second attempt. It looks like a processor problem. The cause is retry logic that treats every decline the same instead of branching on the `decline_code`. **`PaymentIntents` resting in `requires_action`.** A server-side confirm with no client-side `handleNextAction`, so the 3DS step is never triggered and the intent waits for an authentication nobody sent. Money that could have been collected is instead stuck, and nothing errors. **A `requires_capture` with money held and no order behind it.** The order is created by a client call that runs after the authorization lands. Kill the tab in that window and the money is held with nothing behind it. The customer was charged and got nothing, and the exception tracker is empty. **Connected accounts that quietly went `restricted`.** No subscription to `account.updated`, so an account hits `requirements.currently_due`, flips to `restricted`, and keeps taking payments into `testmode_charges_only`. Live volume is lost while the code that moves money keeps working. **Async payment methods refunded like cards.** The integration fulfills off the return URL, ignores `payment_intent.processing`, and never handles the `succeeded` that lands a day or two later. Revenue you already earned, refunded. Independent signals like these tend to arrive late, after the money has already moved. Five subsystems, five different bugs. None threw an error. None is a syntax problem. Each one is a decision about how the money should behave that nobody actually made. On their own they look unrelated, but read against the business intent they share one source: the payment knowledge that was never written into the code. Once you can read them, you can encode them. ## Encoding the business intent This part is harder, because the right answer depends on the team, and there is no single best practice. Think about how you already treat code style: a formatter and a linter keep the syntax consistent so anyone can read it. Business intent needs the same discipline, and most teams do not have it yet. Whether you use a well-named function, a comment that states the rule, a pull request linked to a documented requirement, metadata on the object, or a Stripe custom object does not matter. The point is that the decision is written down where the next person, or the next agent, cannot miss it. Here is the test I use. I ask a developer why a parameter is set the way it is, and I want more than the technical meaning. I want the business needs behind it. Why does every payment redirect? Why do we retry, and which declines? What happens when a connected account becomes restricted? If the answer is "that is just how it was generated," the intent was never encoded. Metadata is a good habit here, because it makes the intent legible from the outside. Open a `PaymentIntent` in the Dashboard, and if the metadata says which order and decision it belongs to, you understand the business behind it without reading the code: ```javascript // Server. Put the business context on the object itself. const order = await orders.createPending(); // your order id, status "pending" const paymentIntent = await stripe.paymentIntents.create({ amount, currency, // Business decision: authorize now, capture only once the order is confirmed. // Never hold funds we cannot fulfill. capture_method: "manual", // Business decision: every authorization must trace back to an order. metadata: { order_id: order.id }, }); ``` ## Validating every build against the intent We have an agent to build the code. We need an agent to validate it. The best teams I work with have stopped treating the build agent as the whole story. They run a small system of agents. An orchestrator coordinates the work for the development team. A builder agent writes the code. And a verifier agent runs after the build, with one job: check that what was built actually does what the money is supposed to do. The verifier is where it comes together. To build one, someone has to encode the business knowledge into it. You cannot check that a terminal decline is never retried, or that no order exists without an authorization behind it, unless someone states those rules. So the verifier forces the business intent to be written down. In most reviews the business owner never stated it up front, which is exactly why nothing encoded it. Building a verifier forces the conversation that should have happened at the start. The important part is that those rules are code, not a checklist. Here are three of the five signals from earlier, each written down as something a verifier can run on every build. The other two follow the same shape: ```javascript // Verifier rules, each one a signal that cost a live integration money. const paymentRules = [ { rule: "Never retry a terminal decline", check: (retry) => !["authentication_required", "incorrect_number", "expired_card"] .includes(retry.declineCode), }, { rule: "A held authorization must have an order behind it", check: (pi) => pi.capture_method !== "manual" || Boolean(pi.metadata?.order_id), }, { rule: "Async payment methods handle their asynchronous result", check: (integration) => integration.subscribesTo("payment_intent.processing") && integration.subscribesTo("payment_intent.succeeded"), }, ]; ``` How these rules run is up to the team, and both common paths work. You can encode them in a skill the verifier agent loads before it reviews a build, so the check happens conversationally as part of the agent workflow. Or you can wire the same rules into automated testing, a CI step that inspects the integration and fails the build when a rule is violated, the same way a linter fails on a style break. The teams getting the most value do both: the skill catches intent gaps while the code is being written, and the test suite enforces the same rules on every merge so nothing regresses later. What matters is not the mechanism but that the rules run on every build automatically, not when someone remembers to look. None of these came from a specification. Each one came from an integration that looked correct and lost money until someone read the signal and wrote the rule down. That is the point: the rules live where the code can be checked against them, and writing them forces the conversation with the business owner that should have happened first. And that is the shift: judgment stops being personal and becomes shared. A business team encodes what correct means into the verifier, and every build, whoever or whatever wrote it, is checked against the same rules. None of this removes the human. Encoding the knowledge into an agent does not hand over the decision, it makes it explicit and repeatable. The person still owns what correct means; the agents only enforce it. ## Conclusion The value is moving. The low-level code that makes a payment go through is getting cheap, fast. What is becoming valuable is the judgment above it: knowing what the money is supposed to do and making sure the code obeys it. So read the signals your integration is already sending. State the business intent out loud, encode it where the code can be checked against it, and keep a human owning what correct means. Implementing the `PaymentIntent` is getting cheap. Being right about the business intent behind it is now the whole job. SaaS platforms don't fit a single mold when it comes to payments pricing. An early-stage vertical software company needs simple, flexible tools to experiment and iterate. A platform moving upmarket needs granular cost control and the ability to offer sophisticated pricing to enterprise customers. And as AI features reshape how platforms monetize, that diversity is only going to increase. Connect has made significant strides on both ends of that spectrum. For platforms that want flexibility without complexity, segmented pricing lets you set and manage rates directly from the Dashboard with the ability to differentiate by payment method, geography, and other attributes. For platforms moving upmarket, Interchange Plus Plus (IC++) takes things further: it gives you the ability to offer cost-plus pricing to your users, passing network costs transparently while protecting your margins, without the operational burden of managing rate tables, navigating messy reconciliation, or tracking constant interchange updates from the networks. That last capability is proving to be a meaningful unlock. In the article below, we dig into how network cost passthrough actually works: what it means for your pricing model, how to set it up and how it shows up in your users' fee reporting. ## Why blended pricing hurts platform margins On a blended rate, the platform absorbs all interchange variance. When your card mix is predictable, this isn’t a problem. But premium rewards cards, corporate purchasing cards, and high-interchange consumer cards can cost materially more in network fees than your blended rate assumes. The difference comes straight out of your spread, and as platforms scale and attract larger, more sophisticated merchants, that card mix tends to shift in the higher cost direction. Network cost passthrough solves this by moving the platform to IC++: interchange and card scheme fees flow directly to connected accounts at cost, and the platform earns a clean, protected margin on top. Regardless of card mix, the economics become predictable. The operational headache of tracking interchange schedules, managing rate table updates, or reconciling cost variances disappears. And for connected accounts, the model is actually more transparent: they receive reporting on the network costs attributed to their payment, not a blended approximation of it. That combination: margin protection for the platform and cost transparency for users, is why IC++ is increasingly the default choice for platforms moving upmarket. ## Setting the stage: IC+ vs IC++ IC+ and IC++ are related but distinct offerings for Connect platforms: - IC+ (Interchange Plus): A pricing model where the platform is charged the underlying network costs (interchange + scheme fees) plus a Stripe markup, instead of a single blended rate. - IC++ (also referred to as network cost passthrough for platforms): A Connect capability built on top of IC+ that lets a platform pass its network costs through to its connected accounts. In this case, the platform can offer IC+pricing to its own connected accounts rather than charging them a blended rate. ## How network cost passthrough (IC++) works ### Eligibility requirements For your platform to be eligible for network cost passthrough, the following must be true: - Your platform must be on IC+ pricing - Your platform must control pricing (IC++ is only relevant if the platform is on a buy-rate, not on revenue share) - The connected account must have the transfers capability enabled - The connected account should be the Merchant of Record of the transaction: in practice, this means you’re either using Direct Charges or Destination Charges with the `on_behalf_of` parameter fund flows - The platform and connected account pair must be in eligible geographies (you can work with your account team to ensure geographical availability) ### Enable network cost passthrough for your connected accounts You can enable Network Cost Passthrough for a connected account either on the Dashboard or through the Stripe API. In the Dashboard, navigate to the connected account's detail page. In the monetization section, toggle on "Pass through network costs" in the Network costs tab. Through the API, create a Pricing Config Scheme of type `network_costs` for the connected account using the Stripe-Account header: ```bash curl POST https://api.stripe.com/v1/pricing_configs/network_costs/schemes \   -u "sk_live_xxxx:" \   -H "Stripe-Version: 2026-06-24.preview" \   -H "Stripe-Account: CONNECTED_ACCOUNT_ID" \   -d enabled=true ``` To check the current status for a connected account: ```bash curl https://api.stripe.com/v1/pricing_configs/network_costs/schemes/current_at \   -u "sk_live_xxxx:" \   -H "Stripe-Version: 2026-06-24.preview" \   -H "Stripe-Account: CONNECTED_ACCOUNT_ID" ``` Once enabled, IC++ passes eligible card-network costs, including interchange, scheme fees, and applicable adjustments, through to the connected account at cost. It does not pass through separate Stripe product fees. In practice, Stripe first charges network costs to your platform account on your IC+ billing schedule (typically within two days of the payment occuring). Within a few hours, we recover these costs from the connected account’s balance and add them to the platform’s balance via a Balance Transaction of type `platform_fee_transfer`. Note that if the connected account has paid out its funds, issued refunds, or otherwise reduced its balance before the recovery occurs, the network cost recovery can take the account negative. In this case, payouts are paused until the connected account’s balance goes positive again. ### Adjust the pricing for your connected accounts To accommodate this change, your platform’s existing blended application fee, which was priced to absorb network costs, needs to come down. If you use Stripe's [Platform Pricing Tool](https://docs.corp.stripe.com/connect/platform-pricing-tools) (no-code pricing management), the recommended approach is to create a dedicated pricing group for IC++ accounts rather than modifying your existing rules. Add a condition of "Network cost passthrough = Enabled" to scope the rule correctly, then set a lower volume fee that reflects your Stripe fees and your markup, without the network costs. Alternatively, if you manage pricing programmatically, you can update your own internal pricing engine to accommodate for this change. ![Blended and passthrough pricing diagrams](/images/pass-network-costs-to-your-connected-accounts/image1.png) ## Reporting and reconciliation for your merchants As you change your pricing strategy for your connected accounts, you must accompany this change by providing them with new reporting capabilities. You can help your connected accounts understand their network costs by sharing the following reports with them: - IC+ plan-level report: This report shows data aggregated at the calendar month level. This helps connected accounts understand the monthly network costs computed across all their charges. It provides interchange plan names and an aggregated scheme fee total - IC+ transaction-level report: This report helps connected accounts understand transaction costs at an individual-transaction level. It provides information about which charges led to higher network costs and how refunds and disputes impact network costs. This report shows data aggregated by calendar month. Both reports provide complementary information. You can access the reports for a connected account in several ways: - Stripe Dashboard (for connected accounts with Dashboard access): this route requires no technical lift at all from you as a platform. - Network cost passthrough embedded component: you can use Connect embedded components to add connected account dashboard functionality to your website. These libraries allow you to grant your users access to Stripe products directly in your dashboard. This route requires very little technical lift from you as a platform. - [Reporting API](https://docs.stripe.com/api/reporting/report_run): our Reporting API lets you programmatically access the same financial data that's in your Dashboard’s financial reports. This route requires some technical lift from you as a platform. - Sigma or Stripe Data Pipeline (for platforms with access to these two products):  to run custom analyses and integrate network cost data into your existing workflows, you can access this report data in Sigma and Stripe Data Pipeline. Similarly, this route requires some technical lift from you as a platform. Regardless of how you access the report, the network cost schema is the same and is described [here in our documentation](https://docs.stripe.com/connect/network-cost-passthrough-platforms?core-dashboard-or-api=dashboard#network-cost-report-schema). ## How to deploy this new pricing strategy ### Start with a pilot cohort Enabling IC++ is a pricing change with real financial implications for your connected accounts. We recommend starting with a pilot cohort of a few connected accounts that are good candidates: - High-volume, payment-aware accounts: merchants who already think carefully about their processing costs and will understand the change quickly - Commercially engaged: accounts you have a close relationship with and can get feedback from ### Communicate before you enable Connected accounts need context before they see new line items on their statements. Before enabling this change for a cohort, send a short explanation covering: what is changing, why (transparency and cost accuracy), what their new fee structure will look like, and where the connected accounts can find the IC++ reports. ### Embed IC++ into your go-to-market motion Once the pilot validates your rollout approach, IC++ becomes a commercial differentiator in addition to being an operational change. For prospecting, IC++ is a key value proposition with enterprise and payment-aware buyers who have outgrown blended pricing elsewhere. Position IC++ as a premium tier with greater transparency for sophisticated operators. ## Get started Network cost passthrough is available for eligible Connect platforms today. If you're ready to move your connected accounts to IC++, the [full documentation](https://docs.stripe.com/connect/network-cost-passthrough-platforms) covers everything from enabling passthrough per account to reading the network cost reports. If you're not yet enabled for IC++ at the platform level, or you want to talk through whether this pricing model is the right fit for your business, reach out to your Stripe account team. They can confirm your eligibility and help you build a rollout plan. How does the fridge turn a sensor signal into a trusted grocery order? How does it find an available product, choose a delivery window, and pay on the household’s behalf, without receiving unrestricted access to the household’s card or wallet? For the fictional grocery marketplace GreenMart, the first architecture choice is not about payment. It is about how GreenMart becomes discoverable to agents. GreenMart could build and operate its own ACP product feed, discovery document, and checkout implementation. Instead, it uses the [Stripe Agentic Commerce Suite](https://stripe.com/blog/agentic-commerce-suite) to upload or connect its catalog and expose a dedicated, hosted ACP endpoint. That choice lets GreenMart share current product, price, and availability data with AI agents without building and maintaining a protocol-specific public surface itself. The solution includes: - Stripe [Agentic Commerce Suite](https://docs.stripe.com/agentic-commerce/for-sellers) to turn GreenMart’s existing catalog and commerce data into a hosted ACP storefront. Stripe can also expose UDP storefront and eventually manage any changes to protocols. - [Agentic Commerce Protocol](https://docs.stripe.com/agentic-commerce/acp) (ACP) for the fridge buying agent and the companion mobile app to interact with that storefront. - Household authorization policies to define what the shopping agent may buy. - A household payment authorization experience—for example, a fridge companion app—that decides when the agent may use household payment authority. - [Link for AI wallet](https://link.com)  for agents as an optional way to give the shopping agent bounded payment capability without exposing a card to the fridge or marketplace. - [Shared Payment Tokens](https://docs.stripe.com/agentic-commerce/concepts/shared-payment-tokens) (SPTs) as the underlying Stripe payment primitive for direct Stripe integrations; Link can handle those mechanics for the agent. We follow this core principle: an agent should be able to make approved decisions autonomously, but it should not receive more authority than the buyer intended. We assume the fridge’s sensors and inventory-detection model already exist. This post focuses on the commerce flow after the fridge detects that something needs to be bought. ## Why GreenMart uses the Suite instead of building ACP itself A marketplace’s product information is usually scattered across catalog, inventory, pricing, delivery, and order-management systems. Implementing ACP directly means turning those systems into a protocol-facing product feed and checkout API, keeping that interface available, and maintaining compatibility as the protocol evolves. GreenMart already needs to own the source data and business decisions: what is in stock, what substitutions are acceptable, which delivery windows are possible, and whether an order can be fulfilled. It does not need to own the agent-facing protocol surface as well. With the Stripe Agentic Commerce Suite, GreenMart provides its catalog and relevant commerce information to Stripe. The Suite exposes the hosted ACP endpoint that agents call. GreenMart retains its role as the merchant and source of truth for inventory, pricing, fulfillment, and order operations. The benefit is practical: - GreenMart can make its catalog available to agentic surfaces without separately implementing discovery, feed hosting, and protocol routing. - The fridge agent can use a standard ACP interaction rather than a GreenMart-specific integration. - The companion mobile app can display the same authoritative checkout state that the agent received. - GreenMart can concentrate engineering effort on catalog quality, inventory freshness, and fulfillment—not protocol infrastructure. The hosted endpoint is an abstraction boundary, not a replacement for GreenMart’s commerce system. GreenMart must still keep the underlying information accurate and re-check price and availability before an order is accepted. ## The GreenMart shopping agent Every Friday, the fridge checks the household’s inventory and prepares a grocery order for Saturday-morning delivery. The household has configured preferred brands, dietary requirements, acceptable substitutions, delivery windows, and a weekly spending limit. The fridge also supports an urgent mode. If milk or eggs run out, the agent can request same-day delivery—but only for approved items, within a lower budget, and without automatically accepting substitutions. The roles stay deliberately separate: - The fridge identifies what is missing. - The shopping agent builds a basket and communicates with GreenMart through ACP. - Stripe Agentic Commerce Suite hosts GreenMart’s ACP-facing catalog and checkout surface. - GreenMart provides the source information and performs its normal inventory, fulfillment, and order operations. - Household policy decides whether the agent may request payment. - The household payment authorization experience decides whether payment authority is issued. ## One hosted marketplace surface, two ACP clients GreenMart sends catalog, price, inventory, and delivery information from its commerce systems to Stripe Agentic Commerce Suite. The Suite exposes that information through a hosted ACP endpoint. The fridge buying agent is one ACP client. It uses the endpoint to discover products and create a checkout. The companion mobile app is the household-facing ACP client: it uses the final checkout state to show what the agent wants to buy, apply household policy, and initiate the supported payment-authorization flow. ## ![A diagram of ACP data flow](/images/agentic-payments-for-marketplaces/image2.png) This is why the hosted endpoint is useful: GreenMart avoids a bespoke protocol implementation, while the agent and app still have a consistent way to exchange discovery and checkout information. ## The end-to-end flow Here is how the scheduled or urgent grocery order moves through the system. ![A diagram of the entire flow](/images/agentic-payments-for-marketplaces/image1.png) The agent never needs to understand GreenMart’s internal catalog schema. It sees the information through ACP. GreenMart never needs to build a custom API for this agent. It supplies information to the Suite and receives the resulting order in its normal fulfillment flow. ## The household policy is core to the companion app Household policy is a concrete configuration owned by the people who control the bridge between the household’s agent and payment authority. The companion app should give them a way to define who may buy, what they may buy, and when the agent must stop and ask. A policy setup flow can combine: - Guided controls: approved agents, merchants or categories, item exclusions, per-order and weekly limits, delivery locations and time windows, substitution rules, and approval thresholds. - Policy templates: starting points for common arrangements, such as routine household replenishment, emergency purchases, or a child’s limited spending allowance. - Natural-language authoring: as an optional convenience, an LLM can turn a request such as “restock essentials up to €80 per week, but always ask before changing brands” into proposed structured rules. The household should review and confirm the resulting rules before they are enabled. - Lifecycle controls: named policy owners, policy versions, an audit trail, expiration dates, and a quick way to pause or revoke the agent’s authority. Evaluate the final checkout, not an estimate The household policy is not a payment credential. It determines whether the agent may request payment for this specific final checkout. If the amount, item, seller, or delivery terms violate policy, the agent can choose another option or ask the household to approve an exception. That evaluation uses a deterministic policy engine against the merchant, items, quantities, total, currency, selected fulfillment option, delivery address or window, substitutions, and any applicable budget already spent. The result should be explicit: approved, requires household approval, or denied. An approved result allows the app to request bounded payment authority through Link or another supported payment path. A checkout that exceeds a limit or introduces an unapproved substitution can be revised by the agent, escalated to a household member, or canceled. This keeps the policy understandable and auditable: an LLM may help people write it, but it should not be the component that decides whether a particular payment is allowed. Below is an example of authoritative results after the shopping agent creates or updates the checkout through GreenMart’s Stripe-hosted ACP endpoint. ```json { "id": "chk_greenmart_123", "status": "ready_for_payment", "currency": "usd", "line_items": [ { "id": "li_milk_organic_2l", "item": { "id": "gm_milk_organic_2l", "name": "Organic 2% milk", "unit_amount": 449 }, "name": "Organic 2% milk", "unit_amount": 449, "quantity": 2, "availability_status": "in_stock", "totals": [ { "type": "subtotal", "display_text": "Organic 2% milk", "amount": 898 } ] }, { "id": "li_eggs_free_range_12", "item": { "id": "gm_eggs_free_range_12", "name": "Free-range eggs, 12 pack", "unit_amount": 487 }, "name": "Free-range eggs, 12 pack", "unit_amount": 487, "quantity": 2, "availability_status": "in_stock", "totals": [ { "type": "subtotal", "display_text": "Free-range eggs, 12 pack", "amount": 974 } ] } ], "fulfillment_options": [ { "id": "delivery_sat_0900_1100", "type": "shipping", "title": "Saturday delivery, 09:00–11:00", "selected": true, "totals": [ { "type": "shipping", "display_text": "Delivery fee", "amount": 499 } ] }, { "id": "delivery_sat_1100_1300", "type": "shipping", "title": "Saturday delivery, 11:00–13:00", "selected": false, "totals": [ { "type": "shipping", "display_text": "Delivery fee", "amount": 299 } ] } ], "totals": [ { "type": "subtotal", "display_text": "Subtotal", "amount": 1872 }, { "type": "shipping", "display_text": "Delivery fee", "amount": 499 }, { "type": "tax", "display_text": "Tax", "amount": 13 }, { "type": "total", "display_text": "Total", "amount": 2384 } ], "messages": [] } ``` Which becomes the following policy-evaluation view derived by the fridge: ```json { "checkout_id": "chk_greenmart_123", "seller": "GreenMart", "total": 2384, "currency": "usd", "selected_delivery": "Saturday delivery, 09:00–11:00", "items": [ { "product_id": "gm_milk_organic_2l", "quantity": 2, "amount": 898 }, { "product_id": "gm_eggs_free_range_12", "quantity": 2, "amount": 974 } ] } ``` `id`, `status`, `line_items`, `fulfillment_options`, and `totals` are ACP checkout concepts. The actual names and optional fields should follow the current [ACP checkout schema](https://github.com/agentic-commerce-protocol/agentic-commerce-protocol/blob/main/spec/2026-04-17/json-schema/schema.agentic_checkout.json). ## Where payment authority lives The app does not store card details. It uses the final ACP checkout as the purchase context, applies the household’s policy, and can either ask for an explicit approval or let the household grant the shopping agent bounded access to its Link wallet for agents. That gives the full system two controls: 1. Household policy decides whether the agent may request payment for this particular checkout. 2. The household chooses how payment authority is issued: explicit approval for a purchase, or a pre-authorized Link capability with guardrails. Link is an optional payment-authority layer, not a prerequisite for ACP or the Agentic Commerce Suite. An implementation can still use a different supported wallet or a direct SPT integration when that is the right product choice. ## Optional: let Link handle the payment credential If the household gives the shopping agent access to its Link wallet for agents, the agent does not need to handle card data—or, for a Stripe-processing marketplace, the details of an SPT—at all. It still needs the final checkout and household policy decision before it asks Link to pay. ### GreenMart processes payments on Stripe For a marketplace like GreenMart that processes payments on Stripe, Link can provide the agent’s payment capability and handle the Stripe-specific credential handoff. Under the hood, the Stripe payment flow uses a Shared Payment Token and a `PaymentIntent` to process the transaction. GreenMart receives the payment result, not the household’s card details. That means the buyer-facing flow can stay simple: 1. The agent creates an ACP checkout through GreenMart’s Stripe-hosted endpoint. 2. The companion app evaluates the final checkout against household policy. 3. Link authorizes the agent to pay GreenMart within the household’s limits. 4. The hosted checkout completes and GreenMart receives the confirmed order. The agent and companion app do not need to create, transport, or interpret an spt_… identifier in this path. SPTs remain the Stripe plumbing behind the authorization. For the lower-level model, a merchant creates a `PaymentIntent` using the granted SPT; see [Shared Payment Tokens](https://docs.stripe.com/agentic-commerce/concepts/shared-payment-tokens). ### GreenMart does not process payments on Stripe Link can also support an agent purchasing from a merchant that is not processing payments on Stripe by issuing a virtual card for the transaction. The virtual card can carry the same kind of bounded authority the household intended—for example, a capped amount and a short expiry window of a few hours—rather than exposing the household’s reusable card credentials. This gives the agent a payment credential that a non-Stripe merchant can accept through its existing card-processing stack. Availability and the exact guardrails depend on the Link and Issuing-for-agents capabilities enabled for the household and merchant, so production teams should validate the current product and integration requirements before relying on this path. ## Use direct SPTs only when you need the lower-level integration A direct SPT flow remains useful when the agent, wallet, or marketplace needs to control the token exchange explicitly. In that model, after policy approval a supported wallet returns a GreenMart-specific SPT; the marketplace then uses it to create a `PaymentIntent` on Stripe. Whether Link abstracts the token or the integration passes an SPT directly, the security boundary is the same: - The agent receives bounded payment authority, not a card number. - GreenMart receives a confirmed order through its commerce integration. - Retries must be idempotent, and payment/order events must be reconciled through verified webhooks. - Revoked or expired payment authority must prevent order completion. ## Design for the moments when the agent should stop Suppose GreenMart’s preferred milk is unavailable. The marketplace offers a larger replacement, but the replacement raises an urgent order from $23.84 to $26.10. The agent should not silently accept the change if it exceeds the household’s policy. It can find another eligible product, remove the unavailable item, select a lower-cost delivery window, or ask the household to approve the higher total. That is what bounded autonomy looks like: the agent can take routine action quickly, and it can recognize when the decision belongs to a person. ## Where the Model Context Protocol fits This architecture does not require the Model Context Protocol ([MCP](https://modelcontextprotocol.io/docs/getting-started/intro))  on the purchase path. Stripe Agentic Commerce Suite gives GreenMart a hosted ACP endpoint, and the fridge agent and companion app use ACP to work with the marketplace. MCP can still be useful for optional capabilities in MCP-enabled hosts: meal planning, loyalty lookup, recipe-based baskets, delivery recommendations, customer support, or fridge-side tools that interpret sensor data. Those extensions remain separate from GreenMart’s hosted commerce surface. ## Reference implementation The companion sample implements mocked fridge inventory signals, household policy evaluation, both an ACP- and ACS- based checkout, a household payment-authorization step, SPT-based payment, and webhook-safe order confirmation. Its developer console shows the full flow, including the distinction between a policy decision and payment authorization. [Explore the Smart Fridge Agentic Commerce reference implementation](https://github.com/aandresdelvalle-stripe/smart-fridge-agentic-commerce) on GitHub. Coding agents transformed engineering at Stripe, but non-engineers like sales reps, finance analysts, technical account managers, and others felt left behind by the AI wave of Claude Code and Codex. No existing tool could handle the data security requirements and specific workflows Stripe needed: querying data warehouses, researching accounts before sales calls, triaging incidents, modeling revenue scenarios, or preparing compliance reviews. That all changed when we shipped Stripe’s knowledge AI platform. ![](/images/meet-stripes-knowledge-ai-platform/image5.gif) Within two weeks of our April launch, most of Stripe was using Stripe's Knowledge AI Platform, also known as Kai. Today, 83% are weekly active users, including nearly all of GTM (marketing, sales, customer success managers, and technical account managers). Most Kai sessions require many turns, with users doing deep research, creating specific artifacts, or refining assets before sharing internally or externally.  With Kai, everyone at Stripe has an agent built specifically to help them with their day-to-day work. ## Why we built a Knowledge AI Platform For coding tasks, the specific change varies, but the workflow and tools needed to perform the task stay about the same. You edit files, run tests, commit. The programming languages vary, but the shape of the work is rather uniform, which is why a single agent architecture works well. Knowledge work is the opposite side of that spectrum. Tasks like researching an account or preparing a compliance review require different tools, different data, different outputs, and different definitions of "done". Before Kai, we had two AI options for knowledge work: - **NoCode Agent Builder**: Anyone could build and deploy workflow-specific agents that could use tools. Over 4,000 agents were built using this system. However, we quickly noticed that teams were writing conceptually similar prompts but with varying levels of quality, and found the proliferation of these micro-agents increasingly hard to monitor and maintain. - **Coding agents**: Coding agents were powerful, but they introduced a different set of risks. Since our goal is to enable improved productivity for all of Stripe, some users altered their workflows and chose coding agents.  However, security concerns quickly emerged, along with a new support burden for code quality teams that had never supported non-engineers before. From these experiences, we realized that building a knowledge AI platform required getting three things right: scaling expertise without centralizing it, meeting users wherever they work, and enforcing guardrails that don't exist in code. ### Scaling expertise without centralizing it The range of expertise required to serve Stripe’s users is staggering. The people who know how to triage a billing escalation or model a revenue scenario are not centralized and certainly aren't on the team building the agent infrastructure. They're distributed across dozens of specialized domains – GTM, Finance, Marketing, Legal, Data Science, and more – each with its own tools, data sources, workflows, and judgment about what "good" looks like. Multiply this across all the products and countries Stripe operates in, and the result is astonishingly complex. Kai has to model that complexity in a way that makes it invisible, so that the task just works. ### The agent has to roam Where the agent surfaces matters as much as what it knows. Not everyone works in a browser tab, and fewer still in a terminal. So a knowledge agent can't just be a single product; it has to be a platform, flexible enough to embed itself wherever work happens. For example, consider an internal application our Finance team uses to model complex changes in Stripe's operating budget: the agent needs to read the context, research related documents, propose valid changes, and summarize the differences, all without pulling them out of the app. Building a standalone agent product wouldn't work.  Instead, it would force users out of their natural workflows and into a new app. Building a separate agent product for each surface wouldn’t work either; it’d be hard to maintain, and users who span multiple tools would have a fractured experience. The platform has to meet the user where they are. ### Building guardrails from scratch Coding agents operate in an environment with decades of fast, verifiable guardrails: compilers reject invalid syntax, tests catch regressions, and git makes every mistake reversible. Knowledge work has very little support for these constructs. Consider a core invariant at Stripe: _“you shouldn't combine data from two unrelated customer contexts in a single analysis.”_ A user may have legitimate access to both contexts independently, but they can never appear in the same session. The isolation boundary isn't _"what can this person access based on their authorization token?"_, but instead _"what should this task be allowed to view given this context?"_  The platform has to enforce these implicit guardrails that users rely upon. ## How we built Kai A single monolithic agent simply cannot encode all of these constraints effectively. And, asking every domain team to independently build secure, hosted, performant agent infrastructure doesn't scale either. To manage this challenge, we built Kai in three layers: - **Surface-agnostic APIs** that give multiple interfaces into the same agent - **AgentStudio** where domain owners build and govern their own Kai agents, and - **Execution environments** to deliver security in seconds without anyone thinking about infrastructure. ### Surface-agnostic APIs Kai ships with an opinionated web application and a Slack integration, but the main primitive is the underlying API that powers them both. The agent is a service, not an application, and surfaces are simply customized views into it. Most Stripes interact with Kai through the internally hosted web application. There's no infrastructure to set up – it's available to every employee on Day 0. Any internal tool can also embed Kai, and many have chosen to do so. For example an employee working in our business intelligence platform can ask Kai a question from within their existing application because our Chrome extensions surface Kai capabilities inside web-based third-party tools. ![](/images/meet-stripes-knowledge-ai-platform/image3.png) > Custom applications embed Kai via APIs to bring agentic experiences to all workflows ### AgentStudio AgentStudio is the control plane for domain owners. Teams use it to build, test, and monitor their skills, custom Kai agents, and tool selections. A GTM team, for example, owns a Kai agent tuned to their workflows. It loads their skills by default, connects to their data sources, and presents outputs in the format their users expect. AgentStudio surfaces usage data and quality signals alongside each asset, so domain owners can see what's working without asking the platform team. ![](/images/meet-stripes-knowledge-ai-platform/image4.png) > Skills are organized into areas across Stripe that are managed by domain experts ### The execution environment ![](/images/meet-stripes-knowledge-ai-platform/image1.png) This is the layer that makes the platform's promises real. The core primitives, including the agent harness, sandbox, workflow orchestration, and access control framework, are deliberately shared with Stripe's product-facing agents. Internal knowledge work operates on the same sensitive data and serves the same users as our external products, so it requires the same security and compliance bar. Sharing the substrate forces discipline and creates a flywheel: improvements to the execution environment benefit both internal and product agents simultaneously. The agent harness, built using [LangChain’s deepagents](https://github.com/langchain-ai/deepagents), runs on Kubernetes with a secure per-session sandbox and a multi-tenant virtual filesystem. Within a session, the agent works with a virtual filesystem where it creates and iterates on artifacts, while a secure code execution sandbox is used for analytics and data processing. It's built to hold state across long, complex sessions — one recently reached 932 turns. With Kai’s deep task management capabilities, a single conversation can consist of hundreds of turns, and hundreds of tool and LLM calls without timing out or overloading the context window. This matters because knowledge work is rarely a single question. It's iterative reasoning that builds on itself, and the session has to hold that state without degrading. ![](/images/meet-stripes-knowledge-ai-platform/image2.png) > User behaviors are changing, and sessions are increasingly used for deep multi-turn collaboration One of the most interesting parts of the harness is how it chooses the correct skill to use. Kai is connected to 1,000+ skills and tools spanning various internal systems – from business intelligence dashboards that track key metrics, to project management tools that organize internal execution, and third-party services like Zoom and Google Workspace. Anyone can ask it a question and trust it will load the right context and use the right tools to get the job done. Coding agents have a natural advantage here: the folders they work provide a natural organization for skills and context. In a follow-up post, we’ll go into how we solved this without that pre-existing structure by utilizing a hybrid RAG/LLM approach, among other techniques. ## Impact The results have been striking. New hires on GTM are Kai-native: they use it 2.7x more, and power users close 80% more value than low users within the same cohort. When Account Executives use Kai, they produce 2x the sales activity, create 17% more opportunities, generate 26% more revenue opportunities, and close 39% more deals when compared to the same sellers in weeks they don't use it. In aggregate, Kai has helped shift 25,000 hours per year from administrative work, to revenue generating work. In finance and operations, Kai is helping Stripes analyze messy data, generate recurring digests, and turn fragmented context into usable artifacts. In engineering, Kai is now a natural place to ask system questions, research for run requests, analyze logs, draft plans, and invoke more specialized agents and skills. And across Stripe, more than 5,000 sessions everyday center on data analysis. This makes Kai a unique leverage point: by plugging in the right context about data quality and our analytics layer, we can ensure correct responses by default for most questions. Stripes’ direct feedback backs up these aggregates: they report feeling “empowered to embrace AI” and “astounded at what Kai just does precisely correct”. But our favorite anecdote is a non-engineer who left a Kai intro session and immediately collaborated on a digest that pulls together Asana, Slack, and Jira into a single automated process. ## We haven’t won yet At Stripe, one of our favorite catchphrases is “we haven’t won yet”, and that’s apt for Kai. We’re in the earliest stages of this journey, and have a lot more we want to do: - **Better state management:** General-purpose agents like Kai generate a lot of state as they iteratively make tool calls, pull down large documents, and more. We are continuously tuning both the “active” context being sent to the LLM and the “extended” context sitting in state stores like S3 or the virtual file system. - **Reflection and self-improvement:** We are working on a quality improvement loop that lets Kai reflect on traces involving a skill, propose improvements, test them, and submit changes for the skill owner to review. - **Better collaboration primitives:** Users generate a lot of context in their Kai sessions that is currently “locked in”, but that’s not how work gets done. We want to let people share what Kai surfaces across sessions, and let multiple people (and agents!) collaborate on the same artifacts. Coding agents made AI feel concrete for software engineers first. Kai has helped bring that same sense of leverage to knowledge workers across Stripe. It’s interesting because while we have improved productivity considerably, we don't know the ceiling yet - and we’re excited to keep pushing the envelope here. If building agentic systems that power internal productivity and external agents sounds like your kind of challenge, [we’re hiring](https://grnh.se/b5wzjpge1us). At 2 a.m. on a Tuesday, an on-call engineer's pager fires. A MongoDB shard—one of 2,000 that collectively processed $1.9 trillion in payments in 2025—has entered a degraded state. Two nodes are down, and a third is blocking an index build due to a misconfigured vote. To nurse the shard back to health, the engineer will need to spend 15 minutes carefully sequencing manual operations, then up to 3 hours triggering and monitoring each operation. This scenario played out hundreds of times a year across Stripe's Document Database fleet—our global MongoDB infrastructure spanning over 40 distinct shard layouts, from cost-optimized configurations to high-availability setups designed for disaster recovery. The combinatorial explosion of failure modes made it impossible to anticipate every scenario with static, hand-coded automation. We needed a fundamentally different approach. Our solution treats infrastructure state as a traversable graph and lets a pathfinding algorithm discover recovery sequences at runtime. By applying breadth-first search, and later, Dijkstra's algorithm, over a simulated state machine, we built a system that dynamically computes and executes multi-step recovery plans. As a result, we’ve seen a 30% reduction in pager volume (~200 fewer pages per year), 12 fewer days of shards stuck in unhealthy states annually, and zero additional work required to support new shard layouts. ## Why static automation breaks at scale Our original auto-remediation system (V1) operated as a single-step, hard-coded state machine. A set of plugins—each responsible for one issue, like "fix votes," "fix priority," or "rebuild downed node"—ran in a carefully ordered sequence based on hard-coded ranking and assumptions within a reconciliation loop. This worked well for simple cases, like if a single node went down, or one or two misconfigured votes, but it had fundamental limitations: - Implicit dependencies between plugins meant that ordering was fragile. The "fix votes" and "fix priorities" plugins required no nodes to be down, but they had higher priority than the "node down" plugin. We could only resolve these circular dependencies with manual intervention. - Multi-failure scenarios exposed blind spots. When multiple impaired nodes combined with voting and priority misconfigurations, the sequential, single-issue-at-a-time approach couldn't find a valid ordering. The system would exhaust its options and page an operator. - Layout coupling was everywhere. Each plugin contained layout-specific safety checks, so onboarding a new layout to the V1 remediation platform required auditing the logic of every plugin and workflow, a process that took about 1 week for each new layout. - Workflow cancellations left shards stranded. A canceled workflow could leave the shard in an intermediate state that V1 never anticipated. These orphaned states fell outside any plugin's preconditions and required manual cleanup. In one six-month window, the control plane paged operators 124 times for misconfigured shards, and 32 times for single-node-down scenarios complicated by additional health issues. Critical operations like index builds and planned maintenance were blocked for an average of one hour per incident. ## Infrastructure as a traversable graph ### Reframing the question The breakthrough came when we stopped asking, "What's the most important issue to fix right now?", which is a local, greedy question. Instead, we asked, "What sequence of operations transforms the current shard state into a healthy state without ever violating safety invariants?" Once we framed it that way, we realized we were looking at a graph search problem. ![](/images/how-stripe-uses-graph-search-and-state-machines-to-auto-remediate-a-global-database-fleet/image1.gif) ### Modeling a shard’s health as a state machine In MongoDB, cluster topology is controlled by assigning nodes specific roles: voting rights determine participation in leader elections and quorum writes, priority levels control a node's eligibility to become the primary, and hidden status keeps a node out of the client read path. We capture these per-node attributes, along with shard-level properties like oplog sizes, regional distribution, and quorum status, to model a shard’s state as a node in a directed graph. Edges in the graph represent atomic infrastructure operations: adding or removing a vote or priority, hiding or unhiding a node, rebuilding a node, or resizing an oplog. These are steps we need to take on the path to getting the shard healthy again. ### Finding the path with breadth-first search over simulated states The initial state is the shard's current ground reality. The goal state, the desired, healthy configuration, is the shard's Source of Truth (SOT). Invalid states violate safety invariants. These could be an even number of votes, a minority of healthy voting nodes, which puts write availability at risk, or a node in an invalid state, like priority=1 and vote=0. With the state space defined, we use breadth-first search (BFS) to find the shortest sequence of operations from the current state to the goal state. The algorithm generates successor states at each step, prunes any that are invalid, and returns the first path that reaches the goal. Since BFS traverses level-by-level, it guarantees that the first solution uses the minimum number of operations. Consider a healthy shard where three things go wrong simultaneously: a data node goes down, the backup node goes down, and another data node loses its vote and priority. V1 is completely stuck—the vote-fix plugin requires no nodes to be down, and the node-rebuild plugin requires votes to be correct. Our state machine, however, explores all valid orderings: ``` Current State → [Rebuild backup] → [Fix vote+priority] → [Rebuild data node] → Healthy Current State → [Fix vote+priority] → [Rebuild backup] → [Rebuild data node] → Healthy Current State → [Fix vote+priority] → [Rebuild data node] → [Rebuild backup] → Healthy ``` Each path is validated against invariants at every intermediate step. Fixing the vote/priority issue first is safe since it maintains quorum, which then unlocks subsequent operations. ### In-memory simulation and durable execution with Temporal We orchestrate our remediation workflows with [Temporal](https://temporal.io/), a durable execution framework that guarantees a workflow interrupted by a deploy, crash, or timeout can resume exactly where it left off—essential for node rebuilds that can take hours. But Temporal's durability model creates a challenge for pathfinding. Our remediation building blocks are implemented as Temporal workflows and activities that are tightly coupled to Temporal's workflow.Context. They make network calls, wait for infrastructure changes, and checkpoint progress. We can't call these functions in a loop to simulate thousands of state transitions. A single simulated path through a five-step recovery would take minutes of real I/O; exploring hundreds of candidate paths would be intractable. We solved this by introducing an abstraction layer: a CommonContext interface that can be backed by either Temporal's real workflow context, or a lightweight in-memory implementation. ```go // CommonContext abstracts Temporal's workflow.Context, enabling both // production execution and local simulation. type CommonContext interface {         ExecuteActivity(opts workflow.ActivityOptions, resultPtr any, activity any, args ...any) error         ExecuteLocalActivity(opts workflow.LocalActivityOptions, resultPtr any, activity any, args ...any) error         ExecuteWorkflow(opts workflow.ChildWorkflowOptions, resultPtr any, workflow any, args ...any) error         WithExternalDeps(sotProvider, grProvider SerializedShardProviderData, simState *SMShardState) (CommonContext, error) } ``` The interface wraps Temporal's core primitives so that remediation logic can call them without knowing whether it's running inside a real workflow or a local simulation. The key method is WithExternalDeps, which swaps in simulated SOT and Ground Reality providers along with an in-memory shard state, allowing the system to explore thousands of state transitions without touching real infrastructure. In production, CommonContext delegates to Temporal and makes real API calls. In simulation, it delegates to an in-memory state provider that applies operations as pure state transformations. Both modes run the same business logic. This gives us a critical property: what you simulate is what you execute. There’s no separate planning codebase that could diverge from the execution codebase. When the simulator determines that a sequence of operations will heal a shard, we have very high confidence that executing those same operations in production will produce the same result. The simulation approach transforms minutes of I/O-bound execution into just milliseconds of CPU-bound computation. The BFS pathfinder can explore hundreds of state transitions per second, evaluating complete multi-step recovery paths in the time it would take to make a single network call. ## Evolving the algorithm: From BFS to Dijkstra BFS finds the optimal path to a fully healthy state, but it fails entirely if no complete path exists. Consider a shard with an extra node that automation can’t reach, alongside another node that has a missing vote. BFS returns no path at all, because the full goal state is unreachable—even though it’s trivial to fix the missing vote, and leaving it unfixed puts the shard at elevated risk of losing write quorum. When our algorithm couldn’t reach a perfectly healthy state, could it find the least degraded state instead? ### Weighted graph search We evolved the algorithm to use Dijkstra's shortest-path algorithm over a weighted graph. The edge weight for each operation accounts for misconfiguration and estimated time: ``` edgeWeight(state, operation) = misconfiguration(state) × estimatedTime(operation) ``` misconfiguration(state) quantifies how far the current state deviates from healthy, using a rules-based scoring system that accounts for missing votes, incorrect priorities, downed nodes, and other issues. estimatedTime(operation) estimates wall-clock duration–a vote change takes seconds, while a node rebuild takes an hour. Using the product of these two for edge weight means the algorithm minimizes time spent in misconfigured states, prioritizing quick fixes that reduce exposure before committing to longer operations. ![](/images/how-stripe-uses-graph-search-and-state-machines-to-auto-remediate-a-global-database-fleet/image2.png) ### Partial remediation Because Dijkstra's algorithm explores paths to all reachable states rather than only the goal state, we can also get partial remediation. When no complete path exists, the algorithm returns the path to the least misconfigured state. The ephemeral-node example resolves itself: Dijkstra fixes the vote, reduces the shard's risk, and leaves the ephemeral node for operator attention. ![](/images/how-stripe-uses-graph-search-and-state-machines-to-auto-remediate-a-global-database-fleet/image3.png) ### Extensibility through composable rules The misconfiguration scoring is designed as a set of composable rules. The core function curries the SOT and returns a closure that can rapidly score any candidate state during graph traversal: ```go type MisconfigRule func(*ar.SMShardState, *ar.SMShardState) int func GetMisconfigFunc(misconfigRules map[string]MisconfigRule, sot *ar.SMShardState) func(current *ar.SMShardState) int { return func(current *ar.SMShardState) int { misconfig := 0 for _, rule := range misconfigRules { misconfig += rule(current, sot) }   return misconfig } } ``` Each rule targets a specific class of misconfiguration—downed nodes, voting mismatches, priority mismatches, oplog sizing, hidden status, and availability zone imbalance—and we can add new rules independently as our understanding of severity evolves: ```go func ListAllMisconfigRules() map[string]MisconfigRule {       return map[string]MisconfigRule{           "DownNodeMisconfigRule":     DownNodeMisconfigRule,           "VotingMisconfigRule":       VotingMisconfigRule,           "PriorityMisconfigRule":     PriorityMisconfigRule,           "OplogResizeMisconfigRule":  OplogResizeMisconfigRule,           "HiddenStatusMisconfigRule": HiddenStatusMisconfigRule,           "AZMisconfigRule":           AZMisconfigRule,       }   } ``` Operation costs are expressed as relative weights that reflect how dramatically operations differ in duration—a node rebuild takes roughly 33 times longer than a config change: ```go const (       OPTIME_NODE_UPDATE_MONGO_CONFIG = 3       OPTIME_SHARD_UPDATE_OPLOG       = 19       OPTIME_NODE_REBUILD             = 101   ) ``` The named rule map also makes debugging straightforward. The logs for a generated path show exactly how each rule contributed to the misconfiguration score at every intermediate state. ## Impact The state machine auto-remediation system has fundamentally changed our operational baseline. We’ve seen a 30% reduction in pager volume, or ~200 fewer pages a year, along with 12 days of fleet health reclaimed annually from shards that used to sit in degraded states until someone noticed them. Critical operations like index builds and planned maintenance now proceed without getting bottlenecked by manual stabilization. The system is also layout-independent: when we onboarded a new layout for a planned failover, auto-remediation worked with zero code changes. And because workflows can be canceled mid-execution, the system can compute a fresh recovery path from whatever intermediate state was left behind. Beyond metrics, the system has changed how we think about failure. Instead of writing runbooks for anticipated scenarios, we define invariants and available operations, and let the algorithm compose them into recovery plans. ## Future directions Right now, the state machine answers one question: "How do I get this shard back to its declared healthy state?" But the framework is extensible. The most immediate extension is layout transformation. Our database fleet has over 40 shard layouts, and migrating a shard from one topology to another currently means writing a bespoke workflow that encodes every intermediate step. Instead, we can set the goal state and let the algorithm discover a safe migration sequence the same way it discovers a recovery sequence. We can use simple config updates for fleet-wide topology changes rather than needing to write bespoke migration workflows. We can also adapt the state model to handle blue-green migrations, where a shard temporarily runs two "colors" of nodes during a version rollout. The pathfinder must be topology-aware, understanding which color is active and what "healthy" means at each phase of the migration. We want to be able to overlay migration context onto the shard's SOT, allowing the same Dijkstra-based planner to rebalance votes, rebuild failed nodes with the correct version binary, and resize oplogs. Then we can safely automate rollbacks when health signals degrade after a traffic shift. Further out, we want the system to orchestrate planned maintenance alongside reactive healing. Right now, we execute one operation at a time on a single node across the entire shard, but when a node is already offline for a version upgrade, we could batch an oplog resize or index build into the same window. The system could discover these batching opportunities by modeling "node offline for maintenance" as a state where multiple operations become safe to execute together. ## Conclusion If you can model your infrastructure's state space and define valid transitions, recovery becomes a search problem. The engineering challenge is making that search practical—building a simulation layer that’s fast enough for exhaustive exploration, ensuring simulation fidelity matches production execution, and maintaining safety invariants that prevent the algorithm from proposing dangerous intermediate states. For teams managing complex distributed infrastructure, this pattern of state machine modeling, simulation-based planning, and runtime pathfinding offers a compelling alternative to accumulating ever-more-specific runbooks. Runbooks encode known recovery procedures; a state machine discovers novel ones. Special thanks to Aarush Gupta, Jessica Glustien, Neeraj Joshi, Puneet Oberai, Runchen Yan, Shalin Shekhar Mangar and Srivatsan Sridharan for their contributions to this project. If building systems like this interests you, [we're hiring](https://stripe.com/jobs/search?query=infrastructure). Many marketplaces or platforms operate on [Stripe Connect](https://stripe.com/connect), using the [separate charges and transfers](https://docs.stripe.com/connect/separate-charges-and-transfers) charge type. This allows marketplaces to offer different purchase combinations for their customers, such as items from different marketplace sellers, in a single transaction, and then perform separate transfers. If you operate in this model, when your platform collects a payment, those funds land into the Stripe balance on your platform account, pooled together with your own revenue. Stripe handles the accounting and reporting, but the funds themselves aren’t ring-fenced until you explicitly transfer them to a seller's connected account. PSD2 is the 2nd revision of the Payment Services Directive, a European Union law that regulates electronic payments. The latest version of this, PSD3, is due to take effect from late 2027. Under PSD2, most marketplaces and platforms operate in this way using the Commercial Agent Exemption (CAE), allowing you to process payments without a formal payment institution license. Due to upcoming changes to PSD3 and the likely tightening of Commercial Agent Exemptions, Stripe has created a new charge type for Stripe Connect called "[Segregated Separate Charges and Transfers](https://docs.stripe.com/connect/funds-segregation)". ### The problem with pooled balances If we take a marketplace that is processing payments for thousands of different sellers, without fund segregation, a single platform balance on Stripe holds funds for many different connected accounts (sellers), meaning that: - **Automatic payouts** scheduled on your platform account could inadvertently consume funds meant for a seller. - **Unrelated chargebacks** or disputes on one transaction can draw from the shared pool, affecting funds earmarked for a completely different seller. - **Stripe fees** are debited from your platform balance - the same pool that holds seller money. - **Operational errors** such as an accidental refund, or misconfigured payout schedule, can leave sellers short with no clear audit trail. In isolation, each scenario may seem unlikely, but at scale they can compound into systemic risk. ### Why this matters now Under PSD2 and EMD2 regulations in the EU, regulators are increasingly requiring platforms and marketplaces to demonstrate that customers’ funds are safeguarded, that they are held separately from operational funds and protected from the platform’s own creditors. Within the UK, the FCA enforces similar client money rules. Even in geographies outside of this regulation, fund segregation is often treated as a trust signal. Sellers want to know their money is protected, investors or auditors want to see clear separation, and engineering teams want deterministic fund flows, rather than a shared pool of funds where edge cases can compound. ### How fund segregation works Fund segregation in Stripe Connect introduces a new holding state for funds. Funds from payments are allocated; they exist on your platform account, but don’t appear in your available balance, can’t be used for payouts, and can only be transferred to a connected account. The diagram below shows a high level overview of the fund flow: ![High level overview of the fund flow](/images/fund-segregation-stripe-connect/diagram.png) The full end-to-end flow can be described as follows: #### Create a payment with allocated funds When creating a [PaymentIntent](https://docs.stripe.com/payments/payment-intents), set `allocated_funds` to `enabled: true`. At capture time, Stripe automatically places the funds into the allocated balance within your Stripe Platform account. You should also specify the `transfer_group` with your value; this value lets you track the flow of funds from payment through to transfer, and helps with reconciliation and audit flows. ```javascript { "amount": 10000, "currency": "eur", "allocated_funds": { "enabled": true }, "transfer_group": "ORDER-1234" } ``` After successful capture of funds, the full amount becomes available in your allocated balance, subject to normal payment method settlement timing. #### Check the allocated balance You can inspect the allocated funds balance for a specific payment intent by expanding the `latest_charge` property within the PaymentIntent object. This gives you per-payment visibility, so you know exactly how much is in your allocated balance, and how much has been transferred into a connected account. In this example, we can see that `allocated_funds` is enabled, so we know the charge amount is using your allocated balance, and €98.00 is available to be transferred (€100 minus €2 example Stripe fees). ```javascript { "id": "pi_xxx", "latest_charge": { "id": "ch_xxx", "allocated_funds": { "enabled": true, "balance": { "available": 9800, "pending": 0, "currency": "eur" } } } } ``` #### Transfer to connected accounts and collect your platform fee When creating the transfer object to transfer allocated funds to a connected account, set the `source_transaction` parameter to the charge ID from the original payment intent. This tells Stripe to draw from that specific payment’s allocated balance. You can also collect your platform fee in the same call by specifying the `application_fee_amount` parameter. This debits the fee from the allocated funds and credits it to your platform’s payment balance. It’s important to note that the `application_fee_amount` is additive to the transfer amount. For example, if you want to collect a €5.00 application fee for a €100.00 charge, and then transfer the remaining €93.00 to a connected account, you’d need to specify this as follows: ```javascript { "amount": 9300, "currency": "eur", "destination": "acct_seller_123", "source_transaction": "ch_xxx", "transfer_group": "ORDER-1234", "application_fee_amount": 500 } ``` You don’t need to transfer everything at once, you can split allocated funds across multiple transfers to connected accounts; this is useful if you have mixed first-party and third-party purchases, or purchases from multiple sellers in a single transaction. One rule to remember is that the total transferred cannot exceed the original charge amount. As the `application_fee_amount` is taken directly from the allocated funds on your platform account, it avoids unnecessary FX conversions when the platform and connected account operate in different currencies. #### Handling the hard parts In the real world, we know our users don’t just process happy path payments. Refunds, disputes, and reversals are also common, so it’s key to understand how these work using allocated balances. #### Refunds When you process a refund, Stripe will first draw from the remaining allocated balance before touching the balance of your platform account. As an example, if you had a €100.00 charge in your allocated balance, you transferred €60.00 to a connected account (leaving €40.00 in the allocated balance), and then did a €100.00 refund: 1. €40.00 would come from the remaining allocated funds 2. €60.00 would come from your platform’s account balance This predictable ordering means allocated funds are always used first, reducing the frequency of debits from your platform’s account balance. #### Transfer reversals If you need to claw back funds from a connected account balance, for example before processing a refund or while awaiting a dispute outcome, you can use a transfer reversal. Reversed funds will return to the allocated balance, not your platform’s account balance. When creating a reversal, if you set the `refund_application_fee` to `true`, the application fee is also returned to the allocated balance. This is an important decision for your business; some marketplaces choose to refund the application fee, while others choose to retain it. #### Disputes When a dispute is raised on an allocated payment, you can reverse the transfer to pull funds back from the connected account into your allocated balance whilst awaiting the outcome. If the dispute is won, you can then transfer the allocated funds back to the connected account. If the dispute is lost, you can use a Balance Transfer to move these funds into your platform balance, providing the currency matches the original charge settlement currency. Dispute fees are always debited from your platform balance, they never affect the allocated funds balance. #### Hanging balances You may find that you end up with allocated funds that no longer need to be in your allocated balance, for example after a dispute is refunded from your platform balance and you later reverse the transfer from the connected account. In this scenario, you can use a Balance Transfer to move these funds from the allocated balance to your platform balance, providing the currency matches the original charge settlement currency. ### Getting ready Before starting, there are some pre-requisite steps worth being aware of: 1. Your platform account must be responsible for negative balances on connected accounts 2. Include the `allocated_funds_preview=v1` parameter as part of the header on all API requests. For example, with Node you include this as a parameter when defining the Stripe const variable: ```javascript const stripe = require('stripe')( 'sk_test_', { 'allocated_funds_preview=v1', } ); ``` 3. Allocated funds currently only work with card payment methods, so you should avoid using `automatic_payment_methods` and specify payment methods explicitly 4. Allocated balances cannot be combined with overcapture, multi capture, or incremental authorisations 5. For testing, allocated balances can only be used with sandbox accounts, they do not work in legacy test mode 6. The Stripe dashboard doesn’t distinguish between allocated balances and other account balances, you must use the API for visibility ### Benefits With segregated separate charges and transfers and allocated balances, your platform can achieve: - **Deterministic fund flows** — every payment's funds are traceable from capture to transfer, with no possibility of leakage into unrelated operations. - **Regulatory alignment** — demonstrable safeguarding of customer funds, separated from platform operational balances. - **Operational safety** — auto-payouts, unrelated chargebacks, and fee debits can't touch allocated funds. - **Clear audit trail** — per-payment balance visibility via the API at every stage of the lifecycle. For platforms or marketplaces that operate in regulated markets, or those handling significant seller volumes, this allows you to move to a world in which fund safety becomes enforced by the infrastructure, rather than being purely on a trust basis. ### Next steps - Review the full [fund segregation documentation](https://docs.stripe.com/connect/funds-segregation) - Set up a [Sandbox environment](https://docs.stripe.com/sandboxes) to test your integration - If you're evaluating whether fund segregation fits your regulatory requirements, reach out to your Stripe account team for guidance on your specific jurisdiction Handling events is a cornerstone of a successful Stripe integration. But, correctly setting up and maintaining an [event destination](https://docs.stripe.com/event-destinations) is an error-prone process. While authoring, there are a lot of event shapes and keys to manage; static typing doesn't give you much guidance in our non-TypeScript SDKs. Once your event destination is set up, upgrades can be tricky. Because the shape of events are tied to a specific API version, upgrading either your event destination or SDK (especially in strongly typed languages) can lead to unexpected runtime errors. Stripe's solution to the maintenance problem is [thin events](https://docs.stripe.com/event-destinations#thin-events), which are unversioned JSON payloads. Because they're identical across API versions, you can use them with *any* SDK version, making upgrades much safer. But the authoring problem remains: how can the SDKs present as much information about the shape of events as early as possible? Enter [event notification handlers](https://docs.stripe.com/webhooks/event-notification-handlers). They encapsulate everything your event handler needs to run and let you focus on your business logic. They surface errors when you're writing code instead of later, in production. > If you'd like early access to thin events for v1 resources, please [fill out this form](https://forms.gle/tgPakyrUakYoDm6L7). ## How it works today When handling thin events today, you need to write a lot of code to validate and route the event correctly. You're also responsible for managing the Stripe-Context header when handling events for connected accounts. Here's what a TypeScript handler might look like today: ```ts const app = express(); const stripe = new Stripe("sk_test_YOUR_KEY_HERE"); app.post( '/webhook', express.raw({type: 'application/json'}), async (req, res) => { const sig = req.headers['stripe-signature']?.[0] ?? ''; try { const eventNotification = stripe.parseEventNotification( req.body, sig, webhookSecret ); if (eventNotification.type == 'v1.billing.meter.error_report_triggered') { console.log( `Meter w/ id ${eventNotification.related_object.id} had a problem` ); const event = await eventNotification.fetchEvent(); console.log(`More info: ${event.data.developer_message_summary}`); } else if (eventNotification.type === 'v1.billing.meter.no_meter_found') { const meters = await stripe.billing.meters.list(undefined, { // important! stripeContext: eventNotification.context, }); console.log( `Meter not found. Available meters for this account are: ${meters.data .map((m) => m.id) .join(', ')}` ); // ... } else { console.log(`Received unhandled event type: ${eventNotification.type}`); } res.sendStatus(200); } catch (err) { console.log(`Webhook Error: ${(err as any).stack}`); res.status(400).send(`Webhook Error: ${(err as any).message}`); } } ); ``` Notice how all of your business logic is interwoven in webhook-related hardware? Even if you split your logic into small functions, it's still up to you to wire everything up correctly. Plus you have to hope (and verify) that you haven't made any typos in those webhook type strings. ## A better way Event notification handlers abstract away as much of this grunt work as possible, keeping you focused on the unique parts of your implementation. The Stripe SDK takes care of all the casting, routing, validating, and conversions behind the scenes. Let's walk through some examples. ### Create a handler The first step is initializing the handler itself. If you're not using `StripeClient` yet, you can use it for just this bit of your integration without changing anything else. There's more info [in our docs](https://docs.stripe.com/sdks/server-side#stripeclient). Once you have an authenticated client, create your handler. Make sure to provide a "fallback callback", the function that gets called when the event isn't otherwise handled: ```ts const stripe = new Stripe("sk_test_YOUR_KEY_HERE"); const handler = stripe.notificationHandler( webhookSecret, async (unhandledEvent, client, details) => { console.log( `Received unhandled event type: ${unhandledEvent.type}; the SDK does${ details.isKnownEventType ? '' : ' not' } have types for it` ); } ); ``` ### Handle a thin event You can declare callback functions anywhere in your codebase: ```ts // webhookCallbacks.ts const handleNoMeterFound = async ( notification: Stripe.V2.Core.Events.V1BillingMeterNoMeterFoundEventNotification, client: Stripe ) => { // don't need to specify stripeContext! it just works const meters = await client.billing.meters.list(); console.log( `Meter not found. Available meters are: ${meters.data .map((m) => m.id) .join(', ')}` ); }; // eventDestination.ts import {handleNoMeterFound} from './webhookCallbacks.ts' const handler = stripe.notificationHandler(...) // same as above handler.on('v1.billing.meter.no_meter_found', handleNoMeterFound); ``` That `handler.on(...)` call validates (at compile time) that the argument types for your callback match those expected for the `v1.billing.meter.no_meter_found` event, so you don't have any surprises at runtime. The SDK will supply the parsed event notification and a special instance of `StripeClient` that's pre-bound to the context of the event. It also retains all the settings from the `client` instance that created the handler, so no need to re-configure anything. You can make any additional API calls you want. Best of all, because `handleNoMeterFound` is just a function, you can test it as part of your normal development flow. In some languages (like TypeScript), you can even declare callbacks inline, meaning they have the exact correct types without having to specify anything: ```ts handler.on( 'v1.billing.meter.error_report_triggered', async (eventNotification, client) => { // these are automatically typed correctly console.log( `Meter w/ id ${eventNotification.related_object.id} had a problem` ); const event = await eventNotification.fetchEvent(); console.log(`More info: ${event.data.developer_message_summary}`); } ); ``` ### The final result Put it all together and you've got a much more maintainable event destination: ```ts const app = express(); const stripe = new Stripe("sk_test_YOUR_KEY_HERE"); const apiKey = process.env.STRIPE_API_KEY ?? ''; const webhookSecret = process.env.WEBHOOK_SECRET ?? ''; const handler = stripe.notificationHandler( webhookSecret, async (unhandledEvent, client, details) => { console.log( `Received unhandled event type: ${unhandledEvent.type}; the SDK does${ details.isKnownEventType ? '' : ' not' } have types for it` ); } ); handler.on("v1.billing.meter.no_meter_found", handleNoMeterFound); handler.on( "v1.billing.meter.error_report_triggered", handleErrorReportTriggered ); app.post( "/webhook", express.raw({ type: "application/json" }), async (req, res) => { try { const sig = req.headers["stripe-signature"]?.[0] ?? ""; handler.handle(req.body, sig); res.sendStatus(200); } catch (err) { console.log(`Webhook Error: ${(err as any).stack}`); res.status(400).send(`Webhook Error: ${(err as any).message}`); } } ); ``` This pattern is supported in all seven of our [server-side SDKs](https://docs.stripe.com/sdks/server-side), though the exact implementation details will differ between them. In each case, we designed a clean and idiomatic experience for the language. ## What comes next While event notification handlers represent an exciting leap forward, we're not done yet. This more structured approach to event handling sets the stage for even better experiences going forward. While we don't have concrete plans yet, we're working on better validations (like ensuring your handler is listening for all the events your webhook endpoint is sending) and better integrations with popular web frameworks so we can make the integration experience even more seamless. ## How you can help Ahead of their GA launch later this summer, **we're looking for developer feedback** on the handlers to ensure they're ready for prime time. Though we're confident in their overall design, there's no replacing adoption in a real production codebase. If you have a chance to try them, **please report any feedback** (good or bad) in your SDK's corresponding GitHub issue: * [Node](https://github.com/stripe/stripe-node/issues/2763) * [Python](https://github.com/stripe/stripe-python/issues/1835) * [Java](https://github.com/stripe/stripe-java/issues/2239) * [Go](https://github.com/stripe/stripe-go/issues/2379) * [Ruby](https://github.com/stripe/stripe-ruby/issues/1895) * [PHP](https://github.com/stripe/stripe-php/issues/2087) * [.NET](https://github.com/stripe/stripe-dotnet/issues/3404) Most of the world's money still moves in batches. A wire submitted at 2pm might settle by end of day, if you made the cutoff. ACH takes one to three business days. Cross-border payments touch correspondent banks, each adding lag and a fee. Stripe has spent over a decade building the [Global Payments and Treasury Network](https://stripe.com/newsroom/news/stripe-expands-global-infrastructure-with-new-funding) (GPTN), a programmable infrastructure for global money movement that batches transfers to reduce cost, nets opposing flows to minimize actual cash moved, and routes through the optimal path between accounts. Under the hood, it's a graph with accounts as nodes, and payment rails as edges. Stablecoins offered something new: a stablecoin transfer settles on-chain in seconds, 24/7, with global reach and no per-country rail integration. When we decided to add stablecoin support to Stripe, the challenge went beyond "support a new currency." We had to stitch blockchain-based settlement into the GPTN's existing graph of bank accounts, payment rails, and entity structures, while respecting safeguarding requirements and regional regulations, and making it work in both directions. ## How stablecoins move through Stripe Here's a concrete example: a platform holds a USD balance on Stripe and wants to pay out a user in stablecoins. When the platform calls our Payouts API, we decrement their USD balance and record a pending stablecoin obligation. Then, crucially, we don't wait for fiat rails to catch up. We maintain a stablecoin liquidity pool at Bridge, our crypto infrastructure partner. Bridge can draw from this pool and credit the recipient's wallet directly, delivering the payout in seconds to minutes. Meanwhile, the dollars catch up asynchronously. Our cash management layer creates a request to move funds from the originating bank account to replenish the Bridge liquidity pool — but that movement happens over traditional fiat rails, and takes hours to days depending on the corridor. Opposing flows on the same route get batched and netted, so the number of actual bank transfers is a small fraction of the number of payouts. The reverse direction — stablecoins back to fiat — works the same way. Bridge liquidates the stablecoins, dollars flow back through intercompany channels, and liquidity at the fiat entity provides immediate availability while cash settles. Decoupling settlement and movement was our key insight. User-facing settlement runs at crypto speed, while the underlying cash movement runs at fiat speed. Liquidity pools on each side bridge the gap. ## The role of Bridge Bridge, which Stripe acquired in 2025, is the orchestration layer between Stripe's fiat infrastructure and the blockchain. It manages wallet custody, executes on-chain transfers, and handles the minting and burning of stablecoins against reserve accounts. When we need to fund a recipient's wallet, Bridge handles the last mile: converting from the liquidity pool to stablecoins and executing the on-chain transfer to the destination address and replenishing the pool with stablecoins when incoming fiat settles. Because Stripe relies on Bridge for stablecoin custody and transactional services, every fiat-to-stablecoin conversion, in either direction, is a cross-entity cash movement. Payout and onramp transactions require cash to move from Stripe's fiat entities to Bridge; offramps and stablecoin-to-fiat conversions bring it back. Each flow needs to be tracked as an intercompany liability, settled through intercompany channels, and reconciled across both sets of books. The settlement graph had to integrate a new type of node — the wallet — with properties unlike any bank account it had handled before: near-instant finality, per-recipient (not pooled) balances, and no cutoff times. ## Extending the existing graph When we integrated stablecoins, we had two choices: build a parallel system, or extend the existing GPTN. We chose to extend. The existing infrastructure already solves hard problems — orchestration, netting, cross-entity settlement, FX, reconciliation, and liquidity management — with years of investment behind them. Building stablecoins on top gave us those capabilities for free on day one, and improvements to shared infrastructure benefit both fiat and stablecoin flows. To understand what we extended, it helps to see how the fiat side works. Stripe operates entities in dozens of countries, each with its own bank accounts. We model cash movement as a directed graph: nodes are accounts, edges are the available rails between them (ACH, SEPA, wire, book transfer), each with properties for currency, speed, cost, and availability. When the cash management layer needs to move money from account A to account B, it finds the optimal path through this graph. At Stripe's scale, this graph handles millions of cash movement requests per day. Many of them never result in an actual bank transfer — we apply net settlement, which cancels them out. If account A owes account B 10M USD, and account B owes account A 8M USD, we send one 2M USD wire from account A to account B instead of two. With multilateral netting across entity pairs, we can net out a significant portion of overall daily volume across our entities—but getting it right means carefully tracking when cash needs to be available at the destination. Adding stablecoins meant adding new node types and edge types to this graph. The new nodes are wallets: Bridge's liquidity pool, and individual user wallets for recipients. The new edges connect fiat accounts to these wallets, in both directions. The same netting logic applies across fiat and stablecoin flows — if we're sending 5M USD to Bridge to fund payouts while 3M USD is flowing back from offramps, the engine nets this to a single 2M USD fiat transfer. Bilateral netting between fiat and stablecoin flows is one of our most important efficiency gains, because it directly reduces the number of cross-entity transfers needed to keep the whole system running. The composability of this approach also makes expansion practical. Adding a new currency pair or product is a matter of extending a path through the graph, rather than building a new pipeline. A EUR → stablecoin flow, for example, naturally composes from capabilities that already exist: the FX leg converts EUR to USD through our treasury hub, and the stablecoin leg mints at Bridge. Stablecoin support for new products can reuse the same architecture rather than requiring bespoke infrastructure each time. A USD → stablecoin payout starts with a standard fiat hop that already existed in the graph. The routing layer understands both fiat and wallet nodes, so it can construct end-to-end paths that cross the fiat-to-stablecoin boundary and complete the payout. Wallet edges will also eventually add routing redundancy: for example, a USD → MXN payout will be able to go via a traditional fiat partner or via Bridge (liquidating a stablecoin to MXN), giving the system multiple paths for the same funds and the ability to choose based on cost, speed, or availability. ## Making it instant The net settlement engine was designed for a world where everything is measured in hours. It runs on a planning cycle of a few minutes, a negligible delay when your fastest rail settles in hours. Stablecoins changed that calculus. When a user is waiting for a stablecoin to land in their wallet, a few minutes of batching is the difference between "instant" and "not instant." Some wallet funding requests are urgent — maybe a high-priority payout is pending — and holding them for the next batch isn't acceptable. We introduced a direct mode that bypasses the planning cycle for time-sensitive requests, explicitly skipping batching and netting opportunities in exchange for speed. A request that could have netted against an opposing flow now goes out as its own transfer. The system now runs both modes simultaneously, with most flows going through the standard cycle and benefiting from netting, and urgent wallet funding going direct. The decision of which mode to use is made upstream based on urgency, and in the future could factor in real-time pool state and demand forecasts to make smarter tradeoffs between speed and netting efficiency. The liquidity pool is the tightest operational constraint in the system. Payouts and onramps reduce it; offramps and stablecoin-to-fiat conversions replenish it. On a day where payout volume and offramp volume are roughly balanced, the pool stays relatively stable with minimal fiat transfers needed. The netting engine makes this work: by netting opposing fiat-stablecoin flows before they hit the banking system, it directly reduces how much replenishment pressure ends up on fiat rails in the first place. Demand-driven forecasting — the ability to right-size the pool based on predicted flows in each direction—is one of our biggest near-term opportunities. ## Running 24/7 Fiat settlement follows banking hours. Blockchains don't, which has real operational consequences. With fiat, a problem detected in a batch process might give us hours to respond before users are affected. With stablecoins settling in minutes, our alerting SLAs tightened from hours to minutes. We designed routine operations like pool replenishment and reconciliation, to run without needing manual intervention outside business hours. We had to extend our operational tooling, too: the same dashboards that show bank account balances and sweep status now display wallet balances, pool utilization, and on-chain transaction status, with reconciliation that spans both bank statements and blockchain records. ### Agent-accessible operations As SLAs tighten further, autonomous agents that can run routine diagnostics start to make a lot of sense. We're investing in making stablecoin operations more agent-accessible: giving agents visibility into the full transaction lifecycle, training them on patterns from past incidents, and enabling them to diagnose and respond to common issues without needing to wait for a human to come online. ## What's next The infrastructure described in this post is live and handling real traffic, but we're early in what stablecoins at Stripe will become. Here's where we're headed. ### Demand-driven liquidity forecasting Static pool buffers work, but they're not capital-efficient. The next step is moving to dynamic, forecast-driven sizing: right-sizing liquidity per corridor per time window based on historical usage patterns, time-of-day demand curves, redemption rates, and real-time inflow/outflow rates. Better forecasting also makes smarter batch-vs-direct decisions by pre-positioning liquidity ahead of predicted demand spikes rather than reacting after the pool dips. ### Faster replenishment We're working on using real-time fiat rails like RTP and SEPA Instant to replenish the liquidity pool where available. Closing the gap between pool drain speed (minutes) and replenishment speed (currently hours to days) is one of the highest-leverage improvements we can make to give us smaller buffers, less idle capital, and more resilience to demand spikes. ### Expanding to new products and corridors The composability of a settlement graph makes expansion practical. We can add stablecoins to a new product by connecting a new fiat leg to existing wallet edges, or add a new currency pair through the treasury hub's FX capabilities. This same architecture now powers [stablecoin payouts to Link](https://docs.stripe.com/global-payouts/send-money/link), enabling companies like [Meta](https://stripe.com/blog/everything-we-announced-at-sessions-2026) to pay content creators in dollars around the globe. Each of these are new edges in the graph—they all plug into the same netting, routing, reconciliation, and settlement infrastructure that already exists. * * * We want to make stablecoins a first-class rail at Stripe, alongside ACH, SEPA, and wires, as another edge type in the graph with its own speed and cost characteristics, available to every Stripe product that moves money. The architecture is designed to get us there. If these are the kinds of opportunities you want to work on, [we're hiring](https://stripe.com/jobs). Previously, I wrote about [building a transcription app](https://stripe.dev/blog/building-with-agents-stripe-projects) using Stripe Projects. While that tool certainly has a real use case and is still being used by my team, it's much closer to a hobby project than a real production app. That much was obvious both from how quickly I was able to spin it up (just a few days, with only a few hours of development time) to how frictionless the process was. So what does building a more complex production app using agents look like? Even with the best-laid plans, sometimes it will still be mostly friction. Navigating that friction is where the takeaways come in. ### The use case So many people are building with [Stripe Projects](https://projects.dev/), it's getting hard to keep track of them all! I wanted a fun way to catalog and showcase open-source projects, and maybe add a competitive element to it for future hackathons, so I decided to build a leaderboard app. The concept was fairly simple: I wanted to build an app where users could add their project to a table, share it via social media links, and vote on other projects. Despite the simplicity of the app, it would require some more complex infrastructure, namely: - Auth, for tracking user submissions and enforcing a one-project-per-user limit - A database with multiple tables, for tracking project details, user details, and votes - Hosting for the app itself - A mechanism to prevent voting abuse, i.e. ensuring non-logged-in users can only vote once per project ### The initial plan When it comes to agents, a well-crafted plan pays dividends in the long run. I had my requirements but wanted to ensure nothing was missing, so I meticulously laid out every piece of functionality the leaderboard would need. First, I made sure I had the Projects skill available, so my agent would know to use Projects for provisioning infrastructure: ```bash npx skills add https://docs.stripe.com ``` Then, I crafted a detailed markdown document covering requirements and styling, such as the theme's primary and secondary colors, fonts, light/dark mode, etc. Anything left out of the requirements is left to the agent's discretion, which tends to trend towards the generic, and I had a very specific vision in mind as well as Stripe UX guidelines to follow. The requirements included how I was thinking about the data structure, and contained instructions such as: ```markdown - The leaderboard data will be stored in a database in an object with the following types: leaderboard: [ { "projectId": "project_", "projectName": "demo-project", "projectURL": "", "projectRepoURL": "", "projectStackURL": "", "userName": "", "userEmail": "", "ranking": { "position": , "upvotes": , "timeAtPosition": } } ] ``` While in the past I've used apps such as Figma for wireframing, this time I figured the agent needed just a general concept for layout, and I was in a bit of a hurry - so I went old school and sketched out a rough idea of what I had in mind on a scrap of paper, took a photo, and added it to my requirements directory: ![Unfortunately not on the back of a napkin, but close enough](/images/integrating-services-with-agents-stripe-projects/wireframe.jpg) Then came the actual prompt, using Claude's planning mode: ```bash I want to build a single-page NextJS app that shows a leaderboard of applications created using Stripe Projects and allows users to upvote on existing applications without registering, though limited to one vote per user per project. In order to add an application to the leaderboard for voting, a user will need to register and fill out a form, which will be in a modal activated by a "Submit your project" button. See for details, styling, and data requirements, and for a rough wireframe, which should be re-created as a table. Use the best database and auth for the use case, though simpler to use would be better for both, and any other infrastructure needed. Use Vercel for hosting as I already have an account. ``` ### The initial pivot As expected, the agent's initial plan included provisioning the following resources: - Database + auth: Supabase (single service) - Hosting: Vercel The agent followed my request for infrastructure simplicity and chose Supabase as both my database and auth provider, and Vercel for hosting as specified. It created CSS variables based on my requested color scheme, laid out the data structure for a `projects` table and a `votes` table, and presented the following architecture: ![Initial architecture from the agent](/images/integrating-services-with-agents-stripe-projects/architecture.png) Everything looked good, and I hit `build`. The agent started by adding services via the CLI: ```bash stripe projects add supabase/project stripe projects add vercel/project stripe projects env --pull # writes .env.local ``` This also added the relevant skills for each service, which let the agent know to install `@supabase/supabase-js` and other libraries we would need. As the agent was building, we ran into the first issue: enforcing the one vote per user rule for voting on the leaderboard. Using the Vercel skill, the agent determined that the built-in rate limiter for voting integrity it had initially planned would not work on the serverless architecture we were using, and a server-side enforcement mechanism was necessary. It would replace the existing vote flow with a single atomic database function, but that required a new service: [Upstash Redis](https://upstash.com/docs/redis/overall/getstarted) for rate limiting. I gave my consent, it ran `stripe projects add upstash/redis`, and it was able to complete the rest of the build plan. ### Pivoting providers The real problems started once the integrations were configured, the app was working locally, and I started running into limits from the providers themselves. This was most obvious when I started testing the sign-up auth flow using [Supabase auth](https://supabase.com/docs/guides/auth) - specifically, the email rate limits. It turns out that everybody has a plan until they get hit by rate limits. Supabase's auth plan includes a rate limitation of two emails that can be sent per hour from my project - that was not enough for testing, much less a production app. Digging into the docs, I found out I would have to set up a custom SMTP provider or use my own email service via a custom hook to update the email rate limit. That meant another service, specifically an SMTP or email provider, something not yet offered by Stripe Projects - as well as potential new costs. I wanted to avoid having to run a custom email service when all I needed was a way to authenticate my users, so I decided to swap out my auth provider instead. This is the point where human intervention was absolutely necessary, because when asked for potential solutions to this issue, the agent suggested implementing a Twilio integration instead, which aside from lacking the functionality I needed would have been absolute overkill for my use case. ### Pivoting plans It was time to go back into plan mode, both for myself and the agent. I would need to research the available auth providers, see if any of them would work for my use case, or potentially use a provider not offered by Projects. Luckily, [Clerk](https://clerk.com/docs) ended up having the functionality I needed with much more generous rate limits aimed at preventing abuse. Once I knew what service I wanted to use, I asked the agent to come up with a migration plan, which resulted in this simplified auth flow: ![The new auth flow](/images/integrating-services-with-agents-stripe-projects/auth.png) Once built, I was able to get auth working locally and in a deployed version, and after a few more back and forth iterations was ready to share the MVP. ### Takeaways #### Think through your data and UX when planning The requirements doc I made had data models as well as CSS values laid out for the agent. Because I already had specific ideas of how I wanted those to look, writing them out for the initial plan saved a lot of the back and forth I had experienced in previous builds. #### Trust but verify (and research) The initial plan had a major flaw: an in-memory rate limiter doesn't work on Vercel's serverless architecture. Next time I'll have an adversarial agent go over the plan to find issues like this before they come up in the build, as well as going through the provider's docs if I have any doubts a proposed solution won't work. #### Be deliberate in your prompt wording I specifically asked the agent "Use the best database and auth for the use case, though simpler to use would be better for both". When it saw that Supabase offered both, it naturally picked that as the simplest solution, though it ended up being the wrong one for auth. Initially biasing the agent towards simplicity ended up causing a significant refactor after the first build was complete. #### Go with your gut When I initially hit the email rate limit issue, I did ask the agent to give me possible solutions; it came up with implementing Twilio on top of everything. My gut said this was an auth problem and changing the auth provider should solve it, and that ended up being the case. ### Results By the time I was finished, I had built a far more complex app with Projects than any previous endeavors, and ended up with five resources between four providers. But most importantly, I ended up with a working app: ![The finished leaderboard app](/images/integrating-services-with-agents-stripe-projects/leaderboard.png) Before submitting my code for review, I switched to a different model and ran a security audit with one agent and a performance audit with another and patched some fairly trivial but important issues those agents found. All together, the leaderboard app took over a full day of building compared to just a few hours for my previous projects - which is worth putting into perspective considering a year ago it would have taken a whole team at least a week to put together. If you want to get started with Stripe Projects yourself, head to [projects.dev](https://projects.dev/)! When a Stripe engineer makes changes to an API, merging the PR is just the beginning. Stripe maintains a vast developer product suite that needs to stay in sync with the API changes we [frequently ship](https://docs.stripe.com/changelog): - The [official SDKs](https://docs.stripe.com/sdks) need to have new versions published across seven different languages and three release channels. - The [CLI](https://docs.stripe.com/stripe-cli), [Shell and API Explorer](https://docs.stripe.com/workbench/shell) need to be updated to include the new functionality. - The [API Reference](https://docs.stripe.com/api) needs to reflect the new API shape, and have meaningful descriptions to assist developers in integrating with it. - The [public changelog](https://docs.stripe.com/changelog) needs to list the new change, why it matters, and how it affects users. - Internal tools need to reflect these changes to help Stripe engineers (and AI agents) manage and maintain their APIs. - … and more. Keeping all of this in sync is a significant challenge, and building the infrastructure to do it reliably is a long-term investment that started a few years back. ## Enter OpenAPI The [OpenAPI Specification](https://www.openapis.org/what-is-openapi) defines a standard format for describing HTTP APIs. It’s widely used across the industry to generate documentation, client libraries, and to build out a company’s [Developer Experience Infrastructure](https://kenneth.io/post/developer-experience-infrastructure-dxi) (DXI). [Stainless](https://www.stainless.com/) (founded by a former Stripe engineer and recently acquired by Anthropic) and many other companies are built around solving the challenge of DXI. OpenAPI has been part of Stripe’s toolbox since 2016, initially powering internal tooling like validations and test suites. In 2017, we published a [public OpenAPI description of our API](https://github.com/stripe/openapi) and kept it up-to-date as our APIs evolved. In 2019, we used OpenAPI to auto-generate a Stripe SDK for the first time, releasing stripe-java@8.0. But OpenAPI wasn’t universally adopted across Stripe. Some tools relied on the OpenAPI descriptions we generated. Others, like the API Reference, bypassed OpenAPI entirely and parsed APIs straight from our internal Ruby-based [DSL](https://en.wikipedia.org/wiki/Domain-specific_language). ### A breaking point In 2024, Stripe introduced the [v2 namespace](https://docs.stripe.com/api-v2-overview) to bring improved domain modeling and updated API semantics to our users. Internally, this meant an architectural shift in how we define and implement APIs, leveraging Protocol Buffers. Unlike v1, v2 APIs are defined by a separate internal DSL and serialized into snapshots using a Stripe-built internal API spec. Both are protobuf-based, which lets us share primitives and represent the DSL, API shape, and version differences (patch files) in the same format.
```rb class AccountRetrieveMethod < APICore::AbstractAPIMethod description "Retrieves the details of an account." resource AccountAPIResource permission Permission.fetch(:account_retrieve) # ... client_metadata( in_class: "AccountAPIResource", method_type: :retrieve, endpoint_url: "/v1/accounts/:id" ) def execute # ... end end ```
```proto service AccountsApi { // Retrieves the details of an Account. rpc RetrieveAccount(RetrieveAccountRequest) returns (RetrieveAccountResponse) { option (v2.method) = { get: "/v2/core/accounts/:id" documented: PUBLIC permission: "v2_account_read" error_code: "not_found" error_code: "account_rate_limit_exceeded" // ... }; } } ```
Now there were two formats: OpenAPI (or parsing the Ruby-based DSL) for v1, and our internal API spec for v2. The consequences of the new internal API spec were immediate. Teams responsible for a developer product now had to support two formats instead of one. SDK and API Reference generators had to be duplicated. Preview support for v2 APIs in the CLI was shut down entirely because the maintenance burden was too high. Stripe Shell didn’t support v2 APIs at all. The situation was already unsustainable, and we hadn't even launched v2 publicly yet. With new developer products like [Stripe Workflows](https://docs.stripe.com/workflows) and an improved changelog on the way, things were only going to get worse. It was clear we needed to converge on a single way of representing Stripe’s APIs. Between the different DSLs, the internal API spec, and OpenAPI, the choice was clear: converge on OpenAPI. OpenAPI was, and still is, the industry standard for representing HTTP APIs and a path already proven within Stripe. Most importantly, OpenAPI is extensible. Anything we needed to represent that wasn’t natively supported could be added as an extension. This decision to use OpenAPI enabled us to further expand a pipeline that ships developer products at scale, keeping them in sync with every API change we make. ## How the pipeline works The pipeline starts with generating OpenAPI descriptions for each API namespace. But not every consumer of those descriptions needs the same thing. The Stripe CLI doesn't need the same information as the public API Reference. Internal tools can operate on APIs that are internal or still in development, which have no place in public-facing SDKs. To handle this, the generator’s output is controlled by three main parameters: variant, phase, and version. Together, they determine which API definitions (methods, event types, resource types, etc.) and what metadata is included in each artifact. ![](/images/how-api-changes-flow-into-stripes-developer-products/image2.png) > The OpenAPI Generator takes inputs from both v1 and v2 DSLs and produces tailored artifacts per consumer. The variant controls which APIs and metadata are included for a given consumer. Think of variants as "surfaces." Each developer product gets its own tailored artifact. - Public artifacts, like our [stripe/openapi](https://github.com/stripe/openapi) repository, exclude metadata that describe private or sensitive information. - Some APIs are omitted entirely from certain artifacts. For example, methods that power internal integrations like the Stripe Dashboard don't appear in the descriptions powering public SDKs. The phase parameter filters APIs based on their [release phase](https://docs.stripe.com/release-phases): | Phase | What's included | | :---- | :---- | | `generally_available` | GA APIs only | | `public_preview` | GA \+ public preview APIs | | `private_preview` | GA \+ public preview \+ private preview APIs | For example, our public API Reference is powered by two different artifacts chosen based on whether the Preview toggle is enabled–one for GA APIs and one for preview. That distinction is controlled at the DSL level, so that a method marked undocumented won't appear in any public spec and one marked private\_preview won't appear in GA artifacts. The version parameter dictates what version of Stripe's API is being described. Products like [API Reference](https://docs.stripe.com/api) or [Stripe Database](https://docs.stripe.com/data/database) can support different views of the API depending on the API version chosen by the customer, and this parameter allows these teams to fetch the appropriate OpenAPI description. In the v2 namespace, all API changes are stored on disk and easily reproducible from the beginning of history. This allows us to generate snapshots of the API surface, and their OpenAPI representation, for any point in time. With that capability, we can provide a canonical OpenAPI description for any past or current API version, and propagate improvements to the spec (e.g. richer metadata about an API) at will. Things are a little trickier for v1. Due to the historical architecture of the v1 platform, it’s not trivial to regenerate descriptions for non-current API versions. Today, when a new API version is released, we store the current OpenAPI spec as the canonical description of v1 APIs for that version. It’s not perfect: new variants or metadata we add to the spec can't be backfilled into older versions. This is a problem we still have to solve in v1: how to support older API versions and leverage new OpenAPI features we add. ## Making OpenAPI our own Stripe uses [vendor extensions](https://swagger.io/docs/specification/v3_0/openapi-extensions/) to include extra information about the APIs and communicate to consumers how the spec should be interpreted. The extensions cover gaps in what the OpenAPI spec natively supports, helping us bridge the two API namespaces and their DSLs when possible, and signal to consumer products about special behavior that applies to some APIs but not others. For example, we define Stripe's resources as reusable JSON schemas (under [#/components/schemas](https://learn.openapis.org/specification/components.html)) and include an extension called x-stripeOperations. This extension lists which API methods operate on a given resource and, with some additional metadata, directly powers the methods available on an SDK object and the subcommands available in the Stripe CLI. ```yaml components: schemas: v2.core.account: type: object properties: [...] x-stripeOperations: - method_name: list method_type: list operation: get path: /v2/core/accounts # ... - method_name: close method_type: custom operation: post path: "/v2/core/accounts/{id}/close" ``` Extensions helped us turn a standard spec into something purpose-built for Stripe's needs. Here are a few others we have added over the years: | Extension Name | Applies to | Description | | :---- | :---- | :---- | | `x-resourceId` | Resource schemas | String that represents the canonical name for that resource. | | `x-stripeResource` | Resource schemas | Object containing type hints for consumers, e.g. the package location where the type should be added. | | `x-stripeEvent` | Event schemas | Object containing additional metadata about an event, e.g. its type identifier or whether it represents a [thin event](https://docs.stripe.com/event-destinations#benefits-of-thin-events). | | `x-stripeAccess` | Operations or schemas | Object containing metadata about the access and visibility of that API definition, used by the API Reference to conditionally render documentation for APIs that are not publicly available. | | `x-expandableFields` | v1 API Resource schemas | Contains a list of names of fields that are expandable via the `expand` parameter. See [expanding objects](https://docs.stripe.com/api#expanding_objects). | ## Drawing the rest of the owl The above is just a small piece of the work we do to be able to deliver consistently world-class developer experiences. Over Stripe's lifetime, we’ve invested significant care into understanding how API changes impact our entire product suite. Along the way, we’ve codified a set of design patterns that all APIs must follow. Before a PR can merge, a set of automated tests validate API changes against those patterns: API naming, field types, versioning considerations such as backwards compatibility, or constraints specific to products (e.g. reserved words in SDKs). Documentation and code samples follow the same model, they're authored and validated alongside the API definition itself and threaded through to the API Reference generator via OpenAPI artifacts. ```sh warn[empty_doc_string]: Every public API method, event, error, field, & enum value should have a doc string. See https://go/v2-api-ref for more details. --> /path/to/accounts_api_service.proto:71 70 | 71 | rpc CreateAccount (CreateAccountRequest) returns (CreateAccountResponse) { 72 | option (v2.method) = { 73 | stable_id: "v2_method_create_account" 74 | post: "/v2/core/accounts" | ... help: see https://go/api-v2-lint/empty_doc_string for more information ``` In the PR view, we display an OpenAPI-based diff of the changes for visual (or much more common now: agent-assisted) spot-checking. In the v2 namespace, we also detect and display changes to past API versions (if applicable), a feature that has been especially helpful for catching inadvertent changes to older API versions. ![](/images/how-api-changes-flow-into-stripes-developer-products/image4.png) Once the changes get merged, a pre-release flow is kicked off: the changes make their way into our internal API versioning tool, where the OpenAPI description of the previous and upcoming API versions are compared. Each change is listed and enriched with extra information such as previews of how SDKs will be affected, the affected product, suggested changelog descriptions, and more, providing one more place for product architects to review and refine upcoming changes. ![](/images/how-api-changes-flow-into-stripes-developer-products/image3.png) At release time, the canonical OpenAPI description for the new version is snapshotted and propagated to downstream consumers for their subsequent releases. The new artifact is made available to internal services via direct dependencies or build artifacts. It’s published to our CDN and fetched by workflows in our open-source repos such as [stripe/openapi](https://github.com/stripe/openapi) and [stripe/stripe-cli](https://github.com/stripe/stripe-cli). The API Reference is updated with the new API version, up-to-date code snippets are generated, new versions of our SDKs and the CLI are released, and so on. ![](/images/how-api-changes-flow-into-stripes-developer-products/image1.png) All of those improvements–and many others not mentioned here–have helped Stripe maintain a high bar for developer products while reducing manual work for engineers and the chance of mistakes being made. ## What comes next The pipeline’s foundation is solid, but there’s a lot more we want to build on top of it. Smoothing the differences between defining v1 and v2 APIs is an area of active work as we incorporate the learnings of both stacks to provide a more unified experience to Stripe engineers building on either namespace (or most likely, both!). We are also extending our DSLs so that product teams can more easily define custom integration points targeting any developer product: some functionality may not really fit Stripe's API, but make a lot of sense in the Stripe CLI or as an action in a Stripe Workflow. As Stripe launches new developer products, such as [Stripe Database](https://docs.stripe.com/data/database), we constantly find new use-cases that fit into this pipeline and managing that growth becomes its own challenge. It takes a coordinated effort maintaining parity between the DSLs, the OpenAPI generators of both v1 and v2 stacks, and keeping consumer teams in the loop when further extending the spec. — There's no shortage of interesting problems left to solve. If that sounds like your kind of challenge, and you want your work to reach every developer who builds on Stripe, [we're hiring](https://stripe.com/jobs).
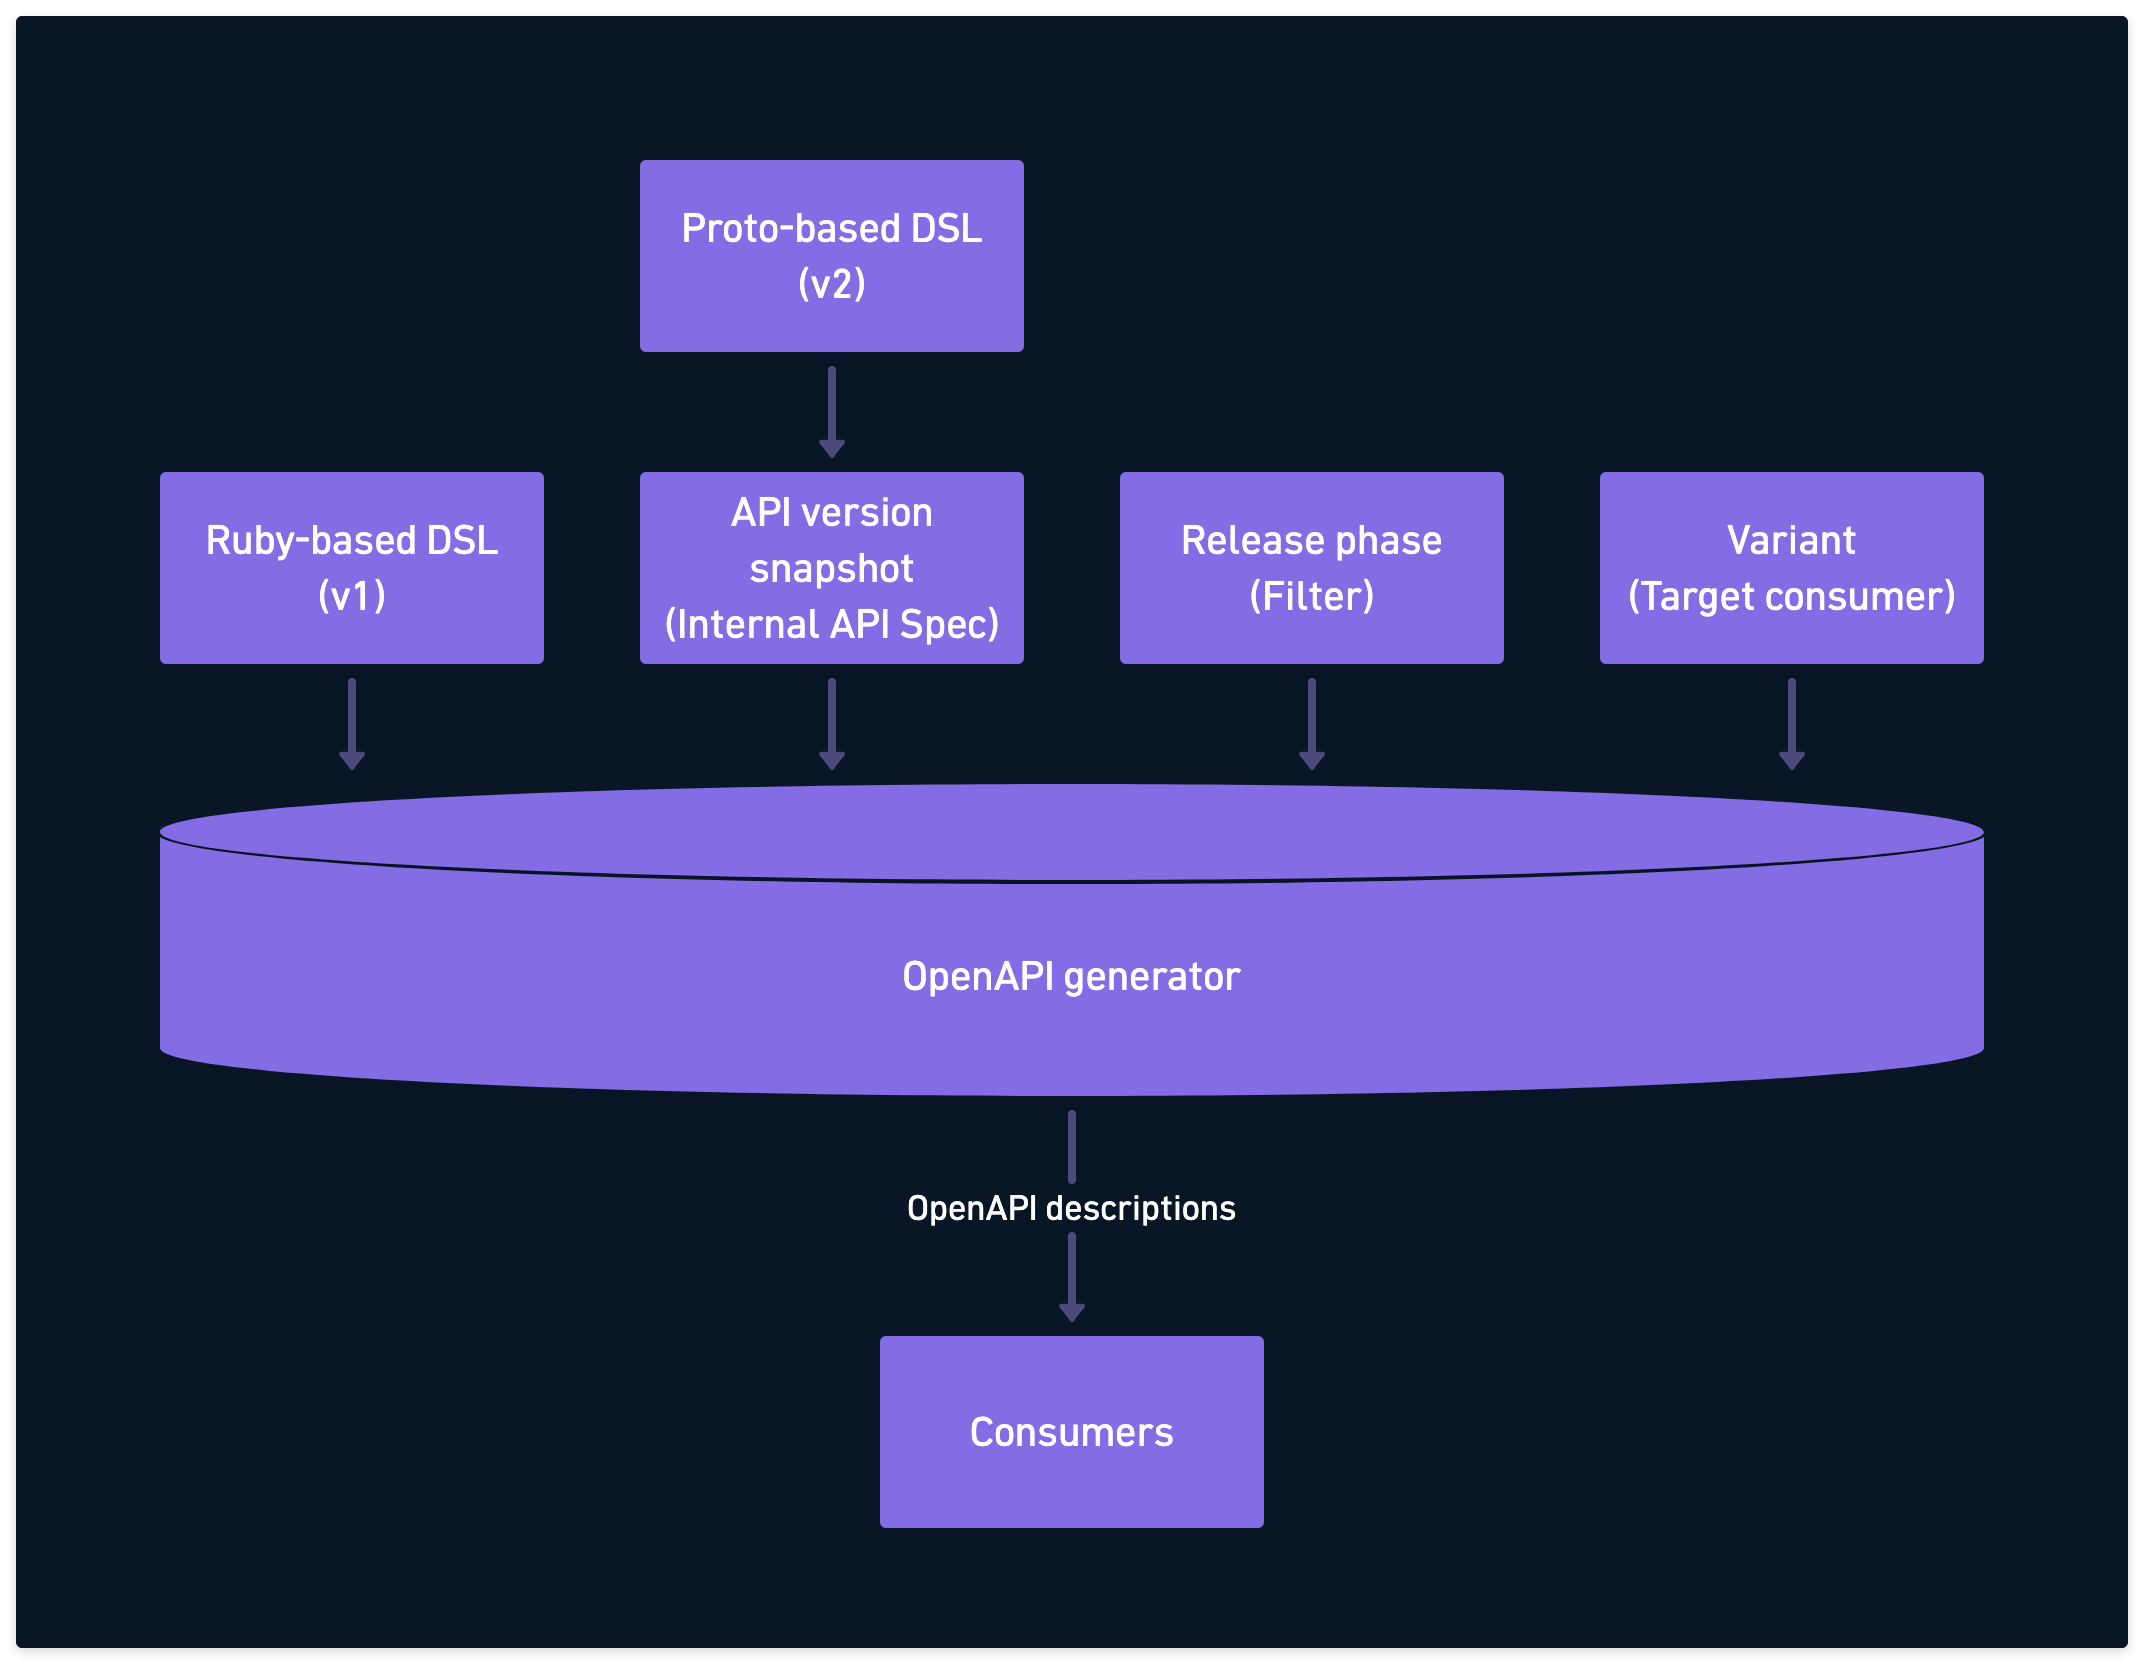
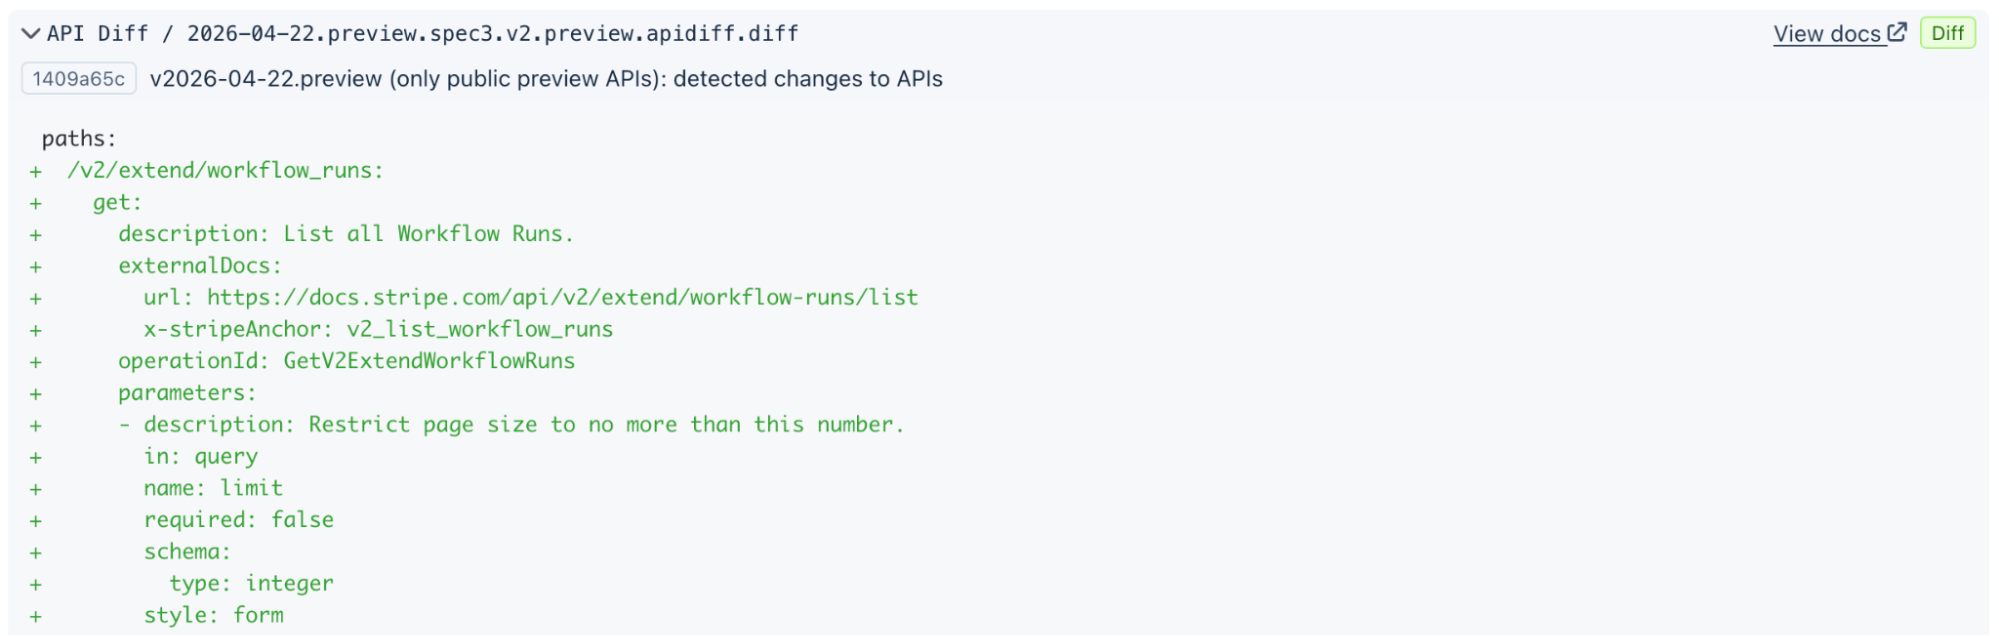
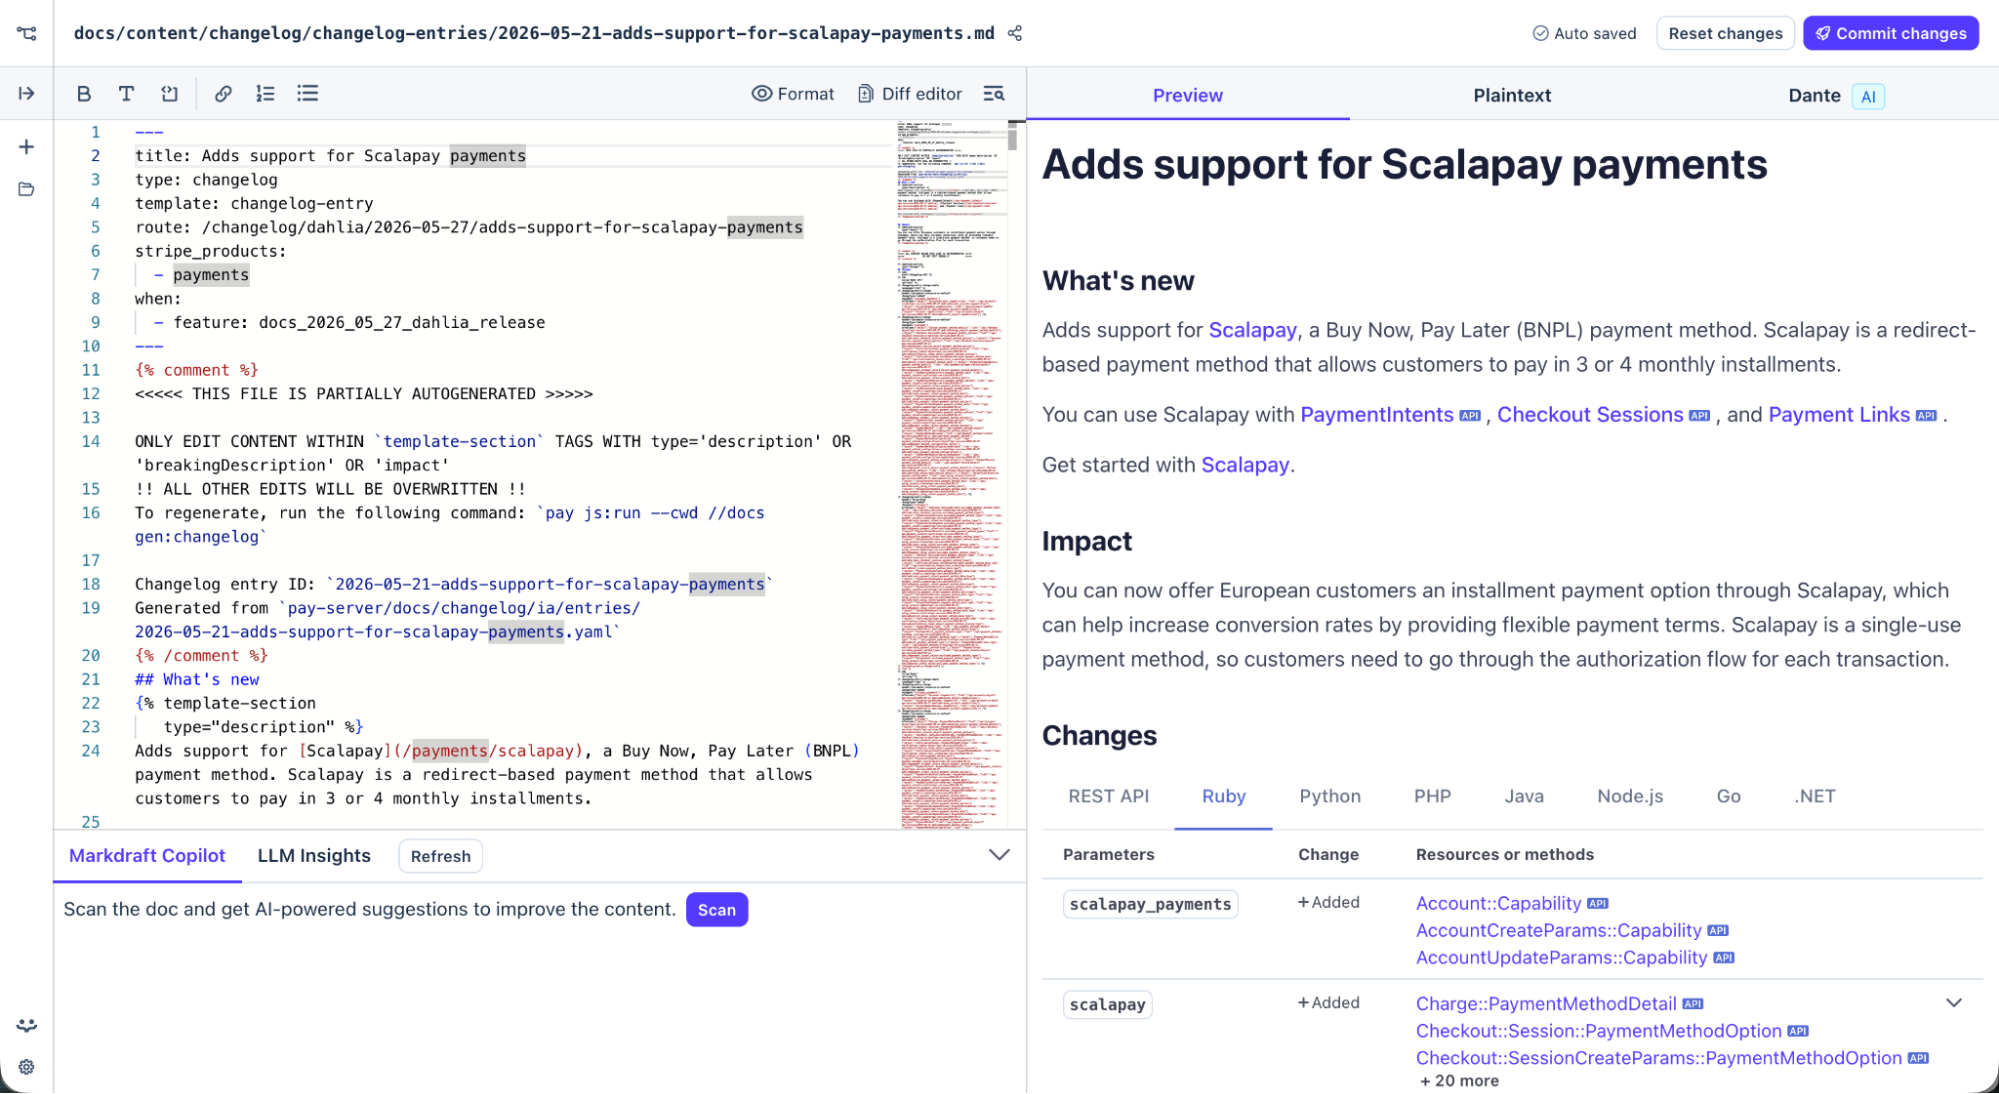
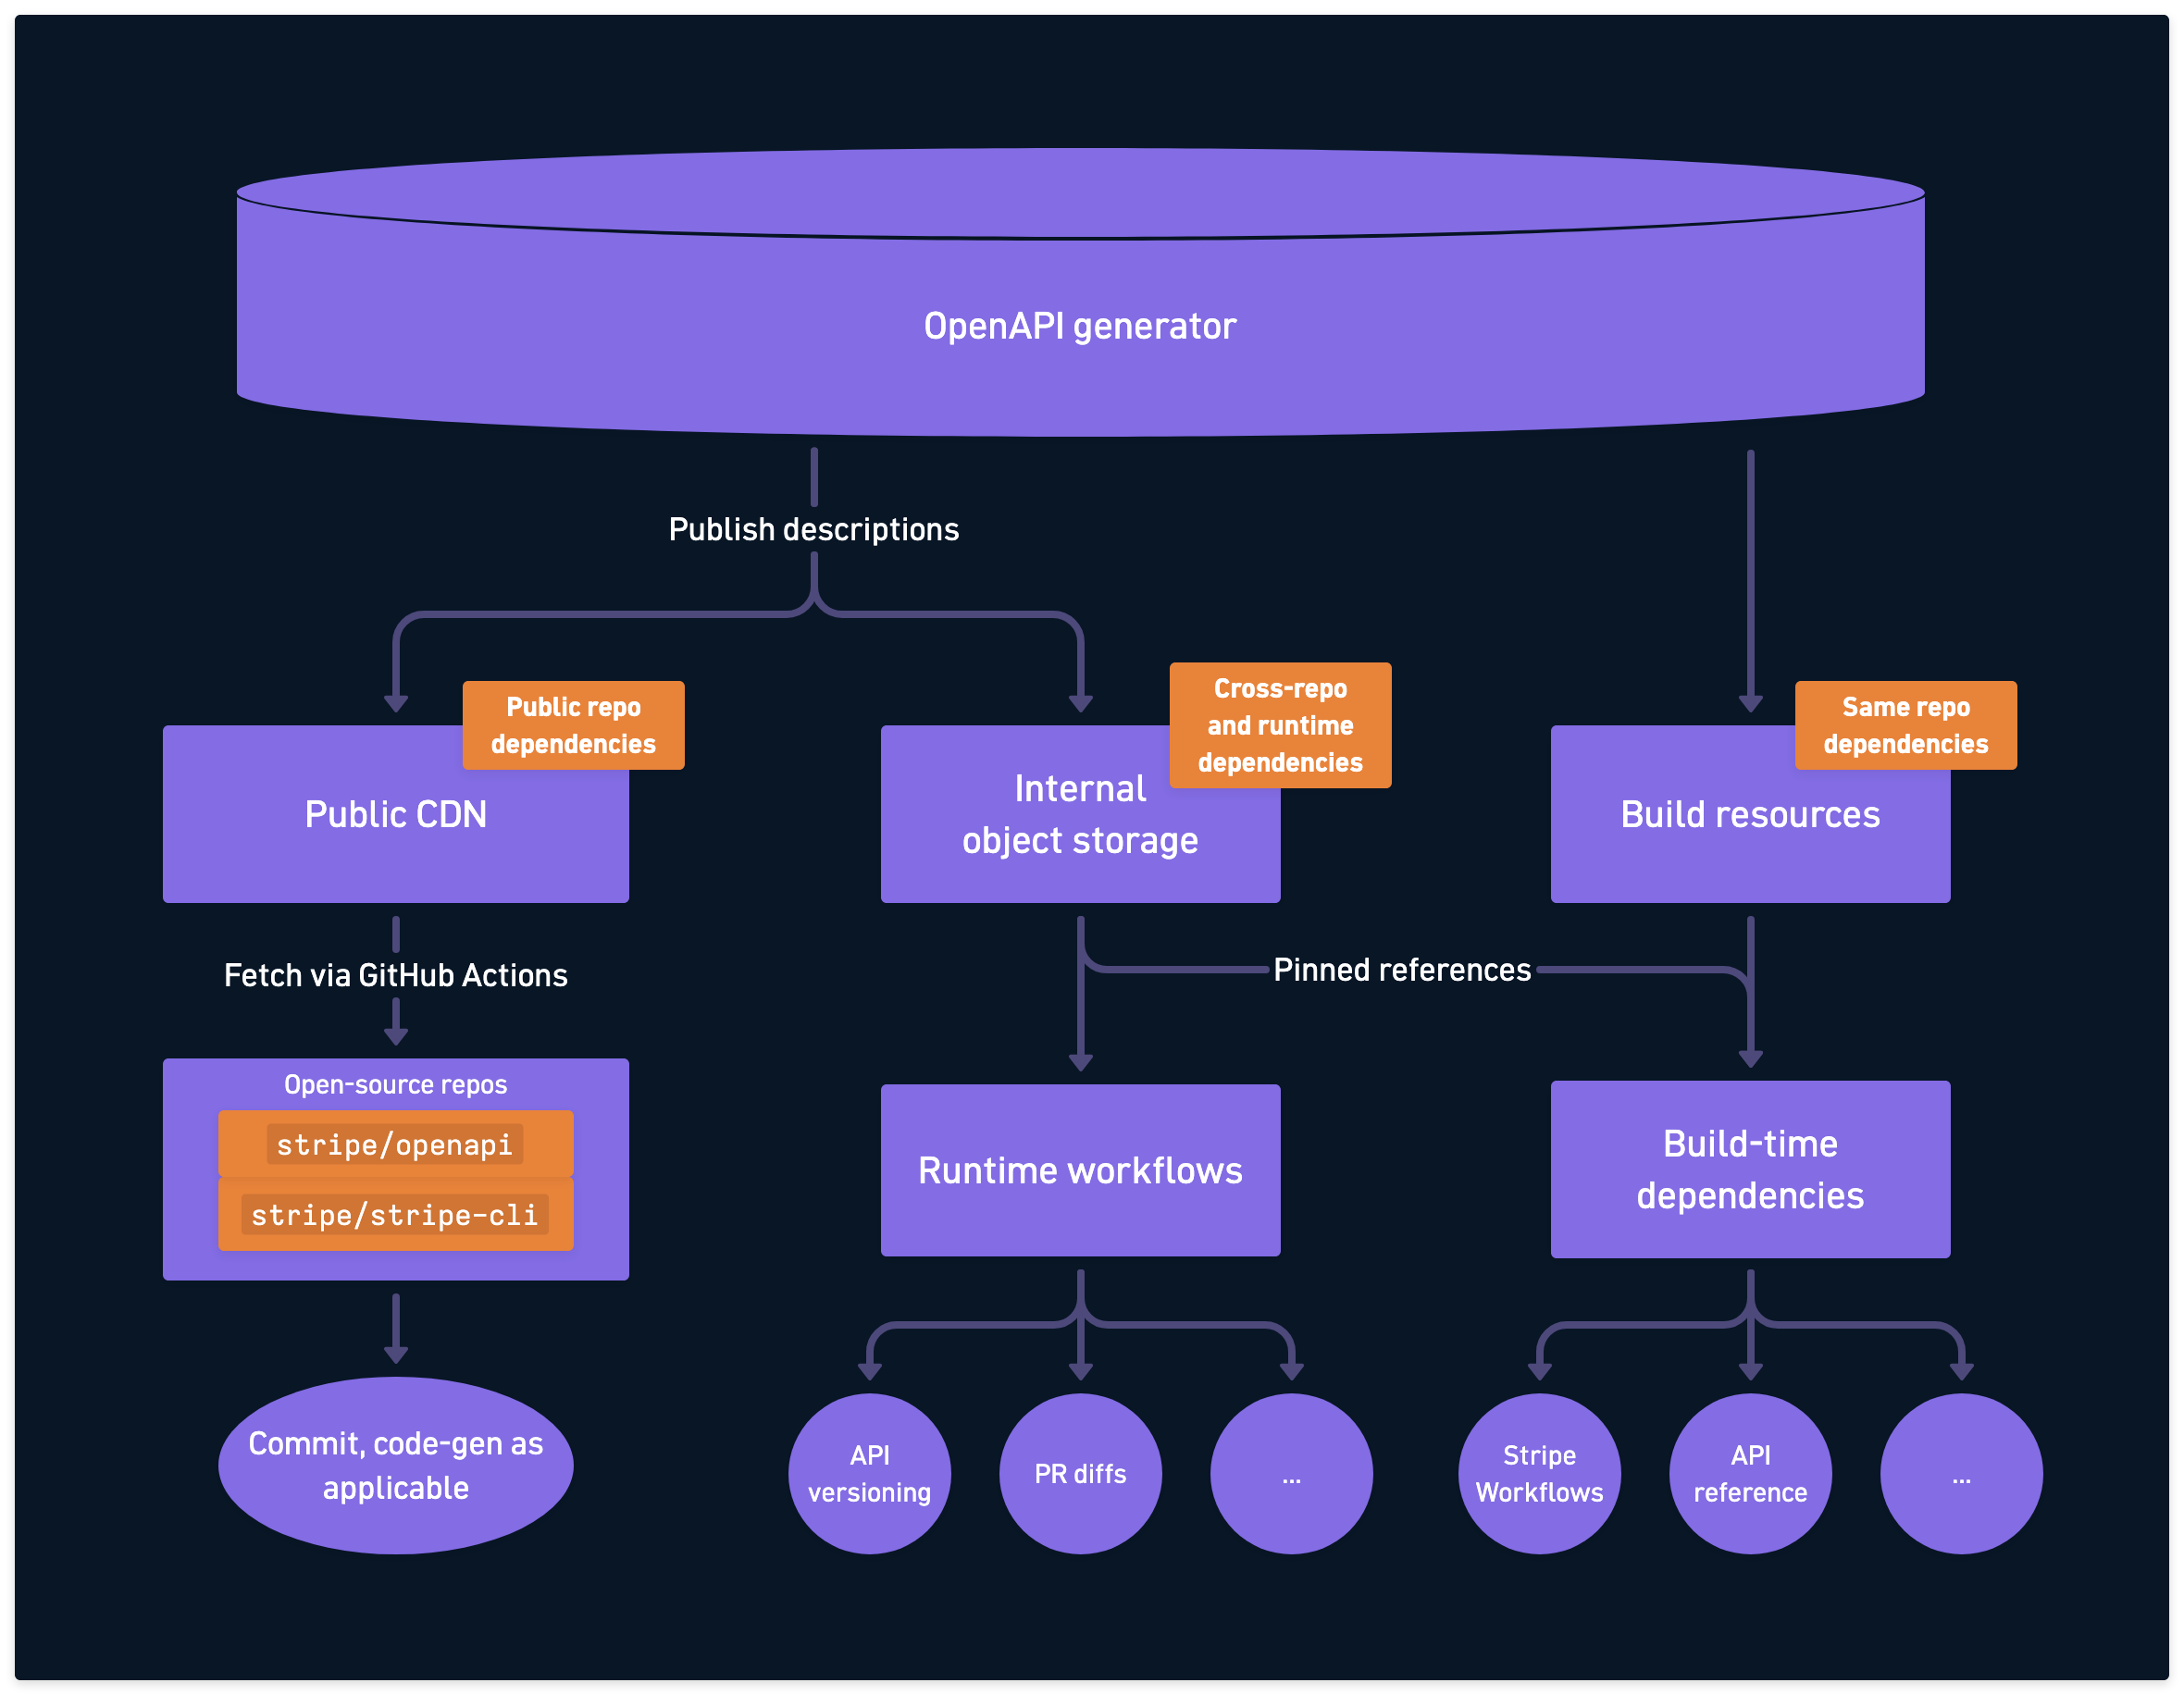
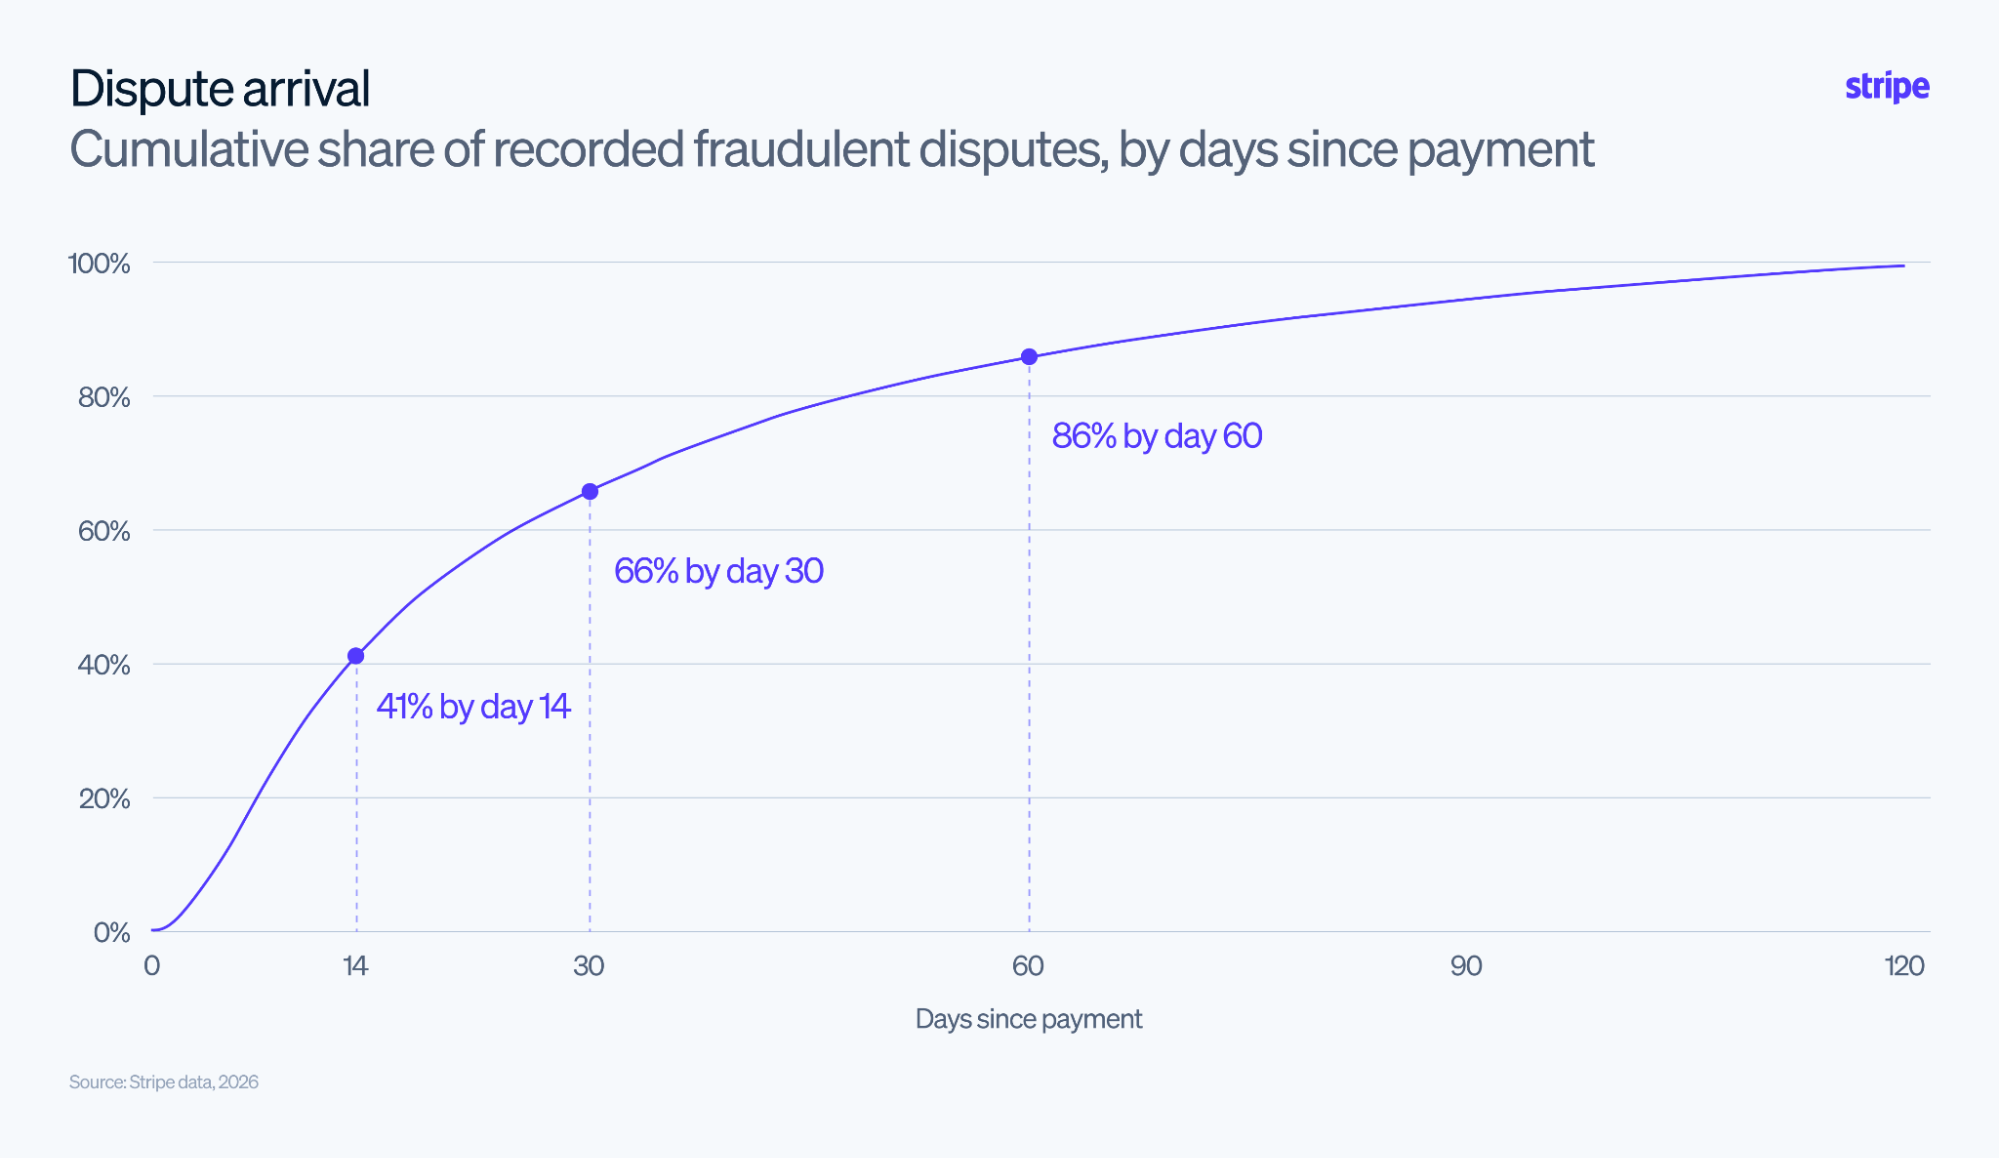
## Building the replay harness In [Part 1](https://stripe.dev/blog/microservice-testing-with-apache-spark) of this blog series on microservice testing, we covered why historical replay is useful for high-impact microservices. Unit and integration tests are still necessary, but they do not show how a candidate implementation behaves across the actual distribution of production-shaped inputs. This section focuses on the implementation side: how to turn that idea into a repeatable Spark replay harness without creating a second implementation of the service. ### Representing dependencies as data The main implementation challenge is dependency state. A production service rarely makes a decision from the request payload alone. It may read database rows, load configuration, check feature flags, call another service, or use previously computed state. A replay is only useful if it can reconstruct enough of that context to make the result meaningful. In a Spark harness, these dependencies need to become datasets. In the running example, live reads can become joins against historical snapshots. Versioned rules can be loaded as replay inputs. Merchant configuration can be joined by merchant and effective date. Program eligibility can be represented as a time-aware state. Calls to other services can be replaced with logged request and response pairs. Side effects can be written as output rows instead of being executed. The right level of fidelity depends on the decision being tested. A replay designed to validate a rate-table refactor requires a different context from one designed to model a new authentication-related cost rule. A replay designed to validate enhanced-data logic may need a different view of the world than a broad scheme-fee update. The harness does not need to simulate the entire production environment; it needs to capture the state that affects the decision being tested. ### Code structure matters This approach works best when the service has a clean separation between orchestration and decision logic. The core logic should accept explicit inputs and dependencies. It should not reach directly into request-scoped framework objects, global state, live databases, or external services. Side effects should be isolated behind interfaces so they can be replaced or captured in the replay environment. Some systems cannot make that separation cleanly, especially when distributed state or event-driven dependencies affect future inputs; in those cases, the replay should model the assumptions it can support rather than claim to simulate production perfectly. Before that extraction, the request path often looks like this: ```java CostResponse call(CostRequest request) { Context context = loadContext(request); CostResult result = evaluateCost(request, context); storage.write(request, result); publisher.publish(result); metrics.emit(request, result); return CostResponse.from(result); } ``` After the extraction, the deterministic decision is callable from both the online service and the replay harness: ```java CostResponse call(CostRequest request) { ReplayInput input = requestMapper .toReplayInput(request, liveContextLoader.load(request)); // The same decision engine can be invoked by Spark as it behaves as a library CostResult result = decisionEngine.evaluate(input); sideEffects.record(request, result); metrics.emit(request, result); return CostResponse.from(result); } ``` The important change is the boundary. The decision engine receives a complete input and returns a result. The online service still owns request parsing, live dependency loading, writes, publishing, and metrics. The Spark harness can build the same input from historical datasets and call the same decision engine offline. If the service is already structured this way, the Spark wrapper can stay thin: read data, reconstruct context, invoke the core logic, and write outputs. If not, building the harness will expose useful coupling to remove. The same refactoring that makes the logic replayable also makes it easier to unit test, migrate, review, and reason about. This is especially valuable during migrations. When a team is already creating a new implementation, it is a natural time to define cleaner boundaries and make the core logic callable outside the request path. The harness can then compare the old and new implementations across historical traffic. In that sense, the Spark harness is not just a testing tool. It is also a forcing function for better service boundaries. ### The shape of the Spark wrapper The Spark job should be a wrapper around the production logic, not a second implementation of it. A common structure looks like this: ![Diagram of Spark wrapper structure](/images/microservice-testing-with-apache-spark/diagram.png) In code, the wrapper might look like this: ```java Dataset events = spark.read().table("historical_events") .as(Events.encoder()); Dataset rules = spark.read().table("rule_snapshots") .as(Rules.encoder()); Dataset merchants = spark.read().table("merchant_context") .as(Merchants.encoder()); Dataset inputs = replayInputBuilder .build(events, rules, merchants); Dataset diffs = inputs .map( input -> { CostResult current = currentEngine.evaluate(input); CostResult candidate = candidateEngine.evaluate(input); return ReplayDiff.from(input.traceId(), current, candidate); }, ReplayDiff.encoder() ); diffs.write().mode("overwrite").saveAsTable("cost_replay_diffs"); ``` The wrapper is responsible for data loading, joins, object construction, distributed execution, and output writing. Spark’s [DataFrame and Dataset APIs](https://spark.apache.org/docs/latest/sql-programming-guide.html) are a natural fit for this kind of workload because replay inputs and outputs are structured datasets, and the final analysis often uses [Spark SQL](https://spark.apache.org/sql/) to group and inspect differences. The core business logic remains in the service library. That boundary is important. If the Spark job reimplements the rules, the replay system can drift from production and produce false confidence. For JVM- or Python-based services, this usually means extracting the deterministic logic into a library that can be used by both the online service and the offline replay job. The online service handles request parsing, live dependency calls, and side effects, while the replay job handles historical data reconstruction and bulk execution. Both paths should execute the same core decision logic. The output schema should be designed for debugging, not just comparison. For each record, it should include identifiers that allow the team to trace the original input, the current output, the candidate output, selected intermediate values, and explanation fields for the rule path taken. For aggregate analysis, it should include the dimensions needed to explain impact to the relevant engineering, product, or business audience. A diff that only says "cost changed" is not enough. The useful diff explains why it changed. ### Practical limits of replay Replay is useful because it makes historical production behavior executable, but it is only as good as the decision state the job can reconstruct. The transaction payload alone is not enough. The replay also needs the relevant configuration, rule versions, eligibility state, and dependency outputs that would have affected the original decision. If that context is incomplete, the result can look precise while being wrong. Some side effects also cannot be cleanly isolated. Services with distributed state, event-driven dependencies, asynchronous workflows, or live dependencies with time-varying behavior may have effects that change future inputs. In those cases, the replay harness should capture the assumptions it can model, write side effects as observable output where possible, and avoid claiming to be a full production simulation. The harness does not need to simulate the entire production environment, but it does need to model the parts that affect the decision being tested. A rate-table migration may need exact historical rule versions. A program-qualification change may need eligibility state and data-quality signals. An authentication-related cost change may need clear scope assumptions. Historical replay also has limits when future behavior depends on external actors. It can estimate how cost logic would apply to past traffic under a new rule, but it may not fully predict issuer behavior, latency, authorization rates, or changes in customer mix. In those cases, replay should be treated as one layer of evidence, not the entire validation strategy. The output should make these limits visible. A useful replay does not only produce a changed cost value; it also records the rule path, the relevant inputs, and enough explanation to debug why the candidate result differed from the baseline. That makes the replay useful for review, not just measurement. The goal is not a perfect simulation. The goal is to reconstruct enough of the decision environment to make high-risk changes safer before they reach production. ### Conclusion For many microservices, the most valuable test cases already exist in logs, warehouses, data lakes, and historical event streams. A Spark-based harness makes those inputs executable, so teams can measure regressions, model future rule changes, and review high-risk changes with concrete evidence. Migrations are often the best time to build this kind of harness. The team is already creating a new implementation, defining new boundaries, and deciding how the service logic should be packaged. That makes it easier to separate deterministic business logic from request handling, live dependencies, and side effects. The same harness then becomes useful immediately: it can replay historical traffic through the old and new implementations and produce the diff needed to validate the migration. That is why the setup effort can pay off quickly. The harness is not only an investment in future testing; it directly reduces the risk of the migration that motivated the work in the first place. Once the harness exists, the payoff compounds. Major refactors, rate-table updates, configuration changes, AI-assisted rewrites, and future migrations can be evaluated against production-shaped data before they ship. Start by choosing one decision path where regressions are expensive. Extract the deterministic logic behind a clear interface, build a small privacy-safe golden dataset, and run it in CI. Once that gives a useful signal, expand the dependency model and run larger historical replays for migrations, rate-table updates, configuration changes, AI-assisted rewrites, and future refactors. The benefit is a different kind of confidence: high-risk changes can be evaluated against the history of how the system actually behaved. ## Why replay testing matters Some microservices are difficult to test because their behavior depends on a long tail of inputs that are hard to model by hand. Payment cost estimation is a good example. The cost of a card transaction is not determined by one rule. It depends on a changing set of network rules, merchant-specific context, transaction attributes, and program qualifications. The behavior of the system often comes from the interaction among many conditions rather than any single rule. Unit tests can validate individual rules. Integration tests can validate a few representative flows. But they do not answer the question teams often care about most: what happens across the actual distribution of historical traffic if one rule, rate table, dependency, or qualification condition changes? That question is becoming even more important in the age of AI-assisted coding. AI tools can help teams refactor, migrate, and generate candidate implementations faster than before. But for systems that affect money movement, billing, pricing, eligibility, or customer-facing explanations, faster code changes need stronger evaluation. A change can look locally correct and still alter behavior in a narrow but important part of the input distribution. For that class of problem, [Apache Spark](https://spark.apache.org/docs/latest/)’s massive parallelism and linear scalability can be leveraged to build a regression test harness. If the core logic of a service is separated from the request path, the same logic can be run offline across months or years of historical inputs. That makes it possible to compare old and new implementations, model upcoming rule changes, and quantify impact before a change reaches production. This post describes that pattern: wrapping deterministic service logic in a Spark execution environment so production history becomes an executable testing asset. ### The core idea A request handler and a Spark transformation often have the same basic shape. A service receives an input, loads supporting state, applies business logic, and produces an output. It usually does this one request at a time. A Spark job reads a dataset, joins in supporting state, applies logic to each record, and writes an output dataset. The execution model is different, but the computation is often similar. That symmetry is the useful part. If the service’s core logic is cleanly separated from transport, framework wiring, and side effects, the same logic can be invoked from a Spark job. Instead of sending one request through an HTTP endpoint, the replay job sends millions of historical records through the same decision path. The output is no longer a single response. It is a dataset that can be queried, joined, diffed, aggregated, and reviewed. For high-impact services, that changes the testing conversation. The team can move from "the tests pass" to "we replayed the candidate implementation across production-shaped traffic and here is exactly where behavior changed". ### A running example: network cost estimation Consider a service that estimates [network costs](https://stripe.com/guides/guide-to-managing-network-costs) for card payments. For each transaction, the service receives payment context and uses it to estimate the applicable [interchange and scheme fees](https://support.stripe.com/questions/understanding-ic-fees). A simplified replay input might include three categories of data: * Transaction facts, such as amount, currency, country, card network, card product, card-present or card-not-present status, authentication method, tokenization state and more. * Merchant and integration context, such as merchant category, merchant configuration, billing-data availability, [enhanced line-item data](https://docs.stripe.com/payments/payment-line-items) and more. * Rule and dependency state, such as versioned rate tables, network program rules, eligibility lists, region-specific configuration and more. The service’s output is not just one number. It may include estimated interchange, estimated scheme fees, the rules that applied, the programs the transaction qualified for, and explanation fields that help downstream teams understand why a cost was assigned. This kind of detail is especially important for businesses on [IC+ pricing](https://support.stripe.com/questions/understanding-ic-fees), where payment costs are exposed to them. This kind of service is hard to validate with synthetic tests alone. A rule may be simple in isolation, but the behavior of the system depends on how many rules combine for a specific transaction. A small change in qualification logic can move a transaction from one cost outcome to another, and those movements are difficult to predict from hand-written examples alone. The system also needs to model change. Card networks can introduce new fees, modify existing rates, change qualification criteria, alter incentives for tokenized or authenticated transactions, or change when a fee is assessed. The impact of those changes is rarely uniform. It depends on the shape of the merchant’s historical traffic. That is where replay becomes valuable. ### Regression testing against historical inputs The most direct use case is regression testing. When refactoring critical logic, the question is not only whether the new implementation passes existing tests. The more useful question is whether it preserves behavior across the actual distribution of inputs the service has processed. A Spark-based harness makes that measurable. The job can load historical inputs from a data lake, reconstruct the dependency state needed by the service, run the current production implementation, run the candidate implementation, and compare the outputs. Historical replay also needs a privacy boundary. The useful test case is the decision-relevant shape of the request, not every raw field that appeared in production, so replay inputs should be minimized to the fields needed for the behavior under test. Sensitive identifiers can be tokenized or replaced with stable test identifiers, and fields that are not needed should be redacted, aggregated, or left out entirely. Expected outputs, diffs, logs, and golden datasets should avoid exposing raw customer, user, or payment PII, with access controls and retention policies that match the sensitivity of the source data. For a network-cost service, the comparison might show how many transactions changed estimated cost, which rule produced the difference, whether the difference came from interchange or scheme fees, and whether the movement is concentrated in a specific part of the business. Instead of relying on a few hand-picked examples, reviewers can evaluate a quantified diff: how many records changed, where the changes occurred, and whether the differences are expected. This is useful for algorithm refactors, dependency upgrades, framework migrations, and rewrites of business-critical logic. A perfect match is not always the goal. Some changes are intended to alter behavior. Some diffs reveal bugs in the old implementation. The value is that the differences become visible before the change reaches production. That makes replay especially useful for AI-assisted development. If an AI tool helps produce a refactor or candidate implementation, the replay harness provides a concrete way to evaluate the result against production-shaped data. The question becomes less subjective: did the behavior change, where did it change, and are those changes acceptable? ### Modeling future rule changes The same harness can also be used for what-if analysis. For the running example, many important changes are not code refactors. They are external rule changes. A network may introduce a new program, change an incentive, add a scheme fee, alter qualification logic, or move a fee so it applies earlier in the payment lifecycle. The engineering problem is not only to encode the new rule. The harder problem is to estimate how that rule will behave across real historical traffic. A Spark replay harness gives the team a way to answer that question before the change takes effect. The job can load historical payments, enrich them with the relevant decision context, apply the current cost logic, and then apply the candidate future logic. The output is a pair of estimated cost datasets: one representing the current world and one representing the proposed or upcoming world. The difference between those datasets is the useful artifact. It can show which merchants are affected, which transaction types move, how much of the impact comes from interchange versus scheme fees, and whether the change is concentrated in a particular segment of traffic. This is different from ordinary analytics. The team is not only querying what happened in the past. It is asking what the service would have returned if the decision environment had been different. That distinction matters. Network-cost changes often involve interacting conditions. Looking at one rule in isolation can be misleading. Replaying the full decision logic across historical traffic gives a more realistic estimate of impact. The result is useful to both engineers and business teams. Engineers can validate that the new rule implementation behaves as expected. Product and operations teams can understand which users or segments are affected. Account teams can explain likely impacts with more precision. Leadership can evaluate tradeoffs before committing to a rollout. Historical data does not perfectly predict the future, but it is a much better baseline than a hand-selected sample. ### Golden datasets for pull requests Full historical replay is the heavy-duty version of this idea. For pull requests, teams need a smaller version first: a golden dataset. A golden dataset is a curated set of inputs and expected outputs that represents important service behavior. For the running example, it should cover common flows, qualification boundaries, historical incidents, and cases where small changes in input or dependency state produce materially different outcomes. The [CI workflow](https://en.wikipedia.org/wiki/Continuous_integration) is straightforward. Store the golden inputs in a durable location, store the expected outputs next to them, run the candidate implementation against those inputs on every pull request, and fail the build if there is an unexpected difference. This gives reviewers a concrete signal: did the observable behavior change, and if so, where? The dataset also becomes a living specification. When an incident exposes a missed edge case or a migration uncovers a subtle difference, that case can be preserved. Golden datasets need the same privacy posture as larger replays. They should contain only the fields needed to exercise the behavior under test, with sensitive identifiers tokenized or replaced by stable test identifiers. Expected outputs and failure diffs should avoid raw customer, user, or payment PII. This does not replace unit tests. Unit tests are still the right place to validate small pieces of logic and intentionally constructed edge cases. Golden datasets validate service-level behavior using realistic inputs. ### Where this fits in the testing stack Spark-based replay testing sits above unit and integration testing. Unit tests are still the right tool for small, intentionally constructed cases. Integration tests still validate interactions between systems. Golden datasets cover known service-level examples. Historical replays add coverage from the real production distribution, including inputs the team did not manually design. That last layer is especially useful for mature systems and AI-assisted development. As services accumulate years of production behavior, the long tail of historical inputs often becomes more informative than any hand-written test suite. Once the value of replay is clear, the next question is how to build it without creating a parallel version of the production service. We will cover that in [Part 2](https://stripe.dev/blog/microservice-testing-with-apache-spark-part-2) of this post. For product-led businesses, conversion is paramount. Every pixel on a checkout page is carefully thought out to maximize conversion. It’s a modern game of friction vs motivation, rooted in the [Fogg Behavior Model](https://www.behaviormodel.org/): the buyer’s motivation must be greater than the friction they encounter when making a purchase for the transaction to complete. For PLG companies with business customers, the checkout experience is different, and often requires additional information such as a business name and address to ensure downstream invoices are issued correctly. Merchants selling to foreign customers will often collect a tax ID at checkout, in part to ensure they’re applying tax correctly on invoices to international customers. Whether your GTM strategy is product-led (PLG), sales-led (SLG), or both, one requisite step in your customer onboarding process is collecting the buyer’s tax ID. The tax ID serves two purposes: 1) It represents a mandatory data point on [compliant tax invoices](https://stripe.com/resources/more/tax-invoices-101-a-quick-guide) 2) It gives your business a key data point for [tax determination](https://docs.stripe.com/tax/calculating) ## Tax invoices Countries with a VAT or GST regime are typically quite prescriptive about the contents and structure of invoices. As it relates to tax data, the tax invoice typically must have line-level tax rates and amounts with descriptions of each good or service, as well as a valid tax ID of each counterparty. A valid tax invoice allows your customer to properly deduct any tax paid on purchases on their own VAT return. Tax invoices have come under closer scrutiny with the advent of [e-invoicing](https://stripe.com/resources/more/electronic-invoicing-101-a-quick-guide-for-businesses) mandates across the globe in recent years. Now in certain countries if you issue a tax invoice that does not adhere to the local data requirements, the automated checks of the e-invoicing system will flag the invoice and reject it. ## Tax determination: applying the reverse charge Despite the name, the reverse charge is not a payment reversal nor is it related to the process of refunding customers. In simple terms, the reverse charge is a classification of a specific type of transaction that occurs between two tax-registered businesses in two different countries (there is a domestic reverse charge in some countries, which is not addressed here). While this sounds straightforward, the OECD provides a [56-page document](https://www.oecd.org/content/dam/oecd/en/publications/reports/2017/10/mechanisms-for-the-effective-collection-of-vat-gst-where-the-supplier-is-not-located-in-the-jurisdiction-of-taxation_4ba05a97/5269dc5a-en.pdf) describing the framework for the reverse charge mechanism and its relevance to modern businesses. While countries are free to implement their own versions of the OECD framework, generally this serves as the basis for many VAT and GST regimes. To bring the reverse charge to life, consider the following scenario: * Company A is an Irish SaaS business * Company B is a VAT-registered Dutch business * Company A sells a one-year SaaS agreement for €10,000 to Company B * Company B provides its Dutch VAT number to the Irish seller during onboarding * Company A validates the Dutch business’ VAT number and issues an invoice without VAT, with an invoice message stating, *No VAT - tax to be paid on a reverse charge basis* In this scenario the Dutch buyer must ‘self-account’ for the VAT, which results in a net-zero accounting entry with no payment due to the local tax authority. The reverse charge exists for two primary reasons: * **Fraud**: Imagine if the Irish software company collected the 21% Dutch VAT but never paid it to the Dutch tax authorities, or if the Dutch buyer fraudulently claimed they paid VAT on the foreign-issued invoice and tried to claim it back as a refund on their VAT return. It is simpler and less risky for the buyer to self-report the liability. For a more sophisticated example of tax fraud beyond the scope of this blog post, [carousel fraud](https://taxation-customs.ec.europa.eu/taxation/vat/fight-against-vat-fraud/vat-carousel-fraud_en) is an interesting topic to explore. * **Level Playing Field:** To avoid giving foreign suppliers a pricing advantage over local suppliers who are required to charge VAT, the internal accounting of the reverse charge levels the playing field. The buyer self-reports the VAT (say 20%) they would’ve been charged, while simultaneously declaring that amount as deductible input VAT on their tax return. Note: we’ve been covering cross-border transactions and the reverse charge, but bear in mind tax IDs are also required for domestic transactions, where VAT is generally applied to the invoice. With the foundational concepts now understood, let’s dive into the mechanics of tax ID validation. ## Implementation options Collecting the customer’s tax ID is the first step; the next step is to validate the tax ID against an official government source, often a national business registry. Many tax authorities expose APIs for [direct integration](https://abr.business.gov.au/Tools/WebServices) to their registries, offering a free, convenient way to validate tax IDs for a single jurisdiction. If your customers are based in many different countries, managing multiple integrations, API updates, and the IF-THEN routing logic for each country becomes difficult to scale. Alternatively, you can integrate with a reputable third party for global tax ID validation. Many privately-run tax ID validation services are available on the market, with different pricing models and varying degrees of quality. Functionally they’re similar, providing a single validation endpoint with routing and retries handled automatically. The downside to this path is many of these vendors are point-solutions: your business will also need a tax engine to properly apply the tax treatment to your invoices, and a tax reporting product to consolidate tax transactions and map this data to corresponding boxes on tax returns. In this context we recommend exploring vendors who offer other tax products beyond just tax ID validation. One important consideration for frontend developers and product managers is deciding whether to implement synchronous or asynchronous tax ID validation in their checkout flow. * **Synchronous** validation requires the buyer to wait until their tax ID has been validated against the government database before their transaction is finalized. * **Asynchronous** validation allows the purchase to complete regardless of the validation outcome. ## Synchronous tax ID validation In a synchronous validation implementation, the risk of cart abandonment is higher as the buyer has to wait for the result, and they may not be willing to re-enter their tax information. The buyer and seller may also be at the mercy of how that [validation service is performing](https://viesapi.eu/vies-unavailability-of-vat-information-exchange-system/) that day: some validation services have historically been highly available (Netherlands) while others have experienced regular service disruptions (Denmark). Most of these government web services will have scheduled downtime for maintenance. From a tax compliance perspective, synchronous validation can be positive, despite the risk of decreased conversion. This is twofold: * Compliant tax invoices can be issued immediately, no corrections or customer contact necessary. * Under audit, the local tax authority will expect all VAT numbers to have been validated against the official database at the point of sale. The tax ID validation databases are used as a real-time search engine, not a historical archive. Sellers cannot retroactively validate their customers’ tax IDs using these tools. Ensuring tax IDs are validated upfront before the [tax invoice](https://stripe.com/resources/more/what-is-a-vat-invoice#what-information-should-be-included-on-a-vat-invoice) is issued reduces the downstream administrative burden of correcting tax IDs, and lowers audit risk. ## Asynchronous tax ID validation An asynchronous implementation of tax ID validation allows the customer to complete their purchase while the validation happens on the backend. While many tax IDs will be valid, the business will need to run a report (e.g. daily, weekly, monthly) of all of their failed customer validations and reach out to these customers to update their records. While communications can largely be automated (email copy, reminders, etc), some customers may not come back on-session to update their tax ID. As a merchant, the question becomes how to handle customers who do not reply *at all*. While the exposure may be less for smaller, one-time purchases, it can be problematic for subscription businesses, as each subsequent invoice is not technically compliant. Under audit, most governments will make you, the seller, liable for the VAT you didn’t charge, plus penalties and interest. If you’re a seller of physical goods and your customers are in other countries, goods may be held in customs until a valid tax ID is provided, creating a poor customer experience. When you’ve decided on an implementation approach, the next decision is selecting a validation service to integrate with. For Stripe users we recommend implementing Stripe’s tax ID validation service, as it seamlessly integrates with your Stripe [`customer`](https://docs.stripe.com/api/customers/object#customer_object-tax_ids) objects and [Stripe Tax](https://stripe.com/tax) to apply the correct tax treatment on your invoices. ## Integrating with Stripe for tax ID validation Stripe offers both synchronous and asynchronous tax ID validation at checkout, depending on your business’ preferences and risk appetite. This is available for both `CheckoutSessions` and `PaymentIntents` integrations with Stripe Elements (private preview and public preview, respectively). For synchronous validation, when creating a [CheckoutSession](https://docs.stripe.com/api/checkout/sessions) with the booleans `automatic_tax.enabled` and `tax_id_collection.enabled` set to `true` , the buyer can input their tax ID into the Stripe-hosted Checkout page or into Stripe’s [Tax ID Element](https://docs.stripe.com/elements/tax-id-element). ##### Synchronous validation with `CheckoutSessions`: ```javascript const taxIdElement = checkout.createTaxIdElement({ // ...other options verification: { taxId: { mode: 'if_supported', }, }, }); ``` ##### Asynchronous validation with `CheckoutSessions`: ```javascript const taxIdElement = checkout.createTaxIdElement({ // ...other options verification: { taxId: { mode: 'none', }, }, }); ``` ##### Synchronous validation with `PaymentIntents`: ```javascript const taxIdElement = elements.create('taxId', { verification: { taxId: { mode: 'if_supported', }, }, }); ``` ##### Asynchronous validation with `PaymentIntents`: ```javascript const taxIdElement = elements.create('taxId', { verification: { taxId: { mode: 'none', }, }, }); ``` When rendering the Tax ID Element, the [verification](https://docs.stripe.com/js/elements_object/create_tax_id_element#tax_id_element_create-options-verification) object should be set to `if_supported` to trigger synchronous validation. If the field is populated with `none` then asynchronous validation will be triggered. Regardless of which method is chosen, when a buyer enters their tax ID, Stripe initially performs a regex check to ensure the tax ID is formatted correctly (e.g. contains the correct number of digits for that country and contains a leading country ISO code). After passing this check, Stripe automatically routes the tax ID request to the relevant government APIs. Validation is often complete in a second or two. In the event the government service takes more than four seconds to process the request, the transaction can proceed as if the tax ID was valid (asynchronous fallback). Post-purchase, you can retrieve a customer’s tax ID validation status by fetching the information from the [customer](https://docs.stripe.com/api/customers/object#customer_object-tax_ids-data-verification) object; specifically look for the `tax_ids.data.verification.status` field. Stripe also emits an event called `customer.tax_id.updated`, so you can listen for a webhook which contains the verification status. Verification status is critical because it allows your business to take action and communicate to customers who provided invalid tax IDs, ensuring your invoices and tax calculations are compliant, both mitigating risk and providing a better customer experience by avoiding misbillings. As this engineering decision impacts cross-functional teams, we recommend it be made with input from stakeholders such as tax, finance and product. During initial deployment it is also worth considering running an A/B test to see how each version performs, and how prevalent the issue of invalid tax IDs is with your customer segment. Ready to get started? [Enable tax ID collection and verification](https://docs.stripe.com/tax/checkout/tax-ids) today. #### Disclaimer The content in this article is for general information and education purposes only and should not be construed as legal or tax advice. Stripe does not warrant or guarantee the accuracy, completeness, adequacy, or currency of the information in the article. You should seek the advice of a competent attorney or accountant licensed to practice in your jurisdiction for advice on your particular situation. We all know the stereotypes of working at enterprise tech companies: endless bureaucracy and behemoth codebases running on a years-old language version. Most organizations know they should modernize quickly, but haven’t figured out how to build an upgrade path compatible with a large codebase. The recurring cost of upgrading keeps most large JVM codebases trailing behind the latest Java versions. As services slip further and further behind the cutting edge, they miss out on the cost savings and performance gains provided by years of JVM improvements. Developer experience degrades gradually enough that it can be hard to notice, but over time the lack of new language features eats into the velocity of shipping products. At Stripe, we weren’t willing to accept this, so we invested in a better way to stay current. Our Java team created a platform that could continuously evolve without burdensome migrations, fundamentally changing our approach from quarter-long, often unfinished migration projects to continuous, automated updates. ## Why Java upgrades stall in large codebases On paper, upgrading Java can look straightforward: just move the toolchain, update a few dependencies, fix a handful of compiler errors, and move on. In reality, there are myriad build-graph constraints to navigate. They require coordinated dependency and runtime moves across hundreds or even thousands of owners. This complexity is why Java upgrades are often left to languish in a backlog. Previously, our Java migrations looked a lot like other large organizations. We relied on bespoke scripts, stale inventory data, and lots of manual reasoning. While there have been some novel approaches to this (e.g., AST rewriting via [OpenRewrite](https://github.com/openrewrite/rewrite), a tool used by PayPal, Apple, and Walmart), the status quo has never shifted to a fully hands-free approach. A migration would begin with a burst of attention, make progress through the easy parts of the graph, and then slow down once it hit the hardest sections. Even when the migration itself was useful, the machinery didn’t survive the migration. That meant every new JDK move started by rediscovering the same facts: - What was safe to upgrade? - What was blocked (permanently or temporarily)? - What required coordination with teams owning external frameworks? - What needed special handling because it lived in an awkward part of the build graph/was a fork? We kept wasting our time solving the same problem over and over again. We wanted to stop re-running long migration projects and instead build a durable and future-proof upgrade process. And so, AutoJDK was built. Instead of treating each Java upgrade as a recurring quarter-long maintenance project, we built a system that continuously computes upgrade eligibility from the live build graph, applies safe migrations with reviewable PRs, leverages AI to fix certain classes of errors, and highlights blockers for code that can’t be upgraded yet. ## Automatic JDK upgrades across a massive JVM monorepo Before getting into the technical details of how AutoJDK works, it’s useful to understand a few of the nuances of version upgrades in a Java codebase. You can compile Java code and run Java code on two different versions of the JDK; however, the runtime version must be greater than or equal to that of the compiled code. Compilation (upgrading language levels) is more restricted—it’s a matter of mass-modifying language version attributes directly in our JVM codebase in such a way that all transitive and reverse dependencies (parents and subtrees in the build graph) are satisfied with a version bump. This means that, with some caveats, it is relatively easy to move services onto the latest Java runtime (and this is a logical first step). But, to handle the challenges around upgrading language versions, we built an internal system to automatically upgrade JDK versions across our JVM monorepo. At a high level, the system: 1. Analyzes the live build graph to determine upgrade eligibility 2. Generates bounded, reviewable PRs instead of giant opaque rewrites 3. Tracks adoption and blockers so the remaining hard parts are visible This allowed us to change our operating model from “How do we run a giant Java migration this quarter?” to “What did we upgrade today, and what is still blocked?” ### 1\. Reasoning over the build graph The language-version management problem in large codebases is fundamentally about build-graph structure and platform policy. If JDK upgrades are primarily a build-graph and compatibility problem, then the solution should start from the live (most recently cached) build graph. Our upgrader is build-graph driven. It uses graph analysis plus compatibility heuristics to determine which Java and Scala targets are eligible for upgrade. Eligibility is not based on a flat list of targets. It takes into account things like: - Reverse dependencies—do consumers of this library allow for a higher Java version? - Runtime JDK compatibility caps - Dependency-ordering constraints - Framework-specific guards - Coordination between source and test targets - Bazel macros that pin language versions or have brittle logic, which should be skipped ### 2\. Generating reviewable changes Once the system identifies eligible targets, it generates target\_jdk upgrades in bounded partitions. From an operational standpoint, this is huge. Large upgrade waves can create merge conflicts, overwhelm reviewers, and become hard to rerun safely. We wanted the output to remain readable to humans even when the system was operating quickly at monorepo scale. The upgrader is designed around: - Partitioned change generation - Automated PR creation - Rerun-friendly, idempotent behavior - The ability to run continuously in the background or ad hoc for a specific package or service ### 3\. Make blockers legible One of the hardest parts of large-scale language upgrades is that blocked code tends to become folklore. Everyone knows some subsystem is “special” or some library is “still pinned,” but nobody has a crisp, live picture of how much is blocked, why it is blocked, and what would unblock it. A big part of our system is visibility for: - Adoption trends over time - Blocker classification - A clearer view of where legacy JDKs still live in the graph - Better prioritization signals for infra teams and service owners Some upgrade failures are genuinely deep compatibility issues, but others are more mechanical like CI cleanup, obvious fixes, or small changes needed to satisfy the new toolchain. We use AI assistance as part of that remediation loop, especially for fixable classes of failures that would otherwise create a lot of manual cleanup toil. [Minions at Stripe](https://stripe.dev/blog/minions-stripes-one-shot-end-to-end-coding-agents) are very well-suited for this task since they can fix minor failures and use fresh git checkouts in sandboxes to do their work. ## How we use it [Minions](https://stripe.dev/blog/minions-stripes-one-shot-end-to-end-coding-agents-part-2) are used to easily launch upgrades directly from Slack: ![](/images/modern-java-at-stripe-language-upgrades-as-a-service/image4.png) > Note: Zoolander is the name of our JVM codebase. It was named after the [movie](https://en.wikipedia.org/wiki/Zoolander) because it originally housed Stripe’s (machine learning) models. For large upgrades, we created an agentic skill that can run upgrades across all codebase partitions we defined, monitor and fix CI, and cherry-pick commits together into massive (~10K targets upgraded) PRs: ![](/images/modern-java-at-stripe-language-upgrades-as-a-service/image1.png) > Most build-time risk is caught by our CI system. We set up LogScale alerts for anticipated runtime failures like UnsupportedClassVersionError, which we can then issue a targeted rollback for. Some compatibility knowledge still needs to be kept current. Some targets remain intentionally skipped because the upgrade risk is higher than we want to absorb automatically, though the automation progress has encouraged efforts to unblock the risky migration targets. ## Impact In under 1 week of rollout progress, service-level adoption reached 93%+ on JDK 17 while following constraints around framework and runtime compatibility. More broadly, the system made JDK 17 the most common target\_jdk configuration in our monorepo, eliminated Java 8 services, and built the foundation to move much faster to Java 21, 25, and beyond. ![](/images/modern-java-at-stripe-language-upgrades-as-a-service/image3.png) ![](/images/modern-java-at-stripe-language-upgrades-as-a-service/image2.png) Since going live 3 months ago, we: - Merged 160+ PRs using the automated upgrader - Made JDK 17 the most widely used target\_jdk configuration in the monorepo - Eliminated all Java 8 services and most Java 11 services - Shrunk the legacy-JDK footprint, specifically JDK 8 and 11, by roughly 25K targets ## The infrastructure decisions that made this possible The automation only works because JDK selection is centralized and enforced by the build system. A build-graph-aware upgrader is powerful, but it becomes much more powerful when version policy lives in the platform rather than in thousands of individual service configurations. In our case, several infrastructure choices made that possible. - Supported Java language (JDK) and runtime versions (JRE) are controlled centrally. - Build-time checks in CI enforce dependency-ordering constraints. That prevents invalid mixed-version edges from slipping through silently. - Our build system supports multiple JDKs at once, which allows the graph to transition gradually instead of requiring an all-at-once cutover. - We utilize static analysis tools and custom allowlists to safely roll out new language versions while controlling available features. - We own the underlying infrastructure with respect to Bazel Java and Scala rules, Java version manifests, and base containers. - Our packaging model removes a common source of runtime drift by bundling a platform-specific JDK directly into deployable artifacts alongside the application artifact. This eliminates the need to rely on a matching JDK being pre-installed in a variety of deployment environments. Taken together, these decisions mean that raising the JDK floor repo-wide can be driven by a small number of centralized definitions plus automation, rather than a scavenger hunt across thousands of targets. A lot of upgrade pain disappears once the language-version policy lives in the platform. ## What’s next We now have infrastructure that can do much of the heavy lifting for Java 21, 25, and beyond. This frees up our Java team to focus on solving complex problems such as enabling Java support outside of IntelliJ, making Bazel fast in our monorepo, and ensuring Stripe’s most latency-sensitive services are performing optimally. If you’re interested in improving developer infrastructure at Stripe, [we’re hiring](https://stripe.com/jobs). I set out to build a simple GitHub traffic dashboard in around an hour using [Stripe Projects](https://docs.stripe.com/projects). What I didn’t expect was how quickly the experience stopped feeling like “AI coding” and started feeling like a real operational stack materializing around an idea with remarkable speed. The original problem was straightforward. GitHub’s traffic analytics are useful enough to immediately expose their own limitations. You can see views, clones, referrers, and the occasional spike after a launch, but after 14 days the history disappears. If you want to compare launches over time or understand whether a repo is actually growing, the default dashboard runs out of road quickly. I’d hit that frustration enough times that I finally decided to build my own archive layer. ![The final result](/images/what-it-feels-like-building-with-stripe-projects/image2.png) ## **Building at the orchestration layer** The idea itself was simple: authenticate users, let them connect repositories, periodically sync GitHub traffic data, store historical metrics, and chart trends over time so the data never disappears. The application wasn’t especially complicated. What interested me far more was the process of building it. I intentionally timeboxed the entire build to 60 minutes because I wanted to test a different way of working. I wasn’t trying to see how quickly I could build an app manually. I wanted to see how far I could get operating almost entirely at the orchestration layer using AI tooling. So instead of opening an editor and building everything piece by piece myself, I approached the exercise more like a builder/operator. I used [Cursor’s](https://cursor.com) agentic chat workflow alongside Stripe Projects and intentionally avoided writing code directly wherever possible. I wanted to see what it felt like to guide the system rather than implement every detail myself. ## **Infrastructure starts materializing** The following prompt is what kicked it all off. The experience became interesting almost immediately: ![The prompt that kicked it all off](/images/what-it-feels-like-building-with-stripe-projects/image3.png) Within minutes, infrastructure started materializing. [Auth0](http://auth0.com) for authentication, [Supabase](https://supabase.com/) for persistence, [Vercel](https://vercel.com/) for hosting and deployments, [Prisma](https://www.prisma.io/) for database schema management, environment wiring. Real services, real deployments, real operational systems, all appearing with surprisingly little friction. *“WOW, this is way too easy.”* There’s a very specific moment during the build where you realize you’re no longer stitching together tutorial projects or isolated demos. The stack crossing from “prototype” into something operational happens extremely quickly. One minute you’re discussing app structure with an AI agent, and the next minute you’re looking at real provider dashboards, deployed environments, authentication flows, and persistent infrastructure. That shift was probably the most interesting part of the entire experience. The feeling reminded me of watching someone confidently use Waymo for the first time while my own brain still struggles with the idea of giving up that much control. You can intellectually understand that the system is operating correctly, but there’s still a weird adjustment period where your intuition hasn’t fully caught up to the amount of complexity being handled automatically underneath you. ## **The operational comprehension problem** At first, the abstraction felt almost magical. But as the build progressed, I noticed something else happening: the operational complexity was being compressed so effectively that I occasionally lost track of the architecture underneath it. Very quickly I realized I now had: * Auth0 infrastructure * Supabase infrastructure * Vercel deployments * deployment connections * authentication flows * environment variables * scheduled background jobs …all assembled with very little manual setup. And that raised an entirely different kind of question. Not “Can I build this?” but, “How do I reason clearly about everything that now exists?” Auth0 became the clearest example of this shift. At one point I found myself mentally trying to map: * who owned which resources * how tenants were connected * where credentials lived * which deployment was active * how the providers related to each other operationally ![The speed of orchestration](/images/what-it-feels-like-building-with-stripe-projects/image4.png) Nothing was broken. Quite the opposite, things were working surprisingly smoothly. But the speed of orchestration was faster than the speed at which I naturally built a complete mental model of the system. That’s what made the experience feel fundamentally different from traditional development. ## **From AI coding to infrastructure orchestration** Stripe Projects didn’t really feel like “AI coding assistance.” It felt much closer to infrastructure orchestration with AI mediation. The hard part wasn’t generating React components or wiring APIs together manually anymore. The interesting challenge became understanding ownership, architecture, deployment topology, operational flow, and maintainability. Cost awareness increasingly becomes part of that operational understanding too. Once infrastructure orchestration becomes fast enough, developers need visibility not just into architecture, but into spend boundaries and provider-level risk across the stack. Soon, seeing consolidated provider spend and setting provider-specific controls feels like a natural evolution of Projects from pure provisioning into operational infrastructure management. The stack came together astonishingly quickly: Next.js, Prisma, Supabase, Auth0, Vercel, scheduled jobs, all stitched together into something that genuinely resembled a production application rather than a tutorial project. ![The stack](/images/what-it-feels-like-building-with-stripe-projects/image1.png) Visualized using a [community tool](https://github.com/bildungsroman/stripe-projects-visualizer/tree/main) built by Anna Spysz. *“I don't know what we built, but we built it.”* The architecture increasingly felt like something a small team could realistically continue building on. The final 20% of the project was where the experience became especially revealing. Once manual intervention became necessary, I found myself navigating a stack that had been assembled collaboratively between me, Cursor, and Stripe Projects. Things like Auth0 callback adjustments, deployment mismatches, token setup, sync troubleshooting, and environment variable debugging. That’s a very different feeling from building a system entirely by hand. ## **Environment management becomes the product** Another thing that stood out was how much operational complexity gets compressed into environment management. By the end of the build there were secrets and credentials spread across multiple providers: GitHub PATs, database URLs, Auth0 secrets, deployment configuration, Prisma environment settings. Looking at the generated environment variables was probably the clearest moment where the orchestration became tangible. Projects had already wired credentials, provider configuration, deployment bindings, and service connections across multiple systems automatically. And once you start operating this way, environment management becomes incredibly important very quickly: separating development from production credentials, understanding where secrets live, and controlling which infrastructure agents are allowed to touch. Native `dev` and `prod` environments inside Projects feel especially important in that world. The role of the builder changes as these tools become more capable. The implementation burden decreases dramatically, but operational awareness becomes increasingly important. I think that’s where this category of tooling becomes especially exciting. Because despite the complexity, the app actually worked. The repositories synced. The charts are populated. Historical traffic data appeared. The original GitHub problem I started with was suddenly solved. And that moment felt very different from most AI-assisted coding demos I’ve seen. This didn’t feel like a toy scaffold or generated sample project. It felt like a real production-shaped application appearing extremely quickly. That’s what stayed with me after the build ended. ## **What comes next** The biggest insight I came away with is that the next frontier probably isn’t better code generation. The interesting challenge now is helping builders better understand what exists after the orchestration happens: how services connect, how infrastructure is structured, how deployments relate to providers, and how to reason about ownership and operational flow. One thing I kept wishing existed throughout the build was some kind of generated architecture or IaC layer that could clearly explain the operational system being assembled around me: the infrastructure and integrations that had been created, how the providers connected together, and what the reproducible state and configuration of the stack actually looked like. At that point, tools like this stop feeling like rapid prototyping tools. They start feeling like genuinely new ways of building software. And honestly, I think we’re much closer to that future than most people realize. If you want to experiment with a similar setup yourself, Stripe Projects can spin up an Auth0, Supabase, Vercel stack directly from a starter template. [Here’s the shared stack configuration](https://projects.dev/s/v1:Auth0~client,Supabase~project,Vercel~project) I used. To learn more about about building with Stripe Projects, go to [projects.dev](https://projects.dev/). Better still, [install it](https://docs.stripe.com/stripe-cli/install?install-method=homebrew#install) and try asking your favorite coding agent, that's what I did. There's a comforting mental model that many of us carried into the age of AI agents, that they'd behave like diligent junior engineers. All you have to do is hand them a codebase, point them at the docs, and they'd read everything, follow best practices, and ask clarifying questions when stuck. However, after running a series of agent steering experiments at Stripe over the past several months, the reality is both messier and more interesting. Agents were integrating with older APIs and were actively making decisions that were contrary to Stripe’s recommended best practices without the knowledge of the users. We tried a lot of things. We modified SDKs. We added warnings to API responses. We restructured skill files. We placed install prompts on CLI login screens and docs pages. Some of these worked remarkably well. Others failed in ways that forced us to rethink our assumptions about how agents process context and, more fundamentally, about what "steering" even means when your user is a language model. This post walks through what we found, what surprised us, and the two conclusions we think matter most for anyone building developer tools in an agent-first world. ### The experiments A quick sketch of the landscape. Our team ran roughly a dozen experiments aimed at a single question: how do you get an AI agent to use Stripe correctly? "Correctly" here means using current API versions, following integration best practices, and leveraging the Stripe skill. This is a structured set of instructions and references that agents can consume to understand our platform. The experiments fell into three broad categories: **Passive hints.** We tried embedding guidance in places agents might encounter it organically, adding warning hashes in API responses, steering cues in SDK source files, and `AGENTS.md` files in package directories. The idea was that agents, like good developers, would notice these signals and adjust. **Active prompts.** We restructured how skill files were organized (progressive disclosure versus monolithic blobs), added agent-specific sections to CLI help output, and surfaced skill install commands during authentication flows and onboarding. **Distribution plays.** We put skills on [docs.stripe.com](http://docs.stripe.com), added install buttons to documentation pages, and ran an onboarding experiment offering users an "AI/agent" path alongside the traditional dashboard flow. The results split very cleanly. Passive hints failed while active prompts and distribution plays worked, some of them far better than expected. ### What failed, and why it matters The two clearest failures were SDK steering and API warning responses. For SDK steering, we forked Stripe SDK packages and added steering cues: modified READMEs, `AGENTS.md` files in the package root, inline comments nudging toward best practices. The hypothesis was reasonable, namely that agents frequently inspect project files and dependencies to build context. But in practice, agents almost never read files inside dependency directories. The steering cues were invisible so we ended the experiment. For API warnings, we added a new `warn` hash to API responses, a soft signal indicating that the agent was doing something suboptimal (using a deprecated parameter, for instance). We also embedded skill install instructions inside compatibility-mode error messages. Again, agents didn't respond. They parsed the API response for the data they needed, ignored the warning, and moved on. This pattern of agents ignoring soft signals is consistent with what researchers at Princeton's SWE-bench project have documented. In their evaluations of agents on real GitHub issues, successful agents tend to exhibit a narrow, goal-directed focus: they identify the immediate task, locate the relevant code, make the change, and move on. They don't browse. They don't explore. Devin's published case studies show a similar pattern. Cognition's work on Devin illustrates the same pattern that agents optimize for task completion, not comprehension ([cognition.ai, 2024](https://www.cognition.ai/blog/introducing-devin)). Our warning-based steers assumed agents would behave like curious developers poking around a new API. But they don't. They behave like contractors on a deadline. This is an important finding for anyone building developer infrastructure. If your developer experience strategy relies on agents discovering guidance through exploration, such as reading changelogs, scanning deprecation notices, browsing adjacent files, it will likely fail. Agents simply don't wander, and you have to put instructions directly in their path. ### What worked Three results stood out. **Progressive disclosure in skill files.** We compared two formats for the Stripe skill: a single monolithic file containing everything, versus a modular structure where the top-level skill referenced sub-skills that could be loaded on demand. The modular format outperformed the monolith by roughly 10% across our eval suite. It also reduced token usage meaningfully since agents pulled in only the context they needed instead of consuming the entire file. This tracks with findings from Anthropic's research on long-context performance. As context windows have grown, a persistent finding is that models exhibit degraded attention to information in the middle of long documents — the so-called "[lost in the middle](https://arxiv.org/abs/2307.03172)" problem identified by Liu et al. at Stanford. Monolithic skill files are particularly vulnerable to this: the guidance for payments might be sharp, but by the time the model reaches the billing section three thousand tokens later, attention has decayed. Progressive disclosure sidesteps the problem by keeping each loaded context small and focused. There's a secondary benefit, too. Modular skill structures let individual product teams own their sub-skills. The payments team maintains the payments skill; the billing team maintains theirs. This mirrors how we already organize API reference documentation and has obvious maintenance advantages at scale. ![A tweet showing the Stripe skill install prompt](/images/ai-steering-experiments/tweet.png) **CLI login promotion.** We added a prompt on the Stripe CLI login confirmation page (the screen users see after running `stripe login`) suggesting they install the Stripe skill with a one-click `npx` command. 30-35% of users who saw the prompt copied the command. That's a startlingly high conversion rate for what amounts to a text-based interstitial. It suggests that developers using the CLI are already in an agent-adjacent mindset (many of them are probably authenticating *because* an agent told them to) and are receptive to tooling that makes the agent work better. **Error-based steering.** We ran an experiment using API compatibility mode. When new merchants hit the API with an outdated version, they received an explicit error rather than a degraded response. In test conditions, agents reliably detected the error, identified the version mismatch, and corrected their request. This is a meaningful contrast with the warning-based approach, which agents ignored. The difference is simple: errors block progress but warnings don't. An agent that hits an error *must* deal with it to complete its task. A warning is, from the agent's perspective, often just noise. ### Two conclusions We are early in implementing and understanding how to steer agents but at this stage, here's what we think generalizes. **First, agent-facing developer experience is a distribution problem, not a content problem.** The Stripe skill itself has been solid for a while. The instructions are clear, the references are well-structured, the coverage is broad. The constraint was never "is the content good enough?" It was "does the agent actually have this content loaded?" Every experiment that succeeded was ultimately a distribution win: getting the skill installed, getting the right sub-skill loaded at the right time, getting the install command in front of developers at moments of high intent. This is surprisingly analogous to the classic mobile app distribution challenge. You can build the best app in the world, but if nobody installs it, it doesn't exist. For skills, the funnel is: awareness → install → load → follow. Most of our wins came from improving the first two steps. **Second, the distinction between "hard" and "soft" steering is probably the most important design axis for agent-facing infrastructure.** Hard steers, such as errors, explicit instructions in loaded context, and blocking responses, work. Soft steers - warnings, hints, adjacent files, in-band suggestions - often don't. This has architectural implications. If you're designing an API that agents will consume, your error messages aren't just debugging aids but your primary steering mechanism. If you're building a CLI, the `--help` text isn't a nice-to-have - it's potentially the only thing the agent reads before acting. If you're writing documentation, the question isn't whether the information is *available* somewhere on the page but whether it's in the text that the agent will actually load into context. This is a different design philosophy than what most developer tools teams have practiced for the past decade. Human-facing DX is forgiving. Developers browse, search, skim, and cross-reference. They'll find the deprecation notice eventually. They'll read the migration guide if they hit enough friction. Agent-facing DX is not forgiving. The agent loads context once, executes, and moves on. If your guidance wasn't in the loaded context, it didn't happen. ### Where this goes We're still early. The real opportunity is fully agentic onboarding: flows where the agent doesn't just receive better instructions but actively drives the setup process end-to-end. Getting there requires rethinking parts of our dashboard-based flows and making UX changes that treat agents as first-class users, not just human users with better memory. That work is underway. The CLI DX evaluation surfaced issues we're still working through. We published a [blog post](https://stripe.com/blog/can-ai-agents-build-real-stripe-integrations) earlier this year on agent benchmarking. We are continuing to build on the setup to enable continuous evaluation and improvement of agent performance on a variety of real integration tasks. We continue to add new best practices for our users who are building with LLMs in our [documentation](https://docs.stripe.com/building-with-ai). But the directional picture feels clear. The agents are here, they're building real integrations, and the tools and infrastructure we've built for human developers don't automatically transfer. The agents are focused, literal, and impatient. They don't read the room, they read only what’s in the context window. Now we know we have to make sure the right things are there. --- *The experiments summarized here were run by engineers across Stripe's developer experience and agent platform teams during early 2026. For details on our agent benchmarking methodology, see [Can AI Agents Build Real Stripe Integrations?](https://stripe.com/blog/can-ai-agents-build-real-stripe-integrations) on the Stripe blog.* Last week, I wrote about [building a transcription app for my team using Stripe Projects, OpenRouter, and Vercel](/blog/building-with-agents-stripe-projects). This app takes video software-generated subtitles and runs them through an AI agent via the OpenRouter API, taking in a detailed system prompt and tool calls to Stripe documentation to ensure speakers and service names are spelled and capitalized correctly, and returns a correctly-formatted transcription file. This was my first foray into using an agent to carry a project all the way from `init` to deploy, and I picked up a few takeaways from the process. ### Always have a plan If anyone still remembers the days of software engineering before agentic workflows, a new feature would usually start with the lead engineer writing a design document with proposed architecture changes, features, and UX flows. Then, the team would read the doc and point out gaps or alternatives; in the end, a better doc led to a better implementation. This is still true, even if it’s now an agent writing the doc and possibly another agent or two reviewing it along with the engineer. Like a good design doc, an agent-designed plan should have a goal, an understanding of data flow (if applicable), an architecture section, whether a diagram or a list of new services, and a list of tasks. It’s the agent’s job to design this based on your requirements in the initial planning prompt; it’s your job to read it thoroughly and make changes where required based on your judgement. If you have questions, it’s better to either pause to do some research on your own or go back and forth with the agent for clarification. As the agent is coming up with the plan, you may get asked clarifying questions. One for me was whether to use streaming or not when receiving the fixed transcription contents. I followed up by asking the agent, based on my current setup of a Vercel-hosted NextJS app, would I be able to support streaming, and did it make sense for my use case of transcripts that could run thousands of lines. Its answer: ``` Streaming is the only architecture that can realistically handle long auto-generated subtitle transcripts on Vercel. Non-streaming serverless functions are capped at 10s on Hobby and 60s on Pro, and must return the full response within that window — so given your use case of a ~1,500-line transcript, it would routinely get cut off as a 504, with nothing to show for the tokens already paid for. ``` I verified that answer and did end up implementing streaming, and so far I haven't run into any timeout issues. ### Do your own research [Stripe Projects](https://projects.dev) makes it really, *really* easy to add new services, including services you haven't used before. That makes it tempting to skip the research that goes into deciding which service to use and how to use it and let the agent run wild, but you'll quickly find gaps in your knowledge when even your agent is asking you clarifying questions. Because I was completely new to OpenRouter, I wasn't aware of its [Free Models Router](https://openrouter.ai/openrouter/free) during my initial setup, and later ended up revising my implementation to first try a free model, and only use a paid one if the user chooses to. This gave me important data on model quality and helped me better finalize my app design. When working with agents, taking the time to come up with a solid plan up front will save you time debugging or changing course in the long run. The same is true when choosing providers and getting to know their APIs - at least the ones most relevant to your project. ### Don't skimp on models My transcription app initially offered three tiers of models: free, auto, and Claude. OpenRouter has a variety of free models with various results, and a handy [auto router](https://openrouter.ai/openrouter/auto) that will select an appropriate (and usually more affordable) model based on the complexity of the prompt. My initial tries with the free model were ...disappointing; rather than following the instructions in the system prompt, which included strongly-worded decrees to stick to the initial script as much as possible, it ended up taking a 700-line script from my [Meetup talk](https://youtu.be/1kBFmOufiNE?si=k29VGEiO_4FuC-PT), and condensing it into a 100-line summary like so: ``` 1 00:00:00,360 --> 00:00:07,200 Hello, Dublin. My name is Anna Spysz. And today I'll show you how to integrate Stripe payments seamlessly. 2 00:00:07,200 --> 00:00:13,880 Stripe offers three options: payment links, embedded buttons, or custom development. Choose based on your needs. [...] 6 00:00:34,279 --> 00:00:41,280 For more details, visit stripe.com. 7 00:00:41,280 --> 00:00:47,600 Now, let’s see how to implement this. 8 00:00:47,600 --> 00:00:53,799 Start with the checkout flow. Ensure it matches your site’s design. [...] 15 00:01:41,329 --> 00:01:48,169 Finally, integrate the payment button into your site. 16 00:01:48,169 --> 00:01:54,709 Double-check everything before launch. 17 00:01:54,709 --> 00:02:01,690 Done! Your site now accepts payments smoothly. ``` Well... at least it kept the (now inaccurate) timestamps 🤦. Repeated results like this made me remove the free option completely and instead default to `openrouter/auto` for the model. More testing revealed that reasoning models, though slower, were far more accurate, so I ended up swapping out Claude Sonnet 4.5 for Claude Opus 4.5 - thinking. The same is true for choosing the model that will plan your feature or app and then build it. If possible, use higher-quality thinking models for at least the planning and reviewing (more on that below). If you're on a token budget, you can then use less complex models for the actual code implementation, as long as they follow the plan and you're the ultimate reviewer of the code. ### Check in your agent files When working on larger repos, my instinct had previously been to add the contents of `.agents/` or `.cursor/` to `.gitignore` - after all, these are *my* personal, hard-fought and probably too-niche-for-my-team learnings. This time, however, I checked in all of my files when I noticed that `stripe projects init` only (rightfully) added `.env` and cache files to `.gitignore` but kept all of the agent-specific files committed. Today, that feels like the right workflow: if I'm using an agent, and so is my teammate, we want our agents to have shared knowledge (skills) and shared rules so our code remains consistent. Just as I wouldn't add `eslint.config` to `.gitignore`, I'll no longer be adding `AGENTS.md`. ### Be your own adversary Just as you always want to read carefully through the agent-created plan, you need to read through agent-created code before checking it in - but you don’t need to be the first reviewer. In my `./agents` directory, I have `agents/pr-reviewer.md`, which is an agent persona that follows my organization’s best practices when reviewing PRs, including internal tools that exist to help in that process, style guides, testing coverage guides, accessibility and security guidelines, and so on. Once the agent has completed all of the tasks in the plan, spin up another agent, load the `pr-reviewer` persona, and ask it to go through the changes in your branch compared to `main` and list issues or problems, if any. The last part is important - an agent will find issues if you tell it to, so be sure to give it an opportunity to say “LGTM” if the code is good as is. Agents can be just as guilty of over-engineering as humans! If the agent does find problems, it will list them in order of severity; at this point, you should start reviewing the code yourself to see if you agree with the issues and if you can find better solutions than those proposed. Then you can ask the agent to address the issues you agree with, and now you’re ready to review the entire changeset before you put up your PR! ### Get started with Projects I hope these learnings are useful to others building with agents. If you want to get started with Stripe Projects yourself, head to [projects.dev](https://projects.dev/). All it takes is one command to give your agents access to a growing list of service providers: ```shell stripe projects init ``` I built an internal tool that cut our transcript editing time by 4x. Here’s how I did it with the newly-launched [Stripe Projects CLI](https://projects.dev), OpenRouter, and Vercel (along with my handy Claude). ### The problem: too many transcripts! I'm on the Developer Relations team at Stripe, and one of the things we do - a lot - is make videos for our [Stripe Developers YouTube channel](https://www.youtube.com/stripedevelopers). To be accessible to a wide audience, all of these videos need subtitles - *accurate* subtitles, because the original English captions are then used by Google to build 22 language translations and 16 voice dubs. While some decent auto-captioning tools exist, they inevitably make mistakes, like failing to recognize proper nouns or the full context of a technical term, so a human needs to review them before they can be released. We recently calculated that it takes between 1.5 and 2 times as many minutes to edit auto-generated subtitles as the length of the video, meaning that one of my teammates will spend 30-40 minutes editing just the subtitles of a 20-minute video. That's a lot of dev hours used on a task that is fairly straightforward and repetitive; in other words, the perfect task for an agent. ### The solution: an agentic transcription app My solution was to build a custom agentic transcription fixing app for my team. To make the process as straightforward as possible, I had a few requirements. Luckily, when using an agentic workflow in a tool like Claude, [Kiro](/blog/building-production-ready-stripe-subscriptions-kiro-powers) or Cursor, planning mode works best when you list requirements clearly, so thinking these through initially set me up to make a solid plan my agents could follow. #### Planning My transcription app needed: - to be hosted in a place accessible to my teammates, but with built-in auth so the entire internet couldn't burn through our tokens - an API that provided access to different LLM models, as shorter or more straightforward transcripts could be handled by free or cheaper models, but I wanted the option of more advanced models in case the output from less capable models was insufficient - to use the Stripe Projects CLI to link all of the providers (and necessary environment variables) in one place - a clean and simple UI that had all needed functionality in a single page (with a dark mode option, because I'm a developer after all) This was my initial prompt: ```markdown I would like to create a new web application that can take a rough output from video transcription software, add instructions from the user in a separate chat window (such as "Capitalize all proper nouns, replace stripe with Stripe"), and run the transcript and instructions through an agent that then outputs the fixed transcript in another panel. If needed, the user can keep chatting to apply additional changes. The UI should have a split layout, with the original transcript input on the top left half of the screen, the chat instructions on the bottom left, and the fixed transcript on the right half of the screen. Please use the Stripe Projects CLI to provision any services needed. Visually, the app should have a simple feel and default to light or dark mode based on the user's browser settings. Please see `./example.json` for an example of an original and fixed transcript. ``` This prompt resulted in a plan from the agent with several TODOs that I was able to go through and edit before we started building. These included: - Implementing a split-pane transcription/chat/output UI with session-only state - Creating routes to wire the request/response contract for iterative transcript fixing - Adding a `transcriptAgent` with a system prompt and helpers - Wiring the frontend up to new API routes - Comprehensive testing (can’t forget that!) But before I could implement the plan, I needed to get all of the required services in place. #### Setup The first thing I want to do is create the scaffolding for my project. This will look different depending on your framework, but at the very least you'll want to create a directory with the name of your project and initialize a git repository in it. In my case, I ran `npx create-next-app@latest transcription-fixer`, which created my project directory and set up a basic full-stack app. Then, I initialized Projects by running this command in the root of my new project directory: ```shell stripe projects init ``` That scaffolds files such as `AGENTS.md` and directories with useful skills and rules for different agents, as well as a `.projects/state.json` file that is the source of truth for your integrations. Because I always review the agent's code, I'm biased towards using frameworks and services I'm familiar with, so I chose to start this project as a NextJS app hosted in my existing Vercel account. Luckily, Stripe Projects lets me link an existing account with the same command I would use to set up a new one: ```shell stripe projects add vercel/projects ``` This links my Vercel account to my Stripe account, and my`.projects/state.json` now looks like this: ```json { "version": 1, "providers": { "vercel": { "name": "Vercel" } }, "resources": { "vercel-project": { "name": "vercel-project", "providerName": "Vercel", "serviceId": "project" } } } ``` With my framework and hosting in place, I had the agent build the initial plan of a transcription UI and put the necessary routing in place so we could then wire it up in the next stage. #### Adding the app logic Once I had built the scaffolding of my app, it was time to consider what other services I might need. The most obvious one would be an agentic API provider - luckily, as of last week, [OpenRouter](https://openrouter.ai/) is available as an AI provider within Projects, and I was excited to try it for the first time. To link OpenRouter, I had to do two things: 1. Add a payment method. As I was using the Vercel free tier and a new Stripe account, I didn't already have a payment method attached to it, and OpenRouter is a paid service (though it does provide free models). I went to the Stripe Dashboard, chose my account, and added a credit card. 2. Run `stripe projects add openrouter/api` Once linked, I could run `stripe projects open openrouter` to see their dashboard and make updates to my account, but I wanted to keep going on my app, so I ran `stripe projects status` to confirm everything was linked as expected, and it was: ```shell ~/s/transcription-fixer stripe projects status │ transcription-fixer │ Project project_1234 │ Account Stripe DevRel (acct_1234) │ Email @stripe.com ✓ Verified │ Created Mar 25, 2026 Providers (2) Name Status Linked ────────── ──────── ────────────── OpenRouter ✓ Linked 11 minutes ago Vercel ✓ Linked 23 days ago Services (2) Name Provider Service Pricing ────────────── ────────── ─────── ─────── openrouter-api OpenRouter api Free vercel-project Vercel project Free ``` Excellent! Additionally, I checked my local `.env` file, and it had been auto-populated with `OPENROUTER_API_KEY` and `OPENROUTER_TYPE`, with the correct values already filled in. #### Let the agent cook (with recipes) With all of the services my app needed set up, I went back into plan mode with my agent. Now we would need to add an LLM client that used the [OpenRouter SDK](https://openrouter.ai/docs/sdks/typescript/overview) to call various endpoints and an ability for the user to select which model they wanted to use. In the end, I would spend the bulk of my time thinking through how to compose the system prompt for the transcription agent so that the app's user would need minimal instructions to get good results (yes, we were getting meta). I wanted to give the transcription agent the ability to call tools such as `search_stripe_documentation` using [Stripe's MCP server](https://mcp.stripe.com) so it would get service names right without explicit prompting. I also provided a before and after example of the transcript I had fixed by hand from my [Dublin Meetup talk](https://youtu.be/1kBFmOufiNE?si=k29VGEiO_4FuC-PT), which my agent shortened and used as a [few-shot example](https://www.promptingguide.ai/techniques/fewshot). This was the final system prompt we ended up with: ```javascript const SYSTEM_PROMPT = `You are an expert transcription cleanup agent. Primary objective: - Apply user instructions to improve the transcript while preserving meaning, text structure exactly except for changes in the instructions, and exact formatting, including line breaks and timestamps. Critical formatting requirements: - Preserve line structure exactly unless the instruction explicitly asks for format edits. - Preserve whitespace intent, paragraph breaks, timestamps, speaker labels, and ordering. - Do not collapse lines, reflow blocks, or normalize spacing unless asked. Quality requirements: - Do not hallucinate facts or insert content not implied by transcript text. - Make the minimum set of edits needed to satisfy user instructions. - Keep language and tone consistent with source transcript. Default cleanups (always apply, even when not explicitly requested): - Remove leading filler utterances at the start of sentences and cues — specifically "uh", "um", "uhm", "umm", "er", "eh", "ah", "hmm", and similar disfluencies — along with any comma, ellipsis, or extra space that immediately follows the filler. Then capitalize the first letter of the next word so the sentence starts cleanly (e.g. "Um, so we shipped" → "So we shipped"; "Uh hello there" → "Hello there"). - "Start of a sentence" means the start of a cue/line, the start of a paragraph, and any position immediately after a sentence-ending "." / "!" / "?". - Do NOT remove filler words that appear mid-sentence (e.g. "I think, uh, we should ship") — only leading ones — since mid-sentence fillers can carry pacing/meaning. Defer to explicit user instructions to strip those. - When removing a leading filler, change nothing else on the line: keep timestamps, line breaks, speaker labels, and the rest of the sentence text intact. Output requirements: - Return only the final fixed transcript text. - Do not include markdown fences, explanations, labels, or commentary.`; ``` Just as with the initial plan with my agent, the more detailed the system prompt, the better my results. #### Results The final app looks like this, using my unedited Meetup talk as the input: ![The application with a fixed transcript](/images/building-with-agents-stripe-projects/transcript.png) The system prompt already took care of removing the "Um"s I uttered, capitalizing Stripe, and preserving formatting. Additionally, the agent was able to infer from the talk's context that I was talking about React the framework, and properly capitalized that. For proper nouns or names that the agent likely wouldn't be able to infer, I ended up adding a form for the user to fill out so they wouldn't have to spell out additional instructions for common fields, and I iterated on the system prompt to include these strings. And the best part - here are the results from my benchmark test, which used the 771-line script of my meetup talk and instructions to correct my name and the mentioned Stripe services (as seen in the screenshot above): | Model | Time | Accuracy | Tokens | | :---- | :---- | :---- | :---- | | Auto (google/gemini-3-flash-preview) | 40.22s | 85% (all instructions followed, some context-aware capitalization and grammar missed, including Stripe services) | 31,724 tokens | | Google Gemini 2.5 Pro | 90.54s | 99% (all instructions followed, correctly capitalized Stripe services not explicitly instructed on, best on inferring technical terms) | 36,486 tokens, 4,814 reasoning | | Claude Sonnet 4.5 | 137.67s | 90% (all instructions followed, some context-aware capitalization and grammar missed, including Stripe services) | 25,781 tokens | | Claude Opus 4.5 - thinking | 298.57s | 95% (all instructions followed, correctly capitalized Stripe services not explicitly instructed on) | 35,348 tokens, 4,452 reasoning | For this 20-minute talk, we went from 30+ minutes of editing to a little over two minutes of generated edits as the average of all the models, and perhaps 2-3 minutes for a human to double-check the fixed transcript for accuracy. That's a 4x reduction in time! And how much has this cost my team? All of the testing over a few days of building the app resulted in a massive bill of… $2.54. You certainly can’t get a cup of coffee that cheap in Oyster Point! #### Going live Once I was satisfied with my app's results, I was ready to deploy to Vercel. But first, I had to get the environment variables Projects added to my `.env` file into the Vercel production environment so that my OpenRouter calls would work when deployed. There are two ways to do this: 1. via the Vercel CLI with `vercel env add [NAME] [ENVIRONMENT]`, though I would have to add my variables one by one 2. via the Vercel Dashboard at My Project -> Settings -> Environment Variables -> Add Environment Variable -> Import `.env` (at the bottom of the form) I chose the former as I only needed `OPENROUTER_API_KEY` added for my app to be fully functional. Finally, I ran `vercel --prod` to deploy straight to my live production environment on a Friday afternoon, because YOLO (and because I had Claude add an extended testing suite and review my changes as a PR reviewer persona). ### Next steps At some point in the near future, I'll want to give my agents a memory - likely a way to store previously accepted transcriptions to use as a reference. That means I'll need a database. Luckily, Stripe Projects makes adding one just as easy as adding hosting or AI. Right now, running `stripe projects catalog` lists the following for just database providers: | Provider | Pricing | | :---- | :---- | | `chroma/database` | Paid | | `cloudflare/d1` | Free & Paid | | `cloudflare/hyperdrive` | Free & Paid | | `flyio/mpg` | Paid | | `neon/postgres` | Free & Paid | | `planetscale/mysql` | Paid | | `planetscale/postgresql` | Paid | | `railway/mongo` | Free & Paid | | `railway/postgres` | Free & Paid | | `railway/redis` | Free & Paid | | `supabase/project` | Free & Paid | | `turso/database` | Free & Paid | | `upstash/redis` | Free & Paid | | `upstash/vector` | Free & Paid | And more are being added weekly! That means as my project grows, I can keep using one CLI tool to keep all of my providers organized and my environments up to date. Best of all, when my teammates check out my repo, all they have to run is the following to get the correct API keys into their environment: ```shell stripe projects env --pull ``` Speaking of working on a team, I’m sure we’ve all felt the panic of hearing about a security incident at 2am and being asked to rotate credentials while barely awake. With Projects, that now becomes as easy as: ```shell stripe projects rotate / ``` If you want to try Stripe Projects yourself, head to [projects.dev](https://projects.dev/) to get started! Stripe runs the [world's largest Ruby codebase](https://newsletter.pragmaticengineer.com/p/stripe). Before `rubyfmt`, no true autoformatter for Ruby existed anywhere in the industry. Previous tools had crashed just trying to process our files. Then, six years after I started [`rubyfmt`](https://github.com/fables-tales/rubyfmt) as a personal open-source project, two Stripe engineers got on a Saturday morning Zoom call with 25 million lines of Ruby and a plan that had never been attempted at this scale. ![](/images/formatting-an-entire-25-million-line-codebase-overnight-the-rubyfmt-story/image1.png) > Sample created using [rubyfmt playground](https://rubyfmt.run/) ## The origin of rubyfmt At RubyConf 2018, over a rye Manhattan at the Millennium Biltmore, I found myself in a heated debate with Justin Searls and Aaron Patterson about how Ruby desperately needed an autoformatter. At the time, language servers in Ruby were nascent, if they existed at all. The cost of booting Ruby with gems and loading `bundler` made the idea of "format on save" editing too slow. We left that bar without a solution. But we knew what one would need to look like: zero configuration, fast, and accessible to engineers coming from other languages. That conversation was the spark. I went home and started building `rubyfmt` as a personal open source project. ### No configuration, no arguments If you've ever had a team debate about trailing commas, keyword layout, or conditional formatting, you already understand the core problem. If you've ever argued about what the correct configuration for a linter is, you understand it even better. `rubocop` is the default linter for almost all Ruby teams. It's a popular and powerful tool, but it isn't an autoformatter. Its hundreds of individually configurable rules mean that any two engineers can reasonably disagree about the right setup, which just moves the bikeshedding from pull requests to configuration files. One thing I've learned during my career is that if engineers *can* disagree about something, they will. Style debates are no different, and they have a way of consuming far more time than anyone wants to admit. What the Ruby ecosystem was missing was something like `gofmt`, a zero-configuration autoformatter that simply makes the decisions for you, runs fast, and ensures you never argue about formatting again. ### Built for the fastest workflows imaginable Starting a regular Ruby process takes around 158ms (Ruby 2.7 on my M4 Pro MacBook Pro). To the most productive engineers, that's an eternity for a save hook. Starting Ruby inside a `bundler` environment is worse, closer to 345ms. We set a strict budget of 100ms for `rubyfmt` to format all but the very largest files. To hit it, we couldn't invoke Ruby in the normal way. We had to go deeper, compiling a hand-authored C program directly against `libruby` to squeeze out every millisecond we could. ### Ruby for engineers who don't speak Ruby (yet) At Stripe, we recruit great engineers regardless of their language background. Many engineers come to Stripe never having written a line of Ruby, and we then ask them to work on the world's largest Ruby codebase. The Go engineers I worked with told me they were struggling with Ruby. Its flexibility left too much room for uncertainty without an autoformatter. They missed `gofmt`, which would simply “snap the code into place” for them. A strict autoformatter removes that uncertainty. It lets engineers new to a language stop thinking about how code should look and start focusing on what it should do. ## Building rubyfmt Ruby isn’t a syntactically simple language. Consider this perfectly valid Ruby program: ```ruby a = < lambda { |ps, rest| format_return(ps, rest) }, :def => lambda { |ps, rest| format_def(ps, rest) }, :if => lambda { |ps, rest| format_if(ps, rest) }, # ...and so on for all expression types }.fetch(type).call(ps, rest) end ``` Speed was a priority, so users were advised to start `rubyfmt` with the `--disable=gems` flag. This meant `rubyfmt` couldn't depend on any gems or be part of a `bundler` environment. Loading either would have blown the 100ms speed budget before a single line was formatted. The distribution strategy was to [literally combine all source files into one large Ruby file](https://github.com/fables-tales/rubyfmt/blob/v0.2.0/Makefile#L6-L7) and tell people to stick it in their path. Not a technique I’d recommend in most contexts, but given the constraints, it was the right tradeoff. ### Rewriting in Rust (it went deeper than expected) As the complexity of `rubyfmt` grew, it became slower and slower to use Ruby to autoformat Ruby. `ripper` was originally chosen because it's the only Ruby parsing library built on top of `parse.y`, the exact same parser Ruby uses when executing code. But `rubyfmt` was blowing the 100ms latency budget autoformatting files of moderate complexity, so I rewrote `rubyfmt` in Rust. This turned out to be complicated. At the time there were no parsers for Ruby that could be compiled without the Ruby VM present. Ruby is itself a very complicated C program, so the result was a build process that *first* compiled all of Ruby, *then* linked it to a Rust program. Ultimately, this required evaluating Ruby code from within a Rust binary: ```rust pub unsafe fn load_rubyfmt() -> Result<(), ()> { let rubyfmt_program = include_str!("../rubyfmt_lib.rb"); eval_str(rubyfmt_program)?; Ok(()) } ``` That’s when something "fun" emerged about the Ruby data structures `ripper` produces: all the output types are valid JSON (with the exception of symbols, which Ruby can turn into JSON strings when you dump JSON from primitives). ```ruby irb(main):001> Ripper.sexp("def foo; 1 + 2; end") => [:program, [[:def, [:@ident, "foo", [1, 4]], [:params, nil, nil, nil, nil, nil, nil, nil], [:bodystmt, [[:binary, [:@int, "1", [1, 9]], :+, [:@int, "2", [1, 13]]]], nil, nil, nil]]]] ``` In the first Rust draft of `rubyfmt`, I didn’t want to get fancy with manipulating Ruby objects from Rust. So I took the entire `ripper` tree, encoded it to JSON (in Ruby), and deserialized it using `serde`. Super janky, but it allowed rapid processing of `ripper` parse trees in Rust. Eventually, going from Ruby objects to JSON to Rust objects became onerously slow. One extremely neat thing about `serde` is that it entirely separates the notion of schema from any specific serialization format. For example, here’s the schema definition for `ripper`'s `@ident` node type: ```rust def_tag!(ident_tag, "@ident"); #[derive(Deserialize, Debug, Clone)] pub struct Ident(pub ident_tag, pub String, pub LineCol); ``` Here's what that node looks like in `ripper`'s output: ```ruby irb(main):002> Ripper.sexp("foo") => [:program, [[:vcall, [:@ident, "foo", [1, 0]]]]] ``` Converting that to JSON: ```ruby irb(main):003> JSON.dump(Ripper.sexp("foo")) => "[\"program\",[[\"vcall\",[\"@ident\",\"foo\",[1,0]]]]]" ``` From there, I gave Rust a pointer to the Ruby string. Rust called back into Ruby to retrieve the raw bytes and handed them to `serde`, which decoded the JSON into Rust objects according to the schema. At the time, sharing objects across Ruby, C, and Rust was largely uncharted territory. This JSON serialization worked. But it was slow. In Ruby, the C type for a Ruby object is called `VALUE`. It’s an opaque wrapper around the structures Ruby uses to represent objects under the hood. I asked myself: the `ripper` parse tree is full of primitives—Can I just teach `serde` to walk through the Ruby objects in memory? The task was to unpack `VALUE`, determine what it represents, and tell `serde` if I’ve encountered some value type it understands: ```rust fn deserialize_any>(self, visitor: V) -> Result { pub use ruby::ruby_value_type::*; match unsafe { ruby::rubyfmt_rb_type(self.0) } { RUBY_T_SYMBOL => visitor.visit_borrowed_str(sym_to_str(self.0)?), RUBY_T_STRING => visitor.visit_borrowed_str(rstring_to_str(self.0)?), RUBY_T_ARRAY => visitor.visit_seq(SeqAccess::new(self.0)), RUBY_T_NIL => visitor.visit_none(), RUBY_T_TRUE => visitor.visit_bool(true), RUBY_T_FALSE => visitor.visit_bool(false), RUBY_T_FIXNUM => visitor.visit_i64(unsafe { ruby::rubyfmt_rb_num2ll(self.0) }), other => Err(de::Error::custom(format_args!( "Unexpected type {:?}", other ))), } } ``` Ruby's C API lets us introspect a `VALUE`. `rubyfmt_rb_type` is equivalent to Ruby's `rb_type` macro, and returns a constant telling us what Ruby type is underneath. Most types map to Rust fairly easily, but `RUBY_T_ARRAY` needs its own special support code: ```rust struct SeqAccess { arr: VALUE, idx: usize, len: usize, } impl SeqAccess { fn new(arr: VALUE) -> Self { let len = unsafe { ruby::rubyfmt_rb_ary_len(arr) } as usize; Self { arr, len, idx: 0 } } } impl<'de> de::SeqAccess<'de> for SeqAccess { type Error = Error; fn next_element_seed>( &mut self, seed: T, ) -> Result> { if self.idx < self.len { let elem = unsafe { ruby::rb_ary_entry(self.arr, self.idx as _) }; self.idx += 1; seed.deserialize(Deserializer(elem)).map(Some) } else { Ok(None) } } fn size_hint(&self) -> Option { Some(self.len - self.idx) } } ``` With these changes, the schema of `ripper_tree_types` (the Rust module defining the shape of `ripper`’s output) didn’t need to change at all. All that was left to do was implement the Ruby `VALUE` deserializer and everything worked. Linking a full Ruby VM into a Rust binary to walk its parse tree in memory isn’t a normal thing to do. But it worked, and that was enough for now. ## Bringing rubyfmt to Stripe ### The problems we couldn't ignore `rubyfmt` was already two years in the making when I joined Stripe in 2020, though it wasn't finished yet. Stripe had already tried adopting [`prettier-ruby`](https://github.com/prettier/plugin-ruby), but it was too slow (`prettier-ruby` is implemented in JavaScript) and too unstable. It had crashed outright on some of our larger files. The pain of not having an autoformatter was visible in how our engineers worked. Stripe's Developer Productivity org runs regular "shoulder surfing" sessions, where we watch engineers work to spot friction. In several sessions, we noticed engineers wrestling with `rubocop` and spending significant time just trying to get their code into the right place. They wanted to spend their time coding, not developing an intuition for Ruby formatting conventions. Something had to change. With 25 million lines of Ruby in Stripe's monorepo, we needed something purpose-built for Ruby at this scale. The manager and tech lead of Stripe's Ruby team came to me with a question: could `rubyfmt` work, and what would it take to fund it? `rubyfmt` wasn't done yet, but it was the best option we had. Stripe decided to bet on it. In 2022, two engineers from our Ruby infrastructure team started working on it full time, and `rubyfmt` remained open source throughout. As the author of `rubyfmt`, I was thrilled. Stripe was going to fund my project and keep it open source. This was exactly what I had hoped for. ### 62,213 files, one Saturday morning Rolling out a novel autoformatter to 25 million lines of code has two big risks: merge conflicts and correctness. A bug affecting just 0.01% of lines would still touch tens of thousands of files. To manage both, we built in a per-file opt-in so `rubyfmt` would only format files that explicitly asked for it. Following the Developer Productivity org’s typical pattern, we started with systems we owned and could observe closely, then expanded coverage gradually as our confidence grew. We also built a tool to diff `ripper` trees across formatted files, accounting for things like `rubyfmt` converting single quotes to double quotes. Combined with our [extensive test suite](https://stripe.dev/blog/fast-secure-builds-choose-two), we built confidence slowly and deliberately. Then came that Saturday morning in 2024\. We flipped the per-file opt-in model entirely: instead of files opting in, only the tiny minority `rubyfmt` couldn't yet handle were held back. We chose a Saturday to format the entire codebase to avoid merge conflicts. And while our test suite gave us high confidence we'd gotten everything right, it's always a bit daunting to have a diff so large that GitHub can't render it. It just shows `files changed: infinity`. We merged it anyway. From there, we burned down the remaining exceptions. The codebase has grown since. And today, 100% of Stripe's 42 million lines of Ruby are formatted with `rubyfmt`. ### How it’s going The thing that strikes us most about `rubyfmt` is how little anyone talks about it. Like the best infrastructure, it's mostly invisible. It just works. The engineers who feel it most are the ones who came to Stripe from other languages. One engineer, who joined Stripe having never written Ruby before, put it plainly: > “I sometimes receive code format nits on code reviews. Coming from Python where e.g. black was very common I found this quite wasteful/frustrating. It was probably among the \~10 things that felt most obviously off about Stripe's developer productivity at the time. I haven't thought about this problem in years and I'm very glad that's the case.” Engineers across Stripe echo this. Faster PRs, less friction, and one less thing to think about: > “It is very fast and it is format-on-save. Personally, I am very happy about it. Best formatting experience I've had in a while.” > “It’s really nice not having to waste time giving or receiving PR feedback about simple formatting stuff.” > “Very fast, no discussions on what format to use, when you have something you don’t even have to think about it means the tooling is at its best.” ### We're not done yet For years, `rubyfmt` required linking to a full Ruby VM just to parse files. In 2025 that changed: `Prism`, a new parser built to replace `ripper`, became the official Ruby parser. Crucially, it can instantiate a parse tree without linking a Ruby VM at all. Migrating `rubyfmt` to `Prism` was gradual. We made the parser toolchain selectable, ran our full test suite against both `ripper` and `Prism` with all `Prism` tests marked as expected failures, and slowly burned down the `Prism` failing tests until `rubyfmt` produced identical output from both parsers. Because `Prism` loads native objects directly into memory, we no longer needed `serde` or the object deserialization code. Our binary shrank by megabytes and `rubyfmt` got dramatically faster. If you want to help figure out what comes next, or work on other developer productivity problems at scale, [we’re hiring](https://stripe.com/jobs). – *We'd like to give special thanks to Reese, a former Stripe engineer. He worked on `rubyfmt` at Stripe and has continued to commit after leaving the company. We truly couldn't have achieved what's described here without him.* For years, Stripe collected all fees from a user’s primary payment balance. We implemented incentive programs using ad-hoc discounts or manual cash adjustments. While functional, this approach introduced significant friction: - **Product silos.** Discounts applied only to card processing, which limited exploration of other Stripe products like Atlas, Billing, Connect, and Radar. - **Confusing accounting.** Users paid full fees up front, then received retroactive refunds or discounts later. Users couldn’t see how or when offers were applied, or track their remaining balance. We built a system, centered on a single, auditable programmable primitive, to manage credits. We built **Stripe Fee Credits**, a virtual, nonwithdrawable balance dedicated solely to paying eligible Stripe fees, kept separate from a user’s primary payment balance. In this post we’ll dive into how we built a virtual cashless payment method that works for prepaid and Stripe-issued credits, and cleanly integrates with our accounting, compliance, and other frameworks. ### Our new fee credit architecture Delivering this experience required a new internal architecture that could work at global scale. We think of it in three layers: the credits engine, logical financial accounts, and fee settlement. ### The credits engine The **credits engine** is a standalone gRPC service that acts as the system of record for credit metadata, policies, lifecycle, and audit history. Because Stripe operates globally with complex tax and product requirements, we couldn’t just create a generic “bucket” of money. We needed a robust data model to define exactly *what* a credit is and *how* it behaves. The core `Credit` object encapsulates policy, economic purpose, and which entities can use the credit, allowing us to share the credit across multiple user accounts. We model the credit lifecycle as a finite-state machine and record each state change in a **credit papertrail** that ensures strict dual-approval flows for compliance. We built compliance in from the beginning, rather than treating it as an afterthought. ### Logical financial accounts With the credits engine defining how credits operate within Stripe’s system, we needed a place to store their value. We needed to represent a “virtual” balance that holds no real cash. We’d been treating them as real funds, but realized that credits aren’t user funds in the regulatory sense. Whether they represent a prepaid amount already received by Stripe, or an incentive Stripe is granting at its own cost, we can classify the money sitting behind a credit as corporate funds. It doesn’t need to be safeguarded, swept to a bank account, or reconciled against a real cash position. This classification unlocked a clean architecture built off our existing abstractions, and a way to issue Stripe-funded credits without needing to issue real cash. ### Extending Money Movement and Storage Rather than building a bespoke balance system just for credits, we extended Stripe’s existing Money Movement and Storage (MMS) platform, the infrastructure that handles real money movement across all of Stripe. We used our existing well-tested primitive, the financial account, which represents an entity capable of holding a balance and participating in money transfers. Every real Stripe financial account—merchant payment balances, bank settlement accounts, treasury accounts—is backed by a real bank account. We created a new variant: purely logical financial accounts that aren’t backed by any real bank account. They carry a balance through Stripe’s internal ledger, but it never corresponds to real cash. This single abstraction eliminated an enormous amount of infrastructure complexity. ### Fee settlement orchestration Orchestration is the final piece: determining *when* and *how* to apply credits to a user’s fees. In the legacy model, discounts were retroactive, which was an accounting headache. Now, our fee settlement engine queries applicable credits and applies them **just in time**—fees are paid using credits *before* they touch the user’s primary balance. The three-step flow checks for eligibility, minimizes wasted credits, then debits the logical credit account, while enforcing critical guardrails and gracefully handling failures. ![](/images/how-we-built-stripe-credits-a-programmable-auditable-way-to-pay-your-stripe-fees/image1.png) ### Guardrails against logical-to-real leakage With this new credits architecture, we needed to protect against the most dangerous failure mode—a logical ledger entry triggering a real cash movement. To prevent this, we built two critical guardrails: movement restriction and cash sweep isolation. #### Movement restriction The mechanism for all value movement between logical accounts is the Originated Money Transfer (OMT), an existing MMS workflow that we repurposed for cashless operations. Every OMT follows a three-phase lifecycle through the ledger: submitted → prepared → disbursed. We added checks in MMS to enforce that logical financial accounts can only participate in OMTs with other logical financial accounts. We reject attempts to create a transfer between a logical account and a real account at the platform level, an important boundary that prevents logical ledger entries from accidentally triggering real cash movements downstream. Using OMTs—the same infrastructure that handles real money—gave us structured, auditable state transitions for every credit funding and every fee drawdown. #### Cash sweep isolation MMS runs automated intercompany sweeps based on ledger data. If logical financial accounts were allowed in sweeps calculations, the system could see a $100 incentive credit and attempt to sweep $100 in real cash—cash that doesn’t exist—between Stripe entities. We worked with the team that owns Stripe’s cash management infrastructure to ensure that ledger entries written to logical accounts are excluded from sweep calculations. ### Why our solution works Logical financial accounts, the heart of our credits system, give us the best of both worlds: the rigor and auditability of Stripe’s battle-tested money movement infrastructure, without the operational overhead of managing real cash. Every credit funding, fee drawdown, and tax write-off produces the same structured ledger events that Stripe’s accounting, reporting, and compliance systems already know how to consume, so we didn’t need to build parallel reporting pipelines or special-case our audit tools. The financial data warehouse receives the same fields it expects for any other funds flow, and downstream teams can trace prepayment-to-revenue linkages through Stripe’s existing tooling. The hard part of building a virtual balance system wasn’t tracking the balance; it was integrating it cleanly with the rest of the financial system without undermining auditability or accidentally moving real money. By integrating with MMS and building thoughtfully off our existing abstractions, we could focus our engineering effort on credit-specific logic like funds flows, policies, lifecycle, multisettlement, and idempotency challenges. ## Deep dive: Two funds flows Our logical account primitive supports both Stripe-funded and user-funded credits. They have the same user experience, but **completely different accounting under the hood**. Prepaid credits create deferred revenue at funding time and collect tax at drawdown, while Stripe-funded credits are booked as a Stripe cost, and taxes are written off entirely since the credit is effectively a discount. We needed two distinct funds flows to handle the two credit types correctly—and sign off from teams across Stripe—before a single dollar could flow through the system. ### User-funded credits Prepayments, where a user pays for fees up front, involve real cash entering the system, deferred revenue accounting, and a split between credit-settled fees and tax settled through the merchant’s regular payment balance. The flow spans multiple internal systems—our invoicing platform, the credits engine, MMS, and the fee settlement engine—and was the first funds flow at Stripe to enable merchants to pay up front annually for fees. In this funds flow, let’s say a merchant signs a $1,000 prepayment deal. Stripe creates the invoice, establishing $1,000 in uncollected deferred revenue on our internal platform. When it’s sent to the merchant, the ledger establishes a credit that represents Stripe’s obligation to deliver future services and a corresponding debit that represents the merchant’s outstanding payment. After the merchant pays the invoice, the credits engine triggers a funding event that initiates an inbound OMT to fund the merchant’s credit balance account with $1,000, which becomes deferred revenue that Stripe receives in a real financial account. When the fee settlement engine assesses $10 in fees plus $1 in tax, the drawdown is split into the $10 fee paid from the credit balance via an outbound OMT that carries the correct product identifier for the account, and the $1 tax collected from the merchant’s payment balance through the existing fee collection path. The $10 fee is cleared from deferred revenue to the revenue account, and Stripe can identify the actual revenue against the product used by the user. If the prepaid credits expire with an unused balance, Stripe recognizes this as breakage revenue and applies the appropriate tax treatment. Every step produces structured ledger events that downstream systems—reporting, data warehouse, general ledger—can consume without needing to recompute. ### Stripe-funded credits Though we initially set out to handle user prepayments, our solution was extensible. All we needed was a new funds flow to apply it to Stripe-funded credits, which has now become the most used credit type. For example, when Stripe grants an incentive credit to a merchant who signed an enterprise deal, or a courtesy credit issued after a service incident, no real money changes hands. The funding is entirely virtual. The credits engine triggers an inbound OMT from a cashless corporate account to the merchant’s credit balance account. The ledger records the funding, distinguishing between incentive fundings and drawdowns, then clears it through an OMT lifecycle until the balance lands in the merchant’s logical account, with no cash movement. When eligible fees are assessed, the fee settlement engine debits the credit balance account and credits the Stripe corporate account via an outbound OMT. A tax write-off event moves the tax amount from the uncollected taxes ledger account to a dedicated write-off account. Neither the merchant nor Stripe pays this tax. The accrual event uses the fee record’s creation date as its effective timestamp, rather than the invoice date, which is often later, ensuring revenue is recognized in the correct accounting period even when the invoice crosses a month boundary. ### Same experience, different ledgers These two distinct paths through the general ledger have the same user experience, where credits automatically apply to fees, and users can see their running balance in the Dashboard. Collapsing these into a single accounting flow would have been an auditing nightmare—the tax treatments alone are incompatible. Maintaining two funds flows, each with its own ledger accounts, events, and sign-off process, is well worth it. --- ## Lessons learned **Logical accounts are a powerful abstraction.** We require careful coordination to ensure logical ledger entries don’t accidentally trigger real cash movements downstream. **Auditability is an engineering requirement.** Every state change is logged with an actor, timestamp, and approval link. Compliance teams never had to ask for logging—it was there from the first commit. **Different economics need different funds flows.** Prepaid and Stripe-funded credits look identical to users but have fundamentally different ledger models. Collapsing them into a single accounting flow would have been an auditing nightmare. The apparent duplication is worth it. ## Impact and what’s next Stripe Fee Credits replaced a patchwork of ad-hoc cash incentives, manual adjustments, and discounts with a single programmable primitive that now powers several commercial models: incentives embedded in sales contracts, prepaid annual fee agreements, startup acquisition credits, Atlas onboarding credits, and courtesy credits. Each program has fundamentally different economics, tax treatment, and lifecycle characteristics, but they all run on the same infrastructure, and we can launch new commercial programs without bespoke engineering work. Now, sales teams can structure more flexible deals, startups are incentivized to explore more of Stripe’s product suite, enterprise users can prepay on better terms, and our finance teams can audit the entire incentive portfolio in real time instead of reconstructing it from scattered systems. We’re continuing to expand what credits can do. Here’s a look at some of what we’re building next: - **Realtime settlement and credit application:** Allowing fees to be settled in near real time on credits and other payment methods, enabling low latency use-cases. We’ll explore how we handled multisettlement in a future post. - **Global expansion:** Stripe Fee Credits is available in 26+ countries today, and we’re accelerating rollout as we satisfy jurisdiction-specific requirements. By treating credits as a programmable, auditable financial primitive rather than a backend accounting hack, we’ve laid the groundwork for more flexible commercial programs. Stripe Fee Credits is built by the Commercial Constructs and Settlement Platform teams within Stripe’s Commerce Systems organization. If you’re interested in building complex yet elegant financial infrastructure at scale, [we’re hiring](https://stripe.com/jobs). As an experiment, [Claude Code](https://code.claude.com/docs/en/overview) was pointed at a project using the [Stripe App for Salesforce](https://docs.stripe.com/use-stripe-apps/stripe-app-for-salesforce/overview). The goal was to generate a Flow that creates a [Checkout](https://docs.stripe.com/payments/checkout) from *Salesforce* *Opportunity* line items when a deal closes, then synchronizes the payment status back to the *Opportunity* record. The real outcome would have been to use the out-of-the-box action `stripeGC.v02_CreateCheckoutSessions` or learn the API structure of a [Checkout Session](https://docs.stripe.com/api/checkout/sessions) and build a helper [apex](https://developer.salesforce.com/docs/atlas.en-us.apexcode.meta/apexcode/apex_writing.htm) class within Flow Builder or use the built-in [agnostic invocable](https://docs.stripe.com/use-stripe-apps/stripe-app-for-salesforce/training/code-examples-agnostic) to construct the API request body. But the AI had no way to know that from the public documentation, and it couldn’t determine how to set up and handle authentication, translate incoming events, and other architectural nuances. The agent also omitted `AsyncAfterCommit` on the scheduled path, causing the Flow to error "Callout from triggers not supported" on deployment. The line-item mapping used incorrect field names. The payment-status sync pointed at a custom field that didn't exist. To get Flow working, it took five more iterations over a couple of hours, and most of that time was spent on problems the AI introduced. How can this process be improved? ### AI agents are reshaping integration work but context gaps hold them back Some of the top AI coding tools like [Claude Code](https://code.claude.com/docs/en/overview), [Codex](https://chatgpt.com/codex), and [Gemini CLI](https://geminicli.com/) are changing how integration work happens. They aren't just code generators; they plan, prototype, scaffold, test, and deploy, all from a single terminal session. Every major platform already has a CLI interface and agentic tools with access, orchestrating the full workflow. The development environment is dramatically getting more context-aware; you brainstorm, plan and describe the outcome, while the agent builds it. An integration surface like the Stripe App for Salesforce has over 200 namespace-qualified invocable actions, platform-specific callout constraints, and [Shadow DOM](https://developer.salesforce.com/docs/platform/lwc/guide/create-dom.html) rules for payment components. The agent doesn't have the context it needs, so it researches (by using tokens, often on irrelevant documentation), guesses (based on generic patterns), and generates code that looks correct but breaks on deployment. These aren't model failures. They're context failures. ### Why Stripe App constraints break AI agents The instinct is to tell the agent "go read the Stripe App for Salesforce docs". But documentation is written for humans, as a narrative spread across pages, organized by concept rather than constraint. An AI agent parsing [docs.stripe.com](https://docs.stripe.com/) won't extract "you must use `AsyncAfterCommit` for any Flow that makes a Stripe API callout" because that rule is hidden in a paragraph about Salesforce governor limits, not stated as a machine-readable constraint. The alternative - to skip the docs and reverse-engineer the package from your org - isn't much better. You would run: ```shell sf data query --query "SELECT Name FROM ApexClass WHERE Name LIKE 'v02_%'" --use-tooling-api ``` This pulls all the `stripeGC` invocable classes, reads each one to understand its parameters, and loads all of that into the agent's context. You then hope it can piece together the naming conventions, input models, and platform constraints. It's a multi-step process that still leaves the agent guessing about rules that aren't expressed in the class signatures. Grounding context files shortcut both paths. They're structured for AI consumption: terse, constraint-first, pattern-oriented. Instead of tutorials and narrative docs, a grounding file states rules directly: ```markdown RULE: Record-triggered Flows making Stripe API calls MUST use scheduledPaths → pathType: AsyncAfterCommit REASON: Salesforce prohibits callouts in synchronous after-save context INVOCABLE: stripeGC__v02_CreateCheckoutSessions NAMESPACE: stripeGC INPUT MODEL: v02_CreateCheckoutSessionsInput REQUIRED FIELDS: line_items, mode, success_url, cancel_url PATTERN: Always pass Stripe Account record ID as accountRecordId LWC: Stripe Payment Element mounting RULE: Use data-* attributes for element containers, NEVER DOM IDs REASON: LWC Shadow DOM scopes element IDs — Stripe.js cannot find them ``` Platform constraints, invocable action signatures, and LWC patterns are all in one place and machine-readable. These agents consume context files natively. You drop the context directory into your project root, and the agent reads it before generating anything. The more autonomous the agent, the higher the cost of wrong context. When an agent generates 200 lines of Flow XML and hallucinates the action name at line 3, the other 197 lines are likely wasted. Grounding files prevent that at the source. ### What's in the repo An [open-source set of grounding context files](https://github.com/stripe/stripe-salesforce-ai-context) has been published for the Stripe App for Salesforce. These encode the actual package surface: * Invocable actions catalog — all `v02\_\*` actions with exact names, parameters, and namespace prefixes * Request/response models — model definitions so the agent builds correct input objects * Platform architecture — package structure, custom objects (`stripeGC\_\_Customer\_\_c`, `stripeGC\_\_Invoice\_\_c`), and the three API patterns (invocable actions, Apex SDK, REST) * Framework constraint rules — Flow XML generation rules (connector integrity, `AsyncAfterCommit`), LWC Shadow DOM mounting patterns, and CSP configuration requirements * Validated examples — deployable Flow XML, Apex controllers, and LWC components tested in scratch orgs The core context files are ~35K tokens, enough for most Flow, LWC, and Apex generation tasks. The full reference catalog (every invocable action signature, every model field) is ~230K tokens. Your agent can pull those in on-demand when it needs to look up a specific action or model structure. You don't need to load everything for every task. ### Proof: same task, with grounding context Here's the same task that failed earlier but with the grounding context files loaded. ```shell $ claude > Read context/LOAD_ALL.md and load the core context files it lists. When ready, tell me what you loaded. ``` The agent reads the context files and makes two architectural decisions before writing any code. First, it finds `v02_CreateCustomers` in the invocable actions catalog and recognizes that customer creation has a simple enough input signature to call the out-of-the-box invocable directly from Flow. No wrapper needed. But for the Checkout Session, the agent sees nested input models — line item price data, product data, session parameters — that don't map directly to Flow variables. Instead of generating brittle XML with dozens of inline parameters, it creates a lightweight helper Apex class that uses the `stripeGC.v02_CreateCheckoutSessions` SDK internally and exposes an `@InvocableMethod` interface to the Flow: ```java stripeGC.v02_CreateCheckoutSessions.Params params = new stripeGC.v02_CreateCheckoutSessions.Params(); params.lineItems = new List{ lineItem }; params.mode = 'payment'; params.successUrl = input.successUrl; List results = stripeGC.v02_CreateCheckoutSessions.createCheckoutSessions_2025_04_30( new List{ params } ); ``` The Flow itself stays simple: it calls the OOTB customer action directly and routes to the helper class for the Checkout Session. The full output includes: * `AsyncAfterCommit` scheduled path — no callout errors * Direct OOTB invocable call for customer creation * Helper Apex class for Checkout Session with correct SDK model names — not hallucinated * Stripe Account lookup preamble with null-check * Idempotency key pattern and fault connectors for error handling Using the grounding files results in significantly fewer iterations and takes minutes instead of hours. These are directional numbers from my own usage, not benchmarks, but the difference is consistent. Org-specific details still require verification: the Stripe Account name, custom field mappings, and error logging paths. The agent provides the structure while the user validates the specifics. This isn't limited to Flows. The repo also includes an LWC + Stripe Payment Element example — embedding a payment form on a Salesforce record page with correct Shadow DOM mounting, CSP configuration, and server-side payment confirmation. The same grounding files that teach the agent Flow constraints also teach it LWC patterns, Apex SDK usage, and webhook handling. See the [examples directory](https://github.com/stripe/stripe-salesforce-ai-context/tree/main/examples) for the full walkthrough. ### Beyond code generation Generating Flows and Apex is the obvious use case, but grounding context changes how you explore the integration surface itself. Instead of skimming through docs to answer "can this app do X?", you ask the agent. It has the full catalog loaded: every out-of-the-box invocable action, every model definition, every constraint. Questions that used to require digging through multiple doc pages get answered in seconds: * *Does the Stripe App support creating subscription schedules directly from a Flow?* * *Why am I getting a callout error on this record-triggered Flow?* * *Can I create a Stripe Invoice from Apex without building a custom integration?* The Stripe App for Salesforce supports two API patterns that can help here. Out-of-the-box invocable actions (`v02_*`) cover the most common Stripe operations (customers, payments, invoices, subscriptions) with pre-built inputs, outputs, and error handling. But when you need a Stripe API method or version that isn't covered by the packaged actions, `agnosticInvocable` lets you make raw API calls to any Stripe endpoint, using the app's pre-built authentication and connectivity layer. You get Stripe API access without managing OAuth, secrets, or named credentials yourself. This is where grounding context pays off at the architecture level, not just the implementation level. When the agent knows both patterns — what the out-of-the-box actions cover and how to fall back to agnostic invocables — it can help you make the right call: use `v02_CreateCustomers` directly, build a helper Apex class using the models reference, or drop down to an agnostic invocable for a raw API call when the packaged surface doesn't cover your use case. These grounding files aren't static: they should get sharper with every implementation. When you find an edge case, or discover a constraint the hard way, tell the agent: ```shell $ claude > Record this learning in the context files ``` The agent updates the grounding rules, and your next iteration or your next project starts smarter. The context becomes a living knowledge base that compounds with every implementation. That's also why the repo is open source. Your local refinements can become shared patterns. Submit a PR, and the next developer who loads the context benefits from what you learned. ### Getting started Here’s how to get started today: ```shell git clone https://github.com/stripe/stripe-salesforce-ai-context.git cd stripe-salesforce-ai-context ``` * You'll need the [Stripe App for Salesforce](https://github.com/stripe/stripe-salesforce-ai-context/blob/main/PREREQUISITES.md) installed in your org. * No org yet? Use the [scratch org quickstart](https://github.com/stripe/stripe-salesforce-ai-context/blob/main/setup/scratch-org-quickstart.md). Point your AI coding tool at the context - Claude Code reads `CLAUDE.md` automatically, Cursor picks up files from `.cursor/rules/`, and other CLI tools can reference the `context/` directory in their system prompt. Try: ```shell $ claude > Generate a Flow that creates a Payment Link when an Opportunity closes and write the URL back to the record. ``` For an end-to-end workflow, pair the grounding context with [Salesforce MCP](https://github.com/salesforcecli/mcp) and [Stripe MCP](https://github.com/stripe/agent-toolkit) servers. Your agent can generate, deploy, and verify without leaving the terminal. The grounding files are versioned and maintained against Stripe App releases. Remember to review before you deploy since these are reference implementations, not production-ready code. Stripe has an extremely large Ruby codebase: our monorepo is the order of 50 million lines of Ruby code, backed by a correspondingly huge test suite—roughly 100,000 Ruby test files and approximately 1.2 million test units. If we ran all of these tests sequentially end to end, a single build would take four months. Which is, of course, implausible. To ensure builds finish within a reasonable time (a few minutes, not four months), we run them over a massively parallel set of workers. At our scale, we run around 50,000 builds a week, a number that is only increasing with AI adoption among our engineering teams accelerating commit rates and productivity. **Selective Test Execution** (internally known as “STE”) is how we keep CI fast and affordable without giving up confidence. Simply put, we don’t run every test on every build. On average, we only run roughly 5% of our full Ruby test suite (with a median value of 0.5%) for a given build, spending \<10% in compute of what an “always run everything” strategy would require. We are able to do this without sacrificing safety. This means that for a typical change, we are able to select and execute a few hundred tests to safely validate it, as opposed to our entire test suite of 100,000 tests. ![](/images/selective-test-execution-at-stripe-fast-ci-for-a-50m-line-ruby-monorepo/image3.png) > **Fig. 1:** Percentage of total test suite executed on average. The average test selection percentage is around 5%, although at least half of our builds execute \<0.5% of tests. ### Building a dependency graph by intercepting file opens A common approach to test selection is static dependency analysis: figure out which code a test depends on by parsing source, building dependency graphs, following package imports, etc. That works well in ecosystems with explicit module boundaries and limited runtime dynamism (and this works for many of the codebases that we have at Stripe today). Ruby is different: even with all of our internal restrictions and conventions, Ruby still retains escape hatches that are extremely hard to model perfectly with static analysis. For example: * Metaprogramming and dynamic dispatch can change the shape of runtime behavior. * Configuration and environment often determine which branches execute. * Tests frequently depend on non-Ruby inputs: YAML and JSON config, templates, fixtures, generated artifacts, and more. The “perfect” version of static selection—predicting exactly what executes at runtime and therefore exactly what the test depends on—is not something you can compute in the general case. Approximations tend to fail in one of two directions: * **Underselection:** Miss a dependency and skip a test that should have run (dangerous). * **Overselection:** Conservatively include too much and end up close to “run everything” (slow). Thus, Stripe’s STE leans on dynamic observation: instead of guessing what a test might touch, we record what it did touch. At a high level, Stripe’s STE works by instrumenting tests and recording which files were accessed during their execution. Then, for a new change, we rerun tests whose previously accessed files intersect with the changed files. This “file-level dependency graph” has two properties we love: * It naturally captures non-Ruby dependencies (config files, fixtures, templates, etc.). * It can be implemented with very low overhead by focusing on file access, not code execution tracing. The foundation of Stripe’s STE is a dynamically linked C++ shared library, built in-house and loaded using `LD_PRELOAD`, which we call `file_access_interceptor`. In broad strokes, it does three things: 1. Provides an external API to tell the interceptor what’s currently running. Our test runner is able to set a “scope,” which essentially maps to the current test that is executing. Any files opened by the test are associated with the test’s “scope.” 2. Intercepts file opens at the operating system level. By intercepting `open` syscalls (and variants), the interceptor can record a mapping from a given opened file to the scope it is opened in. 3. Propagates `LD_PRELOAD` into child processes (analogous to a worm or virus). If a test forks or spawns subprocesses, we keep interception enabled, so file access in those processes is still attributed to the right test scope. ![](/images/selective-test-execution-at-stripe-fast-ci-for-a-50m-line-ruby-monorepo/image2.png) > **Fig. 2:** File access interceptor runs as a low-level utility that monitors file I/O and records the list of files opened by the process. #### Edge cases with instrumenting open syscalls Observing the open syscall is a powerful approach in a dynamically interpreted language like Ruby. Every bit of code or configuration that a Ruby process depends on is necessarily accessed during the lifecycle of the process. Note that this is different from compiled languages (barring dynamic linking), where source file dependencies are statically built into compiled artifacts during the build process. However, this can have edge cases. Some tests can access files without opening them. A good example is tests that use directory globbing or file discovery. For tests like this, the files will not necessarily be `open`\-ed in the test. Adding a new file can change test behavior for these tests without any previously opened file signal. We have a small, limited set of tests at Stripe that have this behavior: typically these are codebase health tests that perform linting rather than verifying production behavior. To bypass the limitation with open, we call these tests mandatory and select them regardless of the results of the selectivity algorithm. #### Making interception fast: Do almost nothing inside open Interception only works if it’s cheap. Ruby tests at Stripe scale already consume massive CPU; adding heavyweight instrumentation would erase the benefit. The design choice in the interceptor is: keep work inside the `open` interception path minimal. While inside the intercepted `open`, we only append a record to a per-process file. These per-process logs are written under a temp directory. Everything more expensive—aggregation, indexing, inversion—is done outside the hot syscall path. #### Scopes: Attributing file access to the right unit of selection STE selection is fundamentally done at the test file level, so we model file access attribution with a simple scope stack. * Every process starts in the root scope (we label this simply: `r`). * When the test runner forks to execute tests for a particular test file, it pushes a new scope. * Scopes are represented as strings separated by `//`. For example, a test file might correspond to a scope like: `//r/file-/cibot/test/tasks/cancel_build_test.rb` Scopes are hierarchical: when deciding whether to run a test file, we consider files opened in that test file’s scope and any parent scope(s). One important consequence: anything opened in root scope effectively becomes a global dependency. If a changed file was opened in root scope, it can force many (or all) tests to run. We view this behavior as a feature, not a bug; it’s the system being honest about shared global dependencies. In our CI test runner, we “preload” some key primitives that are effectively used by all tests: this ensures performant test execution. Any changes to these primitives are classified as in root scope, and trigger all tests. ![](/images/selective-test-execution-at-stripe-fast-ci-for-a-50m-line-ruby-monorepo/image4.png) > **Fig. 3:** Root scope and test scopes. file1 and file2 are recorded as being accessed in root scope, whereas file3 and file4 are recorded in respective test scopes. ### Going from raw logs to a compact selection index The STE pipeline turns “what files did tests open?” into something a build can use quickly. A simplified view of this process has the following steps: 1. Tests run under a wrapper script that enables tracing and interception. 2. Each process produces per-process “opened file → scope” logs. 3. Workers send test unit results to a build scheduler (a sidecar process responsible for scheduling all the tests over a massively parallel set of workers); during that, tooling reads the opened-file logs and sends indexed representations upstream. 4. The scheduler aggregates and inverts the information into a global map of opened file → scopes. We call this the “selection index.” 5. At the end of the build, we write out the compact selection index used for future selection. In addition to the selection index, the scheduler also maintains an inventory of the current set of files in the repository source tree. This is used to detect what changed later. Note this isn’t just git-tracked code in the repository source tree, but also generated artifacts. We call this the “file inventory.” The file inventory is described in more detail in the next section. The selection index is designed for fast lookup and low overhead: * **Data format:** A bitmap, built with [roaring bitmaps](https://roaringbitmap.org/) * **Key:** A global numeric index of the file in the inventory * **Value:** A list of indexes of test files to run if that file changed We use bitmaps as a compact representation that provides fast union or intersection operations—exactly what you want when you’re combining impacted tests across many changed files. In total, we store approximately three billion data points in this bitmap while being able to query it performantly. ![](/images/selective-test-execution-at-stripe-fast-ci-for-a-50m-line-ruby-monorepo/image1.png) > **Fig. 4:** Distributed architecture of the build. A scheduler node distributes tests across multiple workers, which run with the file access interceptor and stream results back to the scheduler. The scheduler then aggregates all the results into a single indexed representation of opened files. #### Selecting tests for a new build: Detect changes, then look up impacted tests Now that we have a selection index and a file inventory, when future builds start, we can use them to select the right set of tests to execute. At build time, selection process looks like the following: 1. Determine which files changed (including generated files). 2. Translate “changed files” into file indexes. 3. For each changed file index, union the bitmap of impacted tests. 4. Apply safety and ergonomics rules (“special cases”). #### Detecting file changes with hashdeep We use hashdeep, a parallelized hash computation utility, to [detect file changes](https://github.com/jessek/hashdeep) between the current commit and the commit baseline associated with the STE data. Note that we can’t just simply use git, because we track both code that is checked into the source tree as well as code that is built by code-generation steps before we run tests. In the previous section, we mentioned that each build produces a file inventory. This inventory is essentially a list of files in the codebase, along with the hash of each file computed by hashdeep. ``` 9d27e374ddab7b5af150ebaa203d180d,/path/to/file1.rb bb5a16e1ba70ab96a2d84e1d43c2cb3d,/path/to/file2.rb f87fdb23e667f0f055af660aadac4c60,/path/to/file3.rb … other files ``` When we start a new build, we compute the file inventory first, and then compare the hashes from the file inventory built by a previous build. This allows us to figure out which files have changed relative to previous, and select tests to execute accordingly. #### Special cases Naively running only the tests correlated to changed files since the previous commit could lead to some unwanted behaviors, and so STE also includes explicit guardrails. Examples include: * Always rerun previously failing tests (users expect failures to persist until fixed). * As explained in a prior section, we always run tests that use directory globbing or file discovery because adding a new file can change behavior without any previously opened file signal. * We include additional handling for linters ([RuboCop](https://github.com/rubocop/rubocop) or YAML lint–style tools), so they don’t force scanning the entire repo; instead, they receive changed-file data and lint selectively. ### Making it reliable at scale The selection algorithm is only as good as our ability to fetch a recent, coherent baseline dataset quickly and reliably. Our current approach is to persist STE build completion state and metadata in a database (internally, we use MongoDB). We then order the build data using an internal primitive we call Monotonic Revision IDs (MRIs)—strictly increasing identifiers that are generated with the key property that ancestry implies ordering: if commit A is an ancestor of commit B, then `MRI(A) < MRI(B)`. This allows us to order build data by commit without needing to actually consult git history as part of the build. ![](/images/selective-test-execution-at-stripe-fast-ci-for-a-50m-line-ruby-monorepo/image5.png) > **Fig. 5:** Leveraging a database to record build baseline metadata, which can be used to power subsequent builds. In this diagram, the build for the Head and M2 commits is powered by data from the prior M1 commit, whose build was completed in time before the subsequent builds began. Then, at the start of a build, we do a single fast DB query keyed by MRI to find the latest completed STE dataset(s) required to make selection decisions. We call the build that corresponds to this dataset the “STE base.” This matters for two reasons: 1. **Reliability and performance:** Selection does not depend on slow, failure-prone multistep discovery at build start. 2. **Reproducibility:** “What baseline did you select?” becomes a debuggable input. You can rerun with the same STE base and reproduce selection behavior deterministically. ### Wrapping up Our Selective Test Execution system employs some clever tricks to allow us to continue scaling our team and our codebase while only running around 5% of our tests on average. The strategy we used to handle the dynamism of Ruby is applicable to any similarly flexible language, and we hope the patterns we used to implement our solution are helpful to other organizations. To sum them up: * Choose a dependency signal that’s robust to language dynamism (file access). * Implement it at a boundary that’s efficient (syscall or file I/O), not at a boundary that’s noisy (per-line execution). * Store and serve the data in a way that’s operationally scalable (single query, monotonic ordering, reproducible baselines). * Layer in pragmatic guardrails for the edge cases real engineers hit every day. If you’re interested in solving developer productivity problems like this, at scale, [we’re hiring](https://stripe.com/jobs). Your agent just helped you crank out a prototype. It runs on localhost, the UI looks good, and the core flow works. Now comes the part that always drags: turning “works on my machine” into a real environment. You open a hosting dashboard. Then a database dashboard. Then auth. Then analytics. You follow setup docs, create accounts, generate keys, paste them into a `.env`, and try to remember where each secret lives and who can see it. By the time you’re done, you’ve got resources scattered across providers and credentials spread across files, terminals, and tabs. It’s hard to make it repeatable, and harder to make it secure. Provisioning a modern app stack is still too manual. Dashboard hopping, brittle setup guides, and copy/paste credentials slow teams down and create key sprawl. It’s even worse with AI agents, because agents need deterministic steps and real credentials, not screenshots and guesswork. [Stripe Projects](https://projects.dev) is a new tool in the Stripe CLI, backed by an integration protocol co-designed with developer tool providers, that lets you provision real services from the terminal, keep resources in your provider accounts, sync agent-ready credentials safely, and upgrade to paid tiers when you need more, without rebuilding your stack or leaving your terminal. ![Video of provisioning Vercel via the Stripe CLI](/images/production-ready-dev-stack-from-terminal/demo.gif) ### Try it yourself In about 10 minutes, you’ll go from a local repo to a working stack backed by provider accounts you own. You’ll attach hosting, a database, auth, analytics, and AI-friendly building blocks, then sync real credentials back into your environment safely. Finally, if your load demands it, you can upgrade a service to a paid tier and have Projects handle payment without re-entering payment details across provider dashboards. #### Step 1: Install the Stripe CLI and create a Project [Install](https://docs.stripe.com/stripe-cli/install) the Stripe CLI and the Stripe Projects CLI plugin. In your local project directory, initialize a project: ```bash brew install stripe/stripe-cli/stripe && stripe plugin install projects stripe projects init [my-app] ``` ##### What you should expect: - A project named `my-app` (or the same as your directory name) is created and populated with `.projects` configurations, a blank `.env`, and relevant agent skills. - You’ll be guided to add new services or link existing provider accounts. - Your project is configured with a secure place to keep credentials, and can sync them into local development, CI, or a team secret manager depending on your workflow. ##### What is a project? A project is the unit Stripe Projects manages. It’s a lightweight manifest plus a Stripe-backed record of the services you’ve attached, the provider accounts you own, and the credentials those services require. It’s designed to make your setup repeatable across machines and teammates, and deterministic enough for agents to operate safely. #### Step 2: Add services from co-design partners We’re co-designing the integration protocol with some of the most popular providers developers use when building a production-ready stack. The protocol standardizes provisioning, plan selection and upgrades, and credential handoff so the Stripe CLI, and your agents, can do this reliably across providers. ##### Services available in the developer preview: | **Provider** | **Categories** | | --- | --- | | [Vercel](https://vercel.com) | Hosting | | [Railway](https://railway.com) | Hosting, Databases, Storage | | [Supabase](https://supabase.com) | Databases, Auth | | [Neon](https://neon.tech) | Databases, Auth | | [PlanetScale](https://planetscale.com) | Databases | | [Turso](https://turso.tech) | Databases | | [Chroma](https://www.trychroma.com) | Vector database | | [PostHog](https://posthog.com) | Analytics | | [Clerk](https://clerk.com) | Auth | | [Runloop](https://www.runloop.ai) | Sandboxes | Example flow: ```bash stripe projects catalog stripe projects add vercel/project stripe projects add neon/postgres stripe projects add clerk/auth stripe projects add railway/bucket stripe projects add chroma/database ``` ##### You should expect: - Resources are provisioned in the provider account you own, with normal access and dashboards. - Credentials are returned in a format that works for humans and agents. - Changes are auditable and repeatable. #### Step 3: Upgrade to a paid tier when you’re ready (with payments handled securely) A common flow is to start on a free tier, then upgrade once your app is real. ```bash # See what you’re running stripe projects status # Upgrade to a paid tier stripe projects upgrade / ``` When you upgrade, Projects will handle the payment step without you re-entering payment details across provider dashboards. You add your payment method to Stripe once. Then, when you select a paid plan in the CLI, Stripe tokenizes your payment credentials into a [Shared Payment Token](https://docs.stripe.com/agentic-commerce/concepts/shared-payment-tokens) and securely grants the provider a scoped payment credential for that upgrade. The provider will charge using that token, while your underlying payment credentials stay protected and are not manually copied around. In the developer preview, this payment handoff is only available in the US, EU, UK, and Canada, for supported providers and plans. #### Step 4: Sync credentials to your environment ```bash stripe projects env --pull ``` This is where Projects earns its keep. The biggest security footgun in developer workflows is still key sprawl: keys living in Slack messages, old `.env` files, random notes, and half-rotated tokens that nobody wants to touch. Projects treats credentials like first-class infrastructure, not strings you paste into random places. That has a huge side benefit for teams. Onboarding a new engineer onto an existing project becomes a predictable, auditable step instead of a scavenger hunt. If someone gets a new laptop, switches dev boxes, or you spin up a fresh environment in CI, you can re-sync the right credentials in minutes with the same flow every time, without exposing secrets more widely than necessary. Here’s what that can look like after a sync, with values redacted: ```bash VERCEL_PROJECT_ID=... NEON_DATABASE_URL=... CLERK_SECRET_KEY=... POSTHOG_PROJECT_API_KEY=... CHROMA_API_KEY=... ``` ### Get started from the CLI or through your coding agent If you want the direct path, [install the Stripe CLI](https://docs.stripe.com/stripe-cli/install) and initialize a project: ```bash brew install stripe/stripe-cli/stripe && stripe plugin install projects stripe projects init [my-app] ``` When you initialize a project, Stripe Projects writes coding-agent skills into your local project directory. Those skills give your agent the context and actions it needs to work against your project locally. From there, you can either use the CLI directly or ask your agent to achieve outcomes like: “Set up Railway hosting and a Neon database for this repo, sync credentials, and add PostHog on the free tier.” Your agent uses the same Stripe Projects CLI workflow under the hood, so provisioning, upgrades, configuration, and credential sync all happen in a deterministic, auditable way without leaving your terminal. Imagine your digital product business is ready to go global. Whether you're selling software licenses or premium content, moving beyond your first few markets brings a new set of architectural hurdles. You need to calculate VAT for customers in Berlin, support Japanese Yen (JPY) for a download in Tokyo, and seamlessly manage a mix of one-time purchases and recurring subscriptions, all while maintaining a branded, embedded checkout experience that keeps customers on your page. For developers looking to build a flexible payment flow with Stripe, there's an integration pattern that should be your default starting point. The [Checkout Sessions API](https://docs.stripe.com/api/checkout/sessions) supports [Stripe’s embeddable UI Elements](https://docs.stripe.com/payments/elements) so you can build a commerce layer that offloads global complexity to Stripe on the backend while maintaining full control over your branded checkout UX. In this post, we’ll explore how to implement this pattern to design a future-proof payment flow. One where complex global features like [Adaptive Pricing](https://docs.stripe.com/payments/currencies/localize-prices/adaptive-pricing?payment-ui=embedded-components#render-currency-selector-element) can be enabled out-of-the-box with a single API parameter rather than a total code rewrite. ## **Understanding Stripe’s payment abstractions** First, let’s look at how Stripe organizes its API objects. Stripe’s architecture is built on two distinct layers of abstraction that interoperate to manage the payment lifecycle: ![](/images/designing-flexible-payment-flows-with-checkoutsessions/image2.png) * Checkout Objects (High-Level): `Payment Link` and `Checkout Session` act as orchestration layers. You configure what to sell (line items, prices, tax settings), and Stripe automatically creates and manages the underlying payment objects throughout the entire lifecycle. A `Payment Link` object generates `Checkout Session` objects each time the shareable URL is opened. * Payment Objects (Low-Level): A `Payment Intent` represents a single payment attempt and tracks its state from creation through completion. Each `Payment Intent` can have multiple `Charge` objects representing individual charge attempts (such as retries after authentication). When you create a `Checkout Session`, Stripe automatically generates a `Payment Intent` behind the scenes and manages its entire lifecycle based on your session configuration. This approach means complex commerce logic like automatic sales tax calculation with [Stripe Tax](https://docs.stripe.com/tax), multi-currency support with [Adaptive Pricing](https://docs.stripe.com/payments/currencies/localize-prices/adaptive-pricing?payment-ui=embedded-components#render-currency-selector-element), [subscription billing](https://docs.stripe.com/subscriptions), and promotional codes is handled through declarative API parameters rather than building logic yourself. Let’s look at how the `Checkout Session` integrates with the Payment Element for a one-time payment: ![](/images/designing-flexible-payment-flows-with-checkoutsessions/image1.png) #### #### **1\. Create a Checkout Session** When you call `POST /v1/checkout/sessions`, you have the option to set parameters to instruct Stripe to handle complex commerce logic. For example, you can set `adaptive_pricing: {enabled: true}` that automatically localizes the presentment currency for a customer purchasing in another country. The `mode` parameter dictates whether the payment is a one-time or recurring payment, or for storing a payment method that maps to a `Payment Intent`, `Subscription` , or `Setup Intent` API call. Setting the `ui_mode` parameter in `Checkout Session` allows you to integrate with Stripe Element components like the [Payment Element](https://docs.stripe.com/payments/payment-element?locale=en-GB) and [Currency Selector Element](https://docs.stripe.com/elements/currency-selector-element) directly on your checkout page instead of using a pre-built checkout form. `ui_mode` supports ‘custom’, ‘hosted’, and ‘embedded’ that allows you to also integrate with Stripe’s redirectable [hosted checkout page](https://docs.stripe.com/payments/checkout?locale=en-GB) and [embedded checkout form](https://docs.stripe.com/checkout/embedded/quickstart). You can also use `payment_intent_data` to set `Payment Intent` parameters (for example, `payment_intent_data.capture_method`) to model payment flows like placing a hold on a card to charge later or passing custom metadata, like an internal order ID, directly to the payment record for downstream reporting. ```javascript const session = await stripe.checkout.sessions.create({ return_url:'https://example.com/return?session_id={CHECKOUT_SESSION_ID}', ui_mode: 'custom', //Enables embeddable UI components support mode: 'payment', //Supports 'payment', 'setup', or 'subscription' //Set to true to use Stripe's automated tax calculation automatic_tax: { enabled: true }, //Localizes presentment currency automatically adaptive_pricing: { enabled: true }, line_items: [ { price_data: { currency: 'usd', unit_amount: 2900, product_data: { name: 'Pro Software License' }, }, quantity: 1, }, ], //Optional: Granular control over the underlying Payment Intent payment_intent_data: { metadata: { order_id: '6789' }, capture_method: 'automatic', // Or 'manual' to authorize now and capture later }, }); //Client Secret passed to frontend to render Payment Element const clientSecret = session.client_secret; ``` #### **2\. Render embedded elements on your frontend** Pass the `client_secret` to your frontend to initialize Stripe Elements. The Payment Element automatically displays relevant payment methods based on the customer's location, currency, and transaction details. ![](/images/designing-flexible-payment-flows-with-checkoutsessions/image3.png) When you include the Currency Selector alongside the Payment Element, customers can choose to pay in their local currency. Stripe detects their location and unlocks relevant, localized payment methods. For example, a customer in the Netherlands sees iDEAL, while a customer in the US sees Credit Cards or Apple Pay, all powered by the same backend session. ```javascript // Load Stripe with your publishable key const stripe = await loadStripe('pk_test_...'); // Initialize Elements with the client secret from your backend const options = { clientSecret: '{{CLIENT_SECRET}}', // Generated by your backend when creating a Checkout Session }; const elements = stripe.elements(options); // Create and mount the Currency Selector Element const currencySelectorElement = elements.create('currencySelector'); currencySelectorElement.mount('#currency-selector'); // Create and mount the Payment Element const paymentElement = elements.create('payment'); paymentElement.mount('#payment-element'); ``` #### **3\. Complete the checkout session** The final step is to submit the payment by calling stripe.initCheckout() with your Payment Element instance. When using the Currency Selector Element, you must also enable Adaptive Pricing in your Stripe Dashboard. When the customer submits the payment, Stripe: 1. Confirms the `Payment Intent` object 2. Automatically handles additional authentication requirements (such as [3D Secure](https://docs.stripe.com/payments/3d-secure?locale=en-GB)) if required by the customer's bank 3. Processes currency conversion when the customer selects a different currency through the Currency Selector ```javascript const checkout = stripe.initCheckout({ clientSecret, //Marks your integration ready for Adaptive Pricing adaptivePricing: { allowed: true } }); ``` Using this higher layer of abstraction lets you easily configure future Stripe features and enables flexible payment flows (like saving payment methods and adding subscription payments) without changing your core API integration. ## **Going global** While the code example above defines a price of $29.00 USD, your integration is no longer tethered to a single currency. Because you enabled `adaptive_pricing`, Stripe uses the customer's IP address and browser headers to determine their local context. If a customer in Tokyo visits your checkout: 1. Automated Conversion: The Currency Selector detects their location and offers to convert that $29.00 USD into Japanese Yen (JPY) based on real-time exchange rates. 2. Localized UI: The Payment Element instantly reorders payment methods, surfacing options popular in Japan, such as Konbini, alongside standard credit cards. 3. VAT/Tax: If the customer were instead in Berlin, Stripe Tax (enabled via `automatic_tax`) would automatically calculate the correct VAT amount and append it to the line items. By defining your base currency (USD) and enabling these declarative flags, you’ve effectively launched in multiple markets with no additional backend logic. ## **When to integrate with Payment Intent directly** The `Checkout Session` API should be your default starting point. However, use the `Payment Intent` API directly when your business model requires full control over commerce logic that `Checkout Session` abstracts away. This typically applies in two scenarios: 1. You need full control over commerce logic and need to manage line items, discounts, and tax calculations yourself. For example, you need an e-commerce cart where users can modify quantities, apply dynamic discounts, or add items after starting checkout. 2. You're building a platform and your own checkout abstraction layer for your customers. For example, if you're building a product like Shopify where your customers embed payments on their sites, you need the flexibility to construct your own checkout abstraction layer. Start with `Checkout Session` and migrate only if your business model demands it. ## **Conclusion** The `Checkout Session` API with Payment Element integration pattern gives you the best of both worlds: Stripe handles global commerce complexity like tax calculation, currency conversion, and line-item management on the backend while you maintain complete control over your checkout UI. As your business grows, this pattern scales with you. It keeps the door open for future Stripe features without requiring a total rewrite of your integration. Start with the `Checkout Session` API to move fast, and only drop down to `Payment Intent` when your checkout flows require more granular control. Ready to implement this pattern? Check out the [quickstart guide](https://docs.stripe.com/payments/quickstart-checkout-sessions) to get started today. As a recap of [Part 1](https://stripe.dev/blog/minions-stripes-one-shot-end-to-end-coding-agents) in this blog miniseries, minions are a homegrown unattended agentic coding flow at Stripe. Over 1,300 Stripe pull requests (up from 1,000 as of Part 1) merged each week are completely minion-produced, human-reviewed, but containing no human-written code. If you haven’t read Part 1, we recommend checking that out first to understand the developer experience of using minions. In this post, we’ll dive deeper into some more details of how they’re built, focusing on the Stripe-specific portions of the minion flow. ### Devboxes, hot and ready For maximum effectiveness, unattended agent coding at scale requires a cloud developer environment that’s parallelizable, predictable, and isolated. Humans should be able to give many agents logically separate work. Agents should have clean environments and working directories: it unnecessarily wastes tokens on resolution if agents are interfering with one another’s changes. Full autonomy also requires the agent to be systematically isolated from acting destructively over privileged or sensitive machines, especially with a human’s personal credentials. It’s challenging to get agents running on a developer’s laptop with all these properties. Containerization or git worktrees can help, but they’re hard to combine and it’s fundamentally difficult to build local agents that have all the power of a developer’s shell but are appropriately constrained. Minions at Stripe get these properties by default, however, by running on the same standard developer environment that Stripe engineers use: the devbox. A Stripe devbox is an AWS EC2 instance that contains our source code and runs services under development. Most human-written Stripe code is already produced within an IDE that’s remotely connected to a devbox via SSH. In DevOps terminology, devboxes are “cattle, not pets”: they’re standardized and easy to replace, rather than bespoke and long-lived. Many engineers use one devbox per task—a Stripe engineer might have half a dozen running at a time. ![](/images/minions-how-stripe-ships-code-end-to-end-with-llms-part-2/image1.png) > A snippet of an engineer’s list of active devboxes, with minion runs We want it to feel effortless to spin up a new devbox, so we aim for it to be ready within 10 seconds. To achieve this “hot and ready” standard, we proactively provision and warm up a pool of devboxes so they are ready when a developer wants them. This includes cloning gigantic git repositories, warming Bazel and type checking caches, starting code generation services that continually run on devboxes, and more. After 10 seconds, the devbox owner has a box checked out to a recent copy of master across all of Stripe’s main repos, which is immediately ready to open a REPL, run a test, make a code change and type check it, or start a web service. We built out devboxes for the needs of human engineers, long before LLM coding agents existed. As it turns out, parallelism, predictability, and isolation were also very desirable properties as well for Stripe engineers to be able to work most effectively. What’s good for humans is good for agents, and building on this infrastructural primitive paid dividends as a natural home for LLM agents. ### The agent In contrast to devboxes that already powered human development, our agent harness was custom-built for the minions use case. In late 2024, as coding agents emerged across the industry, we internally forked [Block’s goose](https://github.com/block/goose)—one of the first widely used coding agents—and customized it to work within Stripe’s LLM infrastructure. Over time, we focused our feature development of goose on the needs of minions, rather than those of human-supervised tools: that’s a use case that’s well-filled by third-party tools such as Cursor and Claude Code, which are already made available to our engineers. In fact, the most unique aspect of minions is the absence of a supervisory human. Off-the-shelf local coding agents are usually optimized for working through code changes as a companion to engineers, typically with one “looking over its shoulder,” so to speak. Minions, however, are fully unattended, so our agent harness can’t use human-facing features such as interruptibility or human-triggered commands to initiate or steer the agent run. On the flip side, the quarantined devbox environment means that the agent doesn’t need confirmation prompts; any mistakes an agent might make are confined to the limited blast radius of one devbox, so we can safely run the agent with full permissions and skip confirmation prompts. We can also dial in optimizations precisely tuned to Stripe’s development flow. We’ve made many small optimizations based on the particulars of Stripe’s systems. A larger optimization—which turned out to be more fundamental to our implementation of minions—is the notion of a blueprint. ### Blueprints The most common primitives for orchestrating an LLM flow are [workflows and agents](https://www.anthropic.com/engineering/building-effective-agents). A workflow is an LLM system that operates via a fixed graph of steps, where each node in the graph is responsible for a narrowly scoped portion of the overall goal, and predefined edges control the execution flow between these discrete nodes. On the other hand, an agent is typically a simpler “loop with tools” orchestration pattern, where the LLM relies on its own judgment to repeatedly call the tools at its disposal and decide—based on the results of those tool calls—what to do next. Minions are orchestrated with a primitive we call “blueprints.” Blueprints are workflows defined in code that direct a minion run. Blueprints combine the determinism of workflows with agents’ flexibility in dealing with the unknown: a given node can run either deterministic code or an agent loop focused on a task. In essence, a blueprint is like a collection of agent skills interwoven with deterministic code so that particular subtasks can be handled most appropriately. In the blueprint that powers minions, for example, there are agent-like nodes with labels such as “Implement task” or “Fix CI failures.” Those agent nodes are given wide latitude to make their own decisions based on input. However, the blueprint also has nodes with labels such as “Run configured linters” or “Push changes,” which are fully deterministic: those particular nodes don’t invoke an LLM at all—they just run code. Thus, blueprints are a way to guarantee certain subtasks are completed deterministically within the agentic run. The minion blueprint ends up looking like a state machine that intermixes deterministic code nodes and free-flowing agent nodes. ![](/images/minions-how-stripe-ships-code-end-to-end-with-llms-part-2/image2.png) > Example blueprint. Deterministic nodes are indicated with rectangles, and agentic subtasks are indicated with the cloud shape. In our experience, writing code to deterministically accomplish small decisions we can anticipate—such as “always lint changes at the end of a run”—saves tokens (and CI costs) at scale and gives the agent a little less opportunity to get things wrong. In aggregate, we find that “putting LLMs into contained boxes” compounds into system-wide reliability upside. Blueprint machinery makes context engineering of these subagents easy, whether that consists of constraining tools, modifying system prompts, or simplifying the conversation context as required for the subtask at hand. Individual teams can also set up blueprints optimized for their specialized needs. For example, we’ve had teams build custom blueprints to encode running tricky LLM-assisted migrations across the codebase that couldn’t be accomplished with a straightforward fully deterministic codemod. ### Context gathering: Rule files In a large codebase such as Stripe’s, an agent set loose without any guidance might encounter trouble following best practices or using the proper libraries, even with good linters. To help with this issue, various agent rule formats—think CLAUDE.md or AGENTS.md—allow agents to “learn” about the codebase automatically as they traverse its directory structure. Due to the size of our repositories, we use unconditional global rules very judiciously, since otherwise the agent’s whole context window would fill with rules before the agent even starts. Instead, we almost exclusively give minions context from files that are scoped to specific subdirectories or file patterns, automatically attached as the agent traverses the filesystem. From our perspective, it’s best to avoid duplication of rule files in favor of our agent reading the same context that human-directed agents use. Given that, we standardized on a popular rule format that supported these features—[Cursor’s](https://cursor.com/docs/context/rules)—and modified our harness to allow minions to read those rules in addition to a previous homegrown format. We also now sync our Cursor rules into a format that Claude Code can read as well, so that our three most popular coding agents (minions, Cursor, and Claude Code) can all benefit from the guidance that lives in rule files that Stripe engineers are scaffolding in our codebase. ### Context gathering: MCP Reading from a filesystem works well for static context gathering, but agents frequently need to dynamically fetch information using networked tool calls. In particular, to fully hydrate user requests, minions need to retrieve information such as internal documentation, ticket details, build statuses, code intelligence, and more. Upon release, the Model Context Protocol (MCP) quickly became the industry-wide standard for networked tool calls, and we moved to integrate minions with it. Stripe has built or integrated lots of agents running on different frameworks: a no-code internal agent builder, custom agents running on dedicated services, third-party off-the-shelf agents, command-line agentic tools and other coding agents, and agentic Slack bots. All these agents, not just minions, needed MCP capabilities, often including overlapping sets of common tools. To support all of these, we built a centralized internal MCP server called Toolshed, which makes it easy for Stripe engineers to author new tools and make them automatically discoverable to our agentic systems. All our agentic systems are able to use Toolshed as a shared capability layer; adding a tool to Toolshed immediately grants capabilities to our whole fleet of hundreds of different agents. Toolshed currently contains nearly 500 MCP tools for internal systems and SaaS platforms we use at Stripe. Agents perform best when given a “smaller box” with a tastefully curated set of tools, so we configure different agents to request only a subset of Toolshed tools relevant to their task. Minions are no exception and are provided an intentionally small subset of tools by default, although per-user customizability allows engineers to configure additional thematically grouped sets of tools for their own minions to use. Since minions operate autonomously with full freedom to call their MCP tools, we also have an internal security control framework that ensures they can’t use their tools to perform destructive actions. As a first line of defense, though, our devboxes already run in our QA environment, and consequently, minions don’t have access to real user data, Stripe’s production services, or arbitrary network egress. This is no accident: we built isolated devboxes deliberately, so humans have an environment they can experiment within safely. But, as with so much else, a development environment that’s safe for humans has proven to be just as useful for minions. ### … and iterate While we build minions with the goal of one-shotting their tasks, it’s key to give agents automated feedback that they can iterate against to make progress. Stripe’s enormous preexisting battery of tests—over three million of them—can provide this feedback. However, while a pushed branch will run all relevant tests in CI, we don’t want to rely too heavily on CI for all our code feedback. We try to operate under the principle of “shifting feedback left” when thinking about developer productivity. That phrase means that if we know an automated check will fail CI, it’s best if it’s also enforced in the IDE and presented to the engineer right away, since that’s the fastest way to provide feedback to the user. For example, we have pre-push hooks to fix the most common lint issues. A background daemon precomputes lint rule heuristics that apply to a change and caches the results of running those lints, so developers can usually get lint fixes in well under a second on a push. Minions naturally integrate with this framework as well, so they don’t have to waste tokens or CI minutes by iterating against an auto-formatter or similar. We run a subset of linters as a deterministic node within the agent devloop blueprint, and loop on that lint node locally before pushing an agent’s branch, so that the branch has a fair shot at passing CI the first time around. It’s infeasible to run all tests locally, so we also include one iteration against the full CI suite into the standard minion blueprint. After a minion pushes a change, we run CI and auto-apply any autofixes for failing tests. If there are failures with no autofix, we send the failure back to a blueprint agent node and give the minion one more chance to fix the failing test locally. After the second push and CI run, we send the branch back to its human operator for manual scrutiny. Why have only one or two rounds of CI? There’s a balancing act between speed and completeness here; CI runs cost tokens, compute, and time, and we think there are diminishing marginal returns if an LLM is running against indefinitely many rounds of a full CI loop. We feel that our policy strikes a good balance between the competing considerations here. ### In conclusion Minions are just one way that Stripe is using AI to accelerate our engineers, but we think they’re a great example of how we’re able to blend industry-standard concepts—such as agent harnesses and MCP—with our own mix of internal tooling and infrastructure that our engineers have relentlessly tuned over the years to maximize developer productivity. Whether it’s through improving documentation, developer environments, or iteration loops, we’ve found time and time again that our investments in human developer productivity over time have returned to pay dividends in the world of agents. Minions have already changed the landscape of software engineering at Stripe. We’re continuing to make them better as we build out our agent experience with the latest and greatest from the industry at large, adapted to work at Stripe scale. Combined with the taste and expertise we’ve learned in hard-fought battles for human developer experience, we’ll make them the best they can be. Interested in working with, or on, minions? [Stripe is hiring](https://stripe.com/jobs). You’re a developer at a growing online bookshop where customers are browsing shelves of bestsellers, filling their carts with everything from sci-fi novels to cookbooks, but there’s one critical piece missing before you can launch: a smooth, reliable checkout page. It sounds straightforward until you realize how much has to happen behind a single Pay button in just a few seconds. Your system must: * Communicate with card networks like Visa and Mastercard through multiple intermediaries * Coordinate with the customer's bank for real-time fund verification and authorization * Run fraud detection checks and risk assessment * Comply with regulations like [PCI-DSS](https://stripe.com/guides/pci-compliance), [Strong Customer Authentication](https://stripe.com/guides/strong-customer-authentication) (SCA) in Europe, and data privacy laws like [GDPR](https://stripe.com/resources/more/gdpr-compliance-e-commerce-germany) * Handle currency conversion with varying decimal precision across 135+ currencies * Support diverse payment methods from cards to Apple Pay to buy-now-pay-later, each with unique integration requirements * Manage payment states that go far beyond simple success or failure All of this needs to happen in 2-3 seconds or customers abandon their carts. Stripe abstracts payment networks, banking relationships, compliance requirements, and fraud detection, into a unified API so you don’t have to build direct integrations or manage PCI-compliant infrastructure. This blog walks you through the PaymentIntent lifecycle as a [state machine](https://ocw.mit.edu/courses/6-01sc-introduction-to-electrical-engineering-and-computer-science-i-spring-2011/063daea1b8a3573d2aff0f0b96d390da_MIT6_01SCS11_chap04.pdf), and shows how webhooks keep your systems in sync when payment states change. ## **Understanding the state machine of a Stripe payment journey** Let's look at what happens during a card transaction using Stripe's core payment primitive, the `PaymentIntent` object. A `PaymentIntent` represents your intent to collect payment from a customer and tracks the payment lifecycle end to end. Think of a payment as a state machine that moves through multiple stages: ![](/images/building-a-mental-model-for-stripe-payments/image1.png) 1. **Customer checkout:** Your customer is ready to checkout. Your application creates a shopping experience, captures cart details (items, total amount, currency) and collects payment method details. You create the `PaymentIntent` as soon as you know the amount and currency. This records the intent to charge even if the payment ultimately fails. ```javascript // Server-side: Create PaymentIntent setting the amount and currency const paymentIntent = await stripe.paymentIntents.create({ amount: 4999, // Amount in cents ($49.99) currency: 'usd', }); //Returns PaymentIntent object with a client_secret and status: 'requires_payment_method' ``` Then you render the [Payment Element](https://docs.stripe.com/payments/payment-element?locale=en-GB), an embeddable Stripe-hosted UI component that prevents sensitive card details from touching your servers, on the frontend using the `client_secret`. The `client_secret` is a unique key returned on a `PaymentIntent` object that enables client-side retrieval and is used by Stripe’s client SDKs to confirm the `PaymentIntent` and complete the payment: ```javascript //Render the Payment Element passing in the PaymentIntent's client_secret const elements = stripe.elements({ clientSecret: 'CLIENT_SECRET'}); const paymentElement = elements.create('payment'); paymentElement.mount('#payment-element'); ``` 2. **Tokenization**: Once the customer enters card details, you need to collect and send them securely. Stripe provides PCI-compliant interfaces (hosted pages or embeddable components) so you never need to handle sensitive PCI data. Stripe converts sensitive payment details into a single-use token. This is a safe reference to the card that you can send to your server. The actual card numbers are encrypted and stored in Stripe's vault, allowing you to only handle non-sensitive tokens. Stripe’s hosted surfaces leverage client-side tokenization, the process of converting sensitive card data into a non-sensitive unique identifier referred to as a token, allowing you to confirm the `PaymentIntent`, attach the payment method details and instruct Stripe to begin authorization in a single call: ```javascript //Client-side: Confirm payment (tokenizes and authorizes in one call) stripe.confirmPayment({ elements, confirmParams: { // Return URL where the customer should be redirected after the PaymentIntent is confirmed. return_url: 'https://example.com', }, }) .then(function(result) { if (result.error) { // Inform the customer that there was an error. }}); ``` 3. **Authentication and authorization:** Stripe routes the request to the card network and issuing banks to verify the cardholder and available funds. In the background, Stripe performs fraud checks and risk evaluation, and may retry intelligently to improve authorization rates. Once verified, the bank places a hold on the funds. If required (commonly for [SCA](https://stripe.com/guides/strong-customer-authentication) in Europe) Stripe also guides the customer through [3D Secure (3DS)](https://docs.stripe.com/payments/3d-secure?locale=en-GB) or redirects them to a bank authorization page when calling `stripe.confirmPayment()`. 4. **Capture**: After authorization succeeds, Stripe captures the payment. A capture indicates to Stripe that the funds are ready to be acquired and triggers the movement of funds. You can capture immediately or later (for example, when you ship the product). The `PaymentIntent` creates a `Charge` object that represents a single attempt to charge the card. Stripe translates the raw response codes from the bank and card network into readable messages and surfaces them in the `Charge` object. You can observe the downstream actions and results that Stripe performs on your behalf. For example, in the webhook event response for `payment_intent.succeeded` below we see that the charge was approved by the card network and authorized by the bank. ```javascript //Webhook event: payment_intent.succeeded { "data": { "object": { "id": "pi_xxx", "object": "payment_intent", "charges": { "object": "list", "data": [ { "id": "ch_xxx", "object": "charge", "amount": 4999, "amount_captured": 4999, "outcome": { "network_status": "approved_by_network", "risk_level": "normal", "risk_score": 48, "seller_message": "Payment complete.", "type": "authorized" } } ] } } } } ``` 5. **Settlement and Reconciliation:** After capture, Stripe coordinates the clearing and settlement process with card networks and banks, batches transactions, and sends funds to your business bank account. This happens typically 2-3 days after the initial transaction. Even after the on-page checkout flow ends, the payment can still change state. This is why webhooks are essential for keeping your system in sync. A webhook is a way for one system to automatically notify another system when something happens. Instead of your app repeatedly checking (or polling) to see if a payment succeeded or failed, Stripe sends your app a message as soon as that event occurs. It’s like subscribing to real-time delivery updates. You get the status change when it happens. ## **Listen to webhooks for managing asynchronous processes** Your application needs to react to payment state changes that might happen minutes, hours, or days after the initial charge. Customers can request refunds or raise a dispute with their bank days after the charge has been processed. To manage these asynchronous events reliably, set up webhook listeners so your app can respond the moment Stripe posts a status update. Common event types your application (or downstream systems) may need to handle include: * `payment_intent.succeeded` - confirms the payment completed successfully * `payment_intent.requires_action` - indicates additional customer authentication or action is required * `charge.failed` - occurs when a charge attempt fails * `charge.dispute.created` - occurs when a customer disputes a charge with their bank For example, by listening to the `payment_intent.succeeded` webhook event, you can trigger your order management system to ship the books to the customer once payment is confirmed. Additionally, by listening to the `charge.dispute.created` webhook event, you can be notified when a customer disputes a charge and take appropriate action, such as providing evidence of the books being delivered or issuing a refund. Treat these webhook events as the source of truth for payment state, so your app and downstream systems stay accurate and resilient without polling or guessing about when changes will occur. ## **Conclusion** Payments are inherently complex and behave like state machines. Every transaction moves through checkout, tokenization, authorization, capture, and settlement, and state changes can occur asynchronously at any point in that lifecycle. Think of payments as event-driven, not request-response, like ordering a book for your shop. You don’t wait by the door for the delivery, but instead you get notified when it arrives and then shelve the book. To keep your system accurate after the initial charge, use Stripe webhooks as the source of truth for payment state changes. If you’re ready to make your integration resilient, start by implementing and testing your webhook endpoint using Stripe’s [Webhooks Quickstart,](https://docs.stripe.com/webhooks/quickstart?locale=en-GB) then use the [event type reference](https://stripe.com/docs/api/events/types) to choose the events that your applications need to handle. Across the industry, agentic coding has gone from new and exciting to table stakes, and as underlying models continue to improve, unattended coding agents have gone from possibility to reality. Minions are Stripe’s homegrown coding agents. They’re fully unattended and built to one-shot tasks. Over a thousand pull requests merged each week at Stripe are completely minion-produced, and while they’re human-reviewed, they contain no human-written code. Our developers can still plan and collaborate with agents such as Claude and Cursor, but in a world where one of our most constrained resources is developer attention, unattended agents allow for parallelization of tasks. A typical minion run starts in a Slack message and ends in a pull request which passes CI and is ready for human review, with no interaction in between. We frequently see engineers spinning up multiple minions in parallel, to enable them to parallelize the completion of many different tasks. This can be particularly helpful during an on-call rotation to effectively resolve many small issues that might arise. In the first part of this blog post miniseries, we’ll show you how our engineers use minions and what they can do. In Part 2, we’ll dive into the implementation under the hood and how we built them. ### Why did we build it ourselves? Vibe coding a prototype from scratch is fundamentally different from contributing code to Stripe’s codebase. Stripe’s codebase encompasses hundreds of millions of lines of code across a few large repositories. Most of our backend is written in Ruby (not Rails) with Sorbet typing, a relatively uncommon stack. Throughout, our code uses a vast number of homegrown libraries that are unique to Stripe and therefore natively unfamiliar to LLMs. The stakes are high: this code moves well over $1 trillion per year of payment volume live in production. Simultaneously, Stripe has many intricate real-world dependencies on financial institutions and regulatory and compliance obligations that our code must honor. LLM agents are incredibly good at building software from scratch when there are relatively few constraints on a system. However, iterating on any codebase of the scale, complexity, and maturity of Stripe’s is inherently much harder. Humans must build sophisticated mental models to make effective changes in our repos, and enabling agents to develop the correct intuitions and use the correct tools within the confines of their context windows is challenging. Over the years, Stripe has invested in developer productivity foundations that support our unique constraints at all stages in the development lifecycle—source control, environments, code generation, CI, and much more—and so our custom minion harness tightly integrates with that tooling. Minions use the same developer tooling that equally enables Stripe’s human engineers to effectively operate on our scale: if it’s good for humans, it’s good for LLMs, too. ### What is it like to use a minion? There are several different entry points for minions, designed to integrate as ergonomically as possible with where Stripes are. While we provide CLI and web interfaces for initiating minions, engineers will most frequently start one from Slack. By tagging our Slack app, engineers can kick off a minion directly from the thread discussing a change, and it’ll be able to access the entire thread and any links included as context. If you’re an engineer working on internal tools, you might kick off a minion with a message like this: ![](/images/minions-how-stripe-ships-code-end-to-end-with-llms-part-1/image1.png) > A Slack message invoking a minion run Minions can also be invoked from inside other internal applications at Stripe. Our internal docs platform, feature flag platform, and internal ticketing UI all integrate with minions. For example, when our CI systems detect flaky tests, we create automated tickets that prompt users to fix the problem with a minion. ![](/images/minions-how-stripe-ships-code-end-to-end-with-llms-part-1/image2.png) > A flaky test ticket with a button to start a minion that’d fix it While the minion works, or after the fact, engineers can see the decisions and actions the minion took in a web UI. ![](/images/minions-how-stripe-ships-code-end-to-end-with-llms-part-1/image3.png) > An example of the web interface for managing minion runs Once it has completed its task, a minion creates a branch, pushes it to CI, and prepares a pull request following Stripe’s PR template. If the code looks good, the engineer opens the PR and requests a review from another Stripe engineer. If not, they can give the minion further instructions, and it will push updated code to the branch when it’s done. Engineers can also iterate on a completed minion run manually once it’s completed. While our North Star is a pull request produced without any human code, a minion run that’s not entirely correct is often still an excellent starting point for an engineer’s focused work. ### How do minions work? There are many stages to a minion, and in the second part of this miniseries, we’ll have more details about how minions work. Many of the details are Stripe-specific, but we do think that there are some generalizable lessons. To whet your appetite, here’s a brief chronological tour. A minion run starts in an isolated developer environment—or “devbox”—which are the same type of machine that Stripe engineers write code on. Devboxes are pre-warmed so one can be spun up in 10 seconds, with Stripe code and services pre-loaded. They’re isolated from production resources and the internet, so we can run minions on devboxes without human permission checks. This also gives parallelization without the overhead of something like git worktrees, which wouldn’t scale at Stripe. The core agent loop runs on a fork of Block’s coding agent [goose](https://github.com/block/goose), one of the first widely used coding agents, which we forked early on. We’ve customized the orchestration flow in an opinionated way to interleave agent loops and deterministic code—for git operations, linters, testing, and so on—so that minion runs mix the creativity of an agent with the assurance that they’ll always complete Stripe-required steps like linters. In general, minions read the same coding agent rule files that human-operated tools such as Cursor and Claude Code do, consuming several different agent rule file formats. However, it would be impractical for Stripe to have many unconditional rules, so almost all agent rules at Stripe are conditionally applied based on subdirectories. Minions are connected to MCP, which provides a common language for networkable LLM function calling. This is how they gather context like internal documentation, ticket details, build statuses, code intelligence via Sourcegraph search, and more. Indeed, we deterministically run relevant MCP tools over likely-looking links before a minion run even starts, to better hydrate the context. Since MCP is a common language for all agents at Stripe, not just minions, we built a central internal MCP server called Toolshed, which hosts more than 400 MCP tools spanning internal systems and SaaS platforms we use at Stripe. Minions and other agents have connectivity to configurable but curated subsets of the full breadth of tools. Minions are built with the goal of one-shotting their tasks, but if they don’t, then it’s key to give agents feedback. We do this via several automated layers of tests that minions can iterate against. The first line of defense is an automated local executable, which uses heuristics to select and automatically run selected lints on each git push. This takes less than five seconds. We seek to “shift feedback left” when thinking about developer productivity. That means that it’s best for humans and agents if any lint step that would fail in CI is enforced in the IDE or on a git push, and presented to the engineer immediately. If the local testing doesn’t catch anything, CI selectively runs tests from Stripe’s battery of tests—there are over three million of them—upon a push. Many of our tests have autofixes for failures, which we automatically apply. If a test failure has no autofix, we send it back to the minion to try and fix. Since CI runs cost tokens, compute, and time, we only have at most two rounds of CI. If tests fail after an initial push, we prompt the minion to fix failing tests and push a second time, but are then done. There’s a balancing act between speed and completeness here, and there are diminishing marginal returns for an LLM to run many rounds of a full CI loop. We feel this guidance of “often one, at most two, CI runs—and only after we’ve fixed everything we can locally” strikes a good balance. In short, minions are set up with the same tools we give human engineers and the necessary context to follow Stripe best practices in the code they write. And engineers can and do invoke them ergonomically as part of their normal job duties. ### What’s next? Minions have already reimagined what it’s like to code at Stripe. The industry is still exploring what the future of agentic coding will look like, but we’re sure that the unattended code agent use case will remain among the most exciting applications of agents. In [Part 2](https://stripe.dev/blog/minions-stripes-one-shot-end-to-end-coding-agents-part-2), we’ll dive more deeply into how we implemented minions. Interested in working with, or on, minions? [We’re hiring](https://stripe.com/jobs). Setting up a Stripe configuration with AI agents can feel like a superpower. You describe what you want, the agent makes the necessary API calls, and your account is ready in minutes. The problem is that those successful one-off changes rarely become a durable source of truth. A week later, it is hard to answer questions such as what products and prices exist, how your sandbox and livemode accounts differ, and what exactly changed over time without digging through old threads or reverse engineering the Stripe Dashboard. This post shows a safer pattern: use AI agents to author Terraform, not to operate your Stripe account directly. With the [Stripe Terraform provider](https://docs.stripe.com/terraform), you can define products, prices, and webhook endpoints as code, review changes in pull requests, and apply them consistently across Stripe sandboxes and live mode. The end result is repeatable Stripe configuration you can audit, reproduce in new environments, and evolve over time without accumulating mystery state from ad hoc agent runs. If you already use Terraform (or want to), the goal is straightforward. Describe the Stripe objects you want in .tf files, let the agent generate the initial configuration, and rely on the `terraform plan` and `terraform apply` CLI commands to make changes safely. ## The challenge of using AI agents for infrastructure There are three major challenges to setting up infrastructure using AI agents. **Transparency:** Monitoring one-off API calls within an agent run is difficult. Agents often perform multiple tasks initiated by a single user prompt, burying API calls somewhere in the middle of long threads. Furthermore, AI agent runs are often ephemeral, used for a specific task and then discarded. Locating details of an API call from an AI agent days or even hours after the fact often requires developers to sift through many dozens of old threads often to no avail. **Consistency:** AI agents are notoriously stochastic. Giving the exact same prompt twice to the same agent often does not produce the same output, leading to inconsistent configuration between development and production environments. This drift between environments can cause subtle bugs downstream as everything seems to work in your test environment but then fails when moving to production. **Auditability:** API calls are not descriptive of an object’s current state, only the intended destination of how you are changing the object. This means even if you have a full record of all the API calls you have made, it can be difficult to see the exact state at a single moment in time, especially when you have made many edits over time. ## Terraform: A better way to configure your Stripe resources Terraform elegantly solves the problems of transparency, consistency, and auditability. With Terraform, your Stripe configuration lives in code (.tf files) that you can review, version, test, and deploy using the same workflows you already use for application code. Terraform solves the core problems listed above: **Transparency (you can see what exists):** Terraform makes the desired state explicit. Instead of guessing what an agent may have created through scattered API calls, you can open your repository and see the full set of Stripe resources as code. **Consistency (you can reproduce it):** Terraform is declarative: you describe what you want, and Terraform converges on that state deterministically. That means you can: * Reuse the same modules across dev/staging/prod * Parameterize environment differences (for example, webhook URLs) via variables * Get repeatable, predictable results even if the AI agent is stochastic **Auditability (you can track change over time):** Once Stripe infrastructure is expressed in Terraform, you automatically inherit standard software auditing: * Git history shows who changed what and when * Pull request reviews capture why a change was made In other words, you move from “an agent did something at some point” to “here is the exact diff that was reviewed and applied.” ## Example: Define a pricing plan in Terraform If you ask an AI agent to “set up a $20/month plan and a $200/year plan in Stripe using Terraform,” this is the kind of concrete, reviewable configuration it should produce: a product, two prices, and a webhook endpoint captured as code. Create a [`main.tf`](http://main.tf) file: ```shell terraform { required_providers { stripe = { source = "stripe/stripe" version = "~> 0.1" } } } provider "stripe" { # API key is read from STRIPE_API_KEY environment variable } variable "webhook_url" { type = string description = "Public URL Stripe should send webhook events to" } # One product... resource "stripe_product" "standard_plan" { name = "Standard Plan" description = "Simple subscription with monthly and annual billing" } # ...with a $20/month price resource "stripe_price" "standard_monthly" { product = stripe_product.standard_plan.id currency = "usd" unit_amount = 2000 # $20.00 recurring { interval = "month" } } # ...and a $200/year price resource "stripe_price" "standard_yearly" { product = stripe_product.standard_plan.id currency = "usd" unit_amount = 20000 # $200.00 recurring { interval = "year" } } resource "stripe_webhook_endpoint" "billing" { url = var.webhook_url enabled_events = [ "checkout.session.completed", "invoice.paid", "invoice.payment_failed", "customer.subscription.created", "customer.subscription.updated", "customer.subscription.deleted", ] } output "monthly_price_id" { value = stripe_price.standard_monthly.id } output "yearly_price_id" { value = stripe_price.standard_yearly.id } ``` Run it in your Stripe sandbox: ```shell export STRIPE_API_KEY="sk_test_..." terraform init terraform plan -var='webhook_url=https://api.example.com/webhooks/stripe' terraform apply -var='webhook_url=https://api.example.com/webhooks/stripe' ``` ## Best practices The safest way to combine AI agents with infrastructure is to make the agent a code author, not an operator. Instead of prompting an agent to “create a Stripe product and price,” prompt it to “set up my pricing structure XYZ using Terraform”. The agent then updates the Terraform files that you can review like any other code change. This is the workflow: 1. You describe the Stripe setup (for example, $20/month subscription or $200/year) 2. The AI agent translates that into the necessary Stripe objects (products, prices, webhook endpoints, etc.) 3. The AI agent creates or edits Terraform files 4. In development, you run `terraform plan` to validate the changes, then `terraform apply` 5. In production, your CI/CD pipeline runs `terraform apply` once the changes have been approved and merged **Using multiple environments:** When you’re managing both Stripe sandbox mode and livemode, it’s important to keep them isolated so you don’t accidentally apply sandbox changes to production (or vice versa). Terraform workspaces help by giving each environment its own separate state, while you keep the same Terraform configuration. Instead of maintaining two different copies of your Terraform code, you keep one set of `.tf` files and use: * A sandbox workspace for Stripe sandbox mode * A livemode workspace for Stripe production This is the workflow: * You create two Terraform workspaces: one for sandbox and one for livemode * You select the workspace you want to work in * You set the matching Stripe API key for that environment * You run `terraform plan` to confirm what will change, then `terraform apply` to apply it * You repeat the same process for the other environment when you’re ready Create workspaces for sandbox and livemode: ```shell terraform workspace new sandbox terraform workspace new livemode ``` List and verify available workspaces: ```shell terraform workspace list ``` Work in sandbox (Stripe sandbox mode): ```shell terraform workspace select sandbox export STRIPE_API_KEY="sk_test_..." terraform plan terraform apply ``` Work in livemode (Stripe production): ```shell terraform workspace select livemode export STRIPE_API_KEY="sk_live_..." terraform plan terraform apply ``` The key idea is that the selected workspace determines which state file Terraform is using, and the STRIPE\_API\_KEY you export determines which Stripe environment you’re actually modifying. Keeping those two aligned makes this approach safe. ## Conclusion AI agents are powerful tools for building software, but they shouldn’t be your source of truth for your Stripe infrastructure. Terraform provides an elegant solution to the difficulties of setting up your Stripe account in a world of AI development. With Terraform, your resources are easy to review, diff, and audit over time, leading to faster development, safer deploys, and much more stable resources. To learn more about developing applications with Stripe, visit our [YouTube Channel](https://www.youtube.com/stripedevelopers) and take a look at the additional resources linked below. [Stripe Workflows](https://docs.stripe.com/workflows?locale=en-GB) helps you automate the routine parts of your business, send a receipt after a payment succeeds, notify your team when a payout fails, route orders based on inventory, or trigger follow-ups when a dispute is opened. They’re the kind of thing you set up, trust to run, and don’t think about again until something in your business changes. And something always does. Maybe you tighten a fraud check, add a retry, or adjust the timing of an email. These sound like small changes, but they all require touching a workflow that’s already in production. And that’s where things often get stressful. ## The challenge of updating live workflows A common pattern we see is that “I hope this doesn’t break anything” moment. You open a workflow that’s been running smoothly for months, change a step, and worry you might affect a live flow. If the change behaves unexpectedly, there’s no easy way to revert. If a colleague edited it last week, you may not know what changed or why. And if a customer hits a strange edge case, you can’t always inspect what the workflow looked like when it ran. These moments aren’t rare, they’re the natural result of updating logic that’s already in use, without having the tools to track changes or recover easily when something goes wrong. Before versioning, updating a workflow required a level of caution that didn’t match the simplicity of the change you were trying to make. You might only want to adjust one condition or add one more action, but doing so meant editing the live workflow definition directly. There was no draft state, no safety net, and no way to preserve what previously worked. Each save overwrote the last version entirely. Sandboxes helped, but only in a limited way. You could build and test a workflow safely in a sandbox, but once it was deployed to live mode, any future edits, no matter how small, risked unintended side effects. And because Workflows didn’t keep historical definitions, reverting wasn't possible. If a change caused unexpected behaviour, you had to manually reconstruct the old logic from memory or screenshots, then hope you rebuilt it correctly. Even small mistakes could ripple into production without an easy path back to a known state. Troubleshooting was just as constrained. The run details page lets you inspect what happened during a run, but only the path taken. If a branch wasn’t run, you couldn’t see what the structure of the workflow looked like at the time. If an issue appeared days later, you might be looking at a run that used a workflow definition that no longer exists. This meant debugging required guesswork, and often trying to remember how the workflow used to be configured. And for teams, collaboration added another layer of uncertainty. If someone updated a condition or rewired a branch, there was no way to know who made the change or why. Context lived in people’s heads, slack threads, or direct messages, but not in the workflow itself. In practice, this meant teams were slower to improve automations, more hesitant to make changes to logic, and less confident when debugging. The workflows were reliable, but the process of updating and understanding them wasn’t as easy as it should have been. The friction came not from the workflows themselves, but from the lack of tooling around how they changed over time. ## A safer way to evolve workflows Versioning gives you a safe, predictable way to evolve your workflows, without losing track of what changed along the way. Instead of editing the active workflow directly, you now have a dedicated draft where you can make updates at your own pace whether that’s adjusting a condition, adding a new step, or reorganizing branches. This separates the process of iterating on logic from the logic that’s currently running in production. Each published version captures a full snapshot of the workflow definition at that moment in time. That means you can always see exactly which version ran, what branch was taken, and which branches weren’t, something that simply wasn’t possible before. And if a new change doesn’t behave the way you expected, you can roll back to a known good version in a single click. This turns recovery from a manual reconstruction exercise into a straightforward action. You can also annotate each version with a description explaining the “why” behind the change. Over time, this builds a clear, shared record of updates across your team so there’s no more guessing and no more diff hunting. Teams gain the context that normally lives in Slack threads or personal notes, directly in the workflow itself. Versioning is designed to make workflow updates safe, reversible, and understandable. It takes the stress out of shipping changes and gives you the visibility you’ve been missing. You can update workflows with the same confidence you have when building software, with drafts, history, and the ability to look back at exactly what ran. ![](/images/introducing-versioning-for-stripe-workflows/image1.png) ## How versioning works Versioning adds three core elements to Workflows: drafts, published versions, and version history, and each one supports a different part of how you update automations safely. Together, they give you a controlled, predictable way to evolve a workflow while keeping the active version stable. ### Drafts: a dedicated place to iterate Every workflow has a draft. When you create a workflow for the first time, you start directly in this draft. When you return later and choose “Edit workflow”, you’re editing the draft again, not the active version. Drafts are where all edits happen. You can add new steps, introduce branches, or adjust conditions, update messages, or refine logic over time. The draft doesn’t run in production, and changes aren’t applied until you publish. Drafts also behave like a workspace that you can return to. Saving a draft simply keeps your progress so you can continue editing it later without losing any changes. If you leave without saving, the editor prompts you that the changes will be lost. Drafts make it possible to evolve a workflow gradually. You can make a few edits today, return tomorrow, and continue exactly where you left off, all without affecting the active version that you rely on. When you’re ready to make the workflow live, you publish the draft. Publishing is what creates a new active version and determines how future runs behave. Until then, the draft is isolated and has no effect on production. ### Published versions: immutable snapshots When you publish a workflow, Stripe creates a new numbered version. This is a complete, frozen snapshot of the workflow’s definition at that exact moment. This includes every step, branch, condition, variable reference, call, and configuration detail. This published version becomes the active version. All new workflow runs use this definition immediately. Any runs already in progress finish on the version they started on, ensuring consistency and preventing mid-run surprises. Published versions are immutable. Once created, they cannot be edited or modified. Any future change, whether it’s adding a step, adjusting a condition, or restructuring a branch, always begins in the draft, never in a live version. Publishing again will generate the next numbered version, for example, promoting a draft after v2 creates v3. Because each version is fully preserved, you can always return to it. Selecting a past version shows information such as its status, author, notes, run count, and gives you the option to create a new draft from it. If you publish that draft, Stripe increments the version number and promotes your changes as the new active version. Older versions remain intact for reference. This snapshot model guarantees that active workflows stay stable, every change is intentional, and your team always has a precise historical record of how the workflow evolved. And because every run now records the exact version it used, you can inspect the workflow definition that was active at the time, including the branch that ran and the branches that didn’t. This level of visibility wasn’t possible before versioning and significantly improves debugging. ![](/images/introducing-versioning-for-stripe-workflows/image2.png) ## What this means for you Versioning makes it easier to update your workflows with the same confidence you have when they’re running. Instead of treating changes as risky or irreversible, you can evolve logic gradually, publish only when the update is ready, and return to any previous version if something doesn’t behave as expected. It also gives you clearer insight into how your workflows work. Every run points to the version that ran, so you can understand exactly why something happened, down to the branches taken and the ones skipped. And with version descriptions and built-in history, you no longer have to rely on memory or Slack threads to understand how a workflow changed over time. This means you have a system that’s easier to improve, easier to debug, and easier to maintain as your business evolves. You can start using versioning in Stripe Workflows today. Every new workflow now includes a draft by default, so you can explore the builder, make a change, and publish when ready. To try it out, open the [Stripe Dashboard and navigate to Products \> Workflows](https://dashboard.stripe.com/workflows). Create a new workflow and see how drafts and versions shape a clearer, more reliable development flow. For more Stripe developer learning resources, subscribe to our [YouTube Channel](https://www.youtube.com/@StripeDev). Your SaaS application has an opportunity: a new market segment wants premium features, and you can unlock that revenue by adding a "Pro" subscription tier. You need to move fast without compromising code quality. This scenario is increasingly common, and developers are expected to deliver more with less and in shorter time frames. GenAI coding assistants can be used to improve productivity but most coding assistants struggle to understand the full context. This results in disjointed code that requires manual integration. You might gain some productivity, but you will spend time cleaning up various components. In the subscription tier example, teams need to focus on core feature development while also mapping out the complete subscription lifecycle - including scalable payment flows, secure [webhook handlers](https://stripe.com/docs/webhooks), [idempotency](https://stripe.com/docs/api/idempotent_requests) across retry scenarios. You'll need a testing strategy that covers not just happy paths but payment failures, declined cards, and asynchronous payment methods. These decisions shape your architecture and are costly to change later. This post examines how developers can use [Kiro](https://kiro.dev/), with its newly launched Kiro [power](https://kiro.dev/docs/powers/) from Stripe, to design and implement payments. Kiro is an AI-powered development environment designed to take projects from concept to production through features like specs (artifacts for planning and feature design), hooks (event-driven automations that act like an experienced developer catching issues). Stripe partnered as one of the first launch partners, alongside companies like Figma, Neon, and Postman, to bundle Stripe-specific domain knowledge, best practices, and tooling directly into the IDE. Powers addresses a fundamental problem with generic AI coding agents: they lack deep workflow knowledge about how to safely implement domain-specific tasks. Overloading an agent with documentation leads to confusion, hallucinations, and inefficiency. Creating separate specialized agents for each workflow creates proliferation and overhead. Powers solves this by dynamically loading only the context required—each power bundles everything an AI agent needs to perform a workflow end-to-end safely and efficiently, designed in collaboration with domain experts. ## How Kiro power simplifies application development with Stripe When you activate the Stripe power in Kiro, in addition to code generation you're also loading a package that includes [Model Context Protocol (MCP)](https://modelcontextprotocol.io/) servers, steering files with Stripe-specific patterns, and hooks that automate boilerplate tasks as you develop. Stripe provides extensive functionality through its API by necessity—it handles everything from simple one-time payments to complex subscription billing with metering, invoicing, tax calculation and more. For a straightforward subscription flow, you don't need an AI agent reasoning about every possible Stripe capability. You need it to understand the specific patterns for [Checkout Sessions](https://stripe.com/docs/api/checkout/sessions), [subscription lifecycle management](https://stripe.com/docs/billing/subscriptions/overview), and [webhook event handling](https://stripe.com/docs/webhooks/best-practices) without getting distracted by tangential features. The Stripe power packages this focused knowledge. When you describe your subscription model—pricing tiers, billing intervals, one-time payment options—the AI agent has immediate access to Stripe-specific patterns like webhook signature verification, proper error handling for payment failures. It knows that webhook endpoints need raw body for signature verification, that Checkout Sessions should be created server-side to prevent client-side price manipulation, and that subscription state should be managed through webhook events rather than polling. ## Building a subscription feature We'll walk through the Kiro implementation of subscription billing. We'll start by describing what we want to build using this natural language prompt: 'Build a payments page for my SaaS application that has 3 subscription tiers: Basic ($5/month), Advanced ($7/month), Pro ($10/month). Users can cancel anytime. They can also buy a one-time payment valid for 3 months for $4. The solution should be scalable, allow the UI to be hosted on a CDN, and support API-based communication between components. When we give this prompt to Kiro, it immediately understands the need for a scalable, secure architecture. Instead of generating a monolithic application, Kiro creates a clear separation between a React frontend and a Node.js backend API service. This isn't just an architectural preference—it's a practical necessity for modern SaaS applications that need to scale globally. Here's how the pieces work together: The frontend consists of static assets (HTML, JavaScript, CSS) that can be served from a CDN, ensuring your users get fast load times whether they're in New York or London. When a user chooses their subscription tier, the React application calls the backend API to create a Stripe Checkout Session. The backend holds the [Stripe secret key](https://stripe.com/docs/keys) and performs the actual API call to Stripe's API, returning a session ID to the frontend. The frontend then redirects to [Stripe Hosted Checkout](https://stripe.com/docs/payments/checkout), where payment collection happens on Stripe's PCI-compliant infrastructure. After payment completion, Stripe redirects the user back to your success URL and sends a webhook event to your backend to confirm the transaction. This architecture follows best practices for payment handling. Your Stripe secret keys stay safely in the backend, never exposed to the browser. Price manipulation becomes impossible because your backend controls the Checkout Session creation—even if someone tries to hack the JavaScript in their browser, they can't change what your backend sends to Stripe. The frontend can be aggressively cached and distributed globally because it contains no secrets or business logic. Your backend can scale independently based on actual transaction volume rather than page view traffic. ## Code example: Webhook handler Now that we’ve looked at the high-level architecture, let’s zoom in to the code Kiro generated for the webhook handler. This function is where your system learns about payment lifecycle events. Stripe sends [webhook events](https://stripe.com/docs/webhooks/stripe-events) for subscription creation, payment success, payment failure, subscription cancellation, and dozens of other scenarios. Your application needs to process these events reliably and securely. Here's the generated webhook handler: ```javascript // Webhook handler app.post('/webhook', express.raw({ type: 'application/json' }), async (req, res) => { const sig = req.headers['stripe-signature']; let event; try { // Signature verification happens here event = stripe.webhooks.constructEvent( req.body, sig, process.env.STRIPE_WEBHOOK_SECRET ); } catch (err) { console.error('Webhook signature verification failed:', err.message); return res.status(400).send(`Webhook Error: ${err.message}`); } // Handle the event switch (event.type) { case 'checkout.session.completed': // Payment successful case 'customer.subscription.created': // Subscription created case 'customer.subscription.deleted': // Subscription cancelled // ... more event handlers } res.json({ received: true }); }); ``` The implementation details here reflect [Stripe webhook best practices](https://stripe.com/docs/webhooks/best-practices). The endpoint uses [express.raw()](https://expressjs.com/en/api.html#express.raw) middleware instead of the typical JSON body parser. This preserves the raw request body, which is required for signature verification. Stripe signs each webhook with your webhook secret using HMAC, and [stripe.webhooks.constructEvent()](https://stripe.com/docs/webhooks/signatures#verify-official-libraries) recomputes that signature to verify authenticity. Signature verification protects against forged events. Without it, an attacker who discovers your webhook URL could send fake subscription cancellations, false payment confirmations, or fraudulent refund notifications. Validating the signature before processing any event data ensures that events genuinely originated from Stripe. The error handling follows a similar pattern. When signature verification fails, the handler immediately returns a 400 status code without processing the event. It logs the error for debugging but doesn't expose detailed error information in the response body beyond what's necessary for Stripe to understand the rejection. This follows the principle of failing fast—don't partially process invalid events, and don't give potential attackers information about why their forged events failed. The event type routing uses a switch statement to handle different subscription lifecycle events. For production systems, you'd extend this with your specific business logic: granting access when checkout.session.completed fires, provisioning resources when customer.subscription.created occurs, and deprovisioning when customer.subscription.deleted arrives. The generated code provides the skeleton that ensures these events arrive securely and can be processed reliably. ## Conclusion Stripe power for Kiro goes beyond generic code generation by bundling domain-specific knowledge about Stripe integration patterns, security best practices, and architectural decisions directly into the IDE. The generated code isn't just a basic implementation—it provides a secure, scalable foundation that follows Stripe's best practices. By describing your payment integration needs in natural language, you receive a complete implementation structure. This means you can move from identifying a revenue opportunity to having a working subscription feature in production faster. This shifts your development time from payment infrastructure plumbing to what really matters: customizing the integration for your specific business needs and building the features that differentiate your SaaS product. For teams looking to quickly monetize new features or add subscription tiers, this approach provides a practical path from concept to production. You get the security, scalability, and reliability needed for production systems, while maintaining the agility to respond quickly to market opportunities. Check out the demo of Stripe power [here](https://www.youtube.com/watch?v=M46PSAXpMfA). Want to check out Kiro? Sign up [here](https://kiro.dev/pricing/). For more Stripe learning resources, subscribe to the [Stripe Developers YouTube channel](https://www.youtube.com/stripedevelopers). Traditional crypto integrations require managing private keys, estimating gas fees, handling network selection, and building wallet connection flows. That's 50+ lines of complex code before you even process a payment. But what if accepting stablecoin payments was as simple as adding `crypto` to your existing `payment_method_types` array? With Stripe's stablecoin payments, you get all the benefits of crypto—instant global settlement, lower international fees, access to crypto-native users—using the exact same APIs, webhooks, and debugging tools you already know. No blockchain knowledge required. Stripe currently supports USDC payments on [Ethereum](https://ethereum.org), [Solana](https://solana.com), [Polygon](https://polygon.technology), and [Base](https://base.org) networks, with transactions settling as fiat in your Stripe balance at a 1.5% fee. Your customers connect their crypto wallets, you get paid in USD. Everyone wins. Here's how to add crypto payments to your existing Stripe integration in under an hour. ## Compare the implementation **Example: Traditional crypto integration complexity:** ```javascript // Complex wallet connection, network selection, gas estimation... const provider = new ethers.providers.Web3Provider(window.ethereum); const signer = provider.getSigner(); const contract = new ethers.Contract(contractAddress, ABI, signer); const gasPrice = await provider.getGasPrice(); const gasLimit = await contract.estimateGas.transfer(recipient, amount); const tx = await contract.transfer(recipient, amount, { gasPrice: gasPrice, gasLimit: gasLimit }); await tx.wait(); // Plus error handling, network switching, wallet detection, etc. ``` **Stripe crypto integration:** ```javascript // Same Payment Intent pattern you already use const paymentIntent = await stripe.paymentIntents.create({ amount: 2000, currency: 'usd', payment_method_types: ['card', 'crypto'], // Just add 'crypto' }); ``` The webhook you receive uses identical formatting. Your existing error handling, confirmation logic, and webhook processing work unchanged. ## Implementation steps ### Step 1: Enable crypto payments Navigate to your [Payment methods settings](https://dashboard.stripe.com/settings/payment_methods) in the Stripe Dashboard and request the Crypto payment method. Stripe will review your business information and activate the feature once approved. **Note:** Currently only US businesses can accept stablecoin payments. ### Step 2: Update your Payment Intent creation Add `crypto` to your existing payment method types: ```javascript // Before: card payments only const paymentIntent = await stripe.paymentIntents.create({ amount: calculateOrderAmount(items), currency: 'usd', payment_method_types: ['card'], metadata: { order_id: '12345' } }); // After: card + crypto payments const paymentIntent = await stripe.paymentIntents.create({ amount: calculateOrderAmount(items), currency: 'usd', payment_method_types: ['card', 'crypto'], // Add crypto here metadata: { order_id: '12345' } }); ``` ### Step 2a: Recommended approach with dynamic payment methods For the most streamlined integration, Stripe recommends using dynamic payment methods instead of manually specifying payment method types. This approach lets you manage payment methods entirely through the Dashboard: ```javascript // Recommended: Use dynamic payment methods const paymentIntent = await stripe.paymentIntents.create({ amount: calculateOrderAmount(items), currency: 'usd', automatic_payment_methods: { enabled: true }, // Let Stripe handle payment methods metadata: { order_id: '12345' } }); ``` With dynamic payment methods enabled: - **Manage payment methods in the Dashboard** \- No code changes needed to add new payment methods - **AI-optimized ordering** \- Stripe's AI models automatically order payment methods for optimal conversion - **Smart filtering** \- Payment methods are automatically filtered based on amount, currency, and customer location - **A/B testing capabilities** \- Test new payment methods on a percentage of traffic To enable crypto payments with this approach: 1. Navigate to your [Payment methods settings](https://dashboard.stripe.com/settings/payment_methods) 2. Turn on the **Crypto** payment method 3. Your integration automatically supports crypto payments—no code changes required **Excluding specific payment methods** If you need to exclude certain payment methods for specific transactions, you can still do so: ```javascript const paymentIntent = await stripe.paymentIntents.create({ amount: calculateOrderAmount(items), currency: 'usd', automatic_payment_methods: { enabled: true }, excluded_payment_method_types: ['affirm', 'klarna'], // Exclude specific methods metadata: { order_id: '12345' } }); ``` ### Step 3: Frontend integration (no changes required) If you're using [Stripe Checkout](https://stripe.com/payments/checkout), crypto payments appear automatically: ```javascript // Dynamic payment methods with Checkout (recommended) const session = await stripe.checkout.sessions.create({ // Remove payment_method_types to use dynamic payment methods line_items: [{ price_data: { currency: 'usd', product_data: { name: 'Llama Lamp' }, unit_amount: 2000, }, quantity: 1, }], mode: 'payment', success_url: `${YOUR_DOMAIN}/success?session_id={CHECKOUT_SESSION_ID}`, cancel_url: `${YOUR_DOMAIN}/cancel`, }); // Or specify payment methods explicitly const session = await stripe.checkout.sessions.create({ payment_method_types: ['card', 'crypto'], line_items: [{ price_data: { currency: 'usd', product_data: { name: 'Llama Lamp' }, unit_amount: 2000, }, quantity: 1, }], mode: 'payment', success_url: `${YOUR_DOMAIN}/success?session_id={CHECKOUT_SESSION_ID}`, cancel_url: `${YOUR_DOMAIN}/cancel`, }); ``` For [Elements](https://stripe.com/payments/elements) implementations, the crypto option appears automatically in your payment method selection: ```javascript const elements = stripe.elements({ clientSecret: paymentIntent.client_secret, }); const paymentElement = elements.create('payment'); paymentElement.mount('#payment-element'); // Crypto appears as an option automatically ``` ### Step 4: Handle the payment flow When you choose crypto, you're redirected to complete your payment with your preferred wallet. The flow looks like this: 1. You select "Pay with Crypto" on checkout 2. Redirect to crypto.stripe.com where you connect your wallet ([MetaMask](https://metamask.io/), [Coinbase Wallet](https://www.coinbase.com/wallet), etc.) 3. Payment confirmation happens on-chain 4. Return to the success page with the same confirmation flow as card payments Your confirmation handling remains identical: ```javascript app.get('/success', async (req, res) => { try { const { payment_intent } = req.query; if (!payment_intent) { return res.status(400).send('Missing payment_intent parameter'); } const paymentIntent = await stripe.paymentIntents.retrieve(payment_intent); if (paymentIntent.status === 'succeeded') { // Process successful payment (card OR crypto) await fulfillOrder(paymentIntent.metadata.order_id); res.render('success', { payment_intent: paymentIntent }); } else { res.redirect('/payment-failed'); } } catch (error) { console.error('Error retrieving payment:', error); res.status(500).send('Payment verification failed'); } }); ``` ### Step 5: Webhook handling (zero changes) Your existing webhook handlers work with crypto payments without modification: ```javascript app.post('/webhook', express.raw({type: 'application/json'}), (req, res) => { const sig = req.headers['stripe-signature']; let event; try { event = stripe.webhooks.constructEvent(req.body, sig, process.env.STRIPE_WEBHOOK_SECRET); } catch (err) { console.log(`Webhook signature verification failed:`, err.message); return res.status(400).send(`Webhook Error: ${err.message}`); } switch (event.type) { case 'payment_intent.succeeded': const paymentIntent = event.data.object; console.log(`Payment ${paymentIntent.id} succeeded!`); // Your fulfillment logic here break; case 'payment_intent.payment_failed': const failedPayment = event.data.object; console.log(`Payment ${failedPayment.id} failed:`, failedPayment.last_payment_error?.message); break; default: console.log(`Unhandled event type ${event.type}`); } res.status(200).end(); }); ``` ## Testing and debugging ### Sandbox integration Stripe's crypto payments work in [Sandbox environments](https://docs.stripe.com/test-mode) just like card payments—no testnets or fake cryptocurrency required. Sandbox is Stripe's isolated testing environment where you can simulate payments without real money changing hands. When you create a Payment Intent with crypto as a payment method in a Sandbox, you'll see the same crypto payment flow that customers experience, but using simulated transactions. Stripe's Sandbox environments give you multiple isolated testing spaces to experiment with different configurations, perfect for testing crypto payment flows alongside your existing card payment tests. ```javascript const testPaymentIntent = await stripe.paymentIntents.create({ amount: 1000, currency: 'usd', automatic_payment_methods: { enabled: true }, // Test with dynamic payment methods }, { stripeVersion: '2025-06-30', // Use latest API version }); ``` Use the same [test card numbers](https://stripe.com/docs/testing#cards) and test scenarios you're already familiar with to simulate different payment outcomes. ### Debugging with Stripe Workbench [Stripe Workbench](https://stripe.com/workbench) works with crypto payments using the same interface you know. You can inspect payment flows end-to-end, debug webhook delivery, monitor success rates, and test error scenarios without blockchain complexity. - Inspect payment flows end-to-end, including crypto payment redirects - Debug webhook delivery with the same tools - Monitor success rates for crypto vs. card payments - Test error scenarios without dealing with blockchain complexity ### Local development Test webhooks locally using the [Stripe CLI](https://stripe.com/docs/stripe-cli): ```shell # Same CLI command, handles crypto webhooks automatically stripe listen --forward-to localhost:4242/webhook ``` ## Production considerations ### Performance characteristics Crypto payments have slightly different timing than card payments: - **Initial authorization:** Similar to cards (\~2-3 seconds) - **Blockchain confirmation:** Additional 30 seconds to 5 minutes depending on network congestion - **Settlement in your Stripe balance:** Settles as USD after blockchain confirmation Handle this timing difference the same way you handle any payment method with variable processing times. ### Error scenarios Crypto payments can fail for blockchain-specific reasons, but Stripe abstracts these into familiar payment failure patterns: ```javascript const paymentIntent = await stripe.paymentIntents.retrieve(pi_id); if (paymentIntent.status === 'requires_payment_method') { // Handle crypto-specific and general payment failures const errorCode = paymentIntent.last_payment_error?.code; const errorType = paymentIntent.last_payment_error?.type; switch (errorCode) { case 'card_declined': case 'insufficient_funds': case 'authentication_required': // Standard error handling patterns apply console.log('Payment failed:', paymentIntent.last_payment_error.message); break; default: console.log('Payment requires new method:', errorCode); } } ``` ### Monitoring and alerts Your existing Stripe monitoring works with crypto payments: - Dashboard metrics include crypto payment volume and success rates - Webhook monitoring uses standard alerting for failed deliveries - Revenue reporting combines crypto and card payments seamlessly The main operational difference: crypto payments charge 1.5% vs. typical 2.9% \+ $0.30 for cards, which may improve your unit economics. ## What you get with crypto payments Instead of simply listing features, let's look at what this means for your business. When you add crypto payments to your Stripe integration, you're not just adding another checkbox to your payment form—you're opening your business to a global audience that values the speed and transparency of blockchain-based transactions. Your crypto-native customers, who might otherwise abandon their cart when they see only traditional payment options, can now complete purchases using the USDC they already hold. This is particularly valuable for businesses like Llama Lamps, where your customers might be distributed globally and prefer the instant settlement that crypto provides. The lower processing fees (1.5% compared to typical card rates) can meaningfully impact your margins, especially for higher-value transactions. For a $200 lamp purchase, you save approximately $2.80 compared to standard card processing—small per transaction, but significant at scale when you're selling hundreds of lamps monthly. Most importantly, this all happens without requiring you to learn blockchain development, manage private keys, or worry about gas fees. Your existing Stripe expertise transfers completely. **Implementation timeline:** - **Dashboard setup:** 5 minutes to request access - **Code changes:** 15 minutes to add `'crypto'` to existing integration (or 5 minutes with dynamic payment methods) - **Testing:** Same timeframe as testing any new payment method - **Production deployment:** No additional operational complexity ## Next steps Ready to add crypto payments to your application? Start by enabling crypto in your [Payment methods settings](https://dashboard.stripe.com/settings/payment_methods) and add `'crypto'` to your next Payment Intent—or better yet, switch to dynamic payment methods for the most flexible approach. Monitor adoption rates to track what percentage of users choose crypto payments, and consider geographic optimization by enabling crypto primarily in regions where it performs best. For advanced use cases requiring custom stablecoin workflows, explore [Bridge APIs](https://docs.stripe.com/bridge) when you outgrow Stripe's standard crypto integration. **Resources:** - [Stripe Crypto Payments Documentation](https://docs.stripe.com/crypto): Complete API reference and setup guide - [Dynamic Payment Methods Guide](https://docs.stripe.com/payments/payment-methods/dynamic-payment-methods): Learn about Dashboard-based payment method management - [Crypto Payments Demo](https://buy.stripe.com/test_28o4ig0SY9Xq8co3cc): See the customer experience in action - [Stripe Discord](https://discord.gg/stripe): Get help from other developers implementing crypto payments - [Workbench](https://stripe.com/workbench): Debug crypto payment flows with familiar tools Stripe's crypto payments deliver all the benefits of blockchain-based payments—instant settlement, global reach, lower fees—using the APIs and developer tools you already know. No crypto expertise required, no operational complexity added. To learn more about developing applications with Stripe, visit our [YouTube Channel](https://www.youtube.com/stripedevelopers). Many retailers are adopting a modern, [MACH](https://machalliance.org/mach-technology) approach to their commerce experiences, including for in-person payments. For example, they may create a version of their ecommerce website that is specific to in-person payments, and that is meant to be used by salespeople on a showroom floor. This is especially true for digital-first retailers, where the device is used by a salesperson on the floor and shown to the customer - for example, to explore customization options, additional sizes, and choices, or even to sign up for loyalty programs. Retailers already spend considerable time on that ecommerce web stack, and want to use as much of it for in-person as well, instead of maintaining two separate stacks. If the reader they chose is a smart reader, such as the [Stripe Reader S700](https://docs.stripe.com/terminal/payments/setup-reader/stripe-reader-s700), then their website might make use of our [server-driven integration](https://docs.stripe.com/terminal/designing-integration?reader=S700&platform=server-driven) path. However, if they want to use a mobile form factor - for example, an iPad paired with an [M2](https://docs.stripe.com/terminal/payments/setup-reader/stripe-m2), or an Android tablet leveraging [Tap to Pay](https://docs.stripe.com/terminal/payments/setup-reader/tap-to-pay) - things get more complicated. Indeed, the M2 (or the [WisePad 3](https://docs.stripe.com/terminal/payments/setup-reader/bbpos-wisepad3), outside of the US) can only integrate via our mobile SDKs since they lack Internet connectivity capabilities. So an iPad can only communicate with a Bluetooth-connected M2 via the iOS (or React Native) SDK. The same limitation applies to Tap to Pay - a web browser running on a mobile device or NFC-equipped tablet cannot communicate directly with the local reader to take payments - it needs to integrate via our mobile SDKs. In general, this all means the web-based POS needs to be completely refactored into a native app. This is clearly a sizable undertaking, and defeats the economies of scale discussed above. This article describes the concept of a wrapper app, which simultaneously: * Loads the web-based POS and allows the salesperson to interact with the site * Integrates with a mobile or Tap to Pay reader via SDK * Detects events from the former to initiate payment requests to the latter This post offers a proof-of-concept in React Native, which you could then use for: * A tablet paired with a Bluetooth reader * A phone or tablet using Tap to Pay technology ## Application overview The application comprises: * A wrapper App component, which defines a `handleMessage` function. This function listens to events coming from the WebView component and sets a state variable to keep track of the cart's details. This could be as simple as a cart ID - for security purposes, only the backend would have the details of the cart, so it cannot be manipulated into a cheaper basket. * A [WebView](https://www.npmjs.com/package/react-native-webview) component, which loads the web-based POS itself. That component takes the `handleMessage` function as a prop. * A web-based POS that can build a cart and save its details to a backend. When ready to pay, the salesperson presses a button in the site that fires `window.ReactNativeWebView.postMessage(JSON.stringify(data));` where `data` contains information about the cart. This would be the cart ID, salesperson ID, store ID, and any other relevant information. * A ReaderManager component, running the [Stripe Terminal React Native SDK](https://github.com/stripe/stripe-terminal-react-native), which is tasked with discovering readers and connecting to them. This could be an [M2 reader, via Bluetooth](https://docs.stripe.com/terminal/payments/connect-reader?terminal-sdk-platform=react-native&reader-type=bluetooth), or even a [local reader, via Tap to Pay](https://docs.stripe.com/terminal/payments/connect-reader?terminal-sdk-platform=react-native&reader-type=tap-to-pay). This component takes the cart state variable from the parent App component. At the appropriate time (e.g. the `cart` state is populated with an ID and a state), the component queries the backend to calculate how much to charge the customer, and then calls the `createPaymentIntent()`, `collectPaymentMethod()`, and `confirmPaymentIntent()` SDK methods. Notifying the web-based POS that the payment was successful might be done via webhooks (fired from Stripe to the POS backend, and then to the POS frontend via websockets), or via the POS frontend polling its backend. ## Wrapper application architecture The application has 3 main components - an App parent component, where state is managed, a WebView component, and a ReaderManager component. You could also use a state management library like [Recoil](http://recoiljs.org/). This diagram shows the Stripe React Native SDK managing an M2 reader but, as mentioned previously, this could be a WisePad 3 or Tap to Pay reader. ![](/images/web-pos-mobile-terminal-integration/image1.png) ## Processing a transaction ![](/images/web-pos-mobile-terminal-integration/image2.png) 1. The salesperson consults with the customer and adds items to the cart. As items are added to the cart, they may be saved in a cookie and/or sent to the POS backend. 2. At the conclusion of the browsing session, the salesperson clicks a button that saves the final cart details to the backend. 3. The salesperson clicks a button signifying the customer is ready to pay. This emits a `window.ReactNativeWebView.postMessage(JSON.stringify({ cart_id: 'ABC123', status: 'ready_to_pay' }))` message. 4. The WebView component detects this message via its `handleMessage` function, which was passed as a property by the parent App component. This function sets the cart state value in the App component, to something like `{ cart_id: 'ABC123', status: 'ready_to_pay' }`. 5. The ReaderManager component gets the updated cart state and finds it is ready for payment. 6. The ReaderManager queries the backend to retrieve cart details based on the cart ID - these details might include the owed amount based on server-side calculations. 7. The ReaderManager calls the SDK method [`createPaymentIntent`](https://stripe.dev/stripe-terminal-react-native/api-reference/interfaces/StripeTerminalSdkType.html#createpaymentintent) with the right amount, currency, [metadata](https://docs.stripe.com/api/metadata), etc. Metadata attributes should include the cart ID. 8. The ReaderManager calls the SDK method [`collectPaymentMethod`](https://stripe.dev/stripe-terminal-react-native/api-reference/interfaces/StripeTerminalSdkType.html#collectpaymentmethod) to instruct the reader to receive card details via tap or insert. 9. The ReaderManager calls the SDK method [`confirmPaymentIntent`](https://stripe.dev/stripe-terminal-react-native/api-reference/interfaces/StripeTerminalSdkType.html#confirmpaymentintent) to confirm the payment. Stripe gets the card details at that stage, sends the request to the card issuer, via the networks, and returns an auth status which the ReaderManager can then surface to the salesperson (e.g. "card accepted" or "card declined"). 10. The ReaderManager knows the payment status but the POS does not. In order for it to be notified, the backend listens for the `payment_intent.succeeded` webhook event which has the cart ID passed in the metadata attribute, and then sends the notification to the POS via a WebSocket. ## Example application ![](/images/web-pos-mobile-terminal-integration/image3.png) The following is a mock-up of what such an application could look like: * The gray bar at the top is the main app component. * The icons to the right of the gray bar are part of the ReaderManager component. They show some high-level status information (for example, is the reader connected, are there pending offline payments, etc.) * The ReaderManager can also show a Settings panel to help end-users select the reader type they want to connect to (for example, M2, or Tap to Pay), the reader they want to connect to, etc. * The main panel in white is the WebView component. In the upper-left hand corner, a drop down allows the end-user to select various web-based POS experiences. ## Limitations and security considerations WebView does introduce some limitations compared to a native application. Performance might not be as smooth, especially with complex web apps, and offline mode is limited if the web app itself doesn't utilize caching effectively. Security must be evaluated carefully, and debugging the web app and the wrapper is more complex than just debugging one—the whole is more than the sum of its parts. Additionally, some native functionality may not be accessible from a web app being served in a WebView. The main security risks for React Native apps with WebView components include WebView script injection accessing the native bridge, spoofed bridge messages altering or triggering charges, weak IDs or sessions enabling tampering, and webhook/API replay attacks. Several strategies can help mitigate these risks: implementing strict HTTPS and Content Security Policy (CSP), using origin-checked and signed bridge messages, incorporating schemas and one-time nonces in bridge communications, and implementing server-side amount and cart validation. ## Conclusion This wrapper app approach offers retailers a practical solution for integrating web-based point-of-sale systems with mobile Terminal readers like the M2 or Tap to Pay technology. By combining a React Native wrapper with WebView components and the Stripe Terminal SDK, retailers can use their existing ecommerce infrastructure for in-person payments without requiring a complete native app rebuild. The architecture enables communication between web-based POS systems and mobile readers through message passing and state management. While this approach introduces some limitations, it provides significant cost savings and development efficiency compared to maintaining separate technology stacks. To learn more about developing applications with Stripe, visit our [YouTube Channel](https://www.youtube.com/stripedevelopers). ![Blog > Real-time analytics for Stripe Billing > Header image](/images/how-we-built-it-real-time-analytics-for-stripe-billing/image-0.jpg) In a [recent Stripe survey](https://stripe.com/lp/pricing-trends), 84% of global business leaders agreed that adapting pricing quickly will be a key competitive advantage over the next 1–2 years. This echoed what we’ve been hearing directly from our customers: that to stay nimble, they need to be able to spot new patterns of customer behavior just as they emerge—something that’s only possible when high-quality billing data is available in real time. That’s why we’ve developed a new, real-time streaming analytics system for Stripe Billing. Now when customers use the Stripe Dashboard to explore and visualize subscription metrics such as monthly recurring revenue (MRR) growth, churn rates, trial conversion rates, and more, they’re getting data that reflects any new subscription activity with latency as low as 15 minutes. This upgrade allows customers to get the real-time visibility they need to stay ahead of fast-moving trends, and it ensures accurate historical data even as their business changes. Creating this system meant replacing traditional batch processing methods, which had a 24-hour average lag for subscription updates, with new architecture and processes. We broke the problem into three main components: 1. Rebuilding our data architecture to support real-time subscription updates 2. Upgrading our data aggregation system to reflect these real-time updates in the Dashboard on the same time frame 3. Letting customers freely adjust definitions of metrics without impacting real-time or historical analytics We’ll explore how we built each of these functionalities, the engineering challenges involved in them, and how they work together to create a fast, flexible, and reliable real-time analytics platform. ### **Low-latency analytics required an event-driven pipeline from beginning to end** A subscription is a relatively simple way of paying for a service, but it’s a complicated idea to handle within a data structure. The most up-to-date picture of any given subscription relies on past information as much as present. In isolation, it doesn’t mean much to a business that a customer paid $20 in June. The business also needs to know that the customer has paid on time, every month, since signing up in January. The most straightforward technical approach to subscriptions, and what our previous analytics system relied on, is to calculate the current state of a subscription by re-analyzing all of the data related to it from the beginning of time. But this approach means that analysis has to be done in batches, on a set cadence. Running batches frequently enough to support anything close to real-time analytics was impossible given architectural limits. To build our new system, we needed to create a new pipeline that transforms updates to subscription and invoice objects into analytics events. We accomplished this using Apache Flink, which stores a highly compressed version of subscription history as a “state,” and incrementally updates that state as new analytical events are received. But generating the initial Flink state for long-standing customers was still a challenge, because it would require replaying billions of historical events in order. To address this, we also built a custom tool that lets us run our streaming transformation logic as a data job in Apache Spark, which can process large amounts of historical events in parallel and output its results as verifiable flat files. This job efficiently generates the initial Flink state, and it also feeds a redundant offline data pipeline for validation and data export uses. With our new architecture in place, we were able to achieve latency as low as 15 minutes on subscription updates. The $20 June subscription payment now no longer needs to be re-assessed alongside every other payment made since January; it’s simply added to the ongoing ledger contained within the Flink state. ### **Complex, low-latency aggregation became possible with the launch of a brand-new query engine** We designed the Dashboard to respond to queries flexibly and responsively: Stripe users can filter, group, and drill down into their data without waiting as their requests are processed. We want our users to feel as though we’re simply opening a window to their data—but under the hood, aggregating subscription data in a way that supports these queries is a significant computing task. To let users visualize how MRR changes over time, for example, we needed to analyze the historical state of every subscription at every point of time within whatever period the user specifies. When we first built our billing analytics system, using Apache Pinot as our online analytical processing (OLAP) database, the best available solution was to preaggregate subscription data offline in a scheduled batch job. To achieve real-time analytics, we needed to remove that preaggregation step. At query time, we had to be able to analyze the historical and current states of all subscriptions so that we could catch those that had just added new data to their ledgers. But we also needed to maintain the ultraresponsive queries that our users now expected, and which had led us to select Pinot as our OLAP in the first place. We found a solution when the maintainers of the open-source Pinot software released a brand-new [v2 engine](https://docs.pinot.apache.org/reference/multi-stage-engine) that could perform “windowed” aggregation queries. These queries segment data within multiple “windows” or date ranges, and they perform aggregation operations (summing, averaging, etc.) across the data in those ranges—enabling the simultaneous calculation of MRR over time without offline preaggregation. Pinot’s new engine also allowed us to perform more complex data joins, which opened up other real-time functions for the Dashboard: data gap filling, currency conversions, and custom query dimensions. We worked closely with the Pinot maintainers to test and bring this new engine into production, which had never before been deployed in a user-facing context at Stripe’s scale. With the updated Dashboard, the $20 June subscription payment is now not only updated in real time, but it’s able to be queried almost instantly: most updates are processed in well under 1 minute, and nearly all are available to the user within 15 minutes. In production, we now see query latency of less than 300 milliseconds, maintaining the Dashboard’s fast, responsive feel. ### **Allowing customizable metric definitions while maintaining real-time updates required a delicate balance of flexibility and consistency** The definition of a seemingly straightforward metric such as MRR can vary significantly from one business to another. To accommodate this variation, we had let Billing users adjust the formula definitions used for MRR and other metrics. Switching to streaming analytics introduced a new challenge here: we needed to preserve this flexibility for users while maintaining data consistency amid real-time updates. For example, if a customer decided to begin excluding one-time coupons from their MRR calculations, we’d need to ensure this change was reflected consistently across all historical and incoming data. For a customer who has been with Stripe since 2017, that would mean taking hours to reprocess years of data to get historical MRR values consistent with the updated definition—all while continuing to handle new, incoming events. Our solution is a workflow that balances historical recalculation with real-time updates: 1. When a customer changes a metric definition, we initiate a batch process to align historical data with the new definition. 2. Concurrently, we continue streaming and processing new events using the customer’s old metric definition in real time. 3. While processing, these incoming events are also temporarily buffered in memory in our Flink application. 4. Once the historical reprocessing is complete, we patch the Flink app’s state using recalculated historical data and we allow Flink to reprocess the stored events on top of the updated history. 5. We transition the Dashboard to display the fully updated data, at which point we stop all processing that uses the old metric definition. Throughout this process, the Dashboard remains responsive and useful, not grayed out or showing inconsistent data. Customers always see a consistent view of their data from the beginning of their history to the present moment—even while making definition changes and receiving real-time updates. ### **Looking ahead** When building our new streaming analytics system, we had two main goals: to give customers real-time access to data updates, and to help them query and sort that real-time data in the ways that were most useful to them. As we continue to evolve Billing analytics, we’re working on additional upgrades to address both of these goals: - We’re continuing to push data latency even lower, while still maintaining reliability and accuracy. - We’re augmenting the Dashboard with more data and more query dimensions, including usage-based metrics and filters for customer geography and cohort. To learn more, [read our docs](https://docs.stripe.com/billing/subscriptions/analytics) or [get in touch](https://stripe.com/contact/sales). Many industries require more specific or stricter compliance requirements. With Stripe Workflows, you can automate additional compliance requirements to align with your business needs. You can implement a workflow to automatically flag transactions based on criteria such as high order values, unfamiliar sales regions, or other potential fraud indicators. Creating a workflow to streamline compliance enhances risk management and boosts operational efficiency by prompting for further review before order processing. For example, a new customer order exceeding a certain monetary threshold might indicate an accidental over-purchase or potential fraud. Similarly, an order from a region where you’ve never sold before requires additional scrutiny to verify the customer’s legitimacy. Additionally, transactions exhibiting behavioral patterns commonly associated with fraud can trigger alerts for your team’s assessment. In this sample workflow pattern, we’ll trigger an email alert to a designated team member whenever an order surpasses the predefined threshold, enabling your team to address any issues with the order and earn customer trust. ![](/images/workflows-automate-compliance-safeguards/image1.png) ## Building a workflow to flag transactions To build a workflow when a customer order exceeds a monetary threshold: 1. Add trigger: **Payment intent succeeded**. 2. Add a step: **Retrieve a customer,** for Customer ID choose **Payment intent | Customer ID**. 3. Add a condition. 4. Click the “If this condition is met” box and select **Retrieve a customer**, then select **Metadata**, then select **custom_status**. Select "isn't equal to” and type “Approved.” 5. Click Add more. 6. Select **Payment intent succeeded**, select Amount. Select is “greater than” and type your threshold of $5,000. 7. Click Done. 8. Under the condition click Add step and Add action: Select **Email a team member**, select a team member or multiple team members from the list, type instructions in the email body field, and click Done. ## What is Stripe Workflows? [Stripe Workflows](https://docs.stripe.com/workflows/define-workflows) provides a visual building interface in the Stripe dashboard, to help you automate tasks and processes by defining a series of actions that happen sequentially. Workflows is ideal for multi-step processes and is compatible across multiple Stripe products, allowing you to streamline processes, enforce business rules, and reduce manual effort. To explore additional workflow patterns, see: * [Automatically customize an object with metadata](https://stripe.dev/blog/workflows-customize-objects-metadata) * [Creating early fraud alerts for streamlined refunds](https://stripe.dev/blog/workflows-creating-early-fraud-alerts-for-streamlined-refunds) To learn more about developing applications with Stripe, visit our [YouTube Channel](https://www.youtube.com/stripedevelopers). Every day, we navigate a world filled with asynchronous events. My coffee order is ready for pick-up. A package arrives at my front step. A payment succeeds. Events are occurrences or changes in state. Airports are one of my favorite settings to think about events. As you walk through the terminal to your gate, numerous things are happening: an inbound aircraft lands, a gate changes, a flight is delayed. While these types of events have been around since the advent of commercial air travel, it is only in recent years that airlines have started to publish these events to travelers through mobile apps and websites. This transparency benefits both travelers and airlines alike. Stripe makes extensive use of events to communicate changes in state to our users through [event destinations](https://docs.stripe.com/event-destinations). Event destinations enable Stripe users to receive real-time notifications of state changes across multiple channels, including webhook endpoints and [Amazon EventBridge](https://docs.stripe.com/event-destinations). This design allows users to build responsive applications that react promptly to payment status changes, subscription updates, or account modifications, minimizing latency between Stripe backend changes and the user interface. Stripe events are available for many API resource changes, including: - Successful or failed payment transactions - Updates to existing subscriptions - Modifications to connected account profiles, like business information or compliance status Currently, Stripe supports two types of events: [snapshot (v1)](https://docs.stripe.com/api/events) and [thin (v2)](https://docs.stripe.com/api/v2/core/events) events. These two event types differ primarily in the information encoded within the event payload. Snapshot events carry a full copy of the resource state at the time of the event, whereas thin events include only a reference object, requiring additional API calls for complete details. Depending on filtering needs and system design, either type may be appropriate. Similar to the airport scenario, updating user-facing applications (e.g., mobile apps, websites) when Stripe API resources change can significantly enhance user experience and operational efficiency. Imagine sellers receiving near-instant notifications confirming payments, or merchants building rich integrations with Stripe Terminal that inform employees when payment processing is underway. Real-time alerts could also notify users that an outbound payment has been successfully sent or a subscription has been paused. In this blog post, we will explore approaches for connecting Stripe events received by your backend services to your frontend applications. We will delve into asynchronous, event-driven integrations that foster agility, responsiveness, and scalability across client-server interactions. ## Push or pull? Integration between frontend applications and backend servers has traditionally been built using a synchronous request/response pattern. This approach is well understood and supported by mature technologies such as REST APIs. The client requests data, and the server responds immediately—a straightforward pull model. However, this method can become inefficient in highly dynamic systems. Polling tends to generate excessive network traffic as the client repetitively asks the server for updates, even when no changes have occurred. This chatter increases latency and resource consumption on both ends. Polling frequency determines responsiveness, but increasing it can tax infrastructure, while decreasing it can make the app feel sluggish or outdated. Another subtle challenge lies in computing the delta — the difference between current and previous responses — which is necessary to update only changed data efficiently but can quickly become complicated as the application evolves. A push or subscription model offers distinct advantages, especially within event-driven systems. Instead of endlessly querying for updates, clients subscribe to receive messages when relevant changes occur. More sophisticated subscription patterns enable clients to filter and receive only updates pertinent to their interests—for example, notifications tied to specific payment intents or account IDs. ![](/images/seamlessly-connect-stripe-events-to-your-frontend/image1.png) While subscriptions mitigate many inefficiencies and improve the user experience with near-instant updates, they also introduce additional architectural complexity. Implementing robust subscription models often requires new technologies such as WebSockets, MQTT, or managed pub/sub services. Depending on the nature of your workload — for instance, the frequency of state changes or scale of concurrent users — these trade-offs may or may not justify the complexity. Polling may still suffice for infrequent updates or simple applications. In practice, real-world applications often use a hybrid model: a synchronous API request to load the initial or bulk state, complemented by an asynchronous subscription to receive incremental updates. Returning to the airport analogy, this is akin to checking the departures board once before your trip, then watching live updates for delays, gate changes, or boarding announcements as they happen. ## Connecting Stripe events to your frontend Stripe supports two primary options for receiving events: webhook endpoints and Amazon EventBridge. Choosing between these options depends largely on your needs around resiliency, scalability, and integration into your existing system architecture. - **Webhook Endpoints**: Stripe delivers HTTP POST requests to URL(s) you configure whenever specific events occur. You must handle retries, idempotency, security verification, and potential spikes in traffic. - **Amazon EventBridge**: A serverless event bus service that can natively ingest Stripe events, route them, and integrate with various AWS services. EventBridge supports event filtering, transformation, and sophisticated routing patterns out of the box. Regardless of the event ingestion method, a robust event-processing architecture must address key challenges such as: - **Idempotency**: Ensuring that re-delivery of the same event does not cause duplicate processing or side effects. - **Message ordering**: Preserving event sequence to maintain data consistency. - **Duplication**: Detecting and discarding duplicate events. - **Failure handling**: Graceful recovery from transient network or service failures. Once your backend receives a Stripe event, several technical strategies are available to publish relevant information to your frontend clients. Managing these communication channels yourself can be complex, so many teams leverage managed services that offload service maintenance, scalability, and security concerns. Examples of such managed services include: - **AWS AppSync**: A managed GraphQL service that supports real-time subscriptions and integrates with various data sources. - **Momento**: A real-time cache and event streaming platform designed to minimize latency for event-driven applications. When selecting an approach, consider several key factors: - **Messaging pattern**: Will your messages be sent to individual clients (peer-to-peer) or broadcast to many subscribers? - **Message direction**: Is communication one-way (server to client) or bidirectional (client and server over the same connection)? - **Latency requirements**: How quickly must updates reach your subscribers for an acceptable user experience? The following table outlines some common communication patterns and technologies suitable for pushing or polling updates between frontend and backend applications, including latency expectations and sample implementations: | Technology | Model | Patterns Supported | Latency | Sample Implementations\* | | :---- | :---- | :---- | :---- | :---- | | **WebSockets** | Push | Broadcast, P2P, One or Two-Way | Low | AWS AppSync, Amazon API Gateway | | **MQTT** | Push | Broadcast, P2P, Two-Way | Low to Medium | AWS IoT Core | | **gRPC** | Push | Broadcast, P2P, Two-Way | Very Low | Google Pub/Sub, Momento Topics | | **Server-Sent Events** | Push | Broadcast, P2P, One-Way | Medium | Express SSE, Django | | **Polling** | Pull | Broadcast, P2P, One-Way | Medium to Long | Amazon API Gateway, Apigee | *Note that this table is non-exhaustive. Latencies and capabilities may vary based on implementation details, network conditions, and system architecture.* Ultimately, your choice depends on your application's technical ecosystem and business needs. For example, if you publish events to Amazon EventBridge, it's possible to send messages directly using [AWS AppSync Events](https://docs.aws.amazon.com/appsync/latest/eventapi/event-api-welcome.html), enabling sophisticated user experiences without writing extensive custom connectors. Filtering and authorization are also differentiating features to investigate. ## Connecting card present payment events Let’s return to the airport. During a long layover, you decide to visit an airport lounge but need to purchase a day pass for entry. The lounge integrates [Stripe Terminal](https://stripe.com/terminal) with their management software to enable visitors to buy access conveniently with credit cards. The lounge’s management software uses a [server-side integration with Stripe Terminal](https://docs.stripe.com/terminal/payments/collect-card-payment?terminal-sdk-platform=server-driven) to facilitate payment collection. This pattern allows the server to orchestrate payment workflows and control the local Terminal reader, which accepts card-present payments securely. The payment process begins by creating a new `PaymentIntent`: ```javascript let pi = await stripe.paymentIntents.create({ amount: 5000, // one-time payment of $50 (in cents) currency: "usd", capture_method: "automatic", payment_method_types: [ "card_present" ], }); ``` Next, the lounge software instructs the Terminal reader to authorize and confirm the transaction represented by the `PaymentIntent`: ```javascript await stripe.terminal.readers.processPaymentIntent( "{{TERMINAL_READER_ID}}", { payment_intent: pi.id, } ); ``` At this point, the reader will light up, ready to accept a card-present payment. Meanwhile, Stripe publishes events to the configured event destinations, informing other parts of the system of state changes. The lounge management software can take advantage of these events by publishing relevant portions to the frontend interface using the technologies described earlier. For instance, the software can instantly notify the lounge agent when the reader is ready for payment, indicated by the `payment_intent.requires_payment_method` event. If the lounge software uses Amazon EventBridge as an event destination, it can take advantage of the native routing and filtering capabilities to route the event to AWS AppSync Events: ![](/images/seamlessly-connect-stripe-events-to-your-frontend/image2.png) Though a full walkthrough of an EventBridge \+ AWS AppSync setup is beyond this post’s scope, here’s an abbreviated sketch of the solution: 1. Create an [event pattern](https://docs.aws.amazon.com/eventbridge/latest/userguide/eb-event-patterns.html) to match the `payment_intent.requires_payment_method` event: ```json { "source": [{ "prefix": "aws.partner/stripe.com" }], "detail-type": ["payment_intent.requires_payment_method"] } ``` 2. Use an [EventBridge API destination](https://docs.aws.amazon.com/eventbridge/latest/userguide/eb-api-destinations.html) to publish a message to the AWS AppSync Events endpoint. The message structure is flexible; the payload might resemble: ```json { "channel": "payment/lounges/123", "events": [ "{ \"event\": \"payment_required\", \"id\": \"\", \"amount\": \"\" }" ] } ``` 3. On the client side, subscribe to the AWS AppSync Events channel to receive and react to updates. For example, a React application could use the [AWS Amplify](https://docs.aws.amazon.com/amplify/) library: ```javascript await eventsClient.connect(`payments/lounges/${lounge_id}`).subscribe({ next: (data) => { if (data.type === "requires_payment_method") { setReadyToCollect(true); } }, }) ``` While the example above leverages AWS services, you could implement similar flows using any of the previously discussed technologies, trading off complexity, latency, and cost. For instance, you might configure a webhook event destination that publishes a message to a [Momento Topic](https://www.gomomento.com/platform/topics/) when payment data changes, enabling real-time frontend updates without AWS. ### Conclusion Extending Stripe events to the frontend empowers you to build rich, responsive, and interactive applications powered by real-time data streams. With this foundation, retailers can notify merchants of individual sales moments after they occur, subscription platforms can instantly alert users to changes in billing status, and support teams can monitor account events as they happen to provide proactive service. Consider additional real-world use cases such as: - **Inventory Updates**: Automatically adjust stock levels shown on e-commerce frontends once payments settle. - **Customer Support Dashboards**: Display real-time payment and subscription changes to customer success teams. - **Analytics and Reporting**: Feed live metrics into dashboards for operational visibility. By combining Stripe’s powerful event architecture with modern frontend technologies and subscription patterns, developers can deliver compelling experiences that delight users and drive business outcomes. To learn more about developing applications with Stripe and unlock new possibilities with event-driven integrations, visit our [YouTube Channel](https://www.youtube.com/stripedevelopers). Or check out [my conversation with James Beswick](https://www.youtube.com/watch?v=DIsGgXfp7RI) on this topic. An online marketplace is a digital platform connecting buyers and sellers, allowing them to conduct transactions over the internet. Typically, a marketplace relies on third-party vendors to fulfil products and services but may also host a mix of third and first-party products. To succeed, a marketplace should run on a business model that generates profits from funneling customers to sellers by managing all commercial relationships. Marketplace business models rely on monetizing the added value they provide to both customers and third-party sellers. Also read [Stripe Connect programmatically powers marketplaces](https://stripe.dev/blog/stripe-marketplaces-mapping-commercial-relationships-code), which covers how to configure [Stripe Connect](https://docs.stripe.com/connect) to support different monetization strategies. ## **Meet Greens & Dairy Mart** This example uses *Greens & Dairy Mart*, a fictitious online marketplace that allows independent farmers to sell their produce directly to consumers. When using *Greens & Dairy Mart,* buyers choose products from multiple farms and add them to a *Greens & Dairy Mart* basket. Customers pay for the products on the website and receive the products directly from the farmers. Farmers receive the money once the product has been delivered. *Greens & Dairy Mart* uses [Stripe Connect](https://docs.stripe.com/connect) and [Stripe Billing](https://docs.stripe.com/billing). ## The basics of marketplace monetization Marketplaces match buyers with sellers; they earn money from both sides of the commercial exchange. Typically, marketplaces add commission or fees to the base price provided by the sellers and, additionally, try to monetize each of the steps that adds value to the exchange. Example of commercial activities monetized by marketplaces: * **Marketing:** on top of the standard platform options, marketplaces can also offer sellers the possibility to do bespoke marketing on their platform and position exclusive deals and offers. * **Shipping/delivery/returns:** sellers usually manage order fulfilment. Sometimes, marketplaces offer shipping and delivery services to streamline the customer buying experience. Most of the time, sellers pay for the service, although it is not unusual for buyers to contribute to the cost of shipping too. * **Payment and money management:** when facilitating payments through their platform, marketplaces get the opportunity to monetise financial operations. Typical categories of service are: pay-ins, payouts, refunds, disputes, currency exchange, tax management. Most of these services bring value to the sellers. * **Insurance:** When the value of the goods or services proposed is high, marketplaces might also offer insurance on the goods. This service is typically offered to both buyers and sellers. All these value-added services might be delivered directly by the marketplace or, alternatively, by a third-party provider. In this latter case, the marketplace will have to ensure payments for those services are disbursed correctly and compliantly. For instance, marketplaces do not usually hold insurance licenses, therefore, if they offer insurance, they offer a third-party product and often monetise the referral. To monetize services, marketplaces have multiple options: * Take its fees directly from the transactions processed through the platform: common for buyer fees and seller payment-processing fees; * Charge its fees recurrently (e.g. at the end of the month): common for volume based services like marketing leads. * Invoice just once when the service is requested: e.g. common when offering insurance. Stripe helps marketplaces remain compliant with money management by staying outside the flow of funds and, at the same time, monetise: * by enabling to programmatically add monetization fees on top of each money transaction, * by providing a [user-based-billing API](https://docs.stripe.com/billing/subscriptions/usage-based) and a [recurring payment API](https://docs.stripe.com/subscriptions); * by providing an [invoice API](https://docs.stripe.com/invoicing); * and by providing other APIs that help embed value-added financial services [like loans and other on top of their regular services](https://docs.stripe.com/money-management). ## **Greens & Dairy Mart monetization strategy** 1. *Greens & Dairy Mart* charges sellers 15% flat rate to their farmers on the items they sell to cover for payment processing and operational costs. 2. They offer sellers exclusive marketing options on the platform (e.g. premium positioning on page), and charge farmers a pay-per-click fee and additional fee based on conversion. 3. Shipping is usually managed by the farmers and added at check-out. For those farmers who do not want to manage shipping logistics; *Greens & Dairy Mart* offers running deliveries on their behalf. Their fee structure is a combined additional 5% per delivery charged to sellers and a tiered 5-10 GBP flat fee to buyers, based on the weight of the order. This service is provided by Green & Dairy Mart's employees. 4. *Green & Dairy Mart* usually pays out orders after they have been fulfilled. They have started offering faster payouts, at a fee, to those farms with a good track record. And those same sellers can opt into a “damaged goods” insurance, to cover the losses from refunding goods that did not arrive in acceptable condition. This diagram depicts the fund flows associated with the commercial exchanges: ![](/images/managing-marketplace-monetization-with-stripe/image1.png) ## How to code per-transaction fees to sellers Stripe charges marketplaces [payment fees on each payment transaction](https://stripe.com/pricing#connect) it processes. Marketplaces can mirror this behavior and charge sellers a fee that covers this cost and other operational costs. This fee comes back to the marketplace from the connected account balance after the payment is successfully processed. **Charging fees using the Stripe Platform pricing tool** Stripe provides a [platform pricing tool](https://docs.stripe.com/connect/platform-pricing-tools), which helps marketplaces create rules that apply different fees based on multiple payment conditions. When *Greens & Dairy Mart* introduced the shipping service for sellers and charged an additional 5% to those that used it, they decided to move from managing fees explicitly on the business backend to adopting the Stripe platform pricing tool. They identify payments for orders whose delivery they will fulfil using the following [metadata](https://docs.stripe.com/metadata) key:value pair: - `delivery_by: [farm / platform]` And configure the pricing tool as follows: ![](/images/managing-marketplace-monetization-with-stripe/image3.png) Stripe pricing tools allow *Greens & Dairy Mart* to create [pricing schemes](https://docs.stripe.com/connect/platform-pricing-tools/pricing-schemes) to group farms that might be under better commercial terms and thus need different fees. The Stripe pricing tool can be tested in a [Stripe sandbox](https://docs.stripe.com/connect/platform-pricing-tools/testing#test-in-a-sandbox). Before activating a rule, it’s possible to [test its impact across historical transactions](https://docs.stripe.com/connect/platform-pricing-tools/testing#platform-pricing-testing-tool). ## **Charging fees using application fees** For those use cases where the marketplace prefers to control the fees on their own business logic, Stripe Connect allows marketplaces to add an *application\_fee\_amount* to the [PaymentIntent API call](https://docs.stripe.com/api/payment_intents/object#payment_intent_object-application_fee_amount). ## How to code invoiced fees Marketplaces fees that are not linked 1:1 to transactions are usually invoiced separately. Stripe offers a [billing product suite](https://docs.stripe.com/billing) which includes an [Invoice API](https://docs.stripe.com/invoicing) and a [Subscriptions API](https://docs.stripe.com/subscriptions) that allow to programmatically automate the marketplace-fee requests. Invoices and subscriptions are usually paid using funds outside Stripe Connect. However, in certain countries, Stripe offers marketplaces the option to use Stripe account balances to pay for SaaS fees. ## **Invoicing at regular intervals** *Greens & Dairy Mart* uses Stripe usage-based billing to invoice monthly for click-to-pay marketing services and to pass on any penalties generated from payment disputes or missed deliveries. The full process to invoice regularly for a metered service is: 1. [Create a product](https://docs.stripe.com/api/products/create) 2. [Create a billing meter](https://docs.stripe.com/api/billing/meter/create) 3. [Create the price as a combination of 1 and 2](https://docs.stripe.com/api/prices/create). 4. [Create subscription](https://docs.stripe.com/api/subscriptions/create) 5. [Generate meter events per each chargeable action](https://docs.stripe.com/api/v2/billing/meter-event/create) They use three [billing meters](https://docs.stripe.com/billing/subscriptions/usage-based/meters/configure): pay-per-click; pay-per-conversions and penalties. POST /v1/billing/meters: ```bash curl -X POST "https://api.stripe.com/v1/billing/meters" \ -u 'REPLACE_WITH_YOUR_SECRET_KEY': \ -d "display_name"="Pay per click" \ -d "event_name"="clicks" \ -d "default_aggregation[formula]"="sum" \ -d "value_settings[event_payload_key]"="value" \ -d "customer_mapping[type]"="by_id" \ -d "customer_mapping[event_payload_key]"="stripe_customer_id" ``` All three meters will be managed by adding the values passed by the events. For instance, each time a customer clicks on a product ad, the meter event is triggered: POST /v2/billing/meter_events: ```bash curl -X POST "https://api.stripe.com/v2/billing/meter_events" \ -u 'REPLACE_WITH_YOUR_SECRET_KEY': \ -d "identifier"="idmp_12345678" \ -d "event_name"="clicks" \ -d "timestamp"="2025-07-31T12:00:00.000Z" \ -d "payload[stripe_customer_id]"="cus_SrNgH2tpLj0nI3" \ -d "payload[value]"="1" ``` With the API call above, we assign the event to the `customer_id` linked to the connected account of the farm whose ad is clicked. The Stripe dashboard helps monitor events and analyse overall performance of the meters. ![](/images/managing-marketplace-monetization-with-stripe/image2.png) To periodically invoice and charge for the metered services, the marketplace will create a subscription for the Stripe prices related to the meters: ```bash curl -X POST "https://api.stripe.com/v1/subscriptions" \ -u 'REPLACE_WITH_YOUR_SECRET_KEY': \ -d "customer"="cus_SrNgH2tpLj0nI3" \ -d "collection_method"="charge_automatically" \ -d "items[0][price]"="price_1RvgklRf11bwQ2gfntzciS2d" \ -d "items[1][price]"="price_2RvgklRf11bwQ2gluigaffea" \ -d "items[2][price]"="price_3RvgklRhhefkhfksdkazcS2d" \ ``` Where `customer` is the customer ID associated with the Stripe account of the farm whose meter we are using. The `collection_method` is set to `charge_automatically` because this API call assumes that at the moment we are creating the subscription we have already saved the default payment method to pay with. Each price item is a line in the subscription invoice. For instance, the price for the pay per click service is: ``` curl -X POST "https://api.stripe.com/v1/prices" \ -u 'REPLACE_WITH_YOUR_SECRET_KEY': \ -d "currency"="gbp" \ -d "product_data[active]"="true" \ -d "product_data[name]"="pay per click" \ -d "product_data[statement_descriptor]"="pay per click" \ -d "recurring[meter]"="mtr_test_61T7aNt0FSlSNmCCc41I2RyGN8ci3UsS" \ -d "recurring[interval]"="month" \ -d "recurring[usage_type]"="metered" \ -d "unit_amount"=2 ``` This uses the meter ID associated with this counter and a price of 0.02 GBP per click. ## **One-off invoices** For services requested ad hoc, the Invoicing API can be used. *Greens & Dairy Mart* offer farms insurance for damaged deliveries. If food arrives to customers in suboptimal conditions, they refund the customer, no questions asked, and not pass the cost of that refund to the farms. This insurance is invoiced once a year. Generally the process for creating invoices goes as follows: 1. Create an empty invoice with `pending_invoice_items_behaviour` set to “include”. 2. Add the invoice items. 3. Finalize the invoice to activate the invoice and get paid. POST /v1/invoices: ```bash curl -X POST "https://api.stripe.com/v1/invoices" \ -u 'REPLACE_WITH_YOUR_SECRET_KEY': \ -d "customer"="cus_SrNgH2tpLj0nI3" \ -d "collection_method"="charge_automatically" \ -d "description"="Damaged goods insurance" \ -d "pending_invoice_items_behavior"="include" ``` POST /v1/invoiceitems: ```bash curl -X POST "https://api.stripe.com/v1/invoiceitems" \ -u 'REPLACE_WITH_YOUR_SECRET_KEY': \ -d "customer"="cus_SrNgH2tpLj0nI3" \ -d "pricing[price]"="price_1RwIifRf11bwQ2gfORhzCrkX" \ -d "invoice"="in_1RwIl2Rf11bwQ2gfw90wN1Bd" \ -d "description"="Damaged goods insurance" ``` POST /v1/{insert your invoice ID}/finalize: ```bash curl -X POST "https://api.stripe.com/v1/invoices/{invoice}/finalize" \ -u 'REPLACE_WITH_YOUR_SECRET_KEY': \ -d "auto_advance"="true" ``` This invoice will be automatically paid when it's due provided a payment method has been saved before. Alternatively, Stripe can send an email with the invoice by setting the `collection_method` to `send_invoice`. ## Conclusion The success of a marketplace relies on having a monetization strategy that generates profits from the activities they monetise. With Stripe Connect, marketplaces can enable the payment disbursement flows and manage their monetization programmatically. This provides a central point to monitor and report the health of their different monetization activities. To learn more about developing applications with Stripe, visit our [YouTube Channel](https://www.youtube.com/stripedevelopers). Maintaining consistent data across multiple systems is often mission-critical. As organizations grow, the complexity of keeping product information, pricing, and availability synchronized between internal databases, ERPs, and payment platforms like Stripe becomes increasingly challenging. Effective data reconciliation serves as the foundation for accurate financial reporting, seamless customer experiences, and operational efficiency. Part 3 of this series explores different reconciliation approaches available to modern organizations, from real-time streaming solutions that provide more immediate consistency to batch processing techniques that offer cost-effective periodic synchronization. Whether you're managing hundreds or millions of products, understanding the strengths, limitations, and ideal use cases for each reconciliation strategy can help you build resilient systems that scale with your business while preventing costly discrepancies that can impact both customer trust and your bottom line. ## Tools and techniques for effective reconciliation There are many established approaches to data reconciliation, depending upon your architecture, runtimes, and database technology, but they are broadly divided into real-time and batch processing solutions. Each category has its strengths and ideal use cases. ### Real-time reconciliation tools Real-time tools focus on processing data changes as they occur, maintaining tight consistency between systems at the cost of higher implementation complexity: [**Apache Kafka**](https://kafka.apache.org/) serves as a distributed event streaming platform capable of handling millions of events per second. Its persistence and replication features make it ideal for building resilient real-time data pipelines. Kafka's approach to partitioning allows for horizontal scaling as your product catalog grows, while consumer groups enable parallel processing of updates. [**Apache Flink**](https://flink.apache.org/) provides a framework for stateful computations over data streams. It excels at complex event processing scenarios where reconciliation requires understanding the context or history of previous changes. Flink's ability to maintain application state makes it particularly valuable for implementing sophisticated reconciliation rules that depend on historical data patterns. [**Delta Live Tables**](https://www.databricks.com/product/data-engineering/dlt) from Databricks offers a declarative approach to building reliable ETL pipelines with built-in data quality validation. It combines the reliability of batch processing with the freshness of stream processing, allowing for continuous reconciliation with quality guarantees. This platform is particularly valuable when reconciliation involves complex transformations or data quality concerns. [**Debezium**](https://debezium.io/) focuses specifically on [Change Data Capture](https://en.wikipedia.org/wiki/Change_data_capture) (CDC), capturing row-level changes in databases and converting them into event streams. This enables fine-grained tracking of product data changes without modifying application code, making it ideal for retrofitting event-driven reconciliation onto existing systems where direct code modification isn't feasible. These real-time tools excel at maintaining more immediate consistency but typically involve higher implementation complexity and operational overhead. They're best suited for situations where discrepancies must be minimized, such as when pricing or availability information must be tightly synchronized to avoid customer experience issues. ### Batch processing tools Batch processing approaches trade some timeliness for simplicity and cost-efficiency, making them suitable for periodic deep reconciliation: [**Apache Spark**](https://spark.apache.org/) provides a distributed data processing engine capable of efficiently processing large datasets across clusters of computers. Its in-memory processing model makes it considerably faster than traditional MapReduce approaches for large-scale reconciliation jobs. Spark's DataFrame API simplifies the expression of complex transformations between data models, while its scheduling capabilities enable periodic deep reconciliation processes. [**AWS Glue**](https://aws.amazon.com/glue/) offers a fully managed ETL service that simplifies the process of discovering, preparing, and combining data for reconciliation. Its serverless nature means you don't need to manage infrastructure, making it accessible for teams without dedicated data engineering resources. Glue's integration with the broader AWS ecosystem makes it particularly valuable when your internal systems already run on AWS. [**Snowflake**](https://www.snowflake.com/en/) leverages its cloud-native architecture to provide highly scalable data warehousing capabilities with separation of storage and compute. This can make it cost-effective for large reconciliation jobs that run periodically rather than continuously. Snowflake's support for semi-structured data simplifies working with the JSON payloads often returned by APIs like Stripe's. [**dbt**](https://www.getdbt.com/) (data build tool) has emerged as a popular solution for transforming data already loaded into a warehouse. It brings software engineering best practices to data transformations, with features like version control, testing, and documentation. While not a complete reconciliation solution on its own, dbt excels at expressing the transformation rules needed to align data models between systems. Batch processing approaches are typically more cost-effective for large datasets and better suited for deep reconciliation processes that don't require immediate consistency. They're ideal for periodic health checks of your data synchronization or for addressing accumulated discrepancies that may have been missed by real-time systems. ### Validation and data quality tools Regardless of which reconciliation approach you choose, validating data consistency and quality is essential: [**Great Expectations**](https://greatexpectations.io/) is an open-source data validation framework that allows you to express what you "expect" from your data. You can define expectations about product data consistency between systems and automatically verify these expectations during reconciliation processes. Its integration with popular data processing frameworks makes it adaptable to various reconciliation architectures. [**Apache NiFi**](https://nifi.apache.org/) provides a web-based interface for automating data flows between systems with built-in validation capabilities. Its visual approach to building data pipelines makes it accessible to teams without deep coding expertise, while its extensive processor library supports a wide range of data sources and transformation needs. [**Talend**](https://www.talend.com/) delivers an enterprise-grade data integration platform with comprehensive data quality modules. Its visual development environment simplifies the creation of complex reconciliation workflows, while its data quality features help identify and resolve inconsistencies between systems. [**Airbyte**](https://airbyte.com/) has emerged as a popular open-source ELT platform that simplifies connecting to various data sources, including Stripe. Its growing connector ecosystem means you can quickly establish data pipelines between your systems without building custom integrations. Airbyte's focus on configuration rather than coding makes it accessible to data analysts and engineers alike, while its incremental sync capabilities help minimize processing overhead during reconciliation. These validation and quality tools complement both real-time and batch processing approaches by ensuring that reconciliation processes maintain data integrity. They provide visibility into discrepancies and help establish confidence in the synchronized state of your product data across systems. ## Best practices for product data reconciliation Successful product data reconciliation isn't just about choosing the right technology—it also requires implementing sound architectural principles and operational practices. ### Establish clear ownership and source of truth In distributed systems, ambiguity about which system "owns" which data attributes leads to inconsistency and reconciliation conflicts. You should define clear boundaries of ownership. Your ERP or product information management (PIM) system should own core product specifications including names, descriptions, categories, and relationships to other products. When these attributes change, the change should originate in this system and flow outward to other systems, including Stripe. Stripe naturally owns payment terms and pricing structures such as subscription billing cycles, trial periods, and discount application rules. These financial aspects of products are Stripe's domain expertise and are often best managed within its specialized models. Your inventory or warehouse management system should own stock levels and availability information. This operational data reflects the physical reality of your business and should be sourced from systems connected to your supply chain. This clear delineation of ownership creates a "directional source of truth" rather than a single monolithic source. Each attribute has a defined origin point, and changes flow in predetermined directions. When discrepancies arise, there's no ambiguity about which system's data should prevail. Document these ownership boundaries explicitly and ensure they're understood across teams. Create visualizations of your data flow that illustrate how product attributes originate and propagate through your systems landscape. This clarity helps prevent well-intentioned but problematic direct edits in non-authoritative systems. ### Implement idempotency throughout your reconciliation pipeline Distributed systems must contend with network failures, retries, and occasional duplicate processing. Idempotent operations—those that produce the same result regardless of how many times they're executed—are essential for reliable reconciliation: Design operations that can be safely retried without side effects. This often means checking the current state before applying changes, ensuring that repeated applications of the same change won't create unintended consequences like duplicate records or compounding numeric values. Use idempotency keys with Stripe API calls to prevent duplicate operations. Stripe's API supports idempotency keys that allow you to safely retry requests without worrying about creating duplicate resources. Generate consistent idempotency keys based on the content of your operation rather than random values to ensure retried operations are recognized as duplicates. Implement deduplication in your queue processors by tracking processed message IDs or using natural keys derived from the data. This prevents the same product update from being applied multiple times, even if it appears in your queue more than once due to retry logic. Track reconciliation state to avoid unnecessary operations. Before making API calls, check if the current state already matches the desired state. This reduces API usage and minimizes the chance of hitting rate limits, while also making your reconciliation process more efficient. Consider using content-based hashing to detect actual changes. Rather than blindly updating based on timestamps, compare the content fingerprints of records to determine if meaningful changes have occurred. This prevents unnecessary update operations when data was touched but not actually changed. ### Build a detailed conflict resolution strategy In bidirectional synchronization scenarios, conflicts will inevitably arise. Having predefined resolution strategies prevents ad-hoc decisions that lead to inconsistency. For example: * If System A has newer timestamps for a specific field, use System A's data. This time-based approach works well for attributes with clear modification timestamps and straightforward update patterns. However, it requires reliable and synchronized clocks across systems—a detail that's sometimes overlooked. * If System B has more complete information for certain fields, prefer System B regardless of timestamps. This recognizes that some systems have richer data models for specific attributes and should be treated as authoritative for those fields based on data completeness rather than recency. * For critical field mismatches—those that affect core business operations like pricing or availability—route to manual review rather than applying automatic resolution. Create workflows that flag these high-impact discrepancies for human intervention, complete with context about the conflict and tools to resolve it efficiently. * For non-critical mismatches, follow predefined business rules based on the specific fields involved. These rules should reflect your organization's priorities and can include fallback hierarchies (try method A, if not applicable try method B) or field-specific policies (always prefer longer descriptions but more precise measurements). Document your conflict resolution strategy clearly and review it periodically as your systems and business evolve. What works for your current scale and product mix may need adjustment as you grow or enter new markets with different regulatory requirements or business practices. ### Use soft deletes and tombstones Product deletions present unique reconciliation challenges—once data is permanently removed, it becomes difficult to track what was deleted and when. Instead: Implement soft deletes with status flags rather than physically removing records. This preserves the product information while marking it as inactive or archived, making it easier to track the product lifecycle across systems without losing historical context. Maintain tombstone records that persist after logical deletion, containing minimal identifying information and deletion metadata. These lightweight records serve as evidence that a product was intentionally removed rather than lost through synchronization errors. Define clear policies for when records can be permanently removed from all systems. These policies should balance storage costs, compliance requirements, and operational needs. Many organizations find that an archival strategy with progressively reduced detail is more effective than complete purging. Consider archive strategies for historical data that maintain important business information while reducing storage costs. This might involve moving older product data to cheaper storage tiers while maintaining searchability for audit and analysis purposes. These approaches to deletion ensure that reconciliation processes can distinguish between products that should be removed and those missing due to synchronization failures. They also preserve valuable historical data that may be needed for analytics, compliance, or customer support. ## Conclusion As your product catalog grows, data reconciliation between your systems and Stripe transforms from a simple synchronization task into a significant architectural challenge. The approaches that worked for hundreds of products likely won't scale to hundreds of thousands or millions. As you implement these practices, focus on observability and metrics that provide insight into the health of your reconciliation processes. Track synchronization latency, conflict rates, and resolution patterns to identify areas for improvement before they impact your business. Regular reconciliation audits can help verify that your automated processes are working as expected and catch edge cases that might otherwise go undetected. Perfect product data synchronization is difficult to achieve, but with thoughtful architecture, appropriate tools, and clear organizational practices, you can achieve the consistency necessary for reliable business operations across your entire product catalog. For more Stripe developer learning resources, subscribe to our [YouTube Channel](https://www.youtube.com/@StripeDev). In digital commerce, maintaining consistent product data across your systems and third-party platforms is critical yet challenging. Whether you're managing a handful of subscription products or orchestrating a catalog with thousands of SKUs, reconciliation failures can lead to pricing discrepancies, failed transactions, and ultimately, lost revenue. This series looks at this problem in detail. This post dives into common reconciliation patterns that bridge the gap between your product catalog and Stripe's representation of the data. We'll explore both simple first implementations that may serve early-stage products and more robust architectures designed for scale and resilience. Through practical examples and architectural diagrams, you'll gain insights into creating systems that maintain data integrity even as your business grows and becomes more complex. By understanding these patterns, you can build synchronization mechanisms that silently but effectively keep your critical product data in harmony across systems. ## Common reconciliation scenarios Let's examine two prevalent scenarios that software architects must address when reconciling product data with Stripe, exploring both naive first implementations and more robust approaches. ### Scenario 1: One-way synchronization from your system to Stripe In this common pattern, your internal system serves as the single source of truth for product information, with changes propagating to Stripe whenever products or prices are updated. A naive implementation might look like this: ![](/images/database-reconciliation-growing-businesses-part-2/image3.png) A typical first implementation might look like this: 1\. Product changes in your system trigger an event or webhook 2\. This event is processed by a Lambda function or similar serverless worker 3\. The function calls the Stripe API to create or update the product data 4\. Stripe returns a 200 response, and the process considers the product successfully updated 5\. The system moves on to the next change with no persistent record of the synchronization The Lambda function code simply packages the events received by the function and calls the Stripe API: ```javascript const AWS = require('aws-sdk'); const stripe = require('stripe')('your-secret-key-here'); exports.handler = async (event) => { for (const record of event.Records) { const messageBody = JSON.parse(record.body); const { productId, updates } = messageBody; try { // Update the product in Stripe const updatedProduct = await stripe.products.update(productId, updates); console.log('Product updated successfully:', updatedProduct); } catch (error) { console.error('Error updating product:', error); // The message will remain in the queue for reprocessing if there's an error } } }; ``` This approach is straightforward and works well for low volumes, but has several critical flaws that emerge as scale increases: If the Stripe API is temporarily unavailable due to outages or maintenance, the Lambda function might fail, and the change event is lost. There's no built-in mechanism to retry failed operations, leading to data drift between systems. At scale, Lambda functions may be throttled as concurrent executions increase, especially during bulk product updates or catalog refreshes. This throttling can cause some functions to fail without processing their changes, resulting in data loss. High-volume operations may exceed your Stripe API quota limits, causing requests to be rejected. Without proper rate limiting and backoff strategies, your system will continue to hit these limits, potentially triggering temporary bans or additional request failures. The lack of observability makes it difficult to know which products failed to synchronize, leaving the actual state of reconciliation unknown and forcing time-consuming manual verification. #### A more robust implementation ![](/images/database-reconciliation-growing-businesses-part-2/image2.png) A more resilient approach introduces a queue-based architecture that addresses these limitations: 1\. Product changes are captured and stored durably in a message queue (for example, Amazon SQS, Apache Kafka) 2\. A worker service processes the queue at a controlled, configurable rate 3\. Items are only removed from the queue upon confirmed successful processing 4\. Failed operations are automatically retried with exponential backoff 5\. Processing rates are configured to respect Stripe API quota limits 6\. Dead-letter queues capture persistently failing operations for human review The Lambda function is modified to handle batches of messages, and then throw an error if there is a poison pill message in the batch: ```javascript const AWS = require('aws-sdk'); const stripe = require('stripe')('your-secret-key-here'); exports.handler = async (event) => { let allSuccessful = true; // Flag to track success of all updates for (const record of event.Records) { const messageBody = JSON.parse(record.body); const { productId, updates } = messageBody; // Try to update the product in Stripe try { const updatedProduct = await stripe.products.update(productId, updates); console.log('Product updated successfully:', updatedProduct); } catch (error) { console.error('Error updating product:', error); allSuccessful = false; // Mark update as failed } } // Return a success status if all updates were successful if (!allSuccessful) { throw new Error("One or more updates failed."); // This will cause the function to fail, keeping messages in the SQS queue } }; ``` This pattern introduces important guarantees. Changes are stored durably and won't be lost if Stripe is temporarily unavailable. The queue acts as a buffer that can absorb spikes in update volume and weather API outages without losing data. When Stripe becomes available again, processing resumes automatically. Queue depth provides visibility into synchronization backlogs, allowing operations teams to monitor reconciliation health and detect issues before they become critical. Increasing queue depth can trigger alerts or scaling operations to address backlogs. Throttling and retry logic can be implemented independently of your product service, creating a clean separation of concerns. The product service can focus on core business logic while the synchronization service handles the complexities of maintaining consistency with external systems. Processing rates can be dynamically adjusted based on API quota availability, time of day, or business priorities. During critical sales periods, you might increase quota allocation to ensure product updates propagate quickly, while reverting to lower rates during maintenance windows. ### Scenario 2: Bidirectional synchronization The more complex scenario involves changes originating from both your system and Stripe, requiring bidirectional reconciliation. This often occurs when some product attributes are managed in Stripe directly (perhaps by finance teams) while others are managed in your product information system. #### Traditional ETL approach Many organizations initially implement a periodic [ETL](https://en.wikipedia.org/wiki/Extract,_transform,_load) (Extract, Transform, Load) process: 1\. **Extract**: At scheduled intervals, data is pulled from both systems via SQL queries, database dumps, or API calls. This creates point-in-time snapshots of both product catalogs. 2\. **Transform**: The extraction data undergoes transformation processes including schema alignment (mapping fields between systems), data cleaning (fixing formatting inconsistencies), normalization (standardizing values), and aggregation (combining related records). 3\. **Load**: After transformation, a reconciliation engine identifies differences between the systems and applies updates to bring them into alignment. This typically involves a staging area where changes are prepared before being pushed to the target systems. This approach can have significant limitations. It's periodic rather than real-time, creating windows where systems are known to be out of sync. Depending on the frequency of the ETL jobs, these windows could be hours or even days long, potentially impacting business operations. Complex transformation logic is error-prone and difficult to maintain as both systems evolve over time. Each schema change in either system requires updates to the transformation rules, creating ongoing maintenance overhead. Reconciliation rules become increasingly complicated as the business grows. How do you handle situations where the same data was changed in two places? Which system should win when there are conflicts? What happens if a product was updated in one system but deleted in the other? These edge cases multiply over time. The process can become increasingly expensive and time-consuming as data volumes grow, potentially leading to longer reconciliation windows and more opportunities for conflicts to arise. #### Event-driven approach A more modern implementation uses [event-driven architecture](https://en.wikipedia.org/wiki/Event-driven_architecture) to maintain near real-time consistency: ![](/images/database-reconciliation-growing-businesses-part-2/image1.png) 1\. Configure Stripe Event Destinations to stream changes directly to your AWS account via an EventBridge partner event bus. This notifies your systems almost immediately when changes occur in Stripe. 2\. Integrate these webhooks with a durable message bus like SQS and EventBridge for reliable change processing. This combination ensures that events aren't lost even if processing services are temporarily unavailable. 3\. Implement similar event-emitting patterns from your internal systems when product data changes, creating symmetrical event flows from both sources. 4\. Process these events through dedicated synchronization services that apply updates to the opposite system, maintaining bidirectional consistency. This approach offers significant advantages. Near real-time consistency is achieved as changes are propagated as they occur rather than waiting for batch windows. This reduces the reconciliation window from hours to seconds or minutes. The event-driven model provides natural auditability of changes, making it easier to trace how and when data evolved in each system. This audit trail is invaluable for debugging and compliance purposes. Change isolation means each update is processed independently, reducing the complexity of conflict resolution compared to batch processes where multiple changes must be reconciled simultaneously. The architecture scales more gracefully as systems grow, with the ability to parallelize processing and dynamically adjust throughput based on load and priority. ## Conclusion Reconciling product data between your systems and Stripe represents a critical architectural challenge that evolves as your business scales. We've explored two common synchronization patterns—one-way and bidirectional—and witnessed how naive implementations can quickly break down under real-world conditions of scale, outages, and competing updates. The evolution from simple direct-call architectures to robust queue-based and event-driven systems highlights a fundamental principle: durable, observable processes are essential for maintaining data consistency across distributed systems. By implementing proper buffering mechanisms, retry logic, conflict resolution, and monitoring, you can create synchronization pipelines that gracefully handle the inevitable disruptions of distributed computing. Remember that reconciliation isn't just a technical challenge but a business imperative. When product data falls out of sync, the consequences ripple through the entire customer experience. Investing in resilient synchronization architecture pays dividends in reliable operations and customer trust. For more Stripe developer learning resources, subscribe to our [YouTube Channel](https://www.youtube.com/@StripeDev). ![](/images/gating-entrances-with-stripe-and-nfc-passes/image6.png) While working remotely and traveling from place to place, I noticed a recurring pattern. Every time you arrive in a new city, you rent an Airbnb or check-in to a hotel. Then you sign up for a gym and a co-working space. Payments for these services are all done electronically. But when it comes to access, you need a plastic card, a fob, or a physical key. This creates friction for everyone involved. You have to go pick it up, carry it around, hope you don’t lose it, and return it before leaving. From the business side, they need to pay someone to work the front desk to issue, track, and collect these access devices. This made me wonder, what if access was fully digital? ## Digital wallet passes Luckily, there is a better way that is gaining popularity. Instead of cards and keys, we can issue digital passes with Google Wallet and Apple Wallet and use an NFC reader to gate the entrance. These digital passes are like certificates that are scannable with NFC. They can be issued and revoked electronically without human intervention (no front desk needed). Since everyone already has a smart phone or watch with Apple Wallet & Google Wallet, there’s nothing extra to install or carry. ## Integration Both Apple and Google have public Wallet APIs for issuing passes, but for smaller companies it's easier to use an intermediary like [PassNinja](https://www.passninja.com/). [PassNinja](https://www.passninja.com/) acts as an abstraction layer on top of Apple & Google, so you only have to integrate one API. Then you can place an Apple/Google compatible NFC reader near the doorway. We'll use the [DotOrigin](https://www.dotorigin.com/) [VTAP100](https://shop.vtapnfc.com/product/vtap100-embedded-nfc-reader-board/). ## Building it As an example, we'll build a simple gym membership system. Members can purchase a Stripe Subscription and a digital pass will be issued to them. The member can then use their phone (or watch) to access the doorway. ![](/images/gating-entrances-with-stripe-and-nfc-passes/image5.png) There will be two codebases: 1. **Website**: A public facing website that accepts payments via Stripe Checkout and issues the digital passes. 2. **Gate**: A private access control system that runs on Linux near the entrance. It will verify the status of the membership by contacting the Stripe Subscription API, and unlock the door for active members. ## Architecture ![](/images/gating-entrances-with-stripe-and-nfc-passes/image1.png) ## Hardware Here’s what you’ll need to build the solution: ### Requirements - **Computer**: A [Raspberry PI Zero 2W](https://www.raspberrypi.com/products/raspberry-pi-zero-2-w/) or equivalent. For communicating between NFC Reader and Stripe API over WiFi. - **NFC Reader:** [VTAP100](https://shop.vtapnfc.com/product/vtap100-embedded-nfc-reader-board), an Apple / Google Wallet compatible NFC reader. - **Door Strike/Bolt:** To unlock and lock the door. - **Relay:** A [3.3V Relay](https://abra-electronics.com/electromechanical/relays/relay-modules-shields/rm-1-3-3v-t-single-isolated-3-3v-relay-high-low-trigger-module-10a.html) or equivalent. To control locking and unlocking the door strike from the Raspberry PI. - **PassNinja Account**: To handle issuing of Google & Apple Wallet Passes. ### Wiring diagram The wiring will look like this: ![](/images/gating-entrances-with-stripe-and-nfc-passes/image4.png) ## PassNinja setup To set up PassNinja: 1. Create an account. 1. Visit [https://www.passninja.com](https://www.passninja.com) 2. Click “Get Started” 2. Create a pass template 1. Log in to PassNinja: [https://www.passninja.com/login](https://www.passninja.com/login) 2. Click on “Dashboard” in the upper right corner 3. Click on “New Pass Template” button and create a template for Google & Apple 3. Setup the NFC Reader: Follow these instructions [https://www.passninja.com/tutorials/hardware/how-to-configure-a-dot-origin-vtap100-nfc-reader](https://www.passninja.com/tutorials/hardware/how-to-configure-a-dot-origin-vtap100-nfc-reader) ## Purchase flow The purchase part is on a public website that handles the checkout and issuing of passes. ![](/images/gating-entrances-with-stripe-and-nfc-passes/image3.png) We’ll have an endpoint /subscribe to create the Stripe Checkout session and redirect the user to pay: ```javascript // in web/src/index.ts // create a Stripe API client const stripe = new Stripe('') // when user visits /subscribe, a Stripe checkout session is created and they're redirected to pay app.post('/subscribe', async (c) => { // this is where the user is redirected after payment` const success_url = new URL('/success?session_id={CHECKOUT_SESSION_ID}', '').toString() // create a checkout session` const session = await stripe.checkout.sessions.create({ mode: 'subscription', success_url, line_items: [ { price: '', quantity: 1 } ] }) // redirect the user to pay return c.redirect(session.url) }) ``` When the user finishes paying, Stripe Checkout will redirect them to /success, and the digital pass can then be issued: ```javascript // in web/src/index.ts // create the Pass Ninja API client const passNinja = new PassNinjaClient('', '') // when user visits /success (after checkout completes), issue the digital pass app.get('/success', async (c) => { // get checkout session_id` const session_id = c.req.query('session_id') // get the Stripe checkout session const session = await stripe.checkout.sessions.retrieve(session_id) // get the Stripe subscription const subscription = await stripe.subscriptions.retrieve(session.subscription) // ensure the subscription status is active` if (subscription?.status !== 'active') throw new Error('Subscription was not successful') // we've confirmed it's paid, so issue a new pass` const pass = await passNinja.pass.create( PASSNINJA_PASS_TYPE, { name: session.customer_details.name, email: session.customer_details.email, // *important*: save the subscription_id inside the pass // this is the value the NFC reader sends during a scan "nfc-message": session.subscription } ) // redirect the user to add the pass to their wallet return c.redirect(pass.url) }) ``` ## Door access control The door access logic can run on any computer, but we'll use a Raspberry PI Zero 2W which is an inexpensive option (~$15 USD) and has the ability to control a relay. The sequence looks like this: ![](/images/gating-entrances-with-stripe-and-nfc-passes/image2.png) The NFC reader acts as a virtual serial port, and each time a user’s phone or watch is placed near it, a new line is sent over the serial port. Linux typically maps virtual serial ports to /dev/ttyACM0. To access it from Node.js, we'll use the npm package [serialport](https://www.npmjs.com/package/serialport). ```javascript // in gate/src/index.ts` import { SerialPort } from ‘serialport’` // create a serial port client` const port = new SerialPort({ path: '/dev/ttyACM0', baudRate: 9600 }) // use ReadlineParser, so that we receive a full lines const reader = port.pipe(new ReadlineParser({ delimiter: '\r\n' })) // a new line is sent whenever a pass is near the NFC reader reader.on('data', async (data) => {` // verify pass here }) ``` The data sent comes from the nfc-message field of the pass, which in our case is the Stripe Subscription ID (starts with sub_). We can use that ID to verify that the subscription status is `active`: ```javascript // in gate/src/index.ts reader.on('data', async (subscription_id) => { // retrieve the subscription record const subscription = await stripe.subscriptions.retrieve(subscription_id) // check if subscription is active if (subscription?.status === 'active') { // flash LEDs green, play sound, and trigger relay to unlock the door success(port) console.log(`Access allowed. id=${subscription_id}`) } else { // flash LEDs red and play sound error(port) console.error(`Access denied. id=${subscription_id}, status=${subscription?.status}`) } }) ``` The success logic will then open the door bolt by triggering the relay: ```javascript // in gate/src/index.ts // setup a connection to the relay on GPIO #8 const relay = new Gpio(8) // open the door bolt for 5 seconds` function success(port) { // turn relay on to unlock the door bolt relay.high() // in 5 seconds, turn relay off. // this causes the door bolt to lock. setTimeout(() => relay.low(), 5_000) } ``` ## Conclusion Using digital passes makes physical gating much simpler. It allows merchants to sell and grant access completely digitally, and users don't have to deal with picking up, carrying, replacing, sharing and returning cards and keys. It’s as easy as issuing a pass after payment, and adding an NFC reader to the entrance to verify the status of payment. Special thanks to [Bill Scott](https://www.linkedin.com/in/corumba) at [DotOrigin](https://www.dotorigin.com/) for sharing his knowledge on this topic. For more Stripe developer learning resources, subscribe to our [YouTube Channel](https://www.youtube.com/stripedevelopers). Software architects and developers are often confronted with deceptively simple data consistency challenges that become increasingly complex as systems scale. One particularly common scenario involves ensuring that product information in your internal database remains aligned with third-party payment providers like Stripe. What begins as a straightforward synchronization task between a handful of products can quickly evolve into a significant architectural challenge when your catalog grows to thousands or millions of items. The implications of mismatched data are substantial: lost sales opportunities when products appear in your system but not in Stripe, customer frustration when pricing is inconsistent, potential compliance issues when terms don't match across systems, and financial discrepancies that can impact revenue recognition. Perhaps most challenging is that these problems become increasingly difficult to debug as scale increases, potentially turning what seems like a minor technical hiccup into a business-critical issue. This 3-part series explores different approaches to reconciling product data between your systems and Stripe, examining how the nature of this problem has evolved over time, analyzing common implementation scenarios, and presenting modern tools and best practices to address these challenges effectively. ## The evolution of data consistency challenges ### A historical perspective Data consistency issues have evolved significantly over the decades, with each era introducing new complexities and challenges: **Mainframe era**: In the early days of computing, systems were largely monolithic with a single database serving as the central repository for business data. While these systems were complex in their own right, data consistency was simpler in the sense that everything lived in one place. Updates were atomic, data models were unified, and there were limited cross-system synchronization challenges to manage. The system might be cumbersome, but data consistency was often more straightforward. **Client-server era**: As computing evolved, we moved toward multi-tier architectures with separate databases for different functions. This introduced new challenges in maintaining consistency, but these systems typically operated within your infrastructure boundaries. With databases and application servers under your direct control, you could implement transactions, distributed locking mechanisms, and other techniques to maintain consistency. Reconciliation became more complex but remained within your domain of control. **Cloud/SaaS era**: Today's landscape presents an entirely different challenge. Modern architectures connect across organizational boundaries, networks, and platforms. Your product data might live in your own systems while payment information resides in Stripe, inventory in a third-party logistics provider, and marketing content in a headless CMS. Each system has its own data model, API constraints, and operational characteristics. Reconciliation now involves negotiating between independently operated services, often with different availability guarantees, rate limits, and consistency models. This evolution has dramatically changed the nature of the reconciliation problem. What was once about ensuring consistency within your own walls now requires synchronizing across third-party services, hybrid clouds, and real-time data streams, all operating across varied networks with different availability characteristics. The [eventually consistent](https://en.wikipedia.org/wiki/Eventual_consistency) nature of these distributed systems makes perfect synchronization an aspirational goal rather than a guaranteed outcome. ### Scale changes everything The scale of your product data fundamentally alters the nature of the reconciliation problem, transforming what works at small scale into what fails at large scale. Small-scale operations (hundreds of products) allow for a simpler approach. Manual verification remains feasible when dealing with a limited catalog. A team member can periodically review dashboards or reports to spot discrepancies, and manual corrections are practical when needed. This human-in-the-loop approach works when the volume is manageable. Simple scripts and periodic checks are often sufficient at this scale. A nightly reconciliation job running basic SQL queries or API calls can identify and even auto-correct most issues without sophisticated architecture. These approaches often begin as bespoke scripts written by a developer to solve an immediate need. Reconciliation can be performed on-demand rather than continuously. If an issue arises, it's feasible to trigger a one-time reconciliation process to bring systems back into alignment without significantly impacting operations. This reactive approach is acceptable when discrepancies are rare and limited in scope. Large-scale operations (millions of products) fundamentally change the problem. Manual checking becomes impossible when dealing with massive catalogs. No human can reasonably review thousands, let alone millions, of products to verify consistency. The volume exceeds what can be managed through dashboards or spot checks. Line-by-line comparisons may take days to complete at large scale. Naive batch processes that work for hundreds of products become prohibitively expensive when scaled to millions. Database query performance, API rate limits, and processing overhead all become limiting factors. Products change constantly throughout the day in high-scale environments. By the time a traditional reconciliation process completes, hundreds or thousands of products may have already changed, making point-in-time consistency an elusive goal. The rate of change outpaces simple reconciliation approaches. Reconciliation must be systematized and automated with thoughtful architecture. High-scale reconciliation requires streaming approaches, change data capture, intelligent partitioning strategies, and sophisticated conflict resolution algorithms. What was once a simple script evolves into a critical system component. ## The divergent data models A core challenge in reconciling product data with Stripe stems from the inherently different data models employed by each system. These differences aren't merely technical—they reflect the fundamentally different purposes each system serves. Stripe's product model is payment-focused and designed around facilitating transactions. Products in Stripe have attributes focused on what's necessary for payment processing: names, identifiers, and basic descriptions that appear on checkout forms and receipts. The model prioritizes what matters for successful transactions rather than rich merchandising. Prices in Stripe support multiple currency options, allowing for localized pricing strategies and international sales. The pricing model accommodates complex scenarios like tiered pricing, usage-based billing, and recurring subscription models that may not be represented in your internal systems in the same way. Metadata fields allow for custom attributes, but these are typically limited compared to your internal product information system. Stripe provides this extension mechanism to accommodate varied business needs without overcomplicating its core model. Payment terms and subscription details critical to billing are richly modeled in Stripe, often with more sophistication than your internal systems. Features like trial periods, grace periods, and proration rules may be defined here exclusively. Your internal product model likely contains rich merchandising and operational data. Categories and hierarchical relationships are important for organizing your product catalog, powering navigation, and enabling product discovery. Your internal systems may model complex taxonomies that help customers find products but are irrelevant to the payment process. Inventory levels and availability information drive fulfillment operations and influence what can be sold. This operational data is critical to your business but typically doesn't need to be synchronized with Stripe unless it affects purchasability. Rich descriptions, technical specifications, and media assets support the shopping experience. Your internal systems may store dozens of attributes per product that help customers make purchase decisions but aren't needed for payment processing. Cost data and margin information inform your business operations and pricing strategies but represent sensitive internal information that shouldn't be exposed to payment processors or customers. These different perspectives on "what a product is" create natural friction points during reconciliation and require deliberate mapping strategies to harmonize. The challenge isn't simply technical—it's about understanding which attributes belong in which system and how they should be transformed when moving between contexts. ## Conclusion As systems scale from handling hundreds to millions of products, maintaining data consistency between internal databases and third-party payment providers like Stripe transforms from a simple synchronization task into a complex architectural challenge. This evolution reflects the broader shift from mainframe monoliths to today's distributed cloud ecosystems, where data spans organizational boundaries with different consistency models and operational characteristics. The stakes are high: misaligned product data leads to lost sales, customer frustration, compliance issues, and financial discrepancies that become increasingly difficult to debug at scale. The fundamental challenge stems from reconciling inherently different data models—Stripe's payment-focused approach versus internal systems rich with merchandising and operational data. What works for small catalogs (manual verification, simple scripts) becomes untenable at scale, where the volume and velocity of changes demand sophisticated automated solutions. This series explored the historical evolution of these challenges, analyzed common implementation scenarios, and presented modern architectural approaches that can effectively bridge these divergent systems, ensuring that your product ecosystem remains synchronized despite the inherent complexity of cross-system data consistency. For more Stripe developer learning resources, subscribe to our [YouTube Channel](https://www.youtube.com/@StripeDev). Anthropic has set a high standard for tool integrations in the AI space with its [Model Context Protocol](https://www.anthropic.com/news/model-context-protocol), or MCP for short, at the end of last year. The team at [Portia AI](https://github.com/portiaAI/portia-sdk-python), an open-source AI framework that focuses on building predictable and secure AI agents, tests every official MCP server implementation that gets added to its tool catalog. Much has been said about the risk of trusting agents with the high stakes use cases, especially regarding Stripe APIs and anywhere money movement may be involved. With its emphasis on human control during planning and execution, the Portia AI team explored building a customer refund agent that uses Stripe's MCP server to process a customer refund request safely, by defining the conditions that "short-circuit" these agents with human intervention. In this post, you will see how you can build an agent that: * Reads a customer refund request from a Gmail inbox * Assesses it against a refund policy text file * Asks for human approval before issuing a refund. * Creates the refund using [Stripe's MCP tools](https://docs.stripe.com/mcp) You can also find this example in [Portia's agent examples](https://github.com/portiaAI/portia-agent-examples/tree/main/refund-agent-mcp) \- let's take a look. ## Overview of the Portia SDK Portia AI wants to make it easier to build agents for regulated use cases by offering guardrails you can dial up or down on both planning and execution. Here's what you will see below: * A planning agent considers the task at hand and the tools at its disposal, and produces an explicit multi-agent plan. * The Portia client then invokes execution agents to run the plan, adding their outputs to a persistent plan state along the way. * An execution hook is used to deterministically pause the agent attempting to create a refund and to solicit final human approval while providing an LLM-driven assessment. * The human:agent interface is managed by an abstraction called a `clarification` which gives developers the flexibility of presenting such interactions to users through any UX surface. ## Portia installation and example setup To run this example, you need: * Python 3.11 (or greater) * [uv](https://docs.astral.sh/uv/concepts/projects/dependencies/): to manage dependencies * A Portia AI API key: available at [app.portialabs.ai](https://app.portialabs.ai) \> API Keys * [An OpenAI API key](https://platform.openai.com/api-keys) * [A Stripe API key](https://dashboard.stripe.com/test/apikeys) To access the code, you can clone the [agent examples repository](https://github.com/portiaAI/portia-agent-examples/tree/main) locally and navigate to the `refund-agent-mcp` folder. There you can copy the `.env.example` file to `.env` and add your API keys. ## Adding the Stripe MCP server to your tool registry Portia offers a complimentary cloud service that gives you access to an extensive [tool registry with built-in auth](https://docs.portialabs.ai/cloud-tool-registry). The registry includes cloud tools built by the Portia team for popular services like Gmail, Slack, and Zendesk. It also includes a rapidly growing list of MCP servers with communication over a streamable HTTP connection, including Stripe's official [MCP server](https://docs.stripe.com/mcp). Portia allows you to extend the registry with your own tool definitions, connect local MCP servers, or add new remote ones (Portia handles the authentication for you). You can check out the integrations available in Portia cloud and configure the Stripe MCP server with your Stripe API key. Head over to the [dashboard](http://app.portialabs.ai) and follow along with the video snippet below. This adds all of the Stripe MCP server's tools to your `DefaultToolRegistry`. ![](/images/guardrails-money-movement-integrating-stripe-mcp-portia-ai/image1.png) Portia stores all authentication credentials using [production-grade encryption](https://docs.portialabs.ai/security). ## Usage To run this example: 1. Set up a Stripe payment you want to refund. You can use a handy script that is available in the repository: ```bash uv run stripe_setup.py --email . ``` 2. Send an email to that test email address with the subject "Hoverboard refund request" and an example refund request. For example: ``` Hi Hoverboard support team, I bought one of your hoverboards 3 days ago. When I took it out of the box and turned it on, it did not work. Please can I get a refund? Thanks, Marty McFly ``` 3. To run the agent, execute the following command: ```bash uv run refund_agent.py --email "" ``` 4. At the end of your plan, you should see a refund show up against the payment in your Stripe dashboard. You can monitor the execution from the *Plan Runs* tab of the Portia dashboard. Your input is required by the agent in two different steps as shown below (the exact step numbering may vary): - Step 1: Human grants access to Gmail. Resolve this by clicking on the oAuth link on the dashboard. ![](/images/guardrails-money-movement-integrating-stripe-mcp-portia-ai/image2.png) - Step 7: Human reviews and approves. Resolve by typing in "y" inline when you see this clarification in the CLI. ![](/images/guardrails-money-movement-integrating-stripe-mcp-portia-ai/image3.png) ## Understanding the code ### Tool selection and tool calling Once set up in the Portia Tool Registry, the `DefaultToolRegistry` automatically fetches Stripe (and any of the tools you have enabled in the registry). These are provided to the planner to produce the final plan meeting the user's query. They are then used during the plan run to complete the plan run and the task at hand. Based on the prompt provided, you will find that the plan runs correctly, querying for the `customer` and then `payment_intent` objects in Stripe before creating the refund against the most recent one. We want the agent to read the refund request, compare it with the company's refund policy (see [./refund\_policy.txt](https://github.com/portiaAI/portia-agent-examples/blob/main/refund-agent-mcp/refund_policy.txt)) and make a decision autonomously. This last step is handled in the `RefundReviewerTool` custom tool, which is combined with the `DefaultToolRegistry`. ### Agent and human refund approval clarification Because refunds involve sending out money, if the agent thinks a refund should be issued, we want to get a human to review the request along with the agent's rationale. To achieve this, you can pause execution and wait for a [clarification](https://docs.portialabs.ai/understand-clarifications) to get a human to review the request and the agent's analysis. This is implemented using [`ExecutionHooks`](https://docs.portialabs.ai/execution-hooks) by setting the `before_tool_call` property to invoke the method `clarify_on_tool_calls("mcp:stripe:create_refund")` and raise the required clarification. If the end user replies yes (types in 'y' in the CLI), the workflow proceeds, otherwise it exits without creating the refund. In this particular case, you use the CLI to elicit responses from the human, but you can build end-to-end applications that handle clarifications and communication back and forth with the user instead. ```py # Declare your Portia client and set up your execution hook before the create_refund tool call portia = Portia( config=config, tools=tools, execution_hooks=CLIExecutionHooks( before_tool_call=clarify_on_tool_calls("portia:mcp:mcp.stripe.com:create_refund") ) ``` ### Generating and running the plan You’re now ready to bring this together by invoking the Portia client with a natural language prompt. You’re asking it to load the refund policy from `refund_policy.txt`, compare it with the customer refund message in the file `inbox.txt` and email the customer if and once the refund is processed. The prompt also describes how refunds are created in Stripe in functional terms to improve its sequencing of the tool calls (customer \--\> payment intent \--\> refund). ```py # Generate and run the plan plan = portia.plan(""" Read the customer's refund request email from the file "inbox.txt" and decide if it should be approved or rejected based on the refund policy in "refund_policy.txt" file. If it should be approved, then process the refund. Otherwise, do not process the refund. Finally, send a polite email to the customer with details of what you did. Stripe instructions -- To process a refund in Stripe, you need to: * Find the Customer using their email address from the List of Customers in Stripe. * Find the Payment Intent ID using the Customer from the previous step, from the List of Payment Intents in Stripe. * Create a refund against the Payment Intent ID. """ ) portia.run_plan(plan) ``` ### Gmail authentication At the start of the plan run, the agent recognizes that it needs to search a Gmail inbox and eventually send an email. Because Portia cloud's tools use OAuth, the agent requests an end user to authenticate before it starts executing so that it can complete as much of the flow autonomously as possible. ## Learn more To learn more about what Stripe is offering to support agent use cases, refer to the [agent toolkit](https://github.com/stripe/agent-toolkit) for both Python and Typescript resources. If you want to learn more about Portia's SDK, follow the resources below: * The [SDK in GitHub](https://github.com/portiaAI/portia-sdk-python) * The [Portia docs](https://docs.portialabs.ai) * Join the conversation on our [Discord channel](https://discord.gg/DvAJz9ffaR) * Learn more on our [YouTube channel](https://www.youtube.com/@PortiaAI) The world of AI agents is evolving rapidly, but most solutions still require significant technical expertise to implement. What if you could create sophisticated financial operations agents using nothing more than natural language descriptions? That's exactly what [Hypermode Agents](https://docs.hypermode.com/agents/introduction) enables when combined with Stripe's powerful payment processing capabilities. You can speed up complex financial workflows using natural language with no code required. In this post, we'll explore how to build domain-specific financial operations agents that can handle everything from payment processing to complex refund decisions - all through conversational interfaces powered by the [Stripe Model Context Protocol](https://docs.stripe.com/mcp) (MCP) server and Hypermode Agents. ## What makes Hypermode Agents different ![](/images/building-financial-operations-agents-hypermode-stripe/image1.png) When creating agents that are empowered to take action on your behalf, Hypermode Agents has a unique approach by focusing on two key principles: 1. **Domain-specific design**: Rather than building general-purpose AI assistants, Hypermode encourages creating specialized agents for specific roles, like financial operations, customer support, or marketing. This specialization leads to more reliable and effective execution. 2. **Natural language configuration**: Instead of writing code, you describe your agent's role, background, and capabilities in plain English. Hypermode's [Concierge agent](https://docs.hypermode.com/agents/create-agent) guides you through an interview-style process to build comprehensive system prompts that power your specialized agents. ### The power of MCP connections What makes these agents truly powerful is their ability to connect to external services through MCP servers. These [connections](https://docs.hypermode.com/agents/connections) give your agents "tools" - specific functions they can call to interact with services like [Stripe](https://docs.hypermode.com/agents/connections/stripe), [Notion](https://www.notion.com/), [Google Calendar](https://calendar.google.com/), and over 2,000 other integrations. Think of MCP connections as giving your agent superpowers. Instead of just generating text, your agent can: * Process real payments through Stripe * Fetch customer data and transaction history * Apply complex business policies stored in knowledge bases * Generate invoices and handle refunds * Analyze financial trends and generate reports ## Building your first financial operations agent Let's walk through creating a financial operations agent that can handle real-world payment workflows. ### Step 1: Agent creation with Concierge After [signing in and creating a free Hypermode account](https://hypermode.com/login), start by describing your agent's purpose to Hypermode's Concierge: ``` Let's build a financial operations agent that can process payments, handle refunds,create invoices, and analyze financial data using Stripe. It should be able to work with our internal policies from Notion to make decisions about refunds. ``` The Concierge will ask clarifying questions about your business, brand guidelines, and specific operational needs. It then generates a comprehensive system prompt that defines your agent's identity, capabilities, and workflows. ### Step 2: Configure the Stripe connection Once your agent is created, add the Stripe connection: 1. Click "Add connection" in your agent's settings 2. Search for and select Stripe 3. Authorize with your Stripe API key (use test keys for development) It’s recommended that you create a restricted API key in Stripe that only has the permissions your agent needs. This follows the principle of least privilege for better security. Better yet, [start with a Stripe sandbox](https://docs.stripe.com/sandboxes) to ensure you’re only operating on test data. You can even [use your new agent to populate a Stripe sandbox environment](https://docs.hypermode.com/first-operations-agent#step-9%3A-set-up-your-stripe-test-environment). ### Step 3: Add supporting connections For complex workflows, add additional connections such as: * **Notion** for internal policies and procedures * **Google Calendar** for scheduling and planning * **Slack** for notifications and approvals ## Real-world workflow examples Let's explore some practical scenarios that demonstrate the power of combining Hypermode Agents with Stripe. ### Intelligent refund processing One of the most compelling use cases is automated refund processing that considers complex business policies: ``` A customer is requesting a refund for transaction pi_3Rq5PfGb0nZyxz610ZOBBXqt. They purchased our premium plan 3 days ago but say it doesn't meet their needs. ``` Here's what happens behind the scenes: 1. **Policy retrieval**: The agent fetches your refund policy from Notion 2. **Customer analysis**: It looks up the customer's payment history and subscription details 3. **Policy application**: The agent applies your business rules (e.g., "Full refunds within 7 days for premium customers, but reduce by 30% if customer has had 2+ previous refunds") 4. **Decision and execution**: Based on the analysis, it either processes the refund or explains why it's denied The agent might respond: ``` 🔄 Refund Analysis Complete 🔄 Customer: John Smith (Premium subscriber) Transaction: $29.99 (3 days ago) Previous refunds: 2 in last 12 months Decision: Partial refund approved (70% = $20.99) Reason: Policy allows full refunds within 7 days, but customer has exceeded the 2-refund threshold, triggering 30% reduction per company policy. Refund processed: $20.99 ``` ### Revenue analysis and campaign generation Ask your agent to analyze your current financial position: ``` What is our current MRR and what marketing campaigns could we create to increase revenue based on our customer data? ``` The agent will: 1. Query all active subscriptions from Stripe 2. Calculate monthly recurring revenue (MRR) 3. Analyze customer purchase patterns 4. Suggest targeted campaigns with specific Stripe payment links ### Customer onboarding automation For sales and customer success teams: ``` Create a subscription for Bob Fubar for the premium plan and generate an invoice for the setup fee. ``` The agent handles the complete workflow: 1. Creates the customer in Stripe 2. Sets up the subscription with proper pricing 3. Generates and sends the invoice 4. Provides confirmation with transaction details ### Sandbox environment setup For testing and development, you can even ask your agent to populate sample data: ``` Set up a realistic test environment with 10 customers, various subscription types, and some sample transactions for testing. ``` This is particularly useful for onboarding new team members or testing agent workflows. ## Advanced features and capabilities Hypermode Agents supports various AI models (GPT-4, Claude, Gemini), allowing you to choose the best model for specific tasks: * **GPT-4**: Great for general financial operations * **Claude**: Excellent for code generation and complex reasoning * **Gemini**: Strong for document generation and content creation Beyond simple prompting, Hypermode enables sophisticated context management to ensure your agent always has access: * **Knowledge retrieval**: Automatically fetch relevant policies and procedures * **Transaction history**: Maintain context across long conversations ## Getting started Ready to build your own financial operations agent? Here's how to get started: 1. **Sign up** for Hypermode Agents at [https://hypermode.com/login](http://%20hypermode.com/login) 2. **Follow the tutorial** at [docs.hypermode.com/first-operations-agent](https://docs.hypermode.com/first-operations-agent) 3. **Connect your Stripe** test account using the [connection guide](https://docs.hypermode.com/agents/connections/stripe) As you start building, it’s a good idea to keep in mind some best practices: * **Start with test data**: Always use Stripe's sandbox environment for initial development * **Iterate on prompts**: Your agent's instructions can be refined based on real-world usage * **Add human oversight**: For high-value transactions, build in approval workflows * **Monitor and log**: Keep track of your agent's decisions for compliance and improvement ## Conclusion The combination of natural language agent creation and powerful service integrations represents a significant shift in how you can think about business automation. Instead of building rigid systems with predetermined workflows, you can create intelligent agents that understand context, apply complex policies, and adapt to changing business needs. With Hypermode Agents and Stripe, financial operations teams can focus on strategic decisions while routine tasks are handled automatically. Customer support can provide faster, more accurate refund decisions. Sales teams can quickly generate custom pricing and payment links. Finance teams can get real-time insights without waiting for reports. This is about democratizing the power to create sophisticated business automation. If you can describe what you want your agent to do, you can build it. Ready to transform your financial operations? Start building your first agent today and experience the power of natural language automation with Stripe and Hypermode. Additional resources: * Watch the Stripe Office Hours livestream, [Building domain specific agents with natural language using Hypermode](https://www.youtube.com/watch?v=IvBWQHFxewg). * Read the [Hypermode Agents Stripe connection guide](https://docs.hypermode.com/agents/connections/stripe), or follow the [Hypermode Agents financial operations agent tutorial](https://docs.hypermode.com/first-operations-agent). * Try Hypermode's [30-day Agent Bootcamp](https://docs.hypermode.com/bootcamp). * Join the community on [Discord](https://discord.gg/hypermode) to share your agent creations and get support. Automatically customizing objects with metadata allows developers to attach meaningful, contextual information to payments, customers, invoices, subscriptions, or any other objects within Stripe without altering the core data model. For example, developers might tag a charge with a customer’s internal ID, a campaign name, or the order number enabling easier reconciliation, reporting, and integration with internal systems. Use this workflow pattern to customize an object with metadata using [Stripe Workflows](https://docs.stripe.com/workflows/define-workflows). In this specific example, you will add custom data to high-value customers, customers that left a tip. This approach helps you map Stripe objects to your business logic. Metadata can trigger or guide automated actions in your backend systems, support detailed analytics, and simplify debugging. This approach persists additional context directly on Stripe objects without the need to store that data separately or modify the core payment schema. This workflow pattern serves as the foundation for more complex workflows where you need to pass information down the workflow for subsequent actions. ![](/images/workflows-customize-objects-metadata/image1.png) ## Building a workflow to customize an object To build a workflow to customize an object: 1. Add trigger: select **Payment intent succeeded** 2. Add action: select **Retrieve a customer**, for Customer ID choose **Payment intent | Customer ID** 3. Add action: select **Email a team member**, choose a team member from the dropdown, and type an email body. Click done. 4. Add a condition. 5. Click the “If this condition is met” box and select **Payment intent succeeded,** select **Amount details,** select **Tip,** and select **Amount.** Choose **isn’t empty**. Click Done. 6. Add action: select **Update a customer,** in the Customer ID field select **Payment intent succeeded** and choose **Customer ID.** To add custom data, in the Metadata field click Add item and in the key field type **Tier** and add value **VIP**. Click Done. ## What is Stripe Workflows? [Stripe Workflows](https://docs.stripe.com/workflows/define-workflows) provides a visual builder in the Stripe dashboard, to help you automate tasks and processes by defining a series of actions that happen sequentially. Workflows is ideal for multi-step processes and is compatible across multiple Stripe products, allowing you to streamline processes, enforce business rules, and reduce manual effort. Each workflow consists of a trigger and a series of steps that run in order. A step is either an action or a condition. To learn how to [get started with Stripe Workflows](https://stripe.dev/blog/introducing-stripe-workflows). ## What is Stripe metadata? [Metadata](https://docs.stripe.com/metadata) is an attribute on certain Stripe objects (Account, Charge, Customer, PaymentIntent, Refund, Subscription, and Transfer) that lets you store more information, structured as key-value pairs, to these objects for your own use and reference. For example, you can store your user’s unique identifier from your system on a Stripe Customer object. Learn [how to use metadata](https://docs.stripe.com/metadata) to store additional information. To learn more about developing applications with Stripe, visit our [YouTube Channel](https://www.youtube.com/stripedevelopers). Detecting potentially fraudulent transactions before they are processed can help you mitigate losses, reduce financial impact, and earn customer trust. Using this Stripe Workflows pattern, you can automate refund operations, quickly issuing refunds when disputing a charge is more costly. This approach streamlines operations while increasing customer satisfaction by automatically refunding customers under the threshold before a formal dispute is filed, ensuring a smoother and more responsive transaction experience. ![](/images/workflows-creating-early-fraud-alerts-for-streamlined-refunds/image1.png) ## Building an early fraud warning workflow To build an early fraud warning workflow: 1. Select the trigger: **Early fraud warning is created in Radar**. 2. Add a step: Choose add action - **Retrieve a charge**. 3. Charge ID is required: Select **Radar early fraud warning | Charge ID** to pass through the Charge ID. 4. Add a condition. 5. Click the “If this condition is met” box and select **Charge | Amount**. Choose “is less than” and type in 15 and select USD. Click done. 6. Add a step: Add action - select **Create a refund**. *Optional email notification for manual review:* 7. Click the “If the condition isn’t met,” then select Add action - Choose Email a team member. From the dropdown, select a team member and draft the email body text. ## What is Stripe Workflows? [Stripe Workflows](https://docs.stripe.com/workflows/define-workflows) provides a visual builder in the Stripe dashboard, to help you automate tasks and processes by defining a series of actions that happen sequentially. Workflows is ideal for multi-step processes and is compatible across multiple Stripe products, allowing you to streamline processes, enforce business rules, and reduce manual effort. Each workflow consists of a trigger and a series of steps that run in order. A step is either an action or a condition. To learn more, visit [Get started with Stripe Workflows](https://stripe.dev/blog/introducing-stripe-workflows). ## What is Stripe Radar? [Stripe Radar](https://docs.stripe.com/radar) provides real-time fraud protection and requires no additional development time. [Radar for Fraud Teams](https://stripe.com/radar/fraud-teams) adds customization capabilities and deeper insights and trend analysis for your business. Radar for Platforms, currently in public preview, provides protection against both transaction and account risk. To learn more about developing applications with Stripe, visit our [YouTube Channel](https://www.youtube.com/stripedevelopers). ![Guides > JRS > Header image](/images/how-we-built-it-jurisdiction-resolution-for-stripe-tax/image-0.jpg) Illustration by Cynthia Alfonso Stripe’s users rely on us to calculate tax correctly and quickly, no matter where a transaction is happening in [100+ supported countries](https://docs.stripe.com/tax/supported-countries#supported-countries). This is a technical challenge particularly in the US, where there are more than 16,000 different combinations of sales tax rates and rules that can apply to an internet purchase depending on where you pay. To make things even harder, the geographic boundaries that dictate which rules apply where are intricate and constantly changing. As a result, determining which taxes apply to which transactions—quickly and accurately—is a surprisingly complex data engineering and algorithmic challenge. To address it, we’ve introduced the patent-pending jurisdiction resolution system (JRS). When presented with a transaction in the US, the JRS finds the right taxing jurisdictions within a few thousandths of a second. This system runs internally, rather than relying on outsourced processes, which keeps [Stripe Tax](https://docs.stripe.com/tax) fully in control of reliability and accuracy even as tax rates change. The JRS has offline and online components. Offline, it splits the US into nonoverlapping regions defined by unique combinations of taxing authorities. Every transaction within a region is subject to the same state, county, and local taxes. We call these regions Stripe places of taxation (SPOTs). The JRS figures out the geographic boundaries of each SPOT offline, and then it stores that data to be called on later. At calculation time, the online part of the system calls the data and figures out which SPOT applies. Since the data is precomputed, the online computation is completed with minimal latency. Defining SPOTs offline, and determining which ones apply online, required us to reinvent how we organize and query geospatial data. ### Postal addresses aren’t enough You might ask, “Why not use postal addresses to determine which taxes apply to which transactions?” That would be a simple solution, but it doesn’t work since postal addresses do not align neatly with taxing jurisdictions. These two houses in Drexel, Missouri, are in the same city, with the same ZIP code, with very close house numbers—but they’re in different counties, and therefore subject to different sales tax. Postal addresses don’t contain enough information to pick up on that distinction. ![Blog > JRS > Postal addresses image](/images/how-we-built-it-jurisdiction-resolution-for-stripe-tax/image-1.png) Given postal addresses don’t work, we had to develop a more exact way of locating addresses within tax zones. To do this, we collected public data on jurisdiction boundaries—states, districts, counties, and so on. This data is essentially a series of points on a map that define the outline of a polygon. At this point, we could then situate postal addresses inside these polygons to determine the relevant taxes. However, there were two barriers to taking this step directly: 1. Publicly available geospatial data just isn’t that accurate. It varies by quality and consistency across state and local authorities. This is a problem because a deviator of just a few inches could mean addresses are incorrectly assigned and charged the wrong sales tax. Moreover, neighboring jurisdictions must be consistent with one another, meaning they border gaplessly and without overlaps. But the state and local resources that maintain this data are of varying quality and consistency. 2. The polygons are very complex. They can have hundreds—or in some cases, even thousands—of sides, reflecting the intricacy of the legal boundaries of counties, cities, and states. The more complex the polygon, the more algorithmically intensive it is to determine if an address lies within it (especially along the boundaries). For this reason, applying tax via computations on polygons threatened to add latency to our transaction processing, which we didn’t want. ![Blog > JRS > Sandy, UT SPOT outline](/images/how-we-built-it-jurisdiction-resolution-for-stripe-tax/image-2.png) This map of Sandy, Utah, shows how complex SPOTs can get even for a small city in the Salt Lake City metro area. Notice the irregular shape of the boundary and the presence of “islands” within the polygon that are not part of the SPOT. ### Offline processing: Defining SPOTs accurately To tackle the problem of low-quality jurisdictional definitions, we developed a geographic information system (GIS), which cleans, centralizes, and standardizes jurisdiction data. The GIS stores boundaries for 53 states (Puerto Rico, Virgin Islands, and Washington, DC are considered states for simplicity), 3,225 counties, approximately 10,000 cities, and around 3,000 districts. (The exact numbers change as new areas enact and repeal taxes.) Once we had upgraded the jurisdictional data, we overlaid it on a central map. We first overlaid state boundaries, which are easy to handle because they never overlap. Then we overlaid county boundaries, which are also straightforward because they never stretch across state lines. Last, we added jurisdictional data for cities and districts; these are more complicated because cities can cross county boundaries while districts can cross both city, county, and other district boundaries. That completed, we identified SPOTs (i.e., unique tax jurisdictions) as regions where a specific combination of jurisdictions overlap. The GIF below illustrates this process for Utah. We begin with the state boundary, then overlay the boundaries for county, city, and district. This results in the SPOT boundaries in yellow. ![Blog > JRS > Utah SPOT gif](/images/how-we-built-it-jurisdiction-resolution-for-stripe-tax/image-3.gif) This process gives us accurate SPOTs, but only at a moment in time, because tax jurisdictions change often. To keep the GIS up-to-date, the Stripe Tax team carefully tracks any changes in the taxing landscape that impact SPOT boundaries. Each time jurisdiction boundaries change, we recompute the SPOTs for the relevant state. New and updated SPOT boundaries are added to the GIS and tagged with the time the change occurs. Old SPOTs are retained and similarly tagged with the time the change occurs. This makes our SPOTs time-aware, meaning we can calculate tax accurately on transactions that occur right now, as well as recalculate tax accurately on transactions that occurred in the past. ### Online processing: Matching addresses to SPOTs With the SPOT polygons in place, the next step in applying the correct taxes occurs at the time of transaction. This requires matching the customer’s postal address with a SPOT polygon. This process needs to be fast—so customers don’t notice a lag—and extremely accurate. If we match an [address](https://docs.stripe.com/tax/customer-locations) to the wrong SPOT, we’ll get the sales tax wrong. It also can’t easily be done offline given scale: with more than [166 million mailing addresses](https://facts.usps.com/size-and-scope/) and 16,000 SPOTs in the United States, it isn’t practical to create a database that pairs every address with a SPOT. Instead, we need to match addresses to SPOTs on demand, as efficiently as possible. Typically this kind of matching is done through the application of “point-in-polygon” algorithms, which compare the coordinates of the target point (i.e., a customer’s geocoded address) with the coordinates of the vertices of the polygon (the places where two edges meet). The more vertices a polygon has, the more calculations the algorithms need to perform—with the total number of calculations scaling geometrically with the number of vertices. For complex SPOTs with many vertices, the total number of calculations can grow into the millions, which is too many to perform in a timely manner while a customer is waiting for their online transaction to process. Providing fast and accurate tax analysis meant we had to find a way to speed up traditional methods. ### Simplifying SPOTs The determining factor on algorithmic run-time is the complexity of the SPOTs. To achieve the speedups we needed, we decided to replace complex SPOTs with “bounding boxes”—rectangles formed by connecting the minimum and maximum X and Y coordinates on the original SPOT. In the image below, you can see the generation of the bounding box for the earlier SPOT example. ![Blog > JRS > SPOT bounding box gif](/images/how-we-built-it-jurisdiction-resolution-for-stripe-tax/image-4.gif) Replacing complex SPOTs with bounding boxes simplifies the problem: in place of thousands of vertices, we only have to consider four. Of course, a single crudely defined bounding box might encompass multiple tax jurisdictions, essentially recreating the problem we started out with. So, from there, we create bounding boxes within bounding boxes, stored in a balanced R-tree that is rebuilt—using the Sort-Tile-Recursive (STR) algorithm—each time the data is updated. We can navigate these bounding boxes by navigating this R-tree. We zoom in on the geocoded address a little bit at a time, starting from a box that bounds an entire state (in red) and moving to a smaller box at each step. At the final step, we are left with a bounding box (in white) that might span a handful of candidate SPOTs. ![Blog > JRS > Utah and R-tree](/images/how-we-built-it-jurisdiction-resolution-for-stripe-tax/image-5.png) At this point, we implement a point-in-polygon algorithm to determine which tax jurisdictions apply. This is the kind of calculation that was prohibitive when we started—there were too many SPOTs to consider. But by reducing the scope of candidates, it becomes feasible. While the approach resulted in significant latency gains, there were still some problematic outlier areas. The first major optimization was prioritizing smaller bounding boxes within each level. These smaller boxes are typically associated with more densely populated areas, which are more likely to be making requests. Second, we disaggregated complicated SPOTs that reflected disjoint areas. Disjoint SPOTs are ones consisting of noncontiguous islands (imagine Hawaii). Instead of maintaining a bounding box for the entire SPOT (i.e., draw a box around Hawaii), we split the SPOT into component parts (each Hawaiian island), meaning each bounding box was more discrete and targeted. For most states, we can match addresses to SPOT polygons in just a few milliseconds. The graph below shows the 95th percentile latency time for the 53 states, territories, and Washington, DC. All are under 10 milliseconds, except for South Carolina. That’s because tax jurisdictions in the Charleston area are unusually complicated. Charleston alone consists of 73 disjoint areas. ![Blog > JRS > JRS latency graph](/images/how-we-built-it-jurisdiction-resolution-for-stripe-tax/image-6.png) ### Looking ahead Our dual approach of offline SPOT creation and online bounding boxes allows us to make faster tax calculations at the time of a transaction—and allows us to precisely update jurisdictions as tax regulations change. If a sales tax update is enacted at, say, midnight in the relevant time zone, a JRS-like strategy helps us correctly identify which time zone that is and update the rules at the right time. We’re still working to perfect the JRS. One remaining issue is memory—when SPOT polygon boundaries change, we keep the out-of-date SPOTs, so they can be retrieved later if necessary. But as time goes on, the memory load of this data piles up. We’re working on techniques that ease this memory burden while maintaining focus on the core value [Stripe Tax](https://stripe.com/tax) offers to users: delivering fast, accurate tax calculations. By employing the most cutting-edge techniques in geospatial data management and processing, we aim to continue to be the most reliable sales tax solution for businesses around the world. To learn more, [read our docs](https://docs.stripe.com/tax) or [get in touch](https://stripe.com/contact/sales). Already a Stripe user? [Get set up](https://dashboard.stripe.com/tax/overview) in the Stripe Dashboard. A marketplace is a digital platform that hosts multiple merchants. It offers them marketing, selling, and other services and creates a bespoke buying experience to consumers. Typically, marketplaces involve three types of users: * **Buyers:** entities that engage in a commercial relationship with the marketplace to obtain a product or service. * **Sellers:** entities that provide their goods to the buyers through the marketplace. * **Marketplace platform:** the company that provides the technology and services supporting the commercial exchanges between buyers and sellers. They do not own any stock; they simply make the commercial exchanges possible. One defining characteristic of an online marketplace is that buyers and sellers rarely engage in a direct commercial agreement. A marketplace offers terms and conditions of use of their platform to buyers and, equally, it offers other terms and conditions of use to sellers. This post covers how to set up unlicensed marketplaces to manage payments. These marketplaces do not require money or banking license in a given jurisdiction to process payments on behalf of their sellers following regulatory compliance using [Stripe Connect](https://docs.stripe.com/connect). It also shows how to use Stripe’s APIs to control monetary commercial exchanges. ## Meet Greens & Dairy Mart This example uses Greens & Dairy Mart, a fictitious online marketplace that allows independent farmers to sell their produce directly to consumers. Greens & Dairy Mart allows families to choose products from multiple farms and add them to a Greens & Dairy Mart basket. Customers can use bank cards to pay for the products. ## Enabling payments for marketplaces with Stripe Greens & Dairy Mart manages payments using Stripe Connect. Connect does three important things for this marketplace: 1. Enables payment interfaces and processing for the marketplace checkout. 2. Provides the [Know Your Customer](https://docs.stripe.com/connect/required-verification-information) (KYC) tech capabilities to onboard farmers. 3. Helps it monetize and exchange money between parties programmatically. Thanks to the last two points, marketplaces can now automate complex commercial relationships and embed their terms and conditions in code. This allows them to grow fast without having to exponentially scale their operations. In this marketplace, each farm is responsible for preparing and delivering the products they sell through the website, proposing their own costs and terms of delivery. Greens & Dairy Mart charges customers when each farmer has confirmed their products are on their way to the customer. They only pay out the order to the farmer once the customer has confirmed that the order has been delivered correctly. Greens & Dairy Mart takes 15% of the final price to cover their running costs (for example, website management, customer facing support, Stripe payments, etc.) ## Steps to set up and test a marketplace in Stripe 1. Create a Stripe account for free: [https://dashboard.stripe.com/register](https://dashboard.stripe.com/register). 2. Use a [Sandbox](https://docs.stripe.com/sandboxes) to test the implementation. Payments are simulated so you can test API functionality before onboarding and activating the marketplace in Stripe. 3. Select Connect as product to start testing the onboarding of sellers (farmers): 1. Search for **Connect > Onboarding Interface** and click **Get Started**. 2. Follow the personalized setup and make sure that you select: 1. **Buyers will purchase from you** - in a marketplace the marketplace is the merchant of record. 2. **Sellers will be paid out individually** - since each farmer has their own order and delivery terms, Greens & Dairy Mart has opted to simplify the fund management. 3. Stripe Connect's product activation screens remind you that as a marketplace: 1. You are responsible for refunds, chargebacks and potential fines from the payment-rail networks (for example, Greens & Dairy Mart is ultimately responsible for charge disputes). 2. You are responsible for onboarding and making sure that your farmers are compliant with payment regulations. 3. As the main point of contact to farmers, you have to inform them and educate them on the management of risks as well as on your process for remediation for lack of compliance, when detecting fraud or if disputes are raised. ## Using Stripe’s API to map commercial relationships This section explains how Stripe Connect supports coding the key commercial relationships that govern a marketplace. ### Service onboarding and KYC Using the Stripe Account API marketplaces create Stripe Connected Accounts for sellers. These accounts are linked to their own Stripe account. During this process, the marketplace configures a *controller*, stating roles and responsibilities of sellers, buyers, the marketplace and Stripe, and the *capabilities* of the connected account, stating what the sellers’ accounts can do. The use of Stripe and the operational control that the marketplace has over the pay-ins and payouts for each seller should be reflected on the legal terms and conditions agreed between the two parties. The Account API generates links to a Stripe hosted page that can be used to request KYC information. Marketplaces usually add information they already have gathered from their sellers to the API call so that the hosted flow is pre-filled. The generated links are shared with the sellers who complete the full onboarding. KYC onboarding with Stripe is fast, sellers with the right information available can start selling immediately. This is how Greens & Dairy Mart uses the Account API: ```bash curl -X POST "https://api.stripe.com/v1/accounts" \ -u 'REPLACE_WITH_YOUR_SECRET_KEY': \ -d "business_type"="company" \ -d "capabilities[transfers][requested]"="true" \ -d "controller[fees][payer]"="application" \ -d "controller[losses][payments]"="application" \ -d "controller[requirement_collection]"="application" \ -d "controller[stripe_dashboard][type]"="none" \ -d "email"="farmer1@example.com" ``` The only capability required for connected accounts belonging to a marketplace is Transfers. This notably reduces the [KYC requirements](https://docs.stripe.com/connect/required-verification-information) for the farmers. Greens & Dairy Mart sets `fees`, `losses`, and `requirements_collection` to “application” instead of “Stripe” to reflect the commercial relationship between the marketplace, the farmer and Stripe. Specifically, there is no commercial relationship between the farmers and Stripe and there are no direct interactions or commercial liabilities. Because Greens & Dairy Mart wants farmers to control their sales and finance through their Greens & Dairy Mart portal, they have set the `stripe_dashboard` type to `none`. Stripe provides a Stripe-hosted [Express dashboard](https://docs.stripe.com/connect/express-dashboard) for those marketplaces that are okay with a separate payment experience. Greens & Dairy Mart has the option to use [Stripe Embedded Onboarding](https://docs.stripe.com/connect/embedded-onboarding) to have farms do the KYC process inside their applications or use Stripe hosted onboarding links: ```bash curl -X POST "https://api.stripe.com/v1/account_links" \ -u 'REPLACE_WITH_YOUR_SECRET_KEY': \ -d "account"="acct_1RHRSfRdprr9w4wp" \ -d "refresh_url"="URL on website once done" \ -d "return_url"="URL if farmer hits back button" \ -d "type"="account_onboarding" \ -d "collection_options[future_requirements]"="include" \ -d "collection_options[fields]"="eventually_due" ``` This call returns the onboarding link: ```json { "object": "account_link", "created": 1745508543, "expires_at": 1745508843, "url": "https://connect.stripe.com/setup/c/acct_1RHRhnRdSY5bmOIP/1hPK06miXaZK" } ``` By default, Stripe only asks for the minimum amount of data required for sellers to start transacting immediately. Stripe then informs the marketplace using webhooks when more requirements are due. However, Greens & Dairy Mart has opted to use the `collection_options` field to ask farms all KYC details at once. This is the recommended approach for marketplaces that use their own business onboarding flows. There is no need to pull additional information in the future and no risk of pausing operations because of lack of KYC compliance. ### Payments, disbursements and basic monetisation strategy Stripe offers two mechanisms to charge customers and disburse to sellers: * **Destination Charges:** A one-API call option which embeds the disbursement transfer information as part of the PaymentIntent API call. * **Separate Charges and Transfers:** A two-API call process, where after charging the customer using the PaymentIntent API, the marketplace creates as many Transfers as sellers need to be paid. With regards to payment monetization, often marketplaces charge sellers for payment processing only when customers buy products. With Stripe Connect, marketplaces can deduct this fee directly by transferring adjusted amounts to sellers or can select to transfer the full amount and charge a fee. Finally, marketplaces deliver payments into the sellers’ bank account via [Payouts](https://docs.stripe.com/connect/payouts-connected-accounts). With Connect, payouts can be managed by Stripe automatically in a regular cadence (for example, daily or weekly) or it can be triggered by the marketplace manually. In the example marketplace, because sales and delivery conditions are different for each farm, Greens & Dairy Mart has decided to charge the customer per farm order, Greens & Dairy Mart has implemented Destination Charges. For each farmer, they create a [PaymentIntent](https://docs.stripe.com/api/payment_intents) that specifies the amount to be transferred to each farmer, charging a 15% fee on each transaction that customers pay to cover Greens & Dairy Mart's fees. Greens & Dairy Mart uses Stripe's [web payment element](https://docs.stripe.com/payments/payment-element) and [mobile payment element](https://docs.stripe.com/payments/elements/mobile-payment-element) to store the card details of the customer during the first checkout inside Stripe. On each checkout page, they show the items each farmer will deliver, the amount for each farmer's order and the estimated delivery time for each order. When the customer receives the items from one of the farms, Greens & Dairy Mart creates a manual Payout to the farm's bank account. ![](/images/stripe-marketplaces-mapping-commercial-relationships-code/image1.png) Greens & Dairy Mart uses the PaymentIntents API. During the first purchase, they set `setup_future_usage=offline` in the PaymentIntent object, so that Stripe stores the card details as a payment method attached to a Customer object (learn more about this approach [here](https://docs.stripe.com/payments/save-during-payment)). Greens & Dairy Mart keeps track of the IDs as part of their Customer Record Management integration. In future purchases, they will charge that customer directly confirming automatically the PaymentIntent created, unless the card attached needs to be updated. To distribute money to the correct farm, the PaymentIntent contains two additional fields: `transfer_data` and `application_fee_amount`. `Transfer_data` indicates the Stripe account of the farm where the money will be settled. `Application_fee_amount` indicates the amount the farm will pay Greens & Dairy Mart for their services. This is the API call for the payment transaction once the card details have been saved for future use: ```bash curl -X POST "https://api.stripe.com/v1/payment_intents" \ -u 'REPLACE_WITH_YOUR_SECRET_KEY': \ -d "amount"=1000 \ -d "currency"="gbp" \ # farm account -d "transfer_data[destination]"="acct_1OvhPzD123PLHk8z" \ -d "metadata[order]"="257" \ -d "payment_method"="pm_1O5ovIDIWNRw8AogmHeuq3Jq" \ -d "customer"="cus_OtbQdWuzAnLITm" \ -d "confirm"="true" \ # Greens & Dairy Mart's fee: 15% -d "application_fee_amount"=150 ``` Events triggered: * At the platform level (the marketplace): * [payment_intent.created](https://docs.stripe.com/api/events/types#event_types-payment_intent.created) * [charge.succeeded](https://docs.stripe.com/api/events/types#event_types-charge.succeeded) * [payment_intent.succeeded](https://docs.stripe.com/api/events/types#event_types-payment_intent.succeeded) * [transfer.created](https://docs.stripe.com/api/events/types#event_types-transfer.created) * [charge.updated](https://docs.stripe.com/api/events/types#event_types-charge.updated) * [application_fee.created](https://docs.stripe.com/api/events/types#event_types-application_fee.created) * At connected account level (the farm): * [payment.created](https://docs.stripe.com/api/events/types#event_types-payment.created) It's worth noticing that transactions are represented by PaymentIntents (pi_xxxxx IDs) for the platform account and reflect the commercial relationships from Greens & Dairy Mart's perspective. The farm's connected account generated a payment too (py_xxxx) which is linked to the platform Transfer transaction. This payment represents the transaction from the perspective of the farm. This is the API call for the payout: ```bash curl -X POST "https://api.stripe.com/v1/payouts" \ -u 'REPLACE_WITH_YOUR_SECRET_KEY': \ -H "Stripe-Account: {{STRIPE_CONNECTED_ACCOUNT_ID}}" \ -d "amount"=850 \ -d "currency"="gbp" \ -d "metadata[order]"="257" \ -d "statement_descriptor"="Greens&DairyMart257" \ -d "method"="instant" ``` Events triggered: * At the connected account level (the farm): - [payout.created](https://docs.stripe.com/api/events/types#event_types-payout.created) - [payout.updated](https://docs.stripe.com/api/events/types#event_types-payout.update) - [payout.paid](https://docs.stripe.com/api/events/types#event_types-payout.paid) - [balance.available](https://docs.stripe.com/api/events/types#event_types-balance.available) (update on available balance) The farms do not receive the money immediately. The funds reach their bank account on average 3 days after the payout has been created. Marketplaces can [finely tune payout schedules](https://www.google.com/url?q=https://docs.stripe.com/connect/manage-payout-schedule&sa=D&source=docs&ust=1749142406225916&usg=AOvVaw0jffu182MprKln5hD6oB0W). ### Reversing payments: refunds and disputes At payment level, the liability for refunds and disputes lies with the marketplace. This adds operational flexibility which helps maintain cordial relationships with both customers and merchants (for example, the marketplace can issue a goodwill refund without impacting the merchant). However, marketplaces can explicitly state on their terms of service in which circumstances their merchants will be sharing liability. Connect separates the refund in two steps: a payment Refund; and a TransferReversal. Both can be partial or full amounts. If Destination Charges were used, the refund can be done in one single API call. Disputes raised by a customer's issuer bank automatically impact the marketplace's Stripe account balance. In this instance, the marketplace could also reverse the transfer should the dispute be lost. In our example, Greens & Dairy Mart automatically refunds the full amount if a farm has not fulfilled the delivery of the goods: ```bash curl -X POST "https://api.stripe.com/v1/refunds" \ -u 'REPLACE_WITH_YOUR_SECRET_KEY': \ -d "payment_intent"="pi_REPLACE_WITH_PAYMENT_INTENT_ID" \ -d "reason"="duplicate" \ -d "metadata[order]"="257" \ -d "reverse_transfer"="true" \ -d "refund_application_fee"="true" \ ``` Events triggered at the platform level (the marketplace): - [transfer.reversed](https://docs.stripe.com/api/events/types#event_types-transfer.reversed) - [application_fee.refunded](https://docs.stripe.com/api/events/types#event_types-application_fee.refunded) - [refund.created](https://docs.stripe.com/api/events/types#event_types-refund.created) - [charge.refunded](https://docs.stripe.com/api/events/types#event_types-charge.refunded) - [refund.updated](https://docs.stripe.com/api/events/types#event_types-refund.updated) / charge.refund.updated Greens & Dairy Mart recovers disputed transactions from the farms’ balance by using transfer reversals: ```bash curl -X POST "https://api.stripe.com/v1/transfers/{id}/reversals" \ -u 'REPLACE_WITH_YOUR_SECRET_KEY': \ -d "amount"=850 \ -d "description"="dispute" \ -d "metadata[order]"="257" ``` This call obtains the transfer ID (for example, {id}) of the payment transaction). Transfer groups are created and returned when Payment Intents are confirmed successfully. ```bash curl -X GET "https://api.stripe.com/v1/transfers" \ -u 'REPLACE_WITH_YOUR_SECRET_KEY': \ -d "transfer_group"="group_pi_3RVujPDIWNRw8Aog0SmAtcp0" ``` Events triggered at the platform level: - [transfer.reversed](https://docs.stripe.com/api/events/types#event_types-transfer.reversed) ### Additional fees owed by the sellers Sometimes marketplaces are required to move funds from their sellers' Stripe accounts back to their own. Some situations where this could happen include: * To charge the connected account directly for products or services * To recover funds for a previous refund * To make other adjustments to connected [account balances](https://docs.stripe.com/connect/account-balances) (for example, to correct an error) To get paid by the seller, the marketplace can use the [charges API](https://docs.stripe.com/connect/account-debits), which creates a transfer from the sellers’ connected account to the marketplace's platform account. Greens & Dairy Mart has decided to pass a fee of 20 GBP to all sellers whose payments are disputed because of lack of quality or problems in the delivery of the products: ```bash curl -X POST "https://api.stripe.com/v1/charges" \ -u 'REPLACE_WITH_YOUR_SECRET_KEY': \ -d "amount"=2000 \ -d "currency"="gbp" \ -d "metadata[dispute_fee_reason]"="delivery_problem" \ -d "metadata[order]"="257" \ -d "source"="acct_YOUR_ACCOUNT_ID" ``` Events triggered: * At the platform level (the marketplace): * [payment.created](https://docs.stripe.com/api/events/types#event_types-payment.created) * [charge.succeeded](https://docs.stripe.com/api/events/types#event_types-charge.succeeded) * [balance.available](https://docs.stripe.com/api/events/types#event_types-balance.available) * At connected account level (the farm): * [transfer.created](https://docs.stripe.com/api/events/types#event_types-transfer.created) ## Conclusion With Stripe, marketplaces can automate the money interactions between them, sellers and buyers. Stripe Connect provides a family of APIs to manage payments, fees, payouts, contractual and regulatory obligations. This helps marketplaces manage complex contracts programmatically. Stripe Connect can also be used by marketplaces to develop additional services. Once Stripe Connect is adopted, marketplaces can start embedding and monetizing financial products optimizing their sellers' [money management](https://docs.stripe.com/money-management). To learn more about developing applications with Stripe, visit our [YouTube Channel](https://www.youtube.com/stripedevelopers). When you're working with Stripe webhooks, you might be using a popular pattern: treat the incoming event as a signal, then fetch the full, up-to-date resource from the Stripe API. This [fetch-before-process](https://hookdeck.com/webhooks/guides/webhooks-fetch-before-process-pattern?ref=stripe-dev) approach is solid because it protects you from issues like duplicate or out-of-order webhooks. At scale, these problems aren't just possibilities \- they're guarantees. But here’s the catch: as your application grows, this pattern can backfire. A sudden spike in events, such as a burst of invoice.payment\_succeeded or checkout.session.completed webhooks can lead to a surge in API calls. If this exceeds your account’s rate limits (typically 100 read requests per second), Stripe begins returning 429 Too Many Requests responses to help protect service reliability. When you hit a rate limit, you can let the request fail and rely on Stripe’s automatic retries, or implement your own retry logic. A more resilient approach is to queue incoming events from the start and throttle outbound API requests, ensuring you stay within rate limits and handle spikes gracefully. This post walks you through a practical way to achieve the reliability of the fetch-before-process pattern without overwhelming the Stripe API. By using [Hookdeck Event Gateway](https://hookdeck.com/event-gateway?ref=stripe-dev) to queue and control incoming webhooks, it’s possible to process them at a safe pace. ## Why fetch-before-process can be risky Treating webhooks as signals and then fetching the latest data is a growing trend for a good reason. Webhook payloads can be outdated, contain partial data, or arrive in the wrong order. And you might get the same event more than once. As Alex, Hookdeck's CEO, explained in his [Stripe Meetup talk](https://www.youtube.com/watch?v=u2O-QS-A7jo), webhook-driven systems are event-driven by nature. This means you have to design for things like: - **Idempotency:** So duplicate events don’t cause problems. - **Event ordering:** Handling cases where an `update` event arrives before a `create` event. - **Retries:** Having a solid strategy for reprocessing failed events. Fetching the resource from Stripe’s API right before you process it helps you: - Work with the most current data. - Validate the resource's state. - Simplify your retry logic, since the fetch will always get the latest version. Here's what the code might look like in an Express.js application: ```ts const stripe = new Stripe(process.env.STRIPE_API_KEY); app.post( "/api/stripe/invoices", async (req: Request, res: Response) => { try { // Check Stripe signature and construct the Stripe event const sig = req.headers["stripe-signature"] as string; let event: Stripe.Event; try { event = stripe.webhooks.constructEvent( req.body, sig, process.env.STRIPE_WEBHOOK_SECRET ); } catch (err) { console.log(`❌ Error:`, err); res.status(400).json(err); return; } if (event.type.startsWith("invoice.") === false) { res.status(400).send("Unexpected event type"); return; } // Initially the webhook contains a snapshot of the invoice const invoiceSnapshot = event.data.object as Stripe.Invoice; const invoiceId = invoiceSnapshot.id; if (!invoiceId) { res.status(400).send("Invoice ID is missing"); return; } // Retrieve the latest version of the invoice // You will hit the Stripe API rate limit here const invoice = await stripe.invoices.retrieve(invoiceId); console.log(`Processing event type: ${event.type}`); console.log(`Invoice:`, invoice); // Now you can process the invoice, knowing it's the latest version // ... res.sendStatus(200); } catch (err) { // Handle errors or network issues console.error("Error fetching event:", err); // Send Stripe error to Hookdeck for full observability res.status(500).json(err); } } ); ``` That’s all great, until your event volume grows. Stripe sends events fast. Imagine a flash sale, a large data migration, or a monthly subscription renewal run that generates thousands of events in just a few seconds. If your system tries to process events as they arrive, it may generate hundreds of API requests per second, quickly exceeding Stripe’s general 100 requests per second (RPS) limit and triggering 429 errors. ## A simple, scalable pattern Here’s a more resilient approach: 1. **Receive webhooks with Hookdeck:** All your Stripe webhooks go to a single Hookdeck URL. 2. **Throttle delivery to your service:** Control the rate at which Hookdeck sends events to your application. 3. **Fetch the resource from Stripe:** Your code receives the throttled event and safely fetches the data. The idea is simple: instead of hitting Stripe’s API as fast as webhooks arrive, decouple ingestion from processing. Hookdeck queues the events, and you decide how many your app should handle per second. ## Step-by-step: Building the flow ### 1. Create a Hookdeck connection Create a Hookdeck **Connection** in the [Hookdeck dashboard](https://dashboard.hookdeck.com?ref=stripe-dev). From the **Connections** page, click **Create Connection**. **Note**: You can also create a connection with the [Hookdeck Terraform Provider](https://github.com/hookdeck/terraform-provider-hookdeck) or directly with the Hookdeck API. Examples of both of these are in the [Hookdeck Stripe Fetch Before Process example](https://github.com/hookdeck/hookdeck-demo/tree/main/stripe-fetch-before-process) on GitHub. First, define the **Source** and select **Stripe** as the source type. Give the source a name such as `stripe_invoice_webhooks`. Don't enable **Authentication** yet as you need the Stripe webhook secret for that. ![](/images/stay-within-the-limits/image1.png) Next, define the **Destination** for your connection. ![](/images/stay-within-the-limits/image5.png) Select **HTTP** as the destination type and enter the URL for the endpoint where you want to receive the events. Enable **Max delivery rate** to control how fast Hookdeck sends events to your service. Since you'll likely be working in a sandbox Stripe environment at the moment, set the rate-limit to 25 requests per second. In a live/production environment, you can increase this to 100 requests per second. Hookdeck automatically queues any incoming events and delivers them to your service at the rate you've set. This protects your Stripe API quota, your database, and your server's capacity. Name your connection something like `conn_stripe_invoices`, and click **Save**. ![](/images/stay-within-the-limits/image5.png) You'll be presented with a URL in the form `https://hkdk.events/your-unique-id`, which is the Hookdeck endpoint that receives your Stripe webhooks. Copy this URL, as you'll need it to set up the webhook in Stripe. ![](/images/stay-within-the-limits/image8.png) ### 2\. Create a webhook event destination in Stripe From the [Stripe Dashboard](https://dashboard.stripe.com/), use the search and go to the **Create a webhook** (**Create an event destination**) page. Select the events you are interested in, such as `invoice.created`, `invoice.updated`, and `invoice.deleted`. Click **Continue**. Choose **Webhook endpoint** as the destination type, and click **Continue**. Enter a **Destination name,** such as `hookdeck: invoice webhook handler`, and paste the Hookdeck URL you copied earlier into the **Endpoint URL** field. Click **Create destination**. ![](/images/stay-within-the-limits/image6.png) Once your webhook event destination is created, you'll see a **Signing secret**. Copy this secret, as you'll need it to authenticate incoming webhooks from Stripe in Hookdeck. ![](/images/stay-within-the-limits/image9.png) ### 3\. Configure Hookdeck to authenticate Stripe webhooks In the Hookdeck dashboard, go to the **Connections** page. Click on the Stripe **Source** and click **Open Source**. Within the Source page, enable **Authentication** and paste the Stripe webhook secret you copied earlier into the **Webhook Signing Secret** field. This ensures that Hookdeck verifies incoming webhooks from Stripe. ![](/images/stay-within-the-limits/image4.png) Back on the **Connections** page, the Stripe source shows a small icon next to it, indicating that it is authenticated. ![](/images/stay-within-the-limits/image2.png) ### 4\. Handle Webhook and fetch the Stripe event When your endpoint receives an event from Hookdeck, you can use the [Stripe Software Development Kit (SDK)](https://docs.stripe.com/sdks) to fetch the full event object. Because you've throttled the delivery, you don't have to worry about rate limits. Here's the slightly modified Express.js code: ```ts const stripe = new Stripe(process.env.STRIPE_API_KEY); export const verifyHookdeck = ( req: Request, res: Response, next: NextFunction ) => { const hmacHeader = req.get("x-hookdeck-signature"); const hmacHeader2 = req.get("x-hookdeck-signature-2"); const hash = crypto .createHmac("sha256", process.env.HOOKDECK_WEBHOOK_SECRET as string) .update(req.body) .digest("base64"); if (hash === hmacHeader || (hmacHeader2 && hash === hmacHeader2)) { next(); } else { console.error("Signature is invalid, rejected"); res.sendStatus(403); } }; app.post( "/api/stripe/invoices", verifyHookdeck, async (req: Request, res: Response) => { try { // Check Stripe signature and construct the Stripe event const sig = req.headers["stripe-signature"] as string; let event: Stripe.Event; try { event = stripe.webhooks.constructEvent( req.body, sig, STRIPE_WEBHOOK_SECRET, // Disable timestamp checking since event was already check by Hookdeck // This also allows for failed events to be replayed. -1 ); } catch (err) { console.log(`❌ Error:`, err); res.status(400).json(err); return; } if (event.type.startsWith("invoice.") === false) { res.status(400).send("Unexpected event type"); return; } // Initially the webhook contains a snapshot of the invoice const invoiceSnapshot = event.data.object as Stripe.Invoice; const invoiceId = invoiceSnapshot.id; if (!invoiceId) { res.status(400).send("Invoice ID is missing"); return; } // Retrieve the latest version of the invoice // You will not hit the Stripe API rate limit here const invoice = await stripe.invoices.retrieve(invoiceId); console.log(`Processing event type: ${event.type}`); console.log(`Invoice:`, invoice); // Now you can process the invoice, knowing it's the latest version // ... res.sendStatus(200); } catch (err) { // Handle errors or network issues console.error("Error fetching event:", err); // Send Stripe error to Hookdeck for full observability res.status(500).json(err); } } ); ``` You may notice that the example uses a `verifyHookdeck` middleware function. This verifies that the incoming request is from Hookdeck, not directly from Stripe. However, the Stripe headers are still present, so you can verify the webhook signature if needed. You can find the full code for the Express.js server in the [Hookdeck Stripe Fetch Before Process example](https://github.com/hookdeck/hookdeck-demo/tree/main/stripe-fetch-before-process) on GitHub. ### 5\. Test your endpoint locally Run your application locally and expose it to the public internet with a localtunnel solution such as ngrok. ***Note**: The [Hookdeck Command Line Interface (CLI](https://hookdeck.com/docs/cli?ref=stripe-dev)) provides localtunnel functionality. However, CLI destinations can't presently have a delivery rate configured.* Update the Destination URL to point to your localtunnel URL. Go to the **Connections** page in the Hookdeck dashboard, click on the **Destination**, update the URL (remember to include the `/api/stripe/invoices` path), and click **Save**. Ensure you have the [Stripe Command Line Interface (CLI](https://docs.stripe.com/stripe-cli)) installed, and use it to send test webhooks to your Hookdeck endpoint: ```shell stripe trigger invoice.created ``` ![](/images/stay-within-the-limits/image3.png) This helps with testing the general functionality. However, to test that Hookdeck is only delivering events to your endpoint at the defined delivery rate, you can change the rate to a very low value such as 10 per minute and trigger a number of test events and check how quickly the events reach your endpoint. ## Monitoring and backpressure ![](/images/stay-within-the-limits/image7.png) When you use Hookdeck to queue and control your webhooks, you gain visibility into your event processing. You can monitor the queue depth and delivery delays in real-time, which helps you understand how your system is performing. With the Hookdeck Event Gateway, it's simple to see what’s happening with your event queues: - View queue depth and see delivery delays in real-time. - Set up [alerts](https://hookdeck.com/issues) for when backpressure is building. - [Retry](https://hookdeck.com/docs/retries) failed events, either manually or automatically. If your processing starts to lag, you’ll know right away. You can then decide if you need to reach out to Stripe and ask for an API rate-limit increase, and then increase the delivery rate to catch up. ## When to use the Hookdeck and the fetch-before-process pattern This setup is useful if: - You’re already hitting Stripe API rate limits. - You expect bursts of traffic, like from end-of-month billing runs, or you run batch updates. - You want more control and better observability over your webhooks. - You want to standardize how you process events. The fetch-before-process pattern isn't always the right fit for every project, especially given the upper limits of Stripe's API rate limits. However, when used appropriately, it can significantly improve the reliability and resilience of your system. ## Conclusion Stripe’s webhook system is reliable, and the fetch-before-process pattern is a strong foundation. But as your volume grows, it becomes increasingly important to manage event handling with care to avoid bottlenecks and rate limits. Using Hookdeck Event Gateway to queue and throttle your webhooks gives you control over how your system consumes them. It’s a simple way to build a more resilient application, stay within API rate limits, and set your system up for sustainable growth. Catch more details on using Stripe with Hookdeck in [this interview](https://www.youtube.com/watch?v=uwcSJFsQ83c) with co-founder Alexandre Bouchard, on the Stripe Developers YouTube channel. Onboarding accounts and keeping them compliant and activated is one of the most important parts of your Connect platform integration. The goal is for the experience to be as streamlined as possible to maximize conversion and minimize user friction and degradation. This blog post walks you through using [Connect embedded components](https://docs.stripe.com/connect/get-started-connect-embedded-components) to achieve this. For this walkthrough, I am using [Furever](https://www.furever.dev/), a test Connect platform for pet grooming. Let’s start by [creating a connected account](https://docs.stripe.com/api/accounts/create). In order to allow for my connected accounts to process payments, I am adding the `card_payments` and `transfers` [capabilities](https://docs.stripe.com/connect/account-capabilities) to an account fully controlled by Furever with no Stripe dashboard access, such as a Custom account. Since Furever uses [Next.js](https://nextjs.org/), I have added the [Stripe](https://www.npmjs.com/package/stripe?activeTab=readme) npm package as a dependency and have included the create account API call in the sign up flow: ```ts const account = await stripe.accounts.create({ // Account configuration controller: { stripe_dashboard: { type: "none", }, fees: { payer: "application" }, losses: { payments: "application" }, requirement_collection: "application", }, capabilities: { card_payments: {requested: true}, transfers: {requested: true} }, // Options selected in the signup UI country: credentials?.country || 'US', business_type: businessType, email: email, }); console.log('Created stripe account', account.id); ``` The account ID is now created as part of the Furever signup process. ![](/images/connect-embedded-components-streamline-onboarding/image3.png) ![](/images/connect-embedded-components-streamline-onboarding/image9.png) Now that we have a connected account, let’s first show how we would fully onboard this account without embedded components on Furever. First, I use the [create account link API](https://docs.stripe.com/api/account_links/create) and expose an API on my platform that allows me to create account links for my connected accounts. I create a new api `/create_account_link`: ```ts import {getServerSession} from 'next-auth/next'; import {authOptions} from '@/lib/auth'; import {stripe} from '@/lib/stripe'; export async function POST() { const session = await getServerSession(authOptions); let stripeAccountId = session?.user?.stripeAccount?.id; const accountLink = await stripe.accountLinks.create({ account: stripeAccountId, refresh_url: `${process.env.NEXTAUTH_URL}/home`, return_url: `${process.env.NEXTAUTH_URL}/home`, type: 'account_onboarding', }); return new Response(JSON.stringify(accountLink), { status: 200, headers: {'Content-Type': 'application/json'}, }); } ``` On my frontend, I will create a simple component that renders a button that allows the user to navigate to this account link to onboard the account to Stripe: ```ts export default function Onboarding() { const {isLoading, error, data} = useAccountLinkCreate(); if (error) { return
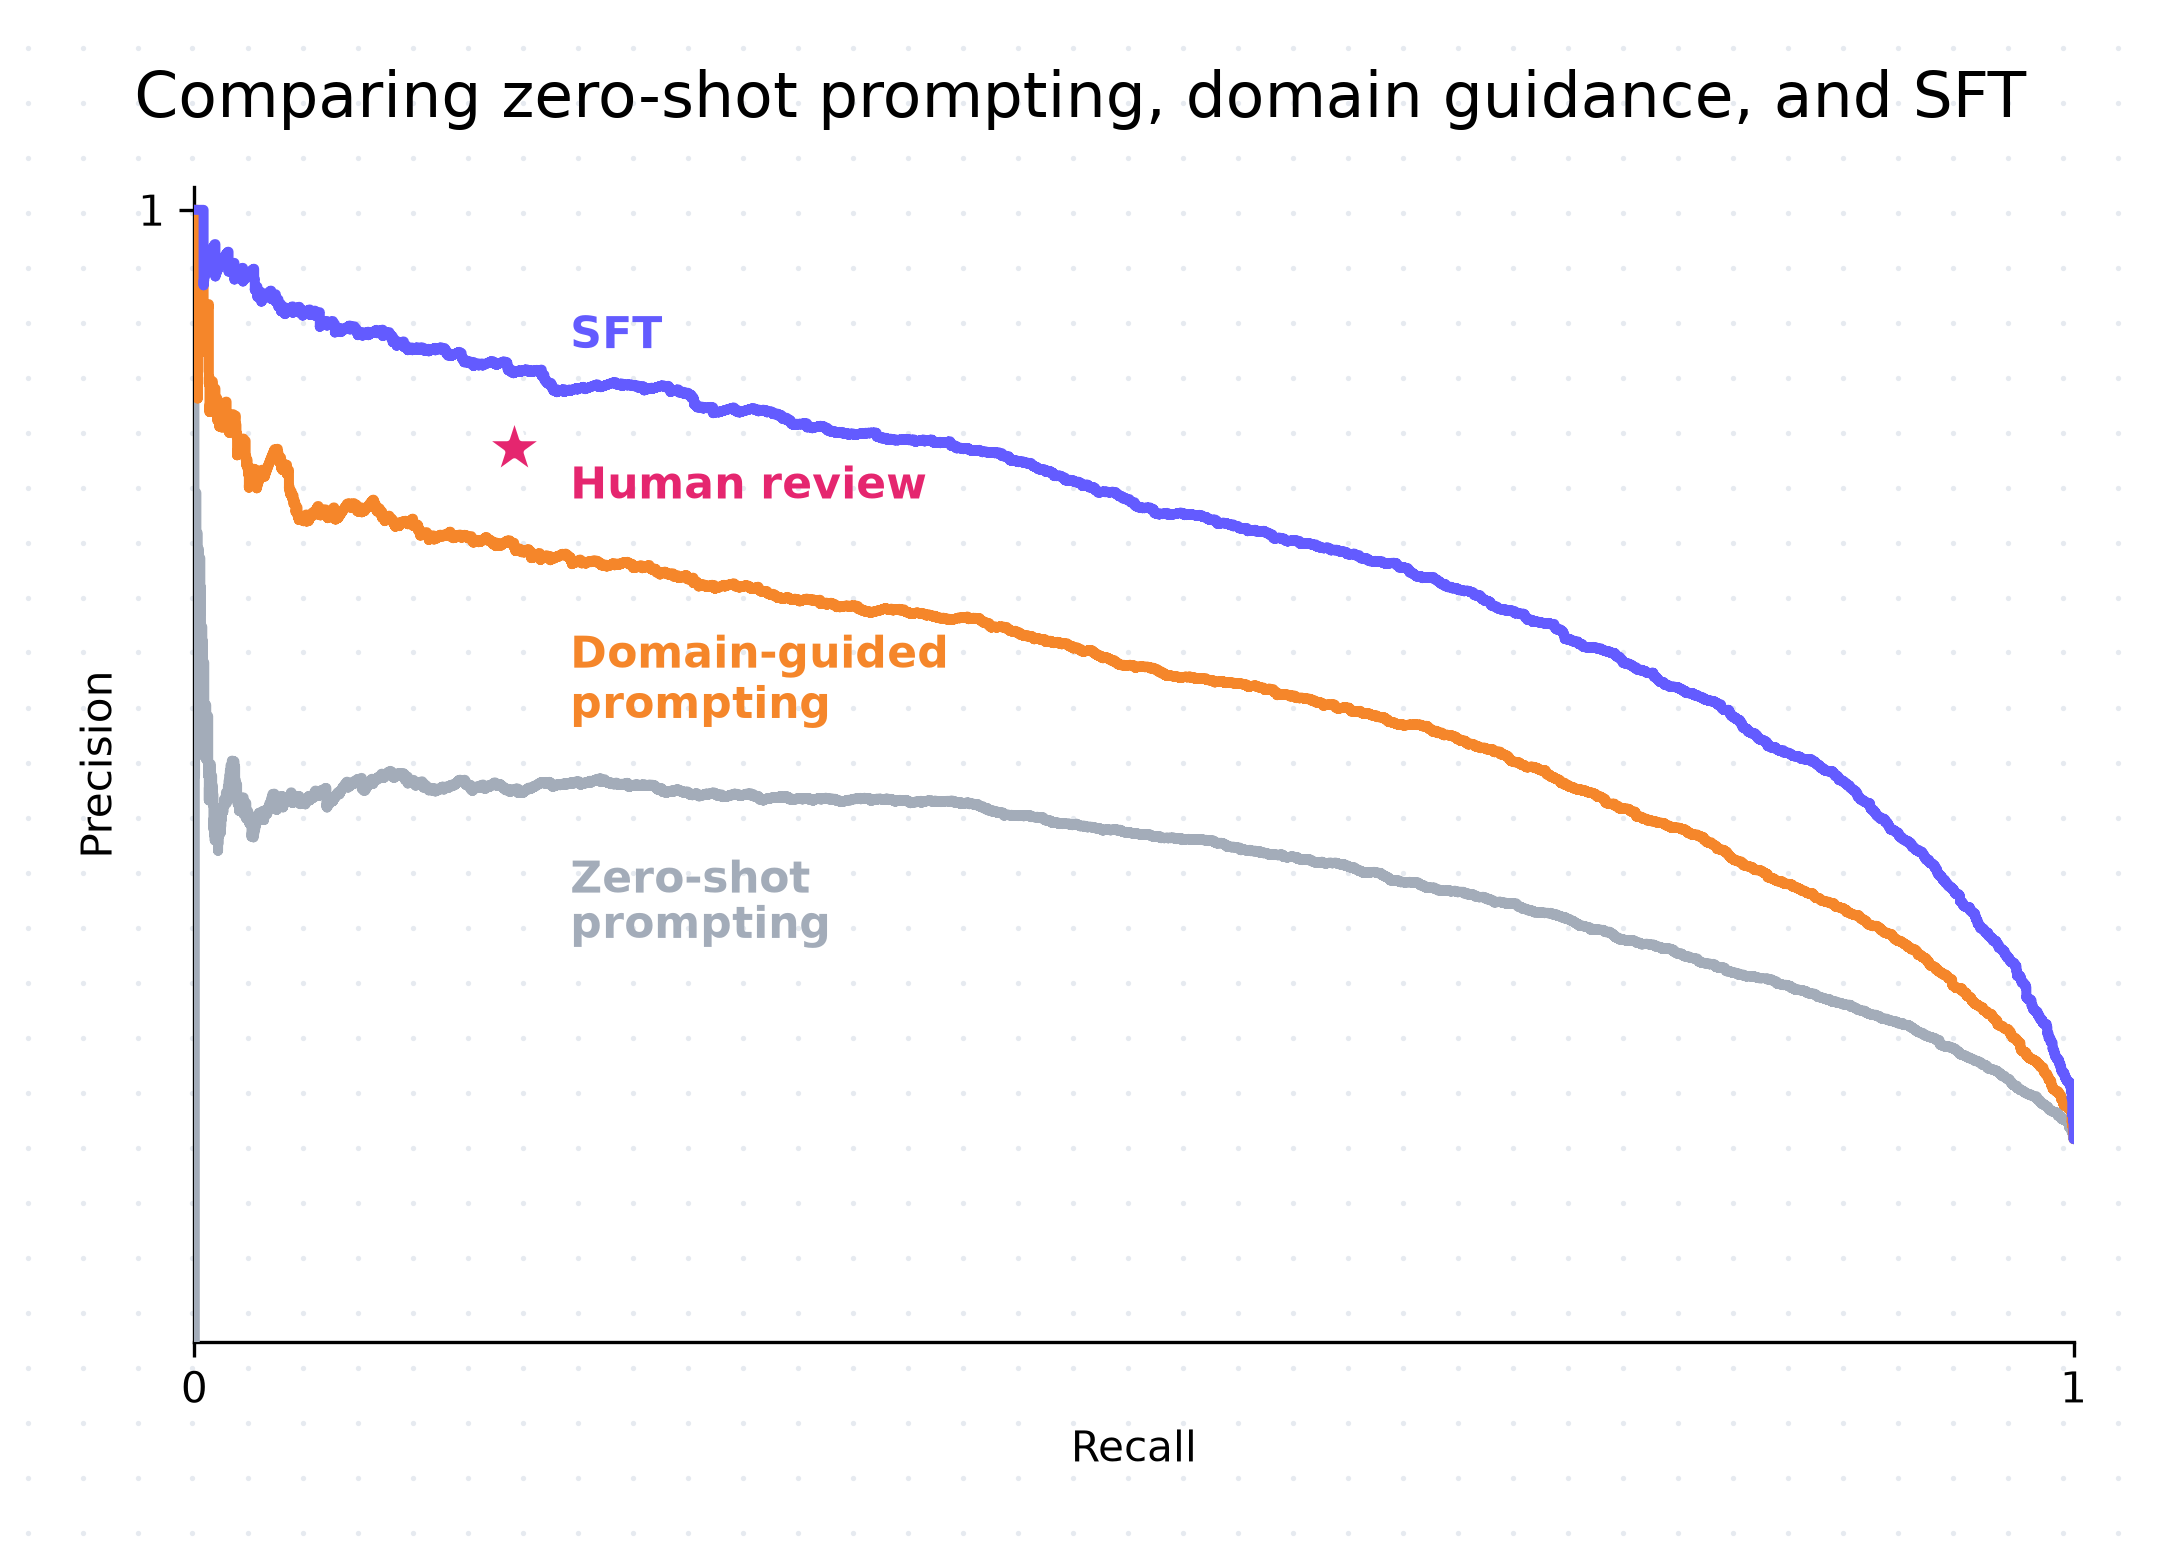
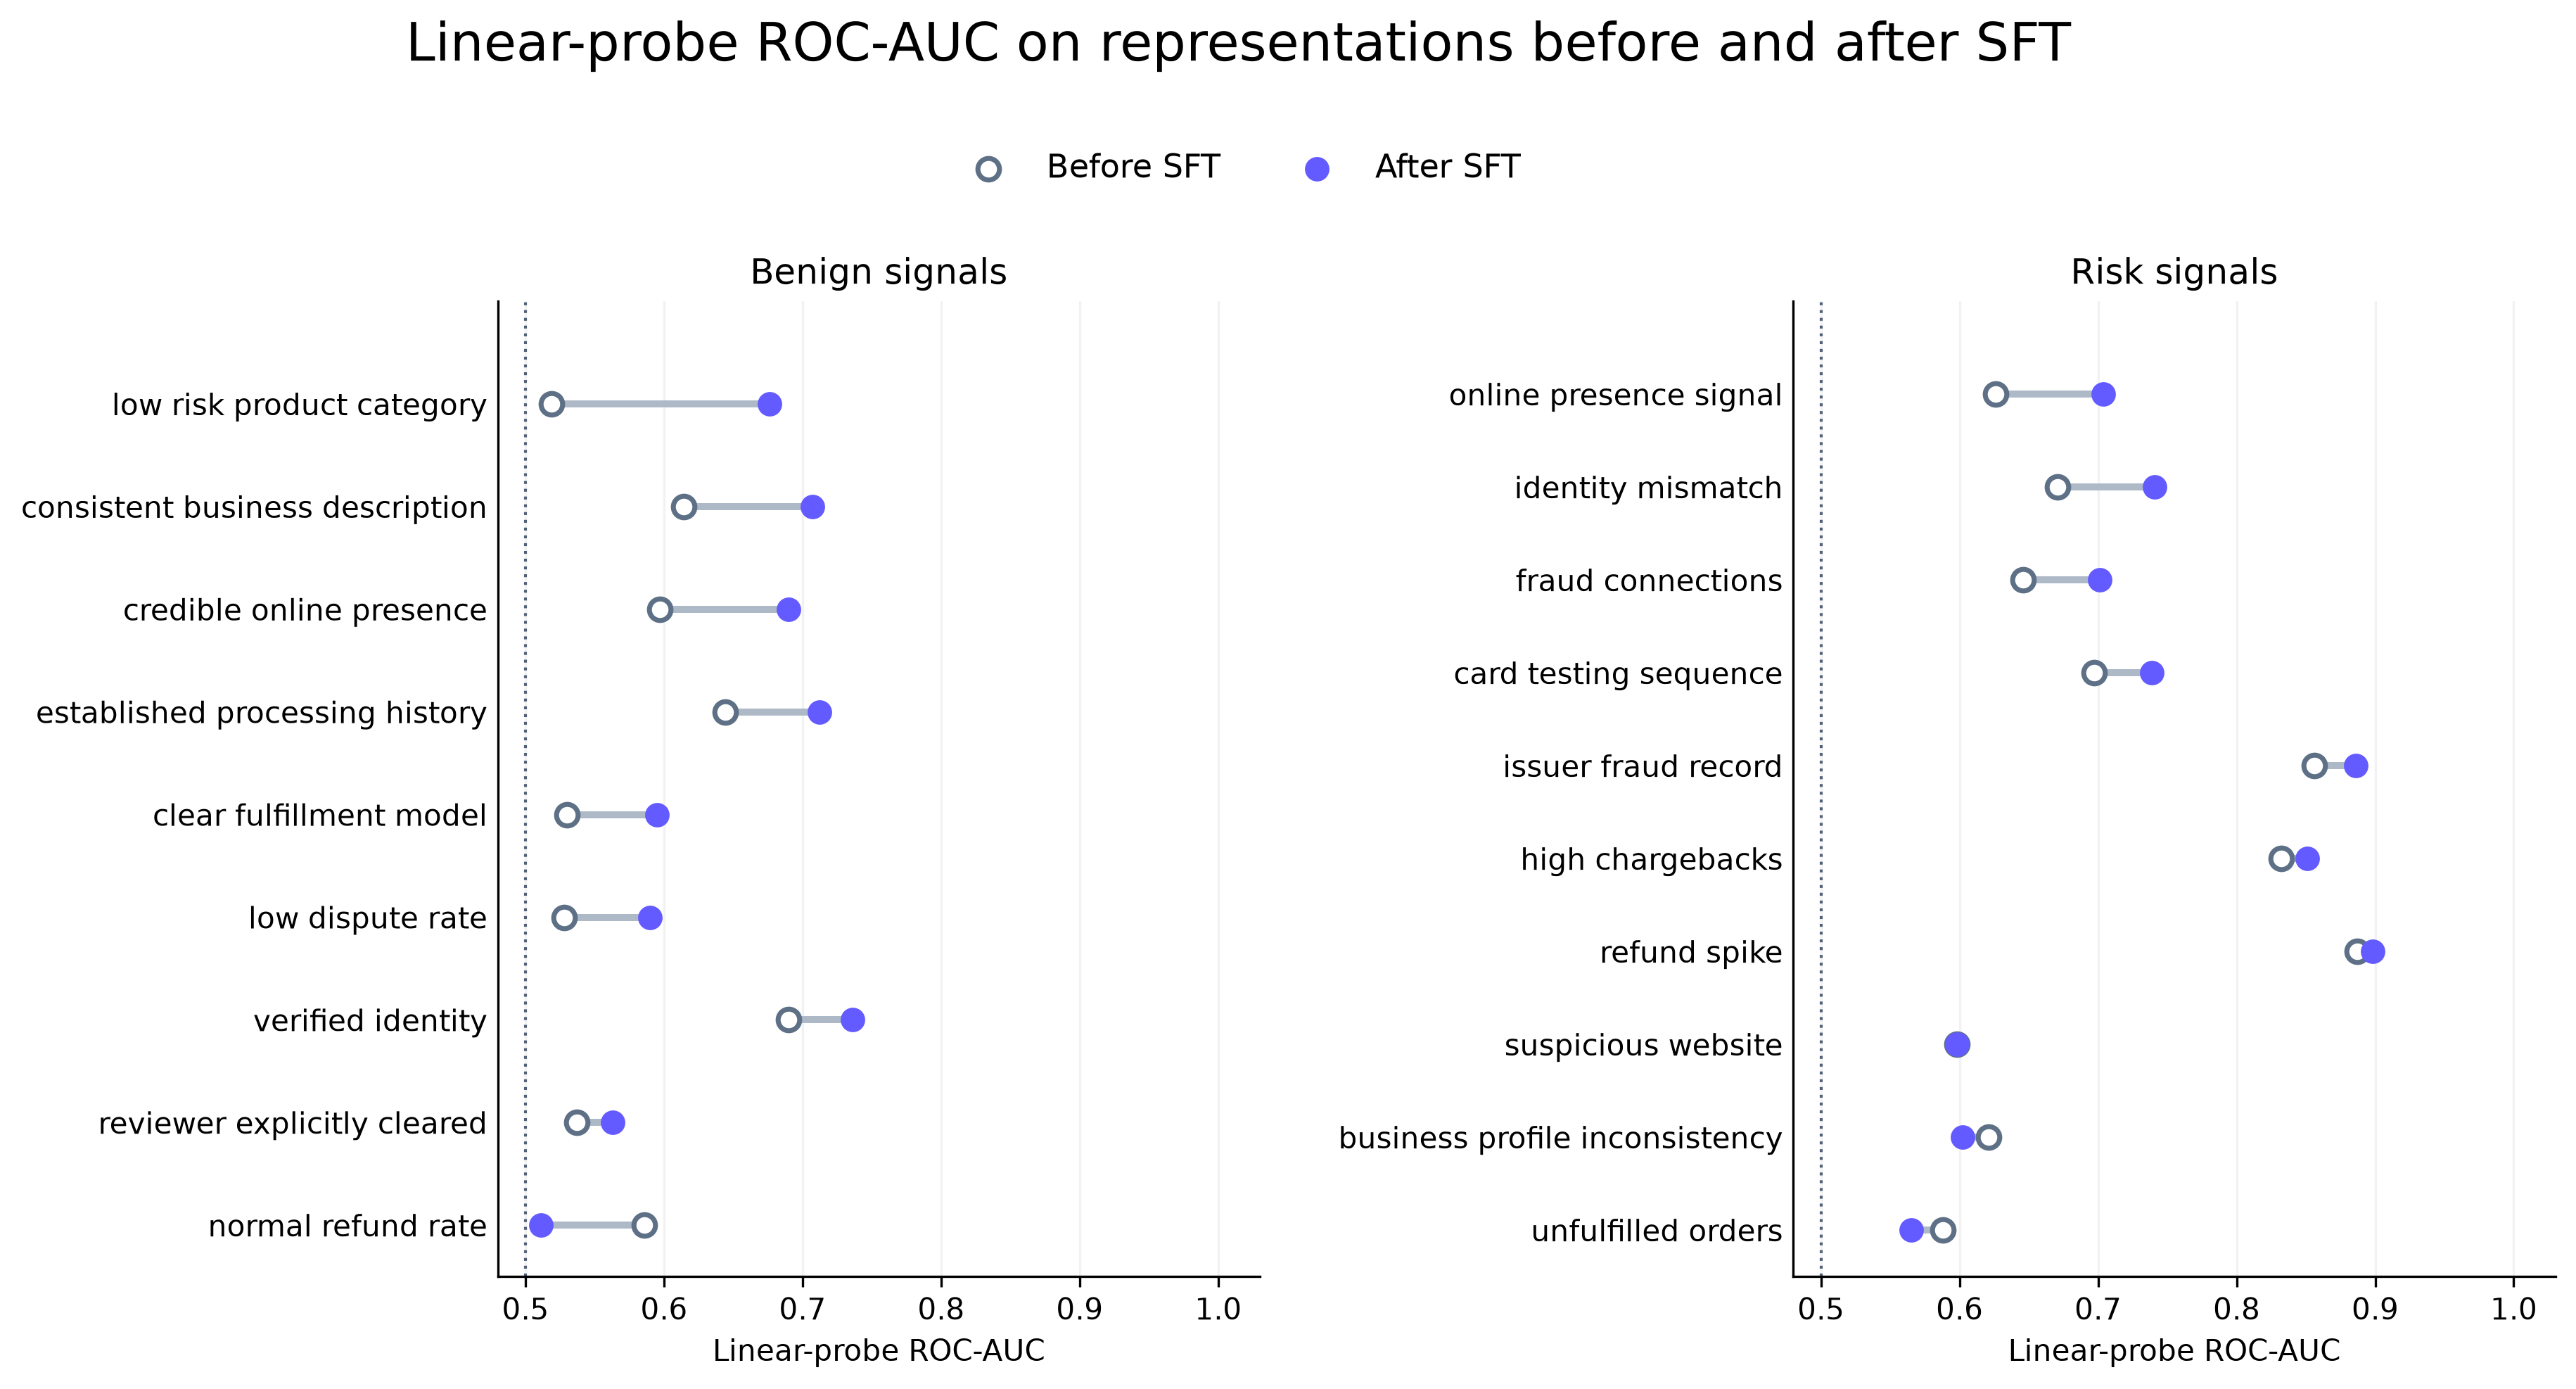
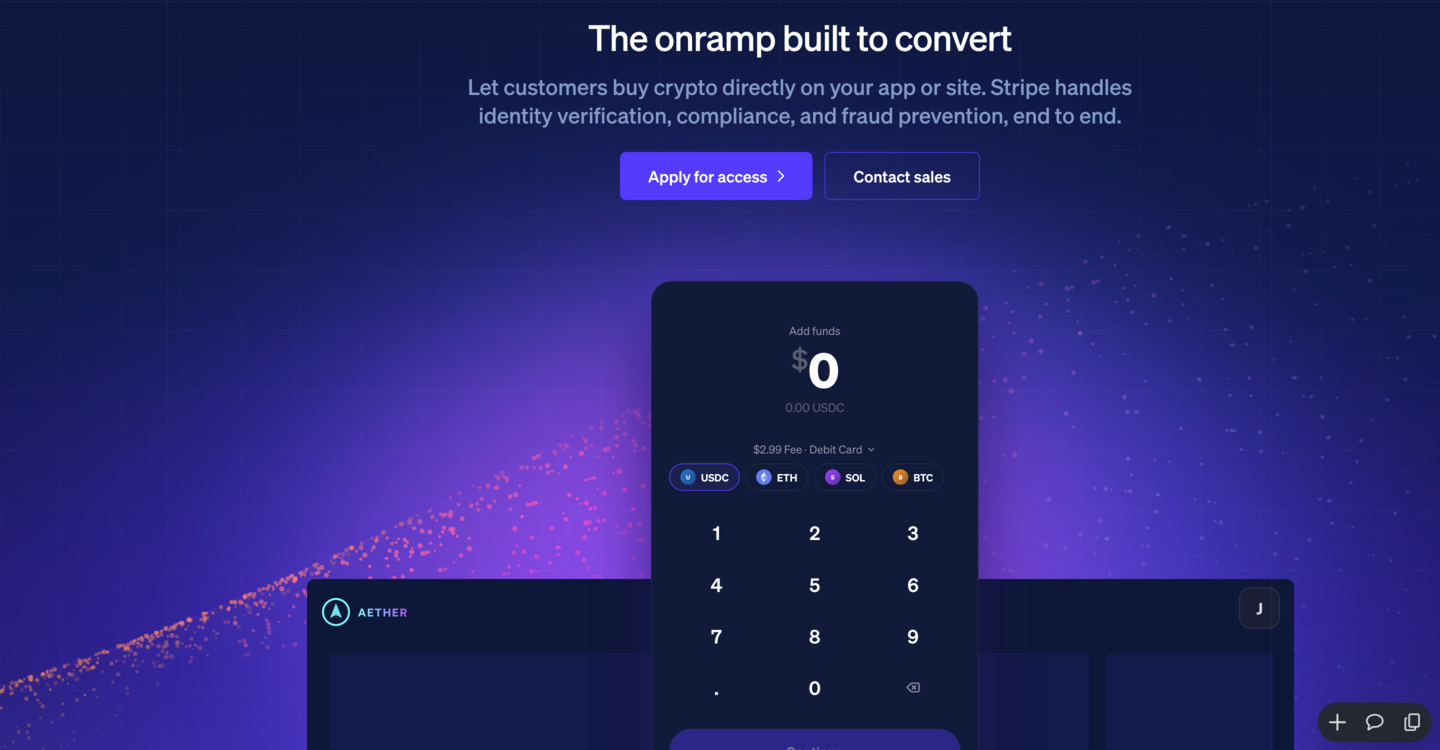
Error: {error.message}
; } if (isLoading || !data) { return
Loading...
; } const {url} = data; return Open account link; } ``` ![](/images/connect-embedded-components-streamline-onboarding/image10.png) ![](/images/connect-embedded-components-streamline-onboarding/image4.png) We now have a fully working onboarding UX and upon completion the account is now enabled for `card_payments` and `transfers`. I can now create payments and receive payouts with this account. However, I’m not sure I like this UX as my user had to open a separate window to onboard and was required to authenticate with Stripe. I wish I could onboard my accounts from within my site in a white-labeled fashion*.* Fortunately, you can do this with the [embedded onboarding component](https://docs.stripe.com/connect/supported-embedded-components/account-onboarding). First, we add a new endpoint `/create-account-session` that uses [the create account session API](https://stripe.com/docs/api/account_sessions/create) and configures it to enable the onboarding component. ```ts export async function POST() { const session = await getServerSession(authOptions); let stripeAccountId = session?.user?.stripeAccount?.id; const accountSession = await stripe.accountSessions.create({ account: stripeAccountId, components: { account_onboarding: { enabled: true, }, }, }); return new Response(JSON.stringify(accountSession), { status: 200, headers: {'Content-Type': 'application/json'}, }); } ``` Now, we'll use this API to initialize embedded components on my platform. I’ll need to add a dependency to the `@stripe/connect-js` and `@stripe/react-connect-js` packages. ```bash yarn add @stripe/connect-js @stripe/react-connect-js ``` Now that we have these packages, I will import them and call `loadConnectAndInitialize` to initialize Connect embedded components. In this initialization, I am using the `/api/create_account_session` API we just created: ```javascript import {loadConnectAndInitialize} from '@stripe/connect-js'; import { ConnectAccountOnboarding, ConnectComponentsProvider, } from '@stripe/react-connect-js'; export default function Onboarding() { const [errorMessage, setErrorMessage] = React.useState(null); const [stripeConnectInstance] = React.useState(() => { const fetchClientSecret = async () => { const response = await fetch('/api/create_account_session', { method: 'POST', }); if (!response.ok) { setErrorMessage('Failed to initialize Session'); throw new Error('Failed to fetch account session'); } else { const {client_secret} = await response.json(); return client_secret; } }; return loadConnectAndInitialize({ publishableKey: process.env.NEXT_PUBLIC_STRIPE_PUBLIC_KEY!, // Your publishable key goes here! fetchClientSecret: fetchClientSecret, }); }); return ( <>TODO: Render the component ); } ``` Next, I can then render the `ConnectAccountOnboarding` component. Let’s replace the `TODO` in the component above: ```tsx ... return ( <> {errorMessage ? (
{`Error: ${errorMessage}`}
) : (
{ window.location.href = '/home'; // This is the action to perform after onboarding is exited }} />
)} ); ``` With these changes, the embedded component renders. ![](/images/connect-embedded-components-streamline-onboarding/image7.png) ![](/images/connect-embedded-components-streamline-onboarding/image1.png) ![](/images/connect-embedded-components-streamline-onboarding/image5.png) ![](/images/connect-embedded-components-streamline-onboarding/image6.png) We’ve successfully brought the onboarding UI within Furever and eliminated an external redirect. Now, let’s optimize this user experience. First, the look and feel of the onboarding flow does not match the rest of the site. Let’s use the [appearance API](https://docs.stripe.com/connect/customize-connect-embedded-components) to make it match. Connect embedded components support a variety of appearance options, so I can make this look exactly like my site by simply passing in another parameter to my existing `loadConnectAndInitialize` call: ```ts return loadConnectAndInitialize({ publishableKey: process.env.NEXT_PUBLIC_STRIPE_PUBLIC_KEY!, fetchClientSecret: fetchClientSecret, appearance: { variables: { fontFamily: 'Sohne, inherit', colorPrimary: '#27AE60', colorBackground: '#ffffff', colorBorder: '#D8DEE4', buttonPrimaryColorBackground: '#27AE60', buttonPrimaryColorText: '#f4f4f5', badgeSuccessColorBackground: '#D6FCE6', badgeSuccessColorText: '#1E884B', badgeSuccessColorBorder: '#94D5AF', badgeWarningColorBackground: '#FFEACC', badgeWarningColorText: '#C95B4D', badgeWarningColorBorder: '#FFD28C', overlayBackdropColor: 'rgba(0,0,0,0.3)', } }, }) ``` With this code, now the onboarding component fits more seamlessly into my page, as the colors, text and border radius are now matching the rest of my UI. ![](/images/connect-embedded-components-streamline-onboarding/image2.png) As with the page hosted on Stripe, the embedded onboarding flow is requesting authentication with Stripe. This is the default behavior for embedded components. However, because I chose the `payments.losses = ‘application’` and `requirement_collection = ‘application’` options on this account (which means I as a platform [own losses](https://docs.stripe.com/api/accounts/create#create_account-controller-losses-payments) and [requirements collection](https://docs.stripe.com/api/accounts/create#create_account-controller-requirement_collection) for these connected accounts), I can disable stripe user authentication with [disable\_stripe\_user\_authentication](https://docs.stripe.com/api/account_sessions/object?api-version=2024-10-28.acacia#account_session_object-components-account_onboarding-features-disable_stripe_user_authentication). My app already has secure authentication, and I am making the explicit decision to bypass the additional [Stripe user authentication](https://docs.stripe.com/connect/get-started-connect-embedded-components?platform=web#user-authentication-in-connect-embedded-components) that comes by default with embedded components. ```ts const accountSession = await stripe.accountSessions.create({ account: 'acct_YOUR_ACCOUNT_ID', components: { account_onboarding: { enabled: true, features: { disable_stripe_user_authentication: true, }, }, }, }); ``` Now my users don’t need to maintain a separate set of credentials with Stripe, and can jump straight into onboarding. One more thing \- I want to know exactly the steps my users go through while onboarding. Let’s integrate with the account onboarding component's `onStepChange` API so I can know exactly where my users are dropping off in the funnel: ```ts { console.log('Onboarding flow exited. Redirecting to home...'); window.location.href = '/home'; // This is the action to perform after onboarding is exited }} onStepChange={(step) => { console.log(`User is in step ${step} of onboarding`) // Send this information to my platform's analytics provider... }} /> ``` With this, all that is left is replacing this console log with my specific analytics tool, and now the data scientists back at Furever can link this data to all of our existing analytics. Since this worked so well in Furever, I’d like to show you how easy it is to include other components, like the `ConnectPayments` [component](https://docs.stripe.com/connect/supported-embedded-components/payments) which would allow my connected accounts to view and manage payments from Furever. Let’s enable the component: ```ts const accountSession = await stripe.accountSessions.create({ account: 'acct_YOUR_ACCOUNT_ID', components: { account_onboarding: { enabled: true, }, payments: { enabled: true, }, }, }); ``` And now I can render it in the frontend, just like I did for onboarding. Generally when using multiple components, you’ll want to reuse the same `connectInstance` (see our [performance best practices](https://docs.stripe.com/connect/get-started-connect-embedded-components?platform=web#performance-best-practices)) and call `loadConnectAndInitialize` once. You can refactor this to a parent component, use react context, or any other state management solution to achieve this. ```ts return ( <> {errorMessage ? (
{`Error: ${errorMessage}`}
) : (
)} ); ``` ![](/images/connect-embedded-components-streamline-onboarding/image8.png) Now I have a fully operational payment list on my site that includes refunds and dispute management, and I no longer need to build it myself. This post has only scratched the surface of the customization that embedded components support \- you can enable/disable permission-related features via [account sessions features](https://stripe.com/docs/api/account_sessions/create), or UX related features via component parameters specific to each component. We support [updating properties after initialization](https://docs.stripe.com/connect/get-started-connect-embedded-components?platform=web#update-connect-embedded-components-after-initialization) (so supporting a dark mode toggle on your app would be easy), [localization](https://docs.stripe.com/connect/get-started-connect-embedded-components?platform=web#localization), and support all frontend UI frameworks (not just React) via our [vanilla JS SDK](https://github.com/stripe/connect-js). There are many [GA and preview components](https://docs.stripe.com/connect/supported-embedded-components), and more are on the way. Adding another component to your site is as easy as updating the Account Session creation call, and integrating the new component in the frontend \- each new component respects the same theming parameters to fit seamlessly into your own UI. From account [onboarding](https://docs.stripe.com/connect/supported-embedded-components/account-onboarding) and account [management](https://docs.stripe.com/connect/supported-embedded-components/account-management), to [payments](https://docs.stripe.com/connect/supported-embedded-components/payments), [payouts](https://docs.stripe.com/connect/supported-embedded-components/payouts), [capital financing offers](https://docs.corp.stripe.com/connect/supported-embedded-components/capital-financing-application) and [instant payouts](https://docs.stripe.com/connect/supported-embedded-components/balances). These components are a great way to quickly implement deep, maintainable and high quality payments functionality into your site and avoid external redirects. For more Stripe learning resources, subscribe to our [YouTube channel](https://www.youtube.com/stripedevelopers).
Implementing metered billing might sound straightforward, until your system starts processing billions of requests per month across a globally distributed architecture. That's exactly the challenge faced by [Edgee](https://www.edgee.cloud/), a startup building a specialized proxy to help companies reclaim lost web analytics data. This article explores how Edgee designed a scalable, [usage-based billing](https://docs.stripe.com/billing/subscriptions/usage-based) system using Stripe's metering and billing APIs, manages complexity across 100+ edge locations, and ensures accuracy and resilience in a critical part of their infrastructure. ## Understanding web data loss at scale "Chances are, you're missing up to 50% of your analytics and conversions data, and making decisions based on incomplete or wrong information." —Alex, Developer Advocate @ Edgee The modern web is more opaque than it appears. Between ad blockers, cookie fatigue, legacy tech deprecation, and privacy regulations like [General Data Protection Regulation (GDPR)](https://gdpr.eu/what-is-gdpr/), many websites are blind to the majority of user actions. Here's what Edgee found: * Ad blockers have quadrupled in adoption over the last decade, often blocking even first-party analytics * Consent banners lead to significant opt-outs, with only 30% of users accepting cookies on average * Client-side Software Development Kits (SDKs) are used by 99% of analytics platforms and fail silently when scripts or API calls are blocked Almost 60% of global traffic is generated by mobile devices while on the go, using unstable connections The problem isn't the analytics platform itself, but where the data is captured. Most tracking happens in the browser, where web developers have little control. The solution is simple but powerful: shift the data collection logic from the unreliable client to the edge, where it's faster, safer, more sustainable, harder to block, and privacy-compliant. ## From client to edge: rethinking web data capture Edgee shifts data collection logic to the edge. In practice, Edgee acts as a proxy in front of your site, handling Domain Name System (DNS) and Transport Layer Security (TLS) transparently, while capturing data before the page even loads in the visitor's browser. This architecture has several advantages: * No reliance on client-side JavaScript for key tracking events such as page views and conversions * Event forwarding happens before the browser sees the page or via the Edgee SDK for browser events * Open source and transparent proxy and components ecosystem * Multi-purpose support: not just analytics, but also consent management, warehousing, A/B testing, and more * Extensibility powered by first-party and third-party [WebAssembly](https://webassembly.org/) components via the [Edgee Component Registry](https://www.edgee.cloud/registry). Edgee integrates with tools like [Google Analytics](https://developers.google.com/analytics), [Segment](https://segment.com/), [Amplitude](https://amplitude.com/), [Posthog](https://posthog.com/), [ClickHouse](https://clickhouse.com), and many other analytics platforms and cloud services. Not replacing them, but making them more effective while allowing website owners to respect their visitors' privacy. "We're not trying to replace Google Analytics. We're making it work the way it was meant to, while respecting privacy and regulations." —Sacha Morard, Co-founder of Edgee. ![image 1](/images/edgee/edgee.png) ## Metering at scale: building usage-based billing with Stripe Edgee's business model combines flat-rate monthly fees with high-volume usage billing, similar to cloud platforms. The key dimensions are: * Requests flowing through the proxy (similar to Content Delivery Network (CDN) traffic) * Data events delivered to analytics platforms, data warehouses, or cloud services The setup and tenant configuration is pretty straightforward: 1. Create [Meter](https://docs.stripe.com/api/billing/meter/object) objects via API (once), one for the two dimensions 2. Create [Product](https://docs.stripe.com/api/products/object) and [Price](https://docs.stripe.com/api/prices/object) objects via API (once, but can be customized per tenant) 3. Create a [Customer](https://docs.stripe.com/api/customers/object) and [Subscription](https://docs.stripe.com/api/subscriptions/object) object for each tenant 4. At runtime, send [Meter Event](https://docs.stripe.com/api/billing/meter-event/object) objects Running on CDNs like [Fastly](https://www.fastly.com/) and [Cloudflare](https://www.cloudflare.com/), Edgee processes billions of monthly requests, across 100+ [Points of Presence](https://en.wikipedia.org/wiki/Point_of_presence) (PoPs), requiring precise, distributed metering. The raw metering data is stored centrally on [Google BigQuery](https://cloud.google.com/bigquery) to simplify internal analysis and reporting. Because this is several terabytes of data, it needs some form of aggregation. Instead of pushing all raw events to Stripe, Edgee pre-aggregates it before reporting [hourly meter events](https://docs.stripe.com/api/billing/meter/object#billing_meter_object-event_time_window). This combination of centralized logging, optimized pre-aggregation, and hourly jobs running on [AWS Lambda](https://aws.amazon.com/lambda/) ensures low-latency, resilience, and accuracy. Raw meter events need to be summed up to compute each tenant's invoice for their monthly consumption. Stripe natively handles [idempotency](https://docs.stripe.com/api/idempotent_requests) and [tiered pricing (graduated)](http://docs.stripe.com/products-prices/pricing-models#graduated-pricing), taking care of all the math and edge cases at the end of each tenant's billing cycle. That means Edgee just sends the hourly total requests and events per tenant, and Stripe does the rest. This allows Edgee to keep the billing system simple and stateless. Here a code extract that shows how the [pricing model](https://www.edgee.cloud/pricing) can be defined centrally (in Go): ```go var stripeProducts = map[string]StripeProduct{ "Events": { MeterName: "edgee_events_meter", PriceName: "edgee_events_price", Pricing: []PricingDataSet{ {From: 0, To: 0.05, PricePerUnit: 0}, {From: 0.05, To: 5, PricePerUnit: 0.009}, {From: 5, To: 50, PricePerUnit: 0.0045}, {From: 50, To: 500, PricePerUnit: 0.0023}, {From: 500, To: 0, PricePerUnit: 0.0010}, }, }, "Requests": { MeterName: "edgee_requests_meter", PriceName: "edgee_requests_price", Pricing: []PricingDataSet{ {From: 0, To: 0.5, PricePerUnit: 0}, {From: 0.5, To: 5, PricePerUnit: 0.00045}, {From: 5, To: 50, PricePerUnit: 0.000225}, {From: 50, To: 500, PricePerUnit: 0.000115}, {From: 500, To: 0, PricePerUnit: 0.000050}, }, }, "Edgee Team Plan": { PriceName: "edgee_team_price", FlatPrice: 12000.0, }, "Edgee Enterprise Plan": { PriceName: "edgee_enterprise_price", FlatPrice: 150000.0, }, } ``` And how aggregated meter events are sent every hour: ```go func BillCustomerRequests(customerId string, requestCount int, timestamp int64) error { params := &stripe.BillingMeterEventParams{ EventName: stripe.String("edgee_requests_meter"), Payload: map[string]string{ "stripe_customer_id": customerId, "value": fmt.Sprintf("%d", requestCount) # hourly consumption value }, Timestamp: stripe.Int64(int64(timestamp)), # unique timestamp for idempotency } result, err := meterevent.New(params) return err } ``` ## Lessons from the integration: resilience, flexibility, and simplicity Edgee approached their Stripe integration with a pragmatic, phased strategy that balanced simplicity on the surface with sophistication under the hood. On the frontend, they kept things clean and intuitive, just a couple of buttons and Stripe's hosted billing portal to give customers easy, self-service access. Behind the scenes, however, they built a robust backend: a metering pipeline tailored to each tenant, support for complex pricing structures like graduated tiers, coupons, and trials, and a design focused on resilience. They implemented retry logic and idempotent updates to ensure reliability, even during cloud disruptions or API outages. One piece of advice they offer to others: "Invest in your metering. It moves from 'nice dashboard' to mission-critical billing fast." Looking ahead, Edgee is already working on new capabilities, including guardrails and spend alerts, pre-paid credit models, and customer-driven preferences like unified monthly billing. ## Conclusion Edgee's implementation of usage-based billing shows how startups can manage massive scale with a clear technical strategy. By capturing data at the edge and pairing it with Stripe's flexible billing APIs, they built a system that stays simple for users while handling billions of events behind the scenes. Their use of serverless metering, centralized logging, and pre-aggregated usage reporting enables accurate, low-latency billing across 100+ edge locations. Stripe handles pricing logic, retries, and idempotency, allowing Edgee to stay stateless and resilient, even during outages. For technical teams, the key takeaway is clear: metering isn't just about visibility, it's infrastructure. With the right foundation, as Edgee shows, it becomes a powerful, reliable driver of revenue and product flexibility. Catch more details in the [companion interview](https://www.youtube.com/watch?v=AaX057035Q0) with Alex Casalboni on the Stripe Developers YouTube channel. Building point-of-sale systems that efficiently capture customer data, beyond just payment details, presents unique technical and operational hurdles. For developers, this often means integrating multiple disparate systems. In traditional checkout processes, customers frequently need to provide various forms of data, which can require interactions with multiple systems and devices. Take car rentals, for example. Customers typically sign agreements on a separate signature pad, then verbally share details like email or phone for receipts or loyalty programs. The operator manually keys this into the POS, increasing errors and slowing down the process. In addition, some customers might be reluctant to share this information verbally, within earshot of strangers. Receipt preferences often add another manual step. This fragmented data collection—relying on verbal input, juggling separate signature pads, and manual entry—consumes staff time, invites errors, and creates bottlenecks, leading to frustrated customers and longer queues, especially during busy periods. These multi-step interactions not only consume valuable time but can also result in long queues, especially during peak business hours. The need to juggle multiple input devices, like signature pads, customer-facing displays, operator-facing displays, or keyboards, contributes to a cluttered and inefficient workspace. This setup not only hampers the checkout process but can lead to a subpar experience as customers grow impatient or frustrated with delays. This technical fragmentation and operational friction doesn't just create delays—it directly impacts customer satisfaction and perception. The challenge is finding a way to consolidate data collection directly within the payment flow, simplifying the technical stack and improving the in-person experience. ### Introducing Stripe Terminal's on-screen input collection Stripe Terminal's on-screen input collection feature directly addresses these challenges by allowing businesses to collect diverse customer data—from loyalty numbers to signatures—directly on the Stripe reader. Critically, this eliminates the need for separate devices like signature pads, consolidating the interaction workflow. Using the [Stripe API](https://docs.stripe.com/terminal/payments/setup-integration?terminal-sdk-platform=server-driven) or [Terminal SDKs](https://docs.stripe.com/terminal/payments/setup-integration?terminal-sdk-platform=react-native&locale=en-GB), developers can integrate custom input forms into their POS flow, before or after a payment. For example, if you want to collect a loyalty number pre-transaction, or an email for a receipt post-transaction, or a signature for an agreement, it's all handled by the reader. ### Key features of Stripe’s input collection #### Versatile input options The feature supports six core input types, designed for common POS data collection needs: * **Selection**: for choosing what type of receipt a customer wants or for closed questions/surveys * **Signature**: collecting a signature as part of a rental agreement * **Email**: collecting email address for a receipt or enrollment in a loyalty program * **Phone**: collecting phone number for an SMS receipt or enrollment in a loyalty program * **Text**: collecting a customer's name, postal code, or other type of free text information * **Numeric**: collecting a loyalty program number Developers can customize forms with features like required fields, skip buttons, and visual styles (like toggle switches). Importantly, you can include metadata in the API request, which is returned in the webhook response, allowing you to associate inputs with specific transactions or objects. (Note: This feature is not for collecting sensitive personal information like health records or payment details.) #### Seamless integration Integration is straightforward using the `collect_inputs` command in the Stripe API. Your POS application constructs the form details in the API call, and the Stripe Terminal reader handles rendering the prebuilt UI. Once the customer completes the input, Stripe sends a `terminal.reader.action_succeeded` webhook event to your application, containing the customer's response. For signatures, the webhook includes a file ID pointing to the signature's SVG file. Multiple inputs can be requested with one API call - Stripe Terminal will simply sequence them. #### Improved customer experience By consolidating input steps directly onto the terminal, businesses dramatically reduce friction for customers. Instead of juggling devices or repeating information verbally, customers interact directly with the reader, leading to a smoother, faster, and more modern checkout experience. The accurate data collected can power personalized follow-ups or loyalty programs, increasing customer satisfaction and encouraging repeat business. ### Sample integration: Collecting customer address and signature Consider a rental car company looking to upgrade its POS. Today, they likely use a separate signature pad in addition to their card reader. They also need to manually collect customer details for lookups or receipts. Stripe Terminal's on-screen input collection can replace these fragmented steps. Here's one possible flow: 1. Ask the customer how to look up their booking—email, loyalty number, booking number 2. Collect relevant input from the reader—email address, loyalty card number, booking number 3. The agent can then handle any aspects related to their booking, confirming dates and times, vehicle type etc., and show them the rental agreement 4. Collect customer signature to agree to the rental agreement on the reader Let's walk through an example flow where the customer selects to use their email address to look up their reservation. This example uses a server-driven integration using the Stripe API. #### Booking lookup Let's detail a flow for initial customer lookup using a server-driven (API-based) integration. Your POS system uses the API to present a "select lookup method" form on the reader. Once the customer taps "Booking reference," your POS gets the selection via webhook. Your POS then triggers a new form on the reader asking for the booking number input. The customer enters it, the response comes back to your POS via webhook, and your system uses that ID to look up their reservation. ![](/images/stripe-terminal-on-screen-input-collection/image2.png) The first code snippet creates a selection form with three options for the customer to choose how they'd like to look up their booking—email, loyalty number, or booking reference. The email and loyalty number are "primary" options, which means they are shown in a different color to highlight them. A title and description are provided for the page, and we've made it a required option. ```python import stripe stripe.api_key = "sk_test_xxxxxxxxxx" reader = stripe.terminal.Reader.collect_inputs( '{{READER_ID}}', inputs=[ { "type": "selection", "selection": { "choices": [ {"style": "primary", "text": "E-mail", "id": "email_id"}, {"style": "primary", "text": "Loyalty Number", "id": "loyalty_id"}, {"style": "secondary", "text": "Booking reference", "id": "booking_ref_id"}, ], }, "custom_text": { "title": "Lookup your reservation", "description": "How would you like to lookup your reservation", }, "required": True, }, ], ) ``` After the customer has made their selection, in this case their email address, you can then render the next form to collect the customer's email address. ```python import stripe stripe.api_key = "sk_test_xxxxxxxxxx" reader = stripe.terminal.Reader.collect_inputs( '{{READER_ID}}', inputs=[ { "type": "email", "custom_text": { "title": "Email address", "description": "Please enter your email address to look up your reservation", }, "required": True, }, ], ) ``` #### Signature Once the customer has agreed to the terms of the rental agreement, the POS renders a signature form on the Stripe Terminal. Once the customer has signed this, a webhook response is sent to the POS. The POS system can then download the signature image file (within 24 hours of the webhook event), store it, and mark that the rental agreement has been signed. Note that Stripe only stores the signature image file for 24 hours so you will need to ensure you keep a copy of the SVG file. ![](/images/stripe-terminal-on-screen-input-collection/image1.png) The next code snippet shows how to render a signature collection form on the reader. This example includes the text to display on the submit button, and also passes in the booking reference number as metadata which will then be included on the webhook response from Stripe. ```python import stripe stripe.api_key = "sk_test_xxxxxxxxxx" reader = stripe.terminal.Reader.collect_inputs( '{{READER_ID}}', inputs=[ { "type": "signature", "custom_text": { "title": "Agreement signature", "description": "Please sign below to accept your agreement", "submit_button": "Submit" }, "required": True, }, ], ) ``` ### Benefits to businesses Efficient data collection through Stripe Terminal's on-screen input functionality directly impacts business operations in several significant ways: #### Improved operational efficiency and data accuracy Moving data collection directly onto the terminal screen eliminates manual transcription and separate devices. This not only drastically cuts down on manual entry errors but also speeds up the entire checkout flow, freeing up staff and reducing queues. The result is a more efficient operation and more reliable customer data. #### Enhanced ability to offer tailored services or promotions Collecting data like emails for receipts, phone numbers for loyalty lookups, or preference selections directly at the point of interaction provides richer, more accurate customer profiles. This allows businesses to follow up with personalized offers or tailor future interactions based on captured data, building loyalty and increasing relevance for the customer. #### Reduction in time By automating data capture on the terminal, businesses drastically cut down the time staff spend on manual data entry or managing separate input devices. This frees up staff to focus on customer service or other critical tasks, boosting overall productivity and reducing operational costs. ### Conclusion Resolving fragmented data collection at the POS is key to improving efficiency and customer satisfaction. Stripe Terminal's on-screen input collection provides a powerful, integrated solution. By allowing you to collect signatures, loyalty details, receipt preferences, and more—directly on the terminal screen via the API and webhooks—you eliminate separate devices and manual steps, significantly reducing errors and speeding up checkout. This streamlined process enhances the customer experience and equips businesses with accurate data for personalization. For developers building POS systems, this feature simplifies architecture while enabling richer customer interactions on compatible readers like the S700. If you're ready to enhance your business operations and elevate customer interactions, we invite you to explore the capabilities of Stripe Terminal further. Whether you're looking to streamline your checkout process, gather valuable customer data, or create a seamless point-of-sale experience, Stripe Terminal's on-screen input collection offers a scalable solution to meet your needs. ### Additional resources To get started and access more information on integrating with Stripe Terminal, check out the following resources: * [Collect on-screen inputs | Stripe Documentation](https://docs.stripe.com/terminal/features/collect-inputs?locale=en-GB) * [Collect inputs using a Reader | Stripe API Reference](https://docs.stripe.com/api/terminal/readers/collect_inputs) * [Terminal | Stripe Documentation](https://docs.stripe.com/terminal) * [Accept in-person payments | Stripe Documentation](https://docs.stripe.com/terminal/quickstart) * [Order Stripe Terminal readers (via Stripe Dashboard)](https://dashboard.stripe.com/terminal/shop) For more Stripe developer learning resources, subscribe to our [YouTube Channel](https://www.youtube.com/@StripeDev). *This post is contributed by Docusign Developer Advocacy.* As any developer who has integrated Stripe with [Docusign Payments](https://developers.docusign.com/docs/esign-rest-api/esign101/concepts/tabs/payment/) knows, agreements and payments go hand in hand. But payments are just one piece of the larger agreement lifecycle. Historically, Docusign has been the go-to solution for electronic signatures. But once a digital document has been signed, it has often been stored as a static PDF, trapping the valuable agreement data inside. Businesses have had to rely on manual processes to transfer this data across different platforms and systems, often losing economic value in the process. That’s where the [Docusign Intelligent Agreement Management (IAM) platform](https://www.docusign.com/blog/developers/streamline-end-to-end-agreement-management-with-docusign-a-developer) comes in, seeking to help organizations unlock the value of their agreement data and simplify the complex workflows involved in the agreement lifecycle beyond the signing stage. A key feature of the IAM platform is [extension apps](https://developers.docusign.com/extension-apps/), which empower developers to build third-party functionality into Docusign. With the [Stripe extension app](https://apps-d.docusign.com/app-center/app/3e8105e3-08a6-48cc-b63a-856954184e65), you can now automate more complex billing workflows to include customer and invoice management in conjunction with other agreement processes inside Docusign. In this post, I’ll give you an overview of extension apps, then walk you through how to configure a workflow featuring the Stripe extension app and trigger it using the [Maestro API](https://developers.docusign.com/docs/maestro-api/). Agreement processes are rarely limited to eSignature and frequently involve multiple platforms. For example, a common use case that many businesses face is the need to archive documents to a cloud storage system such as [Google Drive](https://workspace.google.com/products/drive/) or [Box](https://www.box.com/home) after signing. Or a business might need to update a system of record such as Salesforce to reflect any updates made in an agreement with Docusign. In the past, it would require a complex API integration to connect data between Docusign and an external platform like Stripe. Extension apps solve this problem by packaging the external authentication and external API calls into an app that can be triggered from various [extension points](https://developers.docusign.com/extension-apps/extension-apps-101/concepts/extensions-and-extension-points/#extension-points) inside Docusign, including [Maestro workflows](https://developers.docusign.com/docs/maestro-api/maestro101/workflows/). This demonstrates how extension apps connect an external platform API to a Docusign workflow or envelope: ![](/images/docusign-stripe-integration-automating-billing-workflows/image7.png) Developers can build extension apps for both private and public distribution. If you want your app to be available to any Docusign customer, you can publish it on the [Docusign App Center](https://developers.docusign.com/extension-apps/extension-apps-101/app-center/). But if you have specific business needs that could be met by an extension app using proprietary or internal systems, you can opt to build a [private app](https://www.docusign.com/blog/developers/introducing-private-extension-apps) (beta) that will be shared with only a predefined list of Docusign production accounts. Hopefully, the wheels inside your head are already turning, and you’re starting to imagine how building an extension app might simplify some of your own existing agreement processes. But if you’re looking to further integrate Stripe and Docusign, you can leverage extension apps to do that without building anything custom. You can install the [Stripe extension app](https://apps-d.docusign.com/app-center/app/3e8105e3-08a6-48cc-b63a-856954184e65) from the Docusign App Center and use it in a Maestro workflow, eliminating the need to write any code at all. The Stripe extension app lets you create and update customer records in Stripe based on agreement data and fields in Docusign. You can also use it to build out steps that generate invoices in Stripe inside your Docusign workflows. This maps out a common workflow incorporating Docusign steps and the Stripe extension app: ![](/images/docusign-stripe-integration-automating-billing-workflows/image2.png) The workflow above begins when a customer enters their data using a [Docusign web form](https://support.docusign.com/s/document-item?bundleId=gmi1660583110357&topicId=ofz1660589243255.html). After doing so, they see a confirmation screen letting them know that their information has been received. Then, the extension app takes over, eliminating the need for manual data entry and automatically creating a new customer and invoice in Stripe. ## Getting started with Docusign The only prerequisite to start building extension apps and workflows is a free [Docusign Developer Account](https://www.docusign.com/developers/sandbox). Once you’ve created your account, you can start testing out Docusign features and making API calls. To build an existing extension app into your workflow, you’ll need to install it from the [Docusign App Center](https://apps-d.docusign.com/app-center), where you can browse and install all of the publicly available extension apps. To build the workflow described in this blog post, you’ll need to install the [Stripe extension app](https://apps-d.docusign.com/app-center/app/3e8105e3-08a6-48cc-b63a-856954184e65). ## Building the workflow A workflow like this can be configured through the workflow designer UI. This exact workflow is available as a [workflow template](https://support.docusign.com/s/document-item?bundleId=yff1696971835267&topicId=irb1736981148403.html). To use the template, navigate to the **Templates** tab in your Docusign account and select **Workflow Templates** in the left menu. Then choose the **Send new customer data to Stripe for invoicing** template, shown in the red box in the screenshot below. ![](/images/docusign-stripe-integration-automating-billing-workflows/image8.png) Then, select **Use Template** to create a new workflow from the template in your account. You’ll be directed to the Maestro workflow designer UI, where you can configure each step in the workflow. If you want to trigger the workflow from an API call, you’ll want to change the workflow start method to **From an API Call**. ![](/images/docusign-stripe-integration-automating-billing-workflows/image9.png) Then you can begin to edit the preconfigured workflow steps. The first step that collects customer data in a web form uses a web form provided by the workflow template. If you’d like to collect additional information from the customer, you can edit the form by choosing **Preview this web form**, then selecting **Edit Form.** ![](/images/docusign-stripe-integration-automating-billing-workflows/image6.png) The confirmation screen step has already been configured with a custom message letting the customer know that they will receive an invoice soon, but you can customize this message with any information that you’d like. ![](/images/docusign-stripe-integration-automating-billing-workflows/image3.png) Now, you need to configure the Stripe steps to create a new customer and invoice in Stripe using the information collected through the web form. First, configure the **Create a Customer in Stripe** step. Select **Customer** from the dropdown of Stripe objects and map the data fields from the web form in the first step to the required Stripe fields. ![](/images/docusign-stripe-integration-automating-billing-workflows/image5.png) You’ll need to do the same for the step that creates a new draft invoice, choosing **Invoice** from the dropdown as the Stripe object to write to and mapping the fields accordingly, taking the record ID for the customer from the previous step. ![](/images/docusign-stripe-integration-automating-billing-workflows/image10.png) Then, you’ll configure the step that adds an InvoiceItem to the draft invoice, choosing **InvoiceItem** as the Stripe object to write to. Map the record IDs from the previous two steps to the **customer** and **invoice** fields. ![](/images/docusign-stripe-integration-automating-billing-workflows/image1.png) Finally, configure the step that sends the invoice to the new Stripe customer. Choose Email Invoice as the object to write to and map the record ID from the **Create Invoice Draft** step to the **invoiceId** field. ![](/images/docusign-stripe-integration-automating-billing-workflows/image4.png) The workflow template is meant to be a starting point, so you can always add additional steps or customize these steps further. But once you’re done with your configuration, you’re ready to trigger the workflow. ## Triggering the workflow through the Maestro API You’ve seen how easy it is to configure custom workflows with no code necessary. But developers can take the customization a step further by triggering workflows through the [Maestro API](https://developers.docusign.com/docs/maestro-api/). After [authenticating](https://developers.docusign.com/docs/maestro-api/auth/), you can trigger a workflow with just two API calls. The first step is to retrieve the trigger URL and other requirements necessary to trigger a specific workflow. To do this, call the [Workflows: getWorkflowTriggerRequirements](https://developers.docusign.com/docs/maestro-api/reference/maestro/workflows/getworkflowtriggerrequirements/) endpoint as shown in the snippet below. If you don’t already have your workflow ID, you can call the [Workflows: getWorkflowsList](https://developers.docusign.com/docs/maestro-api/reference/maestro/workflows/getworkflowslist/) endpoint to get a list of all available Maestro workflows for your account, including their IDs. ```shell response=$(mktemp /tmp/response-wftmp.XXXXXX) Status=$(curl -s -w "%{http_code}\n" -i --request GET "${base_path}/accounts/${account_id}/workflows/${workflow_id}/trigger-requirements" \ "${Headers[@]}" \ --output ${response}) ``` The response of this call looks like this: ```json { "trigger_id": "wfTrigger", "trigger_event_type": "HTTP", "trigger_http_config": { "method": "POST", "url": "https://api-d.docusign.com/v1/accounts/0820f9c5-xxxx-xxxx-xxxx-8a0df87f44aa/workflows/36e119db-xxxx-xxxx-xxxx-e91731fe95cd/actions/trigger" }, "trigger_input_schema": [ { "field_name": "signerName" }, { "field_name": "signerEmail" }, { "field_name": "ccName" }, { "field_name": "ccEmail" } ], "metadata": { "created_at": "2025-05-13T21:52:02.983+00:00", "created_by": "8cb9aa3f-xxxx-xxxx-xxxx-f6ce2e16dad1", "modified_at": "2025-05-13T21:52:22.114+00:00", "response_timestamp": "2025-05-20T18:27:04.2896661Z", "response_duration_ms": 1122 } } ``` The response contains the url property, which you’ll use to actually trigger the workflow. It also includes a list of any input fields that need to be passed in the request body when triggering the workflow. To trigger the workflow, construct a request body that includes the instance name and any necessary trigger inputs, like the example request body below. ```shell request_data=$(mktemp /tmp/request-wf-001.XXXXXX) printf \ '{ "instance_name": "'"$instance_name"'", "trigger_inputs": { "signerEmail": "'"${signer_email}"'", "signerName": "'"${signer_name}"'", "ccEmail": "'"${cc_email}"'", "ccName": "'"${cc_name}"'" } }' >$request_data ``` Then make a POST request to the trigger URL that you extracted from the response of the Workflows: getWorkflowTriggerRequirements endpoint. ```shell response=$(mktemp /tmp/response-wftmp.XXXXXX) Status=$(curl -s -w "%{http_code}\n" -i --request POST ${trigger_url} \ "${Headers[@]}" \ --data-binary @${request_data} \ --output ${response}) ``` You’ll receive a response that includes the instance ID and instance URL, which can be used to complete the workflow steps. ```json { "instance_id": "2fca39a8-xxxx-xxxx-xxxx-acd6bf2c5fd7", "instance_url": "https://apps-d.docusign.com/api/maestro/v1/accounts/0820f9c5-xxxx-xxxx-xxxx-8a0df87f44aa/instances/2fca39a8-xxxx-xxxx-xxxx-acd6bf2c5fd7/execution?mtid=9ee64ac9-xxxx-xxxx-xxxx-bf9682cc9466&mtsec=Mo2tZXHOSeS_xJ2hsIklLC5hs_xxxxxxxxxxxx8ceTE" } ``` You can direct users from your application to this instance URL, or you can [embed it in an iframe](https://developers.docusign.com/docs/maestro-api/maestro101/embed-workflow/) so workflow participants can complete their workflow tasks directly inside your app. Thanks to the Stripe extension app, what might have once required a complex integration with many API calls to both Docusign and Stripe endpoints can now be accomplished through a no-code Maestro workflow and just two API calls. You can download the Stripe extension app, and many other apps, from the [Docusign App Center](https://developers.docusign.com/extension-apps/extension-apps-101/app-center/). ## Conclusion In this blog post, I walked through how to incorporate the Stripe extension app into a Maestro workflow, automating a complex billing workflow into a streamlined process that can be kicked off with a single API call. This is just one example of how you can leverage extension apps and Maestro to manage agreements through their whole lifecycle, beyond signing. You can build your own private or public extension apps to easily incorporate any third-party API into Docusign, and build custom workflows featuring those extension apps that automate your agreement processes across multiple platforms. Learn more about how to build your own custom extension apps to fit your use cases on the [Docusign Developer Center](https://developers.docusign.com/extension-apps/), and join the [Docusign Developer Community](https://community.docusign.com/developer-59) to connect with other developers, ask questions, and stay up to date on the latest events. For more Stripe developer learning resources, subscribe to our [YouTube Channel](https://www.youtube.com/@StripeDev). At Sessions we showed new products, APIs, and enhancements for developers. Here’s a recap of everything we showed and links to the best places to learn more. ## Stripe Workflows: automate business processes with a visual builder Stripe has evolved into a comprehensive suite of tools that enable businesses to manage their entire financial infrastructure. Stripe Workflows allows you to build visual automation workflows that respond to real-time events, all without the need for extensive coding or additional infrastructure. This powerful automation tool supports over 600 event triggers and includes features such as branching logic, dynamic fields, and built-in error handling. Businesses can automate a variety of tasks, from responding to fraud alerts and ensuring compliance for high-value transactions to simplifying bespoke subscription setups. Read more about the [launch of Stripe Workflows](https://stripe.dev/blog/introducing-stripe-workflows) on the stripe.dev blog. ## Use Stripe MCP server for enhanced AI development The Stripe [Model Context Protocol](https://en.wikipedia.org/wiki/Model_Context_Protocol) (MCP) server is an essential resource for developers using AI-driven code editors like [Cursor](https://www.cursor.com/) and [Windsurf](https://windsurf.com/editor), as well as general-purpose tools such as [Claude Desktop](https://claude.ai/login?returnTo=%2F%3F). With just one install command, you can enable LLM applications to access comprehensive documentation, account data, and real-time execution of the [Stripe API](https://docs.stripe.com/api). For instance, you can easily access Stripe docs and execute API calls directly within Cursor or send invoices through a simple conversation with Claude. Learn more about [Stripe’s MCP server](https://docs.stripe.com/mcp#mcp) in the Stripe docs. ## Add Stripe to agentic workflows The adoption of agentic AI is rapidly transforming the landscape of application development, enabling automated interactions between users and technology. You can now integrate the Stripe agent toolkit into these new frameworks enhancing your agents’ functionality by enabling access to financial services and tools. Use cases include allowing your agents to help you earn and spend funds, facilitate common support operations, and bill for usage with metered billing. Learn more about the [Stripe agent toolkit](https://stripe.dev/blog/adding-payments-to-your-agentic-workflows). ## Streamline account management for Connect Platforms with Accounts v2 For the past decade, developers using multiple Stripe products \- such as [Payments](https://stripe.com/payments) or [Billing](https://stripe.com/billing) alongside Connect or Issuing \- had to manage separate records for each product, which involved handling multiple IDs and synchronizing data across these records. The updated Accounts v2 API enables a unified approach to user account management, allowing you to easily create and maintain connected accounts while simplifying onboarding and reducing redundancy. Learn more about [Accounts v2](https://docs.stripe.com/connect/accounts-v2/saas-platform-payments-billing) in the Stripe docs. ## Customize user onboarding with fully-localized Connect Mobile Embedded Components [Stripe Connect](https://stripe.com/connect) embedded components are pre-built, customizable user interfaces that allow you to integrate Stripe’s Connect functionality directly into your platform’s product surfaces. Stripe’s fully-localized user onboarding is now available for iOS and Android as an embedded component. You can add this key flow to your apps with just a few lines of code. Fun fact: Stripe’s own mobile app onboarding experience was built by a small engineering team using these components\! Get started with mobile embedded onboarding for [iOS](https://docs.stripe.com/connect/get-started-connect-embedded-components?platform=ios) and [Android](https://docs.stripe.com/connect/get-started-connect-embedded-components?platform=android). ## Payment Element now supports the Checkout Sessions API [Stripe Checkout](https://stripe.com/gb/payments/checkout) makes it easy to get started, but as your business grows, you sometimes need more flexibility. The Payment Element now works with the Checkout Sessions API– providing [Elements’ UI](https://stripe.com/gb/payments/elements) flexibility with Checkout’s simplicity and built-in features like A/B testing and [Adaptive Pricing](https://docs.stripe.com/payments/checkout/adaptive-pricing?locale=en-GB). Learn more about [Payment Elements \+ CheckoutSessions API](https://docs.stripe.com/payments/payment-element) in the Stripe docs. ## New UI components for Stripe Apps With [Stripe Apps’](https://stripe.com/apps) new features, you can create experiences that feel native within the Stripe Dashboard. Create a detailed onboarding journey with a full screen modal or bring app data directly into dashboard pages. No longer are Stripe Apps constrained to the drawer. Sign up to gain access to the [new preview app components and capabilities](https://docs.stripe.com/stripe-apps/build-ui#see-also). ## Test Stripe functionality in an isolated environment with Sandboxes Stripe Sandboxes are now generally available (GA), offering developers a robust and secure environment to test and refine their applications without the risk of real money movement. With sandboxes, you can simulate payment processing, test webhooks, and explore various scenarios without impacting your live data. You can create up to five sandboxes for free, enabling your team to work in isolated environments and iterate on different features or versions before going live. Get started with [Sandboxes](https://docs.stripe.com/sandboxes). ## Share customers and payment methods across your Organization Last year Stripe launched [Organizations](https://stripe.com/blog/stripe-organizations-powering-the-worlds-most-complex-businesses) to help manage complex business structures by bringing together multiple teams, partners, and accounts under a single umbrella. Now, in response to one of our most requested features, you can automatically share customer data and payment methods across multiple business lines within your Organization, eliminating the need for custom code to synchronize data between objects. Additionally, sandboxes now support Organizations, allowing you to test end-to-end across accounts within your Organization. This functionality enables you to deliver a seamless and unified experience for your customers across your entire organization. Learn more about [resource sharing](https://docs.stripe.com/get-started/account/orgs/sharing/customers-payment-methods) in the Stripe docs. ## And one more thing… Stripe documentation is now fully conversational. You now have an AI assistant for docs.stripe.com that’s aware of the page you’re reading and has access to all Stripe documentation and internal knowledge base. While you read, you can ask clarifying questions about specific parts of the documentation. For instance, instead of navigating to another page or site to learn more about a topic, you can highlight a sentence, paragraph, or snippet of code and initiate a conversation with the AI assistant about that particular content. This should make reading and navigating our docs and, ultimately, building your Stripe integration much easier. Navigate to [docs.stripe.com](http://docs.stripe.com) and push cmd+i to use the assistant. ## Conclusion The developer innovations showcased at Stripe Sessions reflect our commitment to providing the right tools you need to build, manage, and scale your financial infrastructure. For more Stripe learning resources, subscribe to our [YouTube channel](https://www.youtube.com/@StripeDev). At Stripe, we’re continually refining the way we release new features, empowering you to innovate faster. Today, we’re excited to announce our new and improved public preview release channel. We’re launching a new category of API versions, which give early access to upcoming features ahead of their General Availability (GA) launches. Starting today, you can use the public preview release channel to access new Stripe features such as the [Accounts v2 API](https://docs.stripe.com/connect/accounts-v2/api) to represent your connected accounts and [Global Payouts](https://docs.stripe.com/global-payouts) to send payouts to customers, affiliates, contractors, or other third parties. Check out all the new public preview features by visiting the [public preview changelog](https://docs.stripe.com/changelog?category=all&channel=preview). ## About public preview The public preview release channel is designed to let you access brand new API features before they become generally available. Although these features are operationally stable and production-ready, they may receive breaking changes more often than GA features, and may be subject to some restrictions. Here’s what you can expect: * **Early access**: Public preview lets you work with new features ahead of their GA release, so you can build, test, and launch your integrations earlier. * **Distinct API versions**: Public preview features will utilize preview API versions, which are distinct from GA versions. For example, `2025-04-30.preview` rather than `2025-04-30.basil`. * **More frequent changes**: Unlike our GA API releases (which introduce breaking changes approximately twice a year), each new public preview API version may contain breaking changes. This cadence allows us to iterate quickly based on your feedback. * **Some other restrictions may apply**: There may be additional restrictions on certain public preview features. For example, some features may not yet be available in certain geographic regions. Others may require one-time onboarding or approval from Stripe before use. Each feature’s documentation describes any restrictions. ## Get started with public preview ### API access with the Stripe-Version header To make public preview API calls, you’ll send a **preview API version** via the `Stripe-Version` header. These versions end in `preview`, for example: `2025-04-30.preview`. You can view information for all preview versions in the [preview section of the changelog](https://docs.stripe.com/changelog?category=all&channel=preview). Note that when upgrading from one preview version to another, there may be breaking changes. Any changes will be described in the changelog. ### SDKs Going forward, Stripe’s beta [SDKs](https://docs.stripe.com/sdks) will use these new preview versions. The beta SDK releases are differentiated from their GA counterparts by special suffixes in their versions, such as `5.2.0-beta.1`. Beta SDKs will include preview features in addition to everything that is already in GA. ### API reference Preview versions now appear in Stripe’s [API reference documentation](https://docs.stripe.com/api?api-version=preview); use the dropdown at the top-right to select a preview version. Code snippets will be populated with the preview version and corresponding types. ![](/images/introducing-stripes-new-public-preview-release-channel/image1.png) ## Illustrating the benefits of public preview Now we’ll walk through a scenario that demonstrates the mechanics of the new preview API versions. Let’s imagine Stripe is launching a new parameter `automatic_vacuum_vat` that can be set when creating an extraterrestrial payment. If set, the payment’s Vacuum VAT (the UN tax on payments that transit the vacuum of space) line items will be automatically calculated using the merchant and customer’s location, and then added to the checkout session. The automatic Vacuum VAT feature already has high availability and low latency, and certain Stripe users want to start using it right away. However, for the time being, automatic Vacuum VAT only works when both the merchant and customer locations are planetary. In other words, the feature doesn’t yet support the merchant or customer being located in the asteroid belt or other non-planetary orbits. There are many users who are okay with that; they still want to use the feature, and would build around the planetary orbit-only restriction. ### In a GA-only world Suppose `automatic_vacuum_vat` were immediately launched in a GA version—say, `2300-04-30.ziziphus`. Some time later, an unsuspecting Stripe user working at a space freight platform noticed an AI coding agent attempting to use the `automatic_vacuum_vat` parameter. Upon conversing with the agent to learn the parameter’s purpose, the user is struck by the feature’s usefulness and applicability to their business. Without noticing the location restrictions in the official documentation, they instruct the coding agent to add it to their integration: ```bash curl https://api.stripe.com/v1/extraterrestrial_payments \ -H "Stripe-Version: 2300-04-30.ziziphus" \ ... -d "automatic_vacuum_vat"=true ``` It works as expected in testing, and they even write a comprehensive automated test suite, and all the tests pass (the test merchants and customers all have Mars addresses). So the user rolls out the change to production. Soon enough, the platform’s customer support channels are awash with space freighter SMBs who enabled the feature—confused why some payments have Vacuum VAT line items and others don’t. ### **With public preview** Say instead that Stripe released `automatic_vacuum_vat` only in `2300-04-30.preview`, a public preview version, and not in GA. In this world, our protagonist user tries to test out `automatic_vacuum_vat` in their integration: ```bash curl https://api.stripe.com/v1/extraterrestrial_payments \ -H "Stripe-Version: 2300-04-30.ziziphus" \ ... -d "automatic_vacuum_vat"=true ``` But this time, Stripe returns a [`parameter_unknown` 400 error](https://docs.stripe.com/error-codes#parameter-unknown), because `automatic_vacuum_vat` doesn’t exist in `2300-04-30.ziziphus`, which is a GA version. If the user had been using SDKs, they would have gotten this feedback even earlier: ```java ExtraterrestrialPaymentCreateParams.builder() ... .addAutomaticVacuumVat(true) // compile error! method doesn't exist in the GA SDK .build(); ``` Upon receiving this error, the user checks the documentation and sees that `automatic_vacuum_vat` is a public preview feature with certain caveats. To use it, they would have to make a conscious decision to change the API version to the appropriate preview version. If they end up deciding to accept the restriction and integrate with public preview to use this feature, the `curl` would look like: ```bash curl https://api.stripe.com/v1/extraterrestrial_payments \ -H "Stripe-Version: 2300-04-30.preview" \ # changed! ... -d "automatic_vacuum_vat"=true ``` But this is only for creating extraterrestrial payment API requests—the rest of the company’s API calls continue to use the GA version `2300-04-30.ziziphus`. Although contrived, this story illustrates how the public preview release channel can provide additional guardrails for new features, while still giving you the option to use those new features as early as possible. ## Conclusion Stripe’s new public preview release channel offers an opportunity for you to access and experiment with upcoming API features before they become generally available. Public preview versions use new versions that are distinct from GA versions. This approach enables you to integrate new functionality earlier while reducing risk, and lets you give more feedback to Stripe at an early stage. We look forward to hearing what you think about the public preview release channel, and we’re excited to see what you build with it. As always, we welcome your thoughts and feedback on [Stripe Insiders](https://insiders.stripe.dev/). For an overview of all of Stripe’s release channels, see [Product release phases](https://docs.stripe.com/release-phases). To learn more about developing applications with Stripe, visit our [YouTube Channel](https://www.youtube.com/stripedevelopers). Today, Stripe introduces [Stripe Workflows](https://docs.stripe.com/workflows), a new way to orchestrate Stripe products and APIs with low latency and high throughput, making it easier to build responsive, end-to-end automation. Stripe began as a payment processing platform that made it famously simple to start accepting payments with just “12 lines of code.” It took on the complexity of handling financial transactions so developers could easily integrate payments and focus on their core business logic. Over time, driven by customer demand, Stripe has evolved into a comprehensive suite of products that enables businesses to run their entire financial infrastructure on the platform. But with greater functionality comes increased complexity. Today, the challenge lies in coordinating multiple products seamlessly. Developers need a clear, streamlined way to build, track, visualize, and orchestrate automated workflows across Stripe’s ecosystem. Common use cases our customers have identified include reducing chargeback risk, automating billing, routing Invoices for internal review and flagging risky transactions. Now, this is possible with Stripe Workflows. ## What’s new? Stripe Workflows introduces a new way to build and run automation workflows directly within the Stripe Dashboard. Instead of writing and maintaining custom code to handle events, orchestrate actions, or manage dependencies, developers can now create visual workflows that respond to Stripe events in real time. This makes it easier to automate tasks like sending notifications, updating subscriptions, flagging fraud, or routing invoices, without spinning up infrastructure or writing boilerplate code. With built-in support for branching logic, dynamic data, and over 600 event triggers, Stripe Workflows brings powerful orchestration to your fingertips. ## Getting started Build and run Stripe Workflows directly from the Stripe Dashboard, with no need for additional infrastructure. To create and deploy a Stripe Workflow: 1. Navigate to the [Stripe Dashboard](https://dashboard.stripe.com) and choose the **menu icon** \> **More** \> [**Workflows**](https://dashboard.stripe.com/workflows). 2. Choose **New Workflow** to begin building your first workflow. 3. Choose **Add a trigger**, and from the suggested triggers, choose **Payment intent succeeded**. 4. Choose **Add a step**, then from the following menu option choose **Add action**. 5. Choose **Email a team member,** and from the *Find a team member* options select your own email address. 6. In the body of the email enter “A new transaction has successfully been made” 7. In the *Append data* section, Choose **\+ Add item,** then in the *My label* input enter *“Amount”.* Lastly, in the *Value* input box select the ***\+*** icon and choose **Amount**. 8. Choose **Done**. ![](/images/introducing-stripe-workflows/image4.png) Provide a name for your workflow by choosing the “Untitled workflow” title at the top of the page and choose **Save changes** and **Activate**. This workflow is now ready to react to [**Payment intent succeeded**](https://docs.stripe.com/payments/payment-intents/) events. ## Monitoring, logging and tracing Stripe Workflows gives you a single pane of glass to monitor every workflow execution in real time. Whether a run succeeds or fails, you can immediately see the outcome and pinpoint exactly which step caused an issue without sifting through logs across multiple systems or services. Clicking into an individual run reveals a detailed execution path. Here, you can inspect the event payload that triggered the workflow, view the data as it passed into and out of each step, and trace the logic branch that was followed. This level of observability is often difficult to achieve when manually coordinating multiple API calls or services. ![](/images/introducing-stripe-workflows/image2.png) Logs are retained for 30 days by default, giving you ample time to debug failures, audit activity, or understand how your automation behaved in production. ## Error handling and resiliency Things fail: services go down, connections drop, rate limits kick in, data gets missed, typos sneak in, it’s all part of building in the real world. Stripe Workflows is built with this reality in mind. Every workflow comes with failure detection and retry mechanisms baked in. If a step fails, say due to a network blip or a service limit, Stripe Workflows automatically retries it with exponential backoff, all without you having to write a single line of error-handling code. This kind of robustness normally requires setting up infrastructure, writing custom retry logic, and planning for edge cases. With Stripe Workflows, it’s built in. The product team designed this from day one to handle the undifferentiated heavy lifting, so you can focus on what makes your business unique. With these fundamentals taken care of, you’re free to build more confidently, and faster. ## Event filtering Let’s take the earlier example a step further. One of the top requests from developers building advanced Stripe integrations is the ability to trigger automations only when certain conditions within an event payload are met. Traditionally, this requires setting up a webhook that fires for a broad event (like `paymentIntent.succeeded`) and then writing custom code to filter out irrelevant cases based on the payload. With Stripe Workflows, you can filter events directly within the workflow trigger. That means the workflow only fires when both the event type and specific conditions in the payload are met, no need for boilerplate filtering logic or unnecessary invocations. It's efficient, cleaner, and reduces noise in your systems. ## Dynamic fields Stripe workflows become even more powerful when they can respond dynamically to the data they receive. Dynamic fields allow you to access values from the triggering event, and from each step and use them to drive logic and actions within your workflow. For example, you can branch based on whether an amount is greater than a threshold, whether a customer has a specific metadata tag, or if a product ID matches a certain SKU. Each branch can run a different set of actions, using the payload values in steps like email templates, API calls, or conditional checks, no extra parsing code required. ## Idempotency [Nobody likes being charged twice](https://stripe.dev/blog/because-nobody-likes-being-charged-twice). In a system that moves money, you want to make absolutely sure that retrying a failed operation won’t accidentally charge or refund a customer more than once. Stripe has long supported this with [idempotency keys](https://docs.stripe.com/api/idempotent_requests) passed via headers and tracked manually by developers. Now with Stripe Workflows, idempotency is built in. Each run of a workflow automatically carries an idempotency key, and each action respects it. This ensures that retrying an operation, whether due to failure, network issues, or human error, won’t lead to duplicated results. No need to generate UUIDs, persist keys, or manage retry logic on your own. Stripe handles it for you. ## Recursion guardrails To help you build safely, Stripe has implemented recursion guardrails that prevent accidental infinite loops or runaway executions. Let’s say Workflow A triggers an event that causes Workflow A to run again. That kind of cycle is allowed once, but if it happens again within the same chain, the system blocks it. This protects you from unintentional loops and unexpected costs. Each workflow-triggered API call carries metadata in the `X-Request-Source` header, including: * `config_id`: the ID of the workflow that triggered the request. * `run_id`: the specific execution instance of that workflow. This metadata propagates through Stripe's systems and events, making it possible to track workflow lineage and detect recursive behavior. To prevent infinite loops, Stripe enforces a maximum recursion depth of 5, if a workflow emits an event that triggers another workflow more than five times in a single call chain, the system will automatically block further executions. This ensures your workflows remain safe, predictable, and cost-effective. ## Example workflows Stripe Workflows is built to help teams automate the kinds of tasks that are often manual, time-consuming, and error-prone. Here are a few real-world examples of how you can put it to use. ### Reduce chargeback workflow! ![](/images/introducing-stripe-workflows/image1.png) One common use case is responding to early fraud warnings from [Stripe Radar](https://stripe.com/gb/radar). Let’s say you receive a signal that a payment might be fraudulent. Typically, this would trigger a manual investigation: someone would need to look into the transaction, determine whether the payment has already been captured, and then issue a refund to reduce the risk of a chargeback. With Stripe Workflows, this entire process can be automated. You can trigger a workflow when the fraud warning is received, check whether the payment has already been captured, and, if so, issue a refund instantly. The result is faster response times and fewer disputes, with no human intervention required. ### Compliance automation workflow ![](/images/introducing-stripe-workflows/image5.png) Another example is compliance automation. For businesses with regulatory or internal policies, certain transactions, such as payments over $5,000 from new customers, may need to be flagged for additional review. With Stripe Workflows, you can build logic that triggers on high-value transactions, checks the customer’s history, and routes the transaction for manual approval if it meets your criteria. It’s a simple way to add compliance guardrails without building a separate review system. ### Custom pricing automation workflow ![](/images/introducing-stripe-workflows/image3.png) Workflows also simplifies processes like setting up subscriptions for custom pricing. If your business offers bespoke plans or tailored quotes, manually creating Stripe products, prices, and subscriptions for each customer can be time-consuming and inconsistent. With Workflows, you can automate this flow: when a quote is finalized, the system can create all the necessary Stripe objects, customer, product, price, and generate an invoice-based subscription, all without any manual steps. This reduces operational overhead and helps your team scale more effectively. These are just a few examples that show how Stripe Workflows is designed to meet developers where they are: solving real problems with automation that’s fast, reliable, and easy to build. ## Conclusion Stripe Workflows gives you a powerful new way to build automation directly within the Stripe platform without managing infrastructure or writing boilerplate code. Whether you're reducing chargeback risk, automating compliance checks, or scaling custom subscription flows, Stripe Workflows helps you move faster and with greater confidence. Most importantly, it's built with long-term extensibility in mind. As your business evolves, and as Stripe continues to expand its capabilities, Stripe Workflows will grow with you. The roadmap ahead includes even more advanced features, giving you the tools to keep your Stripe integration flexible, maintainable, and ahead of the curve. What will you automate first? For more Stripe developer learning resources, subscribe to our [YouTube Channel](https://www.youtube.com/@StripeDev). Over 1 million businesses on Stripe manage multiple accounts to represent different business lines or to acquire locally in a new country. Having multiple accounts allows you to isolate finances and reporting, or accept money in multiple currencies, but it makes it challenging to maintain a unified payment experience for your customers, because you can only charge cards in the same account in which you collected them. With [Organizations](https://docs.stripe.com/get-started/account/orgs), you can now automatically [share customers and payment methods across accounts](https://docs.stripe.com/get-started/account/orgs/sharing/customers-payment-methods) to create a seamless checkout experience across parts of your business without recollecting cards or billing details from your customers. This blog post explains how sharing works to allow you to charge customers across multiple accounts. This capability is currently in preview and you can [request access](https://docs.stripe.com/get-started/account/orgs/sharing/customers-payment-methods) now. If you have any questions or feedback, we’d love to hear from you at [organizations-feedback@stripe.com](mailto:organizations-feedback@stripe.com). ![image 1](/images/how-to-charge-customers-across-accounts/image5.png) ### Why sharing matters Sharing customers and payment methods across accounts makes both your payment integration simpler and the checkout experience smoother for your customers. * **One-click checkout**: Reduce friction by enabling customers to make a purchase on a new business line using a card previously saved from another business line. * **Consistent and personalized experience:** Maintain a canonical customer profile across various accounts, so you and your customers don't need to update payment methods, billing, or contact information in multiple places. * **Holistic reporting:** View a customer’s complete transaction history and lifetime spend across your entire business. Shared customers and payment methods have the same ID across accounts, so you only need to store one ID in your database. * **Easy expansion:** Launch a new business line or geography without conducting a lengthy data migration, maintaining ID mappings, or manually syncing information across accounts. ### How sharing works You can turn on customer and payment method sharing between two or more accounts belonging to the same organization. When enabled, all new and existing customers and their saved cards are automatically shared between accounts. ### Important developer considerations * You can’t remove or disable an account from sharing after enabling the feature. * All new and existing customers are shared. You can’t selectively share individual customers. * You can only share payment methods if the type is a card. You can still save other reusable payment method types to an account, but you won’t be able to charge the customer with them from another account. * You can’t enable sharing between connected accounts under a platform. * You must ensure that you collect consent from all customers to share their payment information between accounts in your organization prior to enabling sharing. Stripe gathers this consent for you if you are using a hosted checkout surface like Elements or Checkout. If your checkout experience uses a custom frontend, make sure to update your consumer terms and conditions. ### Shared customers Shared customers have the same customer ID across accounts. When you create or update a shared customer, only certain fields of the customer object are automatically shared between accounts, including: * [name](https://docs.stripe.com/api/customers/object#customer_object-name) * [email](https://docs.stripe.com/api/customers/object#customer_object-email) * [address](https://docs.stripe.com/api/customers/object#customer_object-address) * [phone](https://docs.stripe.com/api/customers/object#customer_object-phone) * [tax_ids](https://docs.stripe.com/api/customers/object#customer_object-tax_ids) * [description](https://docs.stripe.com/api/customers/object#customer_object-description) * [preferred_locales](https://docs.stripe.com/api/customers/object#customer_object-preferred_locales) The remaining fields (for example, [metadata](https://docs.stripe.com/api/customers/object#customer_object-metadata), [shipping](https://docs.stripe.com/api/customers/object#customer_object-shipping)) are not shared between accounts, since that information may frequently diverge between business lines. For example, suppose a customer Jenny Rosen is shared between two accounts, Rocket Rides and Rocket Deliveries. Here, we’ll add metadata to Jenny that is specific to Rocket Rides. ```json // Jenny Rosen in Rocket Rides { "id": "cus_9DrHraV8v0dsx0", "object": "customer", "address": { "city": "San Francisco", "country": "US", "line1": "123 Market Street", "postal_code": "94103", "state": "CA" }, "created": 1745976923, "email": "jenny@example.com", "name": "Jenny Rosen", "phone": "4142079823", "metadata": { // Metadata is not shared across accounts "RocketRidesId": "rr_4165059" }, // ... other Stripe customer fields } ``` When Jenny is shared to Rocket Deliveries, she can be retrieved in that account using the same customer ID, and certain fields including her name, email, and phone number are shared from Rocket Deliveries. However, any metadata added in Rocket Rides is not accessible from Rocket Deliveries. ```json // Jenny Rosen in Rocket Rides { "id": "cus_9DrHraV8v0dsx0", // Same customer ID as Rocket Rides "object": "customer", "address": { "city": "San Francisco", "country": "US", "line1": "123 Market Street", "postal_code": "94103", "state": "CA" }, "created": 1745976923, "email": "jenny@example.com", "name": "Jenny Rosen", "phone": "4142079823", "metadata": {}, // Metadata from Rocket Rides is not accessible // ... other Stripe customer fields } ``` If you update any of the shared fields for a customer, Stripe generates separate `customer.updated` events for each account where sharing is enabled. If you update an unshared field for the customer, Stripe sends an update event to only that account. #### Shared payment methods Sharing customers across accounts enables you to charge their saved payment methods from any account as well (as long as the payment method is of type card, for now). Shared payment methods have the same ID across all accounts, and updating or deleting a shared payment method affects all accounts. If you update or attach a payment method to a shared customer in one account, Stripe generates a single `payment_method.attached` or `payment_method.updated` event to only that account. We recommend using [organization-level webhooks](https://docs.stripe.com/webhooks#webhook-endpoint-def) to listen to all events related to shared customers and payment methods. ## Getting started with your integration The following guide will walk through how to test charging a customer across multiple accounts in your organization’s sandbox and help you understand how sharing works without charging real money. ### Request access to customer and payment method sharing Before you can begin, [request access](https://docs.stripe.com/get-started/account/orgs/sharing/customers-payment-methods) for your organization. We’ll let you know once your account has been enabled. ### Create a sandbox for your organization To get started, you’ll create an organization inside of a sandbox to test out customer and payment method sharing without charging real money. Before you begin, you’ll need to have already [created your live mode organization](https://docs.stripe.com/get-started/account/orgs/build). 1. Navigate to your organization in the Dashboard, and from the account picker, click on **Switch to sandbox** and **Create sandbox**. ![image 7](/images/how-to-charge-customers-across-accounts/image7.png) 2. Select the **Organization** sandbox type and **Name** your organization. Choose **Copy my organization structure** to clone your live mode organization in a sandbox. ![image 12](/images/how-to-charge-customers-across-accounts/image12.png) ### Enable customer and payment method sharing 1. Once you’ve created your organization, navigate to **Settings.** Click on **Customer and payment method sharing**. ![image 4](/images/how-to-charge-customers-across-accounts/image4.png) 2. Click **Get started** to start enabling sharing between your accounts. ![image 9](/images/how-to-charge-customers-across-accounts/image9.png) 3. Select the accounts for which you want to share customers and payment methods. Remember that only some customer information, such as name, email, address, and phone number are shared between accounts. Other customer information, such as metadata and default payment method remain separate. ![image 2](/images/how-to-charge-customers-across-accounts/image2.png) 4. Select **Share**. You will be required to confirm that you have already collected customer consent to share your customers’ payment information between accounts. ## Charge a shared customer across accounts using the same card Once you’ve enabled sharing, customers and payment methods you create or update in one account will be reflected across accounts in your organization. This makes it easy to charge customers using payment methods you’ve previously collected across any of your accounts. In this example, you’ll create and charge a customer using one saved card on two different accounts, using Stripe Checkout. ### Create a checkout session in the first account In your server-side integration, create a new customer in the first account, Rocket Rides, as part of a checkout session. ```javascript const stripe = require('stripe')('{{ROCKET_RIDES_SECRET_KEY}}'); const session = await stripe.checkout.sessions.create({ customer_creation: 'always', line_items: [ { price_data: { currency: 'usd', product_data: { name: 'Ride service', }, unit_amount: 7500, }, quantity: 1, }, ], mode: 'payment', ui_mode: 'embedded', return_url: 'https://checkout.rocket-rides.com/success', saved_payment_method_options: { payment_method_save: 'enabled', }, }, {stripeAccount: '{{ACCT_ROCKET_RIDES}}'}); // Account context for customer creation ``` ![image 3](/images/how-to-charge-customers-across-accounts/image3.png) Once the customer completes the checkout process, if the customer elects to save their payment method, Stripe will create a customer object and attach the payment method. Both the customer and payment method will be automatically shared to the other account in the organization without requiring any additional API calls. ### Create a checkout session in the second account When you create a checkout session for the customer in the second account, you can pass in the same customer ID from the first account, and Stripe will automatically populate the customer’s saved card. ```javascript const stripe = require('stripe')('{{ROCKET_DELIVERIES_SECRET_KEY}}'); const session = await stripe.checkout.sessions.create({ customer: '{{CUSTOMER ID}}', // Shared customer ID line_items: [ { price_data: { currency: 'usd', product_data: { name: 'Delivery service', }, unit_amount: 5000, }, quantity: 1, }, ], mode: 'payment', ui_mode: 'embedded', return_url: 'https://checkout.rocket-deliveries.com/success', saved_payment_method_options: { payment_method_save: 'enabled', }, }, {stripeAccount: '{{ACCT_ROCKET_DELIVERIES}}'}); // Account context for checkout session ``` ![image 8](/images/how-to-charge-customers-across-accounts/image8.png) ## **View shared customers across your organization** With Organizations, you now see a unified view of your shared customers, including their payment methods and transactions across all accounts. In this example, you can see the customer’s saved card which was used to process transactions in both accounts. This new view enables you to easily understand a customer’s holistic relationship with your business. From the organization, you can manage refunds, update customer details, and add or remove payment methods for shared customers. ![image 10](/images/how-to-charge-customers-across-accounts/image10.png) ## Centralize event management with an organization webhook If you use webhooks to subscribe to API events across multiple accounts, you can create a single organization webhook to centrally subscribe to all API events across your organization. This replaces the need for you to create and maintain separate webhooks for each of your accounts, and also ensures that you will only receive one de-duplicated event for updates to customers and payment methods shared between multiple accounts. To create an organization webhook: 1. Open Workbench by clicking on the **Developers** menu in the lower left corner of the dashboard and selecting **Webhooks.** Click **Add destination**. ![image 6](/images/how-to-charge-customers-across-accounts/image6.png) 2. Select **Accounts in your organization** and select the events you want to subscribe to. ![image 1](/images/how-to-charge-customers-across-accounts/image1.png) 3. Choose the destination type and [configure your event destination](https://docs.stripe.com/event-destinations#supported-destination-types). ![image 11](/images/how-to-charge-customers-across-accounts/image11.png) 4. Create an event handler in your server side code. In the following example, parse the session, account context, and customer ID from the event. The [account context](http://docs.stripe.com/context) contains the account ID where the event was emitted, which may be required if your event handler takes different action depending on the account. Adding the account context to webhook events makes it possible for you to create a single event handler for events received across your organization. ```javascript app.post('/webhook', express.json({ type: 'application/json' }), async (request, response) => { const event = request.body; // Handle the checkout.session.completed event if (event.type === 'checkout.session.completed') { const session = event.data.object; // Get the session object const accountContext = event.context; // Get the account context const customerId = session.customer; // Get the customer ID try { // Define event handler behavior } catch (error) { console.error("Error:", error); } } response.json({ received: true }); // Acknowledge receipt of the event }); ``` ## Conclusion With customer and payment method sharing, it is now easier than ever to create a unified payment experience for your customers across multiple business lines. Sharing replaces the need to recollect customers’ payment methods, migrate customers and payment methods between accounts, or set up Connect to clone customers across your accounts. This capability is currently in preview and you can [request access](https://docs.stripe.com/get-started/account/orgs/sharing/customers-payment-methods) now. If you have any questions or feedback, we’d love to hear from you at [organizations-feedback@stripe.com](mailto:organizations-feedback@stripe.com). For more Stripe learning resources, subscribe to our [YouTube channel](https://www.youtube.com/stripedevelopers). When building systems that heavily interact with any external API, developers often encounter challenges around performance, cost optimization, and rate limiting. Stripe's API is powerful and well-documented, but as your application scales, you'll need to carefully manage your interactions with it, as with any external API. There are several key challenges to consider: 1. **API rate limits**: Stripe API [rate limiting](https://docs.stripe.com/rate-limits) is a mechanism that controls the number of API requests an application can make over a specified period, primarily measured in requests per second (RPS). When users exceed these limits, they receive [429 errors](https://developer.mozilla.org/en-US/docs/Web/HTTP/Reference/Status/429). Rate limits vary by endpoint and may depend on the account's characteristics and transaction volumes. 2. [**API latency**](https://blog.postman.com/what-is-api-latency/): Each call to Stripe's API introduces latency to your application, typically ranging from 100ms to 500ms depending on the endpoint and operation. 3. **Costs**: While Stripe doesn't charge for API usage directly, the cumulative effect of unnecessary API calls impacts your application's performance and infrastructure costs in AWS. In this post, we'll dive deep into implementing an advanced caching architecture using [AWS Lambda](https://aws.amazon.com/lambda/), [Amazon ElastiCache for Redis](https://aws.amazon.com/elasticache/redis/), and [Amazon DynamoDB](https://aws.amazon.com/dynamodb/) to create a robust and scalable solution for high-volume Stripe API interactions. Let's explore how we can architect a solution to address these challenges using AWS services. ## Architecture overview This sample solution implements a multi-layer caching strategy that combines the speed of ElastiCache for Redis with the durability and TTL ([Time To Live](https://docs.aws.amazon.com/amazondynamodb/latest/developerguide/TTL.html)) capabilities of DynamoDB. Here's how the components work together: ![](/images/optimizing-stripe-api-performance-lambda-caching-elasticache-dynamodb/image1.png) Redis serves as the first-level cache, providing sub-millisecond access to frequently requested data. DynamoDB acts as the second-level cache, storing less frequently accessed data and providing automatic TTL management. Lambda functions orchestrate the interaction between these services and the Stripe API. ## Implementing the cache layer This caching strategy implements the following flow: 1. Check Redis for the requested data. 2. If not in Redis, check DynamoDB. 3. If not in DynamoDB, fetch from Stripe API. 4. Update both cache layers with the new data. Here's a more detailed implementation: ```javascript const AWS = require('aws-sdk'); const dynamodb = new AWS.DynamoDB.DocumentClient(); async function getCustomerData(customerId) { // Check Redis first const redis = getRedisClient(); // TODO: Implementation-dependent const cachedData = await redis.get(`customer:${customerId}`); if (cachedData) { return JSON.parse(cachedData); } // Check DynamoDB const dynamoResult = await dynamodb.get({ TableName: 'stripe-cache', Key: { pk: `customer:${customerId}` } }).promise(); if (dynamoResult.Item && dynamoResult.Item.data) { // Store in Redis for future requests await redis.set( `customer:${customerId}`, JSON.stringify(dynamoResult.Item.data), 'EX', 3600 // 1 hour expiry ); return dynamoResult.Item.data; } // Fetch from Stripe const customer = await stripe.customers.retrieve(customerId); // Update both cache layers await Promise.all([ redis.set( `customer:${customerId}`, JSON.stringify(customer), 'EX', 3600 ), dynamodb.put({ TableName: 'stripe-cache', Item: { pk: `customer:${customerId}`, data: customer, ttl: Math.floor(Date.now() / 1000) + 86400 // 24 hour TTL } }).promise() ]); return customer; } ``` ## DynamoDB table design The DynamoDB table design needs to support efficient lookups, automatic TTL cleanup, and flexible data storage for various Stripe entity types. Here the table design defined in CloudFormation: ```yaml AWSTemplateFormatVersion: '2010-09-09' Description: 'DynamoDB table for Stripe API caching with GSI and TTL' Parameters: Environment: Type: String Default: dev AllowedValues: - dev - staging - prod Description: Environment name for the stack TableReadCapacity: Type: Number Default: 5 Description: Read capacity units for the table MinValue: 1 TableWriteCapacity: Type: Number Default: 5 Description: Write capacity units for the table MinValue: 1 GSIReadCapacity: Type: Number Default: 5 Description: Read capacity units for GSI MinValue: 1 GSIWriteCapacity: Type: Number Default: 5 Description: Write capacity units for GSI MinValue: 1 Conditions: IsProd: !Equals - !Ref Environment - prod Resources: StripeCacheTable: Type: AWS::DynamoDB::Table Properties: TableName: !Sub stripe-cache-${Environment} BillingMode: PROVISIONED ProvisionedThroughput: ReadCapacityUnits: !If - IsProd - 50 - !Ref TableReadCapacity WriteCapacityUnits: !If - IsProd - 50 - !Ref TableWriteCapacity AttributeDefinitions: - AttributeName: pk AttributeType: S - AttributeName: sk AttributeType: S - AttributeName: gsi1pk AttributeType: S - AttributeName: gsi1sk AttributeType: S KeySchema: - AttributeName: pk KeyType: HASH - AttributeName: sk KeyType: RANGE GlobalSecondaryIndexes: - IndexName: gsi1 KeySchema: - AttributeName: gsi1pk KeyType: HASH - AttributeName: gsi1sk KeyType: RANGE Projection: ProjectionType: ALL ProvisionedThroughput: ReadCapacityUnits: !If - IsProd - 25 - !Ref GSIReadCapacity WriteCapacityUnits: !If - IsProd - 25 - !Ref GSIWriteCapacity TimeToLiveSpecification: AttributeName: ttl Enabled: true Tags: - Key: Environment Value: !Ref Environment - Key: Service Value: stripe-cache - Key: ManagedBy Value: CloudFormation Outputs: TableName: Description: Name of the DynamoDB table Value: !Ref StripeCacheTable Export: Name: !Sub ${AWS::StackName}-TableName TableArn: Description: ARN of the DynamoDB table Value: !GetAtt StripeCacheTable.Arn Export: Name: !Sub ${AWS::StackName}-TableArn ``` The CloudFormation template implements a production-ready DynamoDB table design optimized for caching Stripe API responses. At its core, the table uses a composite key structure with partition and sort keys (pk and sk) to enable flexible querying patterns, while a [Global Secondary Index](https://docs.aws.amazon.com/amazondynamodb/latest/developerguide/GSI.html) (gsi1) supports efficient lookups by cache type and timestamp. The template incorporates TTL functionality for automatic cleanup of expired cache entries. The infrastructure is environment-aware, with built-in parameter customization that allows for different capacity settings across development, staging, and production environments. The table uses a composite key structure to support various access patterns: ```javascript // Example item structure { pk: 'CUSTOMER#cus_123', // Partition key sk: 'METADATA#latest', // Sort key gsi1pk: 'CACHE#customer', // GSI partition key gsi1sk: '2025-02-05T12:00:00Z', // GSI sort key for TTL ordering data: { // Stripe customer object id: 'cus_123', email: 'customer@example.com', // ... other Stripe fields }, ttl: 1707225600, // Unix timestamp for TTL lastUpdated: '2025-02-05T12:00:00Z', version: 1, checksum: 'abc123' // For data integrity verification } ``` Some of the notable design decisions here include: 1. **Composite Keys**: The composite key structure (pk + sk) supports multiple item types per customer: ```javascript // Primary keys for different item types const keys = { customerMetadata: { pk: `CUSTOMER#${customerId}`, sk: 'METADATA#latest' }, customerSubscriptions: { pk: `CUSTOMER#${customerId}`, sk: 'SUBSCRIPTIONS#latest' }, customerPaymentMethods: { pk: `CUSTOMER#${customerId}`, sk: 'PAYMENT_METHODS#latest' } }; ``` 2. **Global Secondary Index** (GSI): The GSI enables efficient queries for finding all cached items of a specific type, identifying stale cache entries, and supporting bulk cache invalidation. ```javascript // Query all cached customers updated before a timestamp async function findStaleCustomers(timestamp) { const result = await dynamodb.query({ TableName: 'stripe-cache', IndexName: 'gsi1', KeyConditionExpression: 'gsi1pk = :type AND gsi1sk < :timestamp', ExpressionAttributeValues: { ':type': 'CACHE#customer', ':timestamp': timestamp } }).promise(); return result.Items; } ``` 3. **Data Versioning**: A version field can help handle concurrent updates: ```javascript async function updateCustomerCache(customerId, data) { try { await dynamodb.put({ TableName: 'stripe-cache', Item: { pk: `CUSTOMER#${customerId}`, sk: 'METADATA#latest', data: data, version: 1, ttl: Math.floor(Date.now() / 1000) + 86400, lastUpdated: new Date().toISOString(), checksum: calculateChecksum(data) }, ConditionExpression: 'attribute_not_exists(version) OR version < :newVersion', ExpressionAttributeValues: { ':newVersion': 1 } }).promise(); } catch (error) { if (error.code === 'ConditionalCheckFailedException') { // Handle concurrent update conflict await handleUpdateConflict(customerId, data); } throw error; } } ``` 4. **TTL Management**: The TTL attribute enables automatic cleanup of expired items: ```javascript // Calculate TTL based on item type function calculateTTL(itemType) { const ttlMap = { 'customer': 86400, // 24 hours 'subscription': 3600, // 1 hour 'payment_method': 7200 // 2 hours }; const ttlSeconds = ttlMap[itemType] || 86400; return Math.floor(Date.now() / 1000) + ttlSeconds; } ``` This table design provides a flexible and scalable foundation for caching Stripe API responses while supporting various access patterns and maintaining data integrity. The combination of composite keys, GSI, and TTL enables efficient queries and automatic cleanup of stale data. ### Cache invalidation strategy [Cache invalidation](https://en.wikipedia.org/wiki/Cache_invalidation) is important for maintaining data consistency. You can implement a webhook-based invalidation strategy, enabling you to invalidate individual items when new data arrives from Stripe: ```javascript async function handleStripeWebhook(event) { const { type, data } = event; // Determine cache keys to invalidate based on event type const keysToInvalidate = getCacheKeysForEvent(type, data); // Invalidate Redis cache const redis = getRedisClient(); await Promise.all( keysToInvalidate.map(key => redis.del(key)) ); // Invalidate DynamoDB cache by updating TTL await Promise.all( keysToInvalidate.map(key => dynamodb.update({ TableName: 'stripe-cache', Key: { pk: key }, UpdateExpression: 'set ttl = :ttl', ExpressionAttributeValues: { ':ttl': Math.floor(Date.now() / 1000) } }).promise() ) ); } ``` ### Performance optimization tips There are a number of steps that can help improve the performance of this approach: 1. **Redis Connection Pooling**: Configure your Redis client with appropriate connection pool settings for Lambda: ```javascript const redisOptions = { maxRetriesPerRequest: 1, enableReadyCheck: false, connectTimeout: 500, disconnectTimeout: 2000 }; ``` 2. **DynamoDB Capacity Planning**: Use [on-demand capacity mode](https://docs.aws.amazon.com/amazondynamodb/latest/developerguide/on-demand-capacity-mode.html) for unpredictable workloads, or carefully provision capacity based on your access patterns: ```javascript const tableParams = { BillingMode: 'PAY_PER_REQUEST', // Or for provisioned capacity: ProvisionedThroughput: { ReadCapacityUnits: 100, WriteCapacityUnits: 50 } }; ``` 3. **Lambda Configuration**: Optimize memory allocation and timeout settings. Memory is a component of Lambda billing, so ensure your functions are not allocated more memory than necessary. Timeout settings can ensure that a function is terminated if it unexpectedly takes too long. Both of these settings can help reduce costs, especially in high throughput workloads. These can be set in CloudFormation and other infrastructure-as-code (IaC) tools, as well as the Lambda console: ```yaml Resources: StripeCacheFunction: Type: AWS::Serverless::Function Properties: MemorySize: 1024 Timeout: 10 ``` ## Cost considerations For a distributed caching solution for Stripe API integration, several key AWS service costs must be carefully managed. ElastiCache nodes accrue charges on an hourly basis whether you're actively using them or not. This forms one of your primary ongoing expenses, alongside the dual costs of DynamoDB – both for storing your cached data and for the request units consumed during your read and write operations. Your serverless compute layer, running on Lambda, adds another dimension to the cost structure through execution time and memory allocation charges. Tying all of these components together is the often-overlooked cost of data transfer between services, which can become significant in high-throughput systems. Fortunately, several strategies can help optimize these costs without compromising performance. The foundation of cost optimization starts with right-sizing your ElastiCache nodes – selecting instance types that match your actual working set size rather than overprovisioning for potential future growth. This goes hand-in-hand with implementing intelligent TTL policies across both your cache layers, ensuring that stale data doesn't consume costly storage space in DynamoDB or memory in ElastiCache. For your Lambda functions, implementing batch processing patterns can significantly reduce the number of invocations and their associated costs. Perhaps most importantly, maintaining visibility into your cache hit rates through careful monitoring allows you to continuously adjust your storage allocations and caching policies based on real usage patterns, ensuring you're not paying for capacity you don't need while maintaining optimal performance for your users. ## Conclusion This example caching architecture provides a solution for scaling Stripe API access in high-volume applications. By using ElastiCache, DynamoDB, and Lambda effectively, you can significantly reduce API latency and costs while maintaining data consistency and respecting rate limits. Remember to: 1. Regularly monitor and adjust cache TTLs based on your data freshness requirements. 2. Implement proper error handling and fallback mechanisms. 3. Keep your Stripe webhook endpoints updated for cache invalidation. 4. Monitor costs across all services to ensure optimal resource utilization. Additional Resources: - [Stripe API Documentation](https://stripe.com/docs/api) - [AWS ElastiCache Best Practices](https://docs.aws.amazon.com/AmazonElastiCache/latest/red-ug/BestPractices.html) - [DynamoDB Time to Live](https://docs.aws.amazon.com/amazondynamodb/latest/developerguide/TTL.html) - [AWS Lambda Best Practices](https://docs.aws.amazon.com/lambda/latest/dg/best-practices.html) For more Stripe learning resources, subscribe to our [YouTube channel](https://www.youtube.com/stripedevelopers). Imagine a customer checks out on your eCommerce site, enters their payment details, and chooses the "Pay" button. Just as the request is processed, their internet connection drops. They refresh the page and try again. Meanwhile, your backend is retrying the original request due to a timeout. The result? The customer gets charged twice. Duplicate charges lead to refund requests, customer support headaches, and loss of trust. These issues not only hurt your revenue but also damage the customer experience. Customers expect smooth, seamless transactions, and even the smallest hiccup can lead to frustration. This post explores how to design resilient payment systems that prevent duplicate charges, ensuring your system can handle interruptions, retries, and failures without compromising user trust. By implementing strategies like [**queues**](https://en.wikipedia.org/wiki/Message_queue) and [**idempotency**](https://en.wikipedia.org/wiki/Idempotence), you can protect your business from these issues, improve reliability, and ultimately deliver a better experience for your customers. ![](/images/because-nobody-likes-being-charged-twice/image1b.png) *Retrying failed payments without using idempotency keys* ### **Everything fails all the time** In distributed systems, failure is not an edge case, it’s the norm. Network timeouts, server crashes, database locks, downstream API errors, and even user interruptions (like closing a browser tab mid-transaction) are all part of the operational landscape. When building a payment system, each of these failure modes has the potential to leave transactions in an uncertain state, leading to lost revenue, duplicate charges, or degraded user trust. Designing for resilience means anticipating these failures and building systems that can tolerate them gracefully. This is where techniques like message queues and idempotency keys become essential. They allow your architecture to retry operations safely, without unwanted side effects or inconsistencies. The good news is that you can increase reliability by using **idempotency** and **message queues**. ## **Using idempotency keys** Idempotency is a concept from mathematics and computer science that refers to the property of an operation where performing it multiple times with the same input results in the same outcome, without causing any side effects. In other words, no matter how many times you repeat the operation, the result will be the same as the first execution, and no additional changes or effects will occur after the initial action. In Stripe, an [idempotency key](https://docs.stripe.com/error-low-level#sending-idempotency-keys) is a unique identifier that ensures repeated requests result in the same action being performed only once. ### **How it works** 1. Before making a payment request, generate a unique idempotency key (e.g., a UUID). 2. Include this key in your payment request to Stripe. 3. Stripe stores the key and ensures that any subsequent request with the same key returns the same response instead of creating a new charge. ![](/images/because-nobody-likes-being-charged-twice/image1a.png) *Retrying failed payments with Idempotency keys* ### **Why It works** Idempotency ensures that if a request is retried (either by the client or your backend), it won't result in multiple charges. Stripe recognizes the idempotency key for 24 hours and returns the original response instead of processing a new transaction. ## **Using message queues** While idempotency prevents duplicate charges at the payment provider level, message queues ensure your system handles payments reliably even during failures. ### **How it works** 1. When a customer submits a payment request, instead of processing it immediately, enqueue it in a message queue (e.g., [RabbitMQ](https://www.rabbitmq.com/), [Amazon SQS](https://aws.amazon.com/sqs/), [Kafka](https://kafka.apache.org/)). 2. A background worker (or pool of workers) consumes messages from the queue, ensuring payments are processed reliably and independently of user traffic. 3. If payment processing fails (e.g., due to a network error or Stripe outage), the message remains in the queue and is retried automatically after a delay. 4. If a message repeatedly fails after the maximum retry attempts, it can be sent to a [dead-letter queue (DLQ)](https://aws.amazon.com/what-is/dead-letter-queue/) for inspection and manual recovery. ### **Example workflow:** 1. The user chooses “Pay” and the request is added to the queue. 2. The worker processes payment using the idempotency key. 3. If the payment is successful, the message is removed from the queue. 4. If the payment processing fails the message is placed back onto the queue and retried later. If the [AWS Lambda](https://aws.amazon.com/lambda/) function times out while processing the message or encounters an error, Amazon SQS automatically returns the message to the queue after a [visibility timeout,](https://docs.aws.amazon.com/AWSSimpleQueueService/latest/SQSDeveloperGuide/sqs-visibility-timeout.html) allowing for a retry attempt. The message will be retried up to the configured maximum retries before being sent to a [dead-letter queue (DLQ)](https://docs.aws.amazon.com/AWSSimpleQueueService/latest/SQSDeveloperGuide/sqs-dead-letter-queues.html) for further inspection. ![](/images/because-nobody-likes-being-charged-twice/image3.png) *Adding resilience to payment workflows with Amazon SQS queues.* ### **Why it works** Queues decouple the payment request from real-time processing, ensuring that even if the payment gateway is temporarily down, the request isn’t lost. When combined with idempotency keys, it prevents duplicate charges when retries happen. **Common pitfalls** While idempotency keys are a powerful safeguard against duplicate charges, they’re not foolproof unless used correctly. One common mistake is reusing the same key across different operations or users. An idempotency key should uniquely identify one specific action, such as “create a payment for Order \#123”, not a general session or API call. Using the same key for different users or operations can lead to unexpected behavior, like retrieving someone else’s payment response. Another pitfall is generating the idempotency key too early in the flow. For example, at application startup or when the user loads the page. If the user later modifies their order before checking out, that stale key could bind the new request to an old, now-incorrect response. It’s best to generate the key as close as possible to the point of execution, ideally just before placing the payment request into a queue or sending it to Stripe. Some developers also forget to include the idempotency key on retries—especially when retry logic is handled at the infrastructure layer (like a queue worker or a load balancer). In those cases, retries without the original key are treated as entirely new requests, negating the benefits of idempotency and potentially duplicating charges. Lastly, relying solely on idempotency without queues can leave your system vulnerable. If Stripe is temporarily unavailable and your frontend doesn’t retry, or your backend drops the request, there’s no second chance. Queues ensure that the operation gets retried, and idempotency ensures that retry is safe. **Real-world use case** At Stripe, we often see high-growth platforms and marketplaces implement resilient payment architectures using a combination of queues and idempotency. Take the fictional example of a developer tooling company that runs an eCommerce store for conference merchandise. During peak traffic, like during a keynote announcement or swag drop, the team must ensure payments are processed reliably, even if mobile connections are flaky or frontend requests time out. To handle this, they introduce an SQS message queue. Each time a customer clicks “Pay,” the frontend sends a request to their backend, which generates a [UUID](https://en.wikipedia.org/wiki/Universally_unique_identifier) as the idempotency key and enqueues the payment job. A worker service (a Lambda function) then picks up that job, calls the Stripe API using the key in the `Idempotency-Key` header, and confirms the PaymentIntent. If the worker crashes mid-request or Stripe returns a transient error, the message is returned to the queue. When retried, it reuses the same idempotency key, ensuring that only one PaymentIntent is ever created, no matter how many times the worker retries. This pattern gives durability, safety, and observability. And most importantly, it avoided the scenario of double-charging a conference attendee while they were still standing at the checkout booth. **Conclusion** Building a resilient payment system is crucial for both operational reliability and customer trust. By incorporating idempotency keys and message queues into your payment flow, you can ensure that even in the event of temporary failures, payments are processed correctly without duplication. These techniques provide a safety net that not only prevents costly mistakes but also enhances the user experience by making transactions more reliable. As your business scales, having a resilient system in place will reduce support overhead, prevent chargebacks, and provide confidence that your payment infrastructure can handle both expected and unexpected disruptions. Implementing these practices is an investment in the long-term health of your platform, ensuring that customers can trust your payment system to handle their transactions safely. For more Stripe developer learning resources, subscribe to our [YouTube Channel](https://www.youtube.com/@StripeDev). Managing subscription lifecycles in enterprise applications presents unique challenges that go well beyond simple recurring billing. As organizations scale, they need robust systems that can handle complex scenarios like mid-cycle plan changes, usage-based billing adjustments, and synchronized updates across multiple services. In this post, we'll explore a sample architecture that uses AWS services to create a reliable and scalable subscription management system. ## The challenge of enterprise subscription management Enterprise subscription management is fundamentally different from basic recurring billing. Consider a scenario where a customer wants to upgrade their plan mid-billing cycle. This seemingly simple operation triggers a cascade of requirements: - The billing system needs to calculate prorated charges for both the old and new plans. - All associated services need to be updated to reflect new entitlements. - The change needs to be atomic - either all services update successfully, or none do. - The system must handle failed operations gracefully and maintain data consistency. - All operations must be auditable for compliance and debugging. Traditional monolithic approaches to subscription management often struggle with these requirements. They typically involve complex state management within a single application, often buried in code, making it difficult to maintain consistency across services and handle failures gracefully. ## Choosing the right services This sample architecture presents a general pattern that uses several AWS services, each chosen for specific capabilities that address different aspects of the problem: ### Amazon EventBridge [EventBridge](https://aws.amazon.com/eventbridge/) serves as the backbone of our event-driven architecture. It provides reliable event delivery with at-least-once processing guarantees, making it ideal for handling subscription-related events. We use it to decouple our subscription management logic from the actual service updates, allowing for better scalability and maintainability. EventBridge's key features that make it suitable for this architecture include content-based filtering for routing different types of subscription events, dead-letter queues for handling failed event processing, and integration with AWS Step Functions for workflow orchestration. ### AWS Step Functions [Step Functions](https://aws.amazon.com/step-functions/) manages the complex workflows involved in subscription changes. It's particularly valuable because it handles state management automatically, and supports long-running operations (up to 1 year), which is particularly useful for payment operations. It offers built-in error handling and retry mechanisms and maintains a detailed execution history for auditing. ### Amazon DynamoDB [DynamoDB](https://aws.amazon.com/dynamodb/) stores subscription state and metadata. Its choice is driven by several factors, including consistent single-digit millisecond latency, automatic scaling to handle varying loads, and [point-in-time recovery](https://en.wikipedia.org/wiki/Point-in-time_recovery) for data protection. Additionally, it offers strong integration with other AWS services. ### AWS Lambda [Lambda](https://aws.amazon.com/lambda/) functions handle the actual business logic and integration with external services like Stripe. They're ideal for this architecture because they scale automatically with demand, they support multiple runtime environments, and the stateless nature can simplify debugging and error handling. ## Architecture overview The architecture follows an event-driven pattern where subscription changes trigger a series of coordinated updates across multiple services. Here's how the components work together: ![](/images/aws-microservice-architecture-subscription-management/image1.png) When a subscription change is initiated, an event is published to EventBridge. It appears in the SaaS event bus in the configured region of your AWS account. This event includes details about the change (e.g., plan upgrade, downgrade, cancellation) and any relevant metadata. EventBridge routes this event to a Step Functions workflow based on event rules. The Step Functions workflow orchestrates the entire process, which typically includes: 1. Validating the requested change. 2. Using a Lambda function to calculate prorated charges using Stripe's API. 3. Updating the subscription in Stripe. 4. Updating the internal subscription state in DynamoDB. 5. Triggering service-specific updates through Lambda functions. 6. Handling any compensation actions if steps fail. ### Event structure and routing Events from Stripe in this system follow a consistent structure, for example: ```json { "version": "1.0", "id": "evt_123", "detail-type": "SubscriptionUpdate", "source": "subscription.api", "account": "123456789012", "time": "2025-02-04T19:52:00Z", "region": "us-east-1", "detail": { "subscriptionId": "sub_123", "operation": "upgrade", "fromPlan": "business", "toPlan": "enterprise", "effectiveDate": "2025-02-04T19:52:00Z" } } ``` You can configure EventBridge rules on the event bus to route these events based on the `detail-type` and `operation` attributes. For example, a rule filtering on upgrades and downgrades can be defined as: ```json { "detail-type": ["SubscriptionUpdate"], "source": ["subscription.api"], "detail": { "operation": ["upgrade", "downgrade"] } } ``` ### Step Functions workflow The Step Functions workflow handles the complex orchestration of subscription changes. While the exact workflow for your application will vary, here are some the important states defined for this use case: ```json { "StartAt": "ValidateChange", "States": { "ValidateChange": { "Type": "Task", "Resource": "arn:aws:lambda:REGION:ACCOUNT:function:validate-subscription-change", "Next": "CalculateProration", "Catch": [{ "ErrorEquals": ["ValidationError"], "Next": "HandleValidationError" }] }, "CalculateProration": { "Type": "Task", "Resource": "arn:aws:lambda:REGION:ACCOUNT:function:calculate-proration", "Next": "UpdateStripeSubscription" }, "UpdateStripeSubscription": { "Type": "Task", "Resource": "arn:aws:lambda:REGION:ACCOUNT:function:update-stripe-subscription", "Next": "UpdateDynamoDB", "Retry": [{ "ErrorEquals": ["StripeTemporaryError"], "IntervalSeconds": 1, "MaxAttempts": 3, "BackoffRate": 2.0 }] } // Additional states omitted for brevity } } ``` These states invoke Lambda functions that run the business logic and define the next steps in the process. The `UpdateStripeSubscribe` state encapsulates complex error handling logic without needing custom code. The retry configuration is designed this way for several important reasons. First, we specifically catch `StripeTemporaryError` rather than all errors because we want to differentiate between transient failures (like network timeouts or rate limits) and permanent failures (like invalid card numbers). The initial retry interval is set to 1 second with a backoff rate of 2.0, meaning subsequent retries will wait 2 seconds, then 4 seconds. This exponential backoff prevents overwhelming downstream systems while still maintaining responsiveness for the customer. We limit to 3 attempts because Stripe's API typically recovers quickly from transient issues, and waiting longer would degrade the user experience. If all retries fail, the error is propagated to the main error handler which can initiate compensation transactions to maintain system consistency. This is particularly important because Stripe operations are financial transactions – we need to ensure we don't double-charge customers or leave the system in an inconsistent state. ### Amazon DynamoDB data model The DynamoDB table design uses a composite key structure to efficiently support various access patterns. A composite key in DynamoDB consists of two elements: a Partition Key (PK) and a Sort Key (SK): ```javascript { PK: "SUB#sub_123", // Partition key SK: "META#current", // Sort key subscriptionId: "sub_123", customerId: "cust_456", plan: "enterprise", status: "active", effectiveDate: "2025-02-04T19:52:00Z", features: { userLimit: 1000, storageLimit: "5TB" }, // Additional metadata } ``` This Lambda function can use DynamoDB transactions to maintain consistency when updating subscription state: ```javascript const params = { TransactItems: [ { Update: { TableName: "Subscriptions", Key: { PK: "SUB#sub_123", SK: "META#current" }, UpdateExpression: "SET #plan = :plan, #status = :status", ExpressionAttributeNames: { "#plan": "plan", "#status": "status" }, ExpressionAttributeValues: { ":plan": "enterprise", ":status": "active" }, ConditionExpression: "attribute_exists(PK)" } }, { Put: { TableName: "Subscriptions", Item: { PK: "SUB#sub_123", SK: "HISTORY#2025-03-04T19:52:00Z", // Historical record details } } } ] }; ``` ### Stripe integration The Lambda function handling the Stripe integration calls out to the Stripe API and also includes error handling and idempotency: ```javascript const stripe = require('stripe')(process.env.STRIPE_SECRET_KEY); exports.handler = async (event) => { const idempotencyKey = event.detail.id; try { const subscription = await stripe.subscriptions.update( event.detail.subscriptionId, { proration_behavior: 'always_invoice', items: [{ id: event.detail.subscriptionItemId, price: event.detail.newPriceId }] }, { idempotencyKey } ); return { statusCode: 200, body: JSON.stringify(subscription) }; } catch (error) { if (error.type === 'StripeInvalidRequestError') { throw new Error('ValidationError'); } throw error; } }; ``` An architecture using this combination of Step Functions and Lambda can include several layers of error handling. Step Functions has retry logic for transient failures, and workflows can route to dead-letter queues for failed events. For failed states, you can design compensation workflows for rolling back partial changes. Additionally, you can use [Amazon CloudWatch](https://aws.amazon.com/cloudwatch/) for detailed logging and monitoring. ### Conclusion This sample architecture shows a general pattern for managing complex subscription scenarios in enterprise applications. By using AWS services like EventBridge and Step Functions, you can create a system that is reliable, using built-in retry mechanisms and error handling, and maintainable, providing clear separation of concerns and modular design. The comprehensive logging and execution history can also help with auditability. For teams building subscription management systems, this architecture provides a proven pattern that can be adapted to specific business needs while maintaining the rigor required for handling financial transactions and service provisioning. The combination of event-driven architecture and workflow orchestration provides a flexible foundation that can be extended to handle additional requirements as your subscription management needs evolve. This can help you avoid updating old “spaghetti code” with encoded business logic. For more information about the services used in this architecture, refer to: - [AWS Step Functions Developer Guide](https://docs.aws.amazon.com/step-functions/latest/dg/welcome.html) - [Amazon EventBridge User Guide](https://docs.aws.amazon.com/eventbridge/latest/userguide/eb-what-is.html) - [Stripe API Documentation](https://stripe.com/docs/api) - [DynamoDB Developer Guide](https://docs.aws.amazon.com/amazondynamodb/latest/developerguide/Introduction.html) For more Stripe developer learning resources, subscribe to our [YouTube Channel](https://www.youtube.com/@StripeDev). As businesses scale, understanding revenue data is critical for making informed decisions and deriving valuable insights. [Stripe Data Pipeline](https://stripe.com/en/data-pipeline) (SDP) simplifies the process of exporting modeled revenue data into your data storage of choice. In this blog post, we'll walk through how to integrate your Stripe Data Pipeline set up with [Google Cloud Storage (GCS)](https://cloud.google.com/storage/docs) to run analytics in [BigQuery](https://cloud.google.com/bigquery/docs). You'll learn how to seamlessly move data from GCS to BigQuery, and how to automate this process for continuous reporting and analysis. ![](/images/unlock-powerful-analytics-stripe-data-pipeline-bigquery/1.png) ## Why use Stripe Data Pipeline for analytics? 1. **Automate data delivery at scale**: Stripe Data Pipeline makes it easier for businesses to export their data from Stripe. It allows businesses to automatically export their data, including transactions, invoices, subscriptions, and payments, directly to a Google Cloud Storage (GCS) bucket. This means less manual data handling and fewer errors, providing a smooth flow of data for analytics. 2. **Do more with your data**: Speed up your financial close process and unlock new insight by centralizing your Stripe data with our business data. Using SDP means that multiple teams are using the same source of truth for accounting, product, growth, and different use cases. 3. **Direct and secure integration**: Send your data directly to Google Cloud Storage without involving a third party to handle your sensitive revenue data. 4. **Avoid data outages and delays**: Offload delivery and pipeline maintenance from your data engineering teams. Businesses can access fresh data available for analysis frequently, ensuring that you have timely insights to make informed decisions while still benefiting from a reliable and automated pipeline. For more details, read more about freshness expectations [in the documentation](https://docs.stripe.com/stripe-data/available-data). ## Integrating Stripe Data Pipeline with Google Cloud Storage and BigQuery At a high level, these are the steps you must follow: 1. Set up the Stripe Data Pipeline in the Stripe Dashboard. 2. Use Google Cloud Run Job to set up the transfer pipeline. 3. Test the integration by triggering the job. 4. Verify that data is present in BigQuery. 5. Set up a Scheduler to run the recurring job. Below is a detailed description for each of these steps with code examples on how to set up the whole pipeline. ### Prerequisites * Administrator access for your Stripe account. * Access to [Google Cloud Platform](https://cloud.google.com/docs) account and a [Project](https://developers.google.com/workspace/guides/create-project). * A [BigQuery Dataset](https://cloud.google.com/bigquery/docs/datasets) for running the analytics and queries. ### Step 1: Set up Stripe Data Pipeline. Navigate to the Stripe Dashboard, and choose *Reporting > Data Management*. Follow the steps in the self-serve onboarding. Once configured, you have access to a structured set of files organized by time. The first data load can take up to 12 hours. ### Step 2: Use a Google Cloud Run Job to set up the transfer pipeline. 1. Create an empty repository on your local machine. Add the code snippets shared below to create a data pipeline using Python. Later you will deploy it as a recurring job using [Google Cloud CLI](https://cloud.google.com/sdk/docs). 2. Finding the latest Data Snapshot: Stripe Data Pipeline maintains a file `data_load_times.json` which has the information for all the tables that were added to GCS and their latest folder path: ```json { "tableLoadTimes": [ { "tableName": "connected_account_external_account_bank_accounts", "rundate": "2025031106", "dataset": "connect-coreapi", "mode": "LIVEMODE", "succeededAt": 1741693893927, "path": "2025031106/livemode/connected_account_external_account_bank_accounts" }, { "tableName": "connected_account_products", "rundate": "2025031106", "dataset": "connect-coreapi", "mode": "LIVEMODE", "succeededAt": 1741693894217, "path": "2025031106/livemode/connected_account_products" }, . . . ] } ``` Using the [Python Client for Google Cloud Storage](https://cloud.google.com/python/docs/reference/storage/latest), you can load this file and convert it to a Python dictionary to find the paths of the data to be loaded to BigQuery. ```python from google.cloud import storage, bigquery import json import concurrent.futures # Initialize clients for GCS and BigQuery storage_client = storage.Client() bigquery_client = bigquery.Client() # Set up your project, bucket and BigQuery dataset bucket_name = "stripe-data" # Your GCS bucket name dataset_id = "stripe_data" # BigQuery dataset name project_id = "my-test-proj-12345" # Your GCP project ID mode = "LIVEMODE" # The mode for which the data is being loaded # Function to get the latest folder based on the data_load_times.json file def get_latest_load_time_dict(): # Load the JSON file from GCS bucket = storage_client.get_bucket(bucket_name) blob = bucket.blob('data_load_times.json') data_load_times_content = blob.download_as_text() # Parse the JSON data data_load_times = json.loads(data_load_times_content) print("Latest folder found") return data_load_times ``` 3. **Listing Data Files in GCS**: Each table shared by SDP is loaded as a folder. You must iterate over each table and list all the Parquet files present in the folder to be loaded to BigQuery: ```python # Function to list all tables folders and their .parquet files def list_tables_and_files(data_load_times): # Create a dictionary of table names and their corresponding folders table_folders_dict = {} for table_data in data_load_times["tableLoadTimes"]: if table_data.get("mode") == mode: table_folders_dict[table_data["tableName"]] = table_data['path'] print(f"Table folders dict loaded: Found {len(table_folders_dict)} tables") # Now for each table folder, list the .parquet files table_files_dict = {} for table_name, table_folder in table_folders_dict.items(): parquet_files = [] blobs = storage_client.list_blobs(bucket_name, prefix=table_folder) for blob in blobs: if blob.name.endswith(".parquet"): parquet_files.append(blob.name) table_files_dict[table_name] = parquet_files print("Table files dict loaded") return table_files_dict ``` 4. **Loading Parquet Files into BigQuery**: Once you have a list of your data tables in GCS, you must load the Parquet files into BigQuery. Using the `google-cloud-bigquery` client, you can configure the load job to write the data directly into BigQuery tables. You can optimize the load time by running multiple of these jobs in parallel. ```python # Function to load the data from GCS into BigQuery def load_to_bigquery(gcs_paths, table_name): try: # Define the BigQuery load job configuration for Parquet files job_config = bigquery.LoadJobConfig( source_format=bigquery.SourceFormat.PARQUET, write_disposition=bigquery.WriteDisposition.WRITE_TRUNCATE, # Always truncate the table before loading create_disposition=bigquery.CreateDisposition.CREATE_IF_NEEDED, # Create table if it doesn't exist ) # Map the file path to full URI uri_list = [f"gs://{bucket_name}/{gcs_path}" for gcs_path in gcs_paths] # Load data into BigQuery load_job = bigquery_client.load_table_from_uri( uri_list, f"{project_id}.{dataset_id}.{table_name}", job_config=job_config, ) # Wait for the load job to complete load_job.result() # This will wait for the load job to finish # Check if the job completed successfully if load_job.error_result is None: print(f"Loaded data into BigQuery table {dataset_id}.{table_name}") else: raise Exception(f"{load_job.error_result}") except Exception as e: print(f"Error occurred while loading data into BigQuery table {dataset_id}.{table_name} : {e}") raise e # Use ThreadPoolExecutor to load data in parallel def load_tables_in_parallel(table_files): error_dict = {} error_count = 0 # Use ThreadPoolExecutor for parallel loading with concurrent.futures.ThreadPoolExecutor() as executor: # Submit all load tasks to the executor future_to_table = {executor.submit(load_to_bigquery, gcs_paths, table_name): table_name for table_name, gcs_paths in table_files.items()} # Collect exceptions if any occur during execution for future in concurrent.futures.as_completed(future_to_table): table_name = future_to_table[future] try: future.result() # This will raise any exception that occurred in load_to_bigquery except Exception as e: error_dict[table_name] = str(e) error_count += 1 return error_dict, error_count ``` 5. **Putting it all together**: Finally, you must stitch together all these functions to find the latest snapshot, read the data and insert to BigQuery: ```python # Cloud Function main entry point def load_latest_data(): try: # Get the latest folder based on the data_load_times.json file latest_load_time_dict = get_latest_load_time_dict() # List all tables and their .parquet files under the livemode folder table_files = list_tables_and_files(latest_load_time_dict) # Load the data into BigQuery in parallel error_dict,error_count = load_tables_in_parallel(table_files) if error_count > 0: print(f"Data loading completed with {error_count} errors. Error details: {error_dict}") else: print("Data loading completed successfully.") except Exception as e: print(f"Error processing request: {e}") if __name__ == "__main__": load_latest_data() ``` Also add a `requirement.txt` file with the needed dependencies: ``` google-cloud-storage google-cloud-bigquery ``` And a file named “Procfile” without any extension: ``` web: python3 main.py ``` ### Step 3: Test the integration. The script is now ready to be tested. You are going to use Google Cloud Run Job to run the script for inserting data to BigQuery. Make sure you have [Gcloud CLI](https://cloud.google.com/sdk/gcloud) installed and logged in using this [guide](https://cloud.google.com/sdk/docs/install) before continuing. From the same folder where you created this script, run the following command: ```bash gcloud run jobs deploy job-sdp-dataload \ --source . \ --max-retries 5 ``` Choose the preferred region and select `[Y]` for creating an artifact registry. This creates the Docker image for the script, uploads it to Google Artifact Registry, and deploys the Cloud Run job. You can then run the job using the Gcloud Console or by running the command: ```bash gcloud run jobs execute job-sdp-dataload ``` ### Step 4: Verify the data. You can now verify the data by visiting the BigQuery Console and checking that all tables have been created under your specified DataSet. Since you use `WRITE_TRUNCATE` while writing the tables to BigQuery, you only see the latest snapshot of data in BigQuery. This is how the tables appear once they are loaded to BigQuery: ![](/images/unlock-powerful-analytics-stripe-data-pipeline-bigquery/2.png) ### Step 5: Schedule the Google Cloud Run Job. Once the integration is running, you can schedule it to run every 6 hours to ensure the latest data is in BigQuery. To do this, visit the *Add Trigger* page on the created Cloud Run Job page. ![](/images/unlock-powerful-analytics-stripe-data-pipeline-bigquery/3.png) ![](/images/unlock-powerful-analytics-stripe-data-pipeline-bigquery/4.png) --- ## Conclusion Integrating Stripe Data Pipeline (SDP) with Google Cloud Storage and BigQuery unlocks powerful analytics capabilities for Stripe users. The seamless integration between SDP and GCS allows businesses to easily export their payment data, while BigQuery offers the performance and scalability needed for querying and analyzing large datasets. Whether you are looking to build automated data pipelines, perform real-time analytics, or unlock business insights, using SDP with Google Cloud provides a flexible, cost-effective, and scalable solution. By using Stripe Data Pipeline, businesses can analyze their Stripe data effortlessly and gain a competitive edge through timely and data-driven decisions. To learn more about developing applications with Stripe, visit our [YouTube Channel](https://www.youtube.com/stripedevelopers). The raw text content behind [docs.stripe.com](http://docs.stripe.com) is over 130 MB (for comparison, my college [Operating Systems textbook](https://pages.cs.wisc.edu/~remzi/OSTEP/) is a 7 MB PDF) and is updated hundreds of times each week. Although LLMs have Stripe knowledge in their pre-training, they almost instantly become outdated and they will occasionally produce incorrect information. Payments integrations are sophisticated and Stripe offers a lot of customizability. That’s why we built a [Stripe AI Assistant](https://docs.stripe.com/stripe-vscode#ai-assistant) into our VS Code extension, which answers your questions by searching relevant Stripe knowledge (such as API reference entries, integration guides, code examples, and developer Discord threads). This improves accuracy over using a raw LLM tool alone and allows personalized responses tailored to your Stripe account. [**Visit**](http://ai.stripe.com/vscode) **[https://ai.stripe.com/vscode](https://ai.stripe.com/vscode) [to get started with the Stripe VS Code extension.](http://ai.stripe.com/vscode)** ![](/images/stripes-ai-assistant-vs-code/image8.png) ## Using the extension Visit [https://ai.stripe.com/vscode](https://ai.stripe.com/vscode) to automatically install and open the Stripe AI Assistant. The extension is also available in the [VS Marketplace](https://marketplace.visualstudio.com/manage/publishers/stripe/extensions/vscode-stripe/hub). We recommend you also install the [Stripe CLI](https://docs.stripe.com/stripe-cli#install) to enable more features (streaming webhook events, personalized AI responses, and more). Learn more about the extension in the [docs](https://docs.stripe.com/stripe-vscode). [GitHub Copilot](https://code.visualstudio.com/blogs/2024/06/24/extensions-are-all-you-need#_stripe) users can start by typing `@stripe` in the chat. Or, if you do not use Copilot, the extension offers its own chat UI. Here’s an example of asking the extension a question: ![](/images/stripes-ai-assistant-vs-code/image1.png) The assistant calls our backend to retrieve relevant up-to-date Stripe docs. This reduces hallucinations, which is when an LLM produces factually incorrect output. The extension also inserts your API key automatically, which allows you to quickly test out code snippets that’ll just work as-is. We can run the customized code from the assistant to get a working [payment link](https://stripe.com/payments/payment-links?utm_campaign=AMER_US_en_Google_Search_Brand_Payment-Links_EXA_PHR-21355960722&utm_medium=cpc&utm_source=google&ad_content=701657884201&utm_term=stripe%20links&utm_matchtype=e&utm_adposition=&utm_device=c&gad_source=1&gclid=Cj0KCQiAoJC-BhCSARIsAPhdfShZAm0LFpUhEzbDKJeCeQl-iPTqXB0J9NeKGK0KvB2kqruxdB64cVAaAicKEALw_wcB). ```python import stripe stripe.api_key = "rk_test_..." product = stripe.Product.create( name="Original Abstract Painting", description="24x36 inch acrylic on canvas", images=["https://example.com/artwork-image.jpg"], ) price = stripe.Price.create( product=product.id, unit_amount=50000, currency="usd" # $500.00 ) payment_link = stripe.PaymentLink.create( line_items=[{"price": price.id, "quantity": 1}] ) print(f"Share this payment link: {payment_link.url}") ``` In addition to retrieving documentation, the Assistant also searches through thousands of [Stripe Developer Discord](https://stripe.com/go/developer-chat) threads. Here is a more complex question about subscriptions: ![](/images/stripes-ai-assistant-vs-code/image3.png) This is a real question a user asked on our [Discord server](https://discord.com/channels/841573134531821608/1199688011680583700). Stripe engineers assist users in troubleshooting their integration issues on Discord in real-time. We built a pipeline which utilizes an LLM to summarize the issue and the proposed solution. Then, through human evaluations, the best summaries are picked to enter our search index. The team reviews hundreds of summaries per week to curate high quality knowledge that require combining insights from multiple docs. By indexing these threads, the Stripe AI Assistant is able to answer more complex integration questions. ## Guided flows from docs ![](/images/stripes-ai-assistant-vs-code/image4.png) We’re also rolling out a “Open in VS Code” button into our documentation. We are starting with our [integration quickstart guides](https://docs.stripe.com/checkout/quickstart). This will deeplink into the VS Code extension and start to guide you through a specific integration directly in your editor. It has the same AI-assisted tooling, so you can ask a question at any point during the integration, with answers specific to your codebase. ![](/images/stripes-ai-assistant-vs-code/image6.png) If you want to get started integrating with Stripe you can go and start using the extension now. Visit the [docs](https://docs.stripe.com/stripe-vscode) to get started. Continue reading to learn more about the technical architecture that powers the extension. ## How it works To help address LLM hallucinations, we use Retrieval Augmented Generation (RAG) to pick the correct pieces of Stripe knowledge and place them into a prompt that we send to a LLM. This diagram explains how it works: ![](/images/stripes-ai-assistant-vs-code/image2.png) This is what happens when a question is asked: 1. **Classifier**: We classify a query into categories (API Reference, Documentation, Coding Help, etc). This also helps prevent any adversarial or irrelevant questions and allows us to improve our retrieval by expanding the query. 2. **Retrieval**: We continually tweak our index and query settings to improve our search. At a high level, though, we use a combination of keyword search using [BM25](https://www.elastic.co/blog/practical-bm25-part-2-the-bm25-algorithm-and-its-variables) in addition to [k-nearest-neighbor](https://www.elastic.co/guide/en/elasticsearch/reference/current/knn-search.html) embedding search to retrieve relevant document chunks. 3. **Rerank**: Consider the question “What are the main components of a Connect integration?” A naive search might return our doc on “[Getting started with Embedded Connect components](https://docs.stripe.com/connect/get-started-connect-embedded-components)” but a better doc to use would be our more general [Connect overview guide](https://docs.stripe.com/connect/how-connect-works). Reranking is the process of reordering search results after retrieval; we use page traffic and other factors to tune the order of results. 4. **Prompt**: We build a prompt combining the relevant document sources, code snippet examples, user code, and the user’s question, send the full prompt to an LLM (currently Claude Sonnet), and stream its response back to the VS Code assistant. To ensure the assistant is up to date, we have a nightly [Temporal](https://temporal.io/resources/on-demand/stripe) workflow that chunks and embeds thousands of our integration guides, API reference entries, code snippets, and summarized developer Discord threads. Since documents can be too long to be easily digestible by an LLM, we “chunk” by splitting documents into smaller portions. We then encode the semantic meaning of the chunks into [embeddings](https://www.cloudflare.com/learning/ai/what-are-embeddings/). We search over these embeddings as a part of our retrieval set. For the VS Code extension chat UI, we partnered with Microsoft to be one of the first users of the new [chat extensions](https://code.visualstudio.com/api/extension-guides/chat) framework. With this framework, any VS Code extension can contribute an “@ mentionable agent” to make GitHub Copilot more powerful. ## Evaluations Measuring success when working with AI is critical. since LLMs are nondeterministic, we need to be careful to objectively assess the quality of responses. Each user’s question (scrubbed to remove any personally-identifiable-information) and generated response is logged to our LLM evaluation tool. We can then compare cohorts of questions and their responses. ### Step 1: Building a dataset We constructed a “golden” dataset of user questions, paired with hand-picked documents that we determined were the best sources to answer with. But to fully stress test our RAG system we needed much more data. We augmented this golden dataset with a synthetic dataset, created by using an LLM to generate questions a user might ask which were relevant to each Stripe doc. We manually inspected the generated questions and removed any generated questions that did not make sense. After doing this, we now have thousands of questions alongside expected URLs. ![](/images/stripes-ai-assistant-vs-code/image5.png) ### Step 2: Measure When a user asks “Which customer address does Checkout use for taxes?,” responses should use the [https://docs.stripe.com/payments/checkout/taxes](https://docs.stripe.com/payments/checkout/taxes) doc. The simplest measure of correctness is: Did the retrieval step pick the right doc? However, the retrieval engine returns an ordered list of multiple docs, so we can be more sophisticated in measuring correctness. We use Mean Reciprocal Rank (MRR) to test how effective our relevance scoring and reranking is. If we retrieve a doc but it's ranked second on our list, that doc gets a higher score than if it were fifteenth. MRR is calculated as 1 / position, so if the correct doc is retrieved in the second position MRR will be 0.5, third will be 0.33, fourth would be 0.25, and so on. Taking the mean of these reciprocal ranks across all the questions in our dataset gives us an overall measure of correctness. ![](/images/stripes-ai-assistant-vs-code/image7.png) In the above example, an LLM generated the question, “What webhook events should I listen for in a subscription integration?” The doc used to generate this was [docs.stripe.com/billing/testing](https://docs.stripe.com/billing/testing), which is considered the *best* doc to answer this question, but our first result is [docs.stripe.com/webhooks](http://docs.stripe.com/webhooks). Since the correct result here (the billing testing doc) is ranked 4th, we have a reciprocal rank of 0.25. This indicates that there is room for improvement here. ### Step 3: Improve Armed with an evaluation system, we can formulate hypotheses about the behavior of our retrieval and adjust it accordingly. For example, we noticed that semantic embedding search alone was not doing a great job of picking relevant sections of the [API reference](https://docs.stripe.com/api). We started using a “hybrid” search combining traditional keyword-based and semantic embedding search, and saw an uplift in accuracy scores. For another example, we noticed one pattern that lots of questions phrased like “how do I build a payment app” would have low MRR due to including [Stripe Apps](https://docs.stripe.com/stripe-apps) docs. We improved our classification and reranking strategy to fix this and saw improvements. This evaluation suite runs nightly to ensure there are no regressions in quality. Currently, on our test synthetic dataset, we are including the best source ~91.11% of the time, and have a MRR of ~78%. We also manually evaluate live user logs (both the actual text of generated responses as well as source accuracy). To help scale those manual evaluations, we also built an automated [LLM-as-a-Judge system](https://huggingface.co/learn/cookbook/en/llm_judge). This system reads users threads and scores our AI responses (Did this response help answer the users question? Was it useful?). We continually improve the LLM-as-a-Judge by comparing its scores to our own. This helps scale our evaluation s as we get more usage. ## Conclusion With the Stripe VS Code AI assistant, you can quickly integrate Stripe by asking questions without leaving the comfort of your editor. Read the [Stripe VS Code extension documentation](https://docs.stripe.com/stripe-vscode) to learn more. We are just getting started - if you have additional thoughts or suggestions on other things you would like to see, do share them on [Stripe Insiders](https://insiders.stripe.dev/). For more Stripe developer learning resources, subscribe to our [YouTube Channel](https://www.youtube.com/@StripeDev). In today’s fast-paced business environment, building a data pipeline from Stripe to AWS for real-time payment analytics offers a wealth of opportunities. One of the primary advantages is the ability to monitor transactions as they occur, enabling businesses to swiftly identify issues such as fraud, chargebacks, and disputes. This not only enhances security but also minimizes financial losses. By analyzing payment data in real-time, companies can gain deep insights into customer behavior and preferences, allowing for targeted marketing strategies and personalized offers. This proactive approach can lead to increased customer engagement and loyalty. Additionally, real-time analytics facilitates accurate financial reporting and forecasting, empowering businesses to make informed decisions regarding resource allocation and budget planning. The capability to predict churn using real-time payment trends allows companies to implement effective retention strategies. Moreover, automated anomaly detection can uncover unusual payment activities, bolstering security measures against fraud. Integrating payment data with AWS analytics tools provides a comprehensive view of business performance, enabling metrics tracking such as conversion rates and refund rates. In essence, a real-time data pipeline from Stripe to AWS equips businesses with the tools they need to adapt to market changes, optimize operational performance, and make quicker, informed decisions, ultimately driving growth and profitability. In this post, we'll explore how to build a scalable, real-time payment analytics pipeline using Stripe, [Amazon Kinesis](https://aws.amazon.com/kinesis/), and [OpenSearch](https://aws.amazon.com//what-is/opensearch/). This architecture enables near real-time visibility into payment metrics while maintaining the flexibility to perform complex historical analyses. ## The challenges of payment analytics at scale Payment processors like Stripe generate numerous events for each transaction—from initial authorization attempts to final settlement. While Stripe provides a dashboard for many metrics, organizations often need deeper analytics capabilities, historical trend analysis, and real-time visibility into their payment flows. Traditional approaches to payment analytics often rely on periodic batch processing or direct database queries against the payment provider's API. While functional for smaller scales, these approaches break down as transaction volumes grow. Common pain points include: * API rate limits preventing timely data access * High latency for complex aggregations * Limited ability to correlate payment data with other business metrics * Difficulty maintaining historical trending data * Schema evolution challenges as payment models change Many organizations face common challenges when dealing with payment data. Transaction volumes can vary dramatically throughout the day, making capacity planning difficult. Payment events often need enrichment with business context before they become truly valuable for analytics. Additionally, different teams within an organization may need different views of the payment data, from real-time fraud detection to monthly revenue analysis. ## Architectural overview ![](/images/real-time-payment-analytics-stripe-to-aws-data-pipeline/image1.png) This sample solution uses AWS's managed services to create a robust, scalable pipeline with minimum custom coding: 1. **Stripe Payment System**: Source of payment events, generating webhooks for various transaction states and activities. 2. [**Amazon API Gateway**](https://aws.amazon.com/api-gateway/): Managed API endpoint service that provides authentication, throttling, and request validation for incoming Stripe webhooks. 3. [**AWS Lambda**](https://aws.amazon.com/lambda/) Processor: Serverless function that validates webhook signatures, enriches payment data with business context, and prepares events for streaming. 4. [**Amazon Kinesis Data Streams**](https://aws.amazon.com/kinesis/data-streams/): Managed streaming service that acts as a buffer and enables real-time processing of payment events at scale. 5. **Lambda Consumer**: Serverless function that reads from Kinesis stream, transforms data, and loads it into OpenSearch for analytics. 6. [**Amazon OpenSearch Service**](https://aws.amazon.com/opensearch-service/): Managed search and analytics engine that indexes payment data and enables complex queries and aggregations. 7. [**OpenSearch Dashboards**](https://docs.aws.amazon.com/opensearch-service/latest/developerguide/dashboards.html): Visualization platform for creating real-time dashboards and exploring payment analytics. 8. [**Amazon CloudWatch Metrics**](https://docs.aws.amazon.com/AmazonCloudWatch/latest/monitoring/working_with_metrics.html): Monitoring service tracking performance metrics and health of the entire pipeline. When a payment event occurs in Stripe, it triggers a webhook that sends the event to an API Gateway endpoint. This endpoint is configured with appropriate authentication and rate limiting to handle high volumes of incoming events securely. The API Gateway invokes a Lambda function that performs initial validation and enrichment of the event data. The enriched events are then published to a Kinesis Data Stream, which acts as a buffer and enables parallel processing of events. Kinesis provides configurable retention periods and the ability to replay events if needed, making it an ideal choice for this architecture. A second Lambda function processes the Kinesis stream, transforming the events into a format suitable for analytics and indexing them into OpenSearch. OpenSearch provides near real-time search and analytics capabilities, while OpenSearch Dashboards enables the creation of rich visualizations and dashboards. It’s also possible to route events from Kinesis to Kinesis Data Firehose to OpenSearch, without the need for the second Lambda function. This may create added latency due to the batching in Kinesis Data Firehose but may reduce costs by removing the extra function. View this [code sample](https://serverlessland.com/patterns/kinesis-data-firehose-firehose-opensearch-sam) for an example of this architecture. ## Implementation details ### Configuring Stripe webhooks First, you need to configure Stripe to send payment events to the pipeline. Stripe's webhook system supports signing of events for security and provides retry logic for failed deliveries. In the Stripe Dashboard, create a webhook endpoint pointing to your API Gateway URL. For production environments, enable the following event types: * `payment_intent.succeeded` * `payment_intent.failed` * `charge.succeeded` * `charge.failed` * `charge.refunded` ### API Gateway and event validation API Gateway serves as the secure entry point for Stripe events. You can implement webhook signature validation using a [Lambda authorizer](https://docs.aws.amazon.com/apigateway/latest/developerguide/apigateway-use-lambda-authorizer.html): ```javascript const crypto = require('crypto'); exports.handler = async (event) => { const signature = event.headers['stripe-signature']; const webhookSecret = process.env.STRIPE_WEBHOOK_SECRET; const body = event.body; const timestamp = event.headers['stripe-timestamp']; const signedPayload = `${timestamp}.${body}`; const expectedSignature = crypto .createHmac('sha256', webhookSecret) .update(signedPayload) .digest('hex'); if (expectedSignature !== signature) { throw new Error('Invalid signature'); } return { principalId: 'stripe', policyDocument: { Version: '2012-10-17', Statement: [{ Action: 'execute-api:Invoke', Effect: 'Allow', Resource: event.methodArn }] } }; }; ``` ### Kinesis Stream configuration Kinesis Data Streams serves as the backbone of the real-time pipeline, providing the scalability and reliability needed for processing payment events. Let's dive deep into the configuration and best practices for setting up Kinesis streams effectively. Proper capacity planning is crucial for Kinesis streams. Each shard can support writes of up to 1,000 records per second, up to a maximum data write total of 1 MB per second. Each PutRecords request can support up to 500 records. Each record in the request can be as large as 1 MB, up to a limit of 5 MB for the entire request, including partition keys. For payment events, calculate your required shard count using: ```python required_shards = ceil(max( peak_records_per_second / 1000, peak_mb_per_second / 1 )) ``` You can also implement automated scaling using the [Kinesis Auto Scaling API](https://aws.amazon.com/blogs/big-data/auto-scaling-amazon-kinesis-data-streams-using-amazon-cloudwatch-and-aws-lambda/). This can be set up in infrastructure-as-code (IaC) tools, like [Terraform](https://www.terraform.io/): ```terraform resource "aws_appautoscaling_target" "kinesis_target" { max_capacity = 10 min_capacity = 2 resource_id = "stream/${aws_kinesis_stream.payment_events.name}" scalable_dimension = "kinesis:stream:ShardCount" service_namespace = "kinesis" } resource "aws_appautoscaling_policy" "kinesis_scaling_policy" { name = "payment-events-scaling" policy_type = "TargetTrackingScaling" resource_id = aws_appautoscaling_target.kinesis_target.resource_id scalable_dimension = aws_appautoscaling_target.kinesis_target.scalable_dimension service_namespace = aws_appautoscaling_target.kinesis_target.service_namespace target_tracking_scaling_policy_configuration { target_value = 70 scale_in_cooldown = 300 scale_out_cooldown = 60 predefined_metric_specification { predefined_metric_type = "KinesisWriteProvisionedThroughputExceeded" } } } ``` For more detailed information, see the [GitHub Kinesis Autoscaling repo](https://github.com/aws-samples/kinesis-auto-scaling). ### Partition key strategy The partition key is important as it determines which shard in your Kinesis stream receives a given record. A well-designed partition key strategy is essential for: * Even distribution of data across shards * Maintaining ordered processing when needed * Optimal throughput utilization * Cost efficiency For payment events, there are several strategies to consider: #### 1. Customer-based partitioning ```python def generate_partition_key(payment_event): return payment_event['customer_id'] ``` This approach guarantees that all payments from the same customer go to the same shard, maintaining order. This is useful when you need to process a customer's payments in sequence (for example, handling subscription payments or maintaining running balances). However, if you have "hot" customers generating many transactions, this can lead to shard hot-spotting. #### 2. Random distribution ```python import uuid def generate_partition_key(payment_event): return str(uuid.uuid4()) ``` This provides excellent distribution across shards but sacrifices ordering guarantees. It's ideal for use cases where each payment is independent and order doesn't matter. #### 3. Hybrid approach (recommended) ```python import uuid from datetime import datetime def generate_partition_key(payment_event): # If order matters for this type of payment if payment_event.get('requires_ordering'): return f"{payment_event['customer_id']}" # For subscriptions, maintain order per subscription if payment_event.get('subscription_id'): return f"{payment_event['subscription_id']}" # For regular one-off payments, distribute randomly return str(uuid.uuid4()) ``` This strategy balances ordering requirements with distribution: * Maintains order when needed (subscriptions, dependent transactions) * Distributes independent transactions evenly * Prevents hot-spotting by isolating high-volume customers #### 4. Time-based distribution ```python def generate_partition_key(payment_event): timestamp = datetime.fromtimestamp(payment_event['created']) # Partition by hour to balance distribution and time-based querying hour_bucket = timestamp.strftime('%Y%m%d%H') # Add random suffix to distribute within the hour return f"{hour_bucket}#{uuid.uuid4().hex[:8]}" ``` This helps when you need to query data for specific time periods, while still maintaining good distribution within each time bucket. Remember that changing your partition key strategy on an existing stream can be disruptive, as it will change how records are distributed across shards. Plan such changes carefully and consider creating a new stream with the new strategy while maintaining the old one during transition. ### Event processing and enrichment A Lambda function processes events from Kinesis, performing any necessary transformations and enrichment before sending them to OpenSearch. This function can perform various useful tasks, including: * Flattening nested JSON structures * Converting timestamps to ISO 8601 format * Adding derived fields (e.g., payment method categories) * Enriching with business context (e.g., customer segments) ```javascript exports.handler = async (event) => { const records = event.Records.map(record => { const payment = JSON.parse(Buffer.from(record.kinesis.data, 'base64')); return { payment_id: payment.id, amount: payment.amount / 100, // Convert cents to dollars currency: payment.currency, status: payment.status, payment_method: { type: payment.payment_method_details.type, category: categorizePaymentMethod(payment.payment_method_details), country: payment.payment_method_details.card?.country }, timestamp: new Date(payment.created * 1000).toISOString(), // Add additional enriched fields }; }); // TODO: sendToOpenSearch(records); }; function categorizePaymentMethod(details) { if (details.type === 'card') { return details.card.brand === 'amex' ? 'premium_card' : 'standard_card'; } return 'alternative_payment'; } ``` Read more about [Best practices for consuming Amazon Kinesis Data Streams using AWS Lambda](https://aws.amazon.com/blogs/big-data/best-practices-for-consuming-amazon-kinesis-data-streams-using-aws-lambda/) on the AWS Big Data Blog. ### Conclusion This architecture provides a solid foundation for real-time payment analytics. It provides sub-minute visibility into payment metrics, scalable to millions of transactions per day, with flexible querying capabilities and historical trend analysis. The design is maintainable and extensible, thanks to offloading the harder tasks to services and using minimal custom code. The combination of Stripe's reliable webhook system, Kinesis's real-time processing capabilities, and OpenSearch's powerful analytics features creates a solution that can grow with your business while providing immediate visibility into critical payment metrics. Before designing your own solution based on this sample, remember to follow security best practices, including encryption at rest and in transit, proper IAM configurations, and regular security audits. For more Stripe developer learning resources, subscribe to our [YouTube Channel](https://www.youtube.com/@StripeDev). Ensuring reliable payment webhook processing is critical for business success. Failures can lead to lost revenue, damaged customer trust, and operational headaches. This guide explores implementing a resilient, multi-region payment processing architecture using AWS services and Stripe's API, following [AWS Well-Architected Framework](https://aws.amazon.com/architecture/well-architected) principles. ## The challenges of global payment processing Payment processing systems face unique challenges when operating at a global scale. Regional API outages, network latency, and rate limiting can all impact the ability to process transactions successfully. Traditional single-region architectures are vulnerable to these issues, potentially leading to service disruptions and lost transactions. Consider a scenario where your primary payment processing region experiences an outage. Without proper redundancy, your business could lose thousands or even millions in revenue during the downtime. Additionally, customers in different geographic regions may experience high latency when their payments are processed through a distant data center. You must also consider Stripe's API rate limits, which must be managed across multiple regions to ensure optimal throughput without exceeding quotas. Beyond the technical challenges, regulatory requirements often mandate specific data residency and processing requirements for payments. For instance, the European Union's GDPR and PSD2 regulations impose strict requirements on payment data handling and customer authentication. A multi-region architecture must account for these compliance requirements while maintaining system reliability. ## Architecture overview This sample solution implements a multi-region payment processing system that provides high availability, disaster recovery, and consistent performance across global deployments. The architecture uses several AWS services including [Amazon Route 53](https://aws.amazon.com/route53/), [Amazon DynamoDB Global Tables](https://aws.amazon.com/dynamodb/global-tables/), and [AWS Lambda](https://aws.amazon.com/lambda/), integrated with Stripe's payment processing API. ![](/images/load-balancing-stripe-api-calls-multiple-aws-regions/image1.png) This architecture diagram illustrates the key components and their interactions: 1. Route 53 serves as the initial entry point, performing DNS resolution and health checks 2. Traffic is then routed to the appropriate region. 3. Each region maintains identical infrastructure: - API Gateway endpoints for payment processing. - Lambda functions for business logic and rate limit management. - DynamoDB Global Tables for state management and rate limiting. 4. Stripe API integration is handled consistently across regions The flow begins with Route 53 DNS resolution, which directs traffic to the most appropriate region. This ensures optimal routing and automatic failover capabilities and then forwards requests to the regional API Gateway endpoint, maintaining low latency and high availability. First, Route 53 serves as the entry point for payment API requests. Health checks monitor the availability of payment processing endpoints in each region. DynamoDB Global Tables maintain consistent payment state across regions, while Lambda functions handle the actual payment processing logic and Stripe API interactions. Each component plays a role in ensuring system reliability: * **Route 53 Health Checking**: The health checking system continuously monitors endpoint availability across all regions. It uses sophisticated failure detection algorithms that consider both endpoint health and regional AWS health status. DNS failover can be configured with different routing policies (latency-based, weighted, or geolocation) to match your specific requirements. * **DynamoDB Global Tables**: This fully managed multi-master database service automatically replicates payment state across regions with conflict resolution. It provides single-digit millisecond read and write performance at any scale, with built-in encryption and point-in-time recovery. * **Lambda Payment Processing**: Serverless functions handle the payment logic with automatic scaling and fail-safe operation. Each function is configured with appropriate timeouts, memory allocation, and concurrent execution limits to ensure reliable operation under load. ## Implementation details Let's walk through implementing each component of this architecture. ### DNS and health checks with Route 53 First, we'll set up Route 53 health checks to monitor the payment processing endpoints. Here's the CloudFormation template for configuring health checks and DNS failover: ```yaml AWSTemplateFormatVersion: '2010-09-09' Description: 'Payment Processing Health Checks and DNS Failover' Resources: PaymentEndpointHealthCheck: Type: 'AWS::Route53::HealthCheck' Properties: HealthCheckConfig: Port: 443 Type: HTTPS ResourcePath: '/payment-health' FullyQualifiedDomainName: !Sub 'api.${AWS::StackName}.example.com' RequestInterval: 30 FailureThreshold: 3 HealthCheckTags: - Key: Name Value: PaymentEndpointHealth PaymentDNSRecord: Type: 'AWS::Route53::RecordSet' Properties: HostedZoneName: example.com. Name: !Sub 'api.${AWS::StackName}.example.com.' Type: A SetIdentifier: !Sub '${AWS::Region}-primary' Region: !Ref 'AWS::Region' Failover: PRIMARY HealthCheckId: !Ref PaymentEndpointHealthCheck AliasTarget: DNSName: !GetAtt PaymentDistribution.DomainName HostedZoneId: Z2FDTNDATAQYW2 EvaluateTargetHealth: true ``` Visit the [AWS Route53 documentation](https://docs.aws.amazon.com/AWSCloudFormation/latest/UserGuide/aws-resource-route53-healthcheck.html) for a complete description of each property. ### DynamoDB Global Tables for State Management Payment state consistency is critical across regions, and you can use DynamoDB Global Tables to maintain this state. Here’s an example of a definition (see the [Global Tables documentation](https://docs.aws.amazon.com/AWSCloudFormation/latest/UserGuide/aws-resource-dynamodb-globaltable.html) for a description of each property): ```yaml Resources: PaymentStateTable: Type: 'AWS::DynamoDB::Table' Properties: TableName: !Sub '${AWS::StackName}-payment-state' AttributeDefinitions: - AttributeName: PaymentId AttributeType: S - AttributeName: Status AttributeType: S KeySchema: - AttributeName: PaymentId KeyType: HASH - AttributeName: Status KeyType: RANGE StreamSpecification: StreamViewType: NEW_AND_OLD_IMAGES BillingMode: PAY_PER_REQUEST SSESpecification: SSEEnabled: true ReplicaSpecification: - Region: us-east-1 - Region: eu-west-1 - Region: ap-southeast-1 ``` ### Lambda Payment Processing Function The core payment processing Lambda function interfaces with the Stripe API. This CloudFormation template defines the function attributes and the logic: ```yaml Resources: PaymentProcessorFunction: Type: 'AWS::Lambda::Function' Properties: Handler: index.handler Runtime: nodejs22.x Code: ZipFile: | const stripe = require('stripe')(process.env.STRIPE_SECRET_KEY); const AWS = require('aws-sdk'); const dynamodb = new AWS.DynamoDB.DocumentClient(); exports.handler = async (event) => { try { // Extract payment details from event const { amount, currency, paymentMethod } = JSON.parse(event.body); // Initialize payment in DynamoDB await dynamodb.put({ TableName: process.env.PAYMENT_STATE_TABLE, Item: { PaymentId: event.requestContext.requestId, Status: 'PENDING', Timestamp: Date.now(), Region: process.env.AWS_REGION } }).promise(); // Create payment intent with Stripe const paymentIntent = await stripe.paymentIntents.create({ amount, currency, payment_method: paymentMethod, confirm: true, automatic_payment_methods: { enabled: true, allow_redirects: 'never' } }); // Update payment state await dynamodb.update({ TableName: process.env.PAYMENT_STATE_TABLE, Key: { PaymentId: event.requestContext.requestId }, UpdateExpression: 'SET #status = :status, StripePaymentId = :stripeId', ExpressionAttributeNames: { '#status': 'Status' }, ExpressionAttributeValues: { ':status': paymentIntent.status, ':stripeId': paymentIntent.id } }).promise(); return { statusCode: 200, body: JSON.stringify({ paymentId: event.requestContext.requestId, stripePaymentId: paymentIntent.id, status: paymentIntent.status }) }; } catch (error) { console.error('Payment processing error:', error); // Update payment state with error await dynamodb.update({ TableName: process.env.PAYMENT_STATE_TABLE, Key: { PaymentId: event.requestContext.requestId }, UpdateExpression: 'SET #status = :status, ErrorMessage = :error', ExpressionAttributeNames: { '#status': 'Status' }, ExpressionAttributeValues: { ':status': 'ERROR', ':error': error.message } }).promise(); return { statusCode: 500, body: JSON.stringify({ error: 'Payment processing failed', paymentId: event.requestContext.requestId }) }; } }; Environment: Variables: STRIPE_SECRET_KEY: '{{resolve:secretsmanager:StripeSecrets:SecretString:SecretKey}}' PAYMENT_STATE_TABLE: !Ref PaymentStateTable Role: !GetAtt PaymentProcessorRole.Arn Timeout: 30 MemorySize: 256 ``` ### Rate limit management Managing Stripe's API rate limits across multiple regions requires coordination to prevent exceeding global quotas while maximizing throughput. This implementation uses a distributed token bucket algorithm with DynamoDB Global Tables as the coordination mechanism. First, consider Stripe’s various rate limits: * Request limits per second (e.g., 100 requests/second) * Request limits per minute (e.g., 1000 requests/minute) * Concurrent request limits (e.g., 25 concurrent requests) * Account-level limits that apply across all regions The system needs to manage these limits while allowing each region to process payments independently. First, let's set up the DynamoDB table for rate limit management: ```yaml Resources: RateLimitTable: Type: 'AWS::DynamoDB::Table' Properties: TableName: !Sub '${AWS::StackName}-rate-limits' AttributeDefinitions: - AttributeName: ApiKey AttributeType: S - AttributeName: LimitType AttributeType: S KeySchema: - AttributeName: ApiKey KeyType: HASH - AttributeName: LimitType KeyType: RANGE TimeToLiveSpecification: AttributeName: ExpirationTime Enabled: true BillingMode: PAY_PER_REQUEST StreamSpecification: StreamViewType: NEW_AND_OLD_IMAGES GlobalSecondaryIndexes: - IndexName: LimitTypeIndex KeySchema: - AttributeName: LimitType KeyType: HASH Projection: ProjectionType: ALL ``` Here's a sample Lambda function that manages rate limiting: ```javascript const BUCKET_SIZE = 100; // Maximum tokens const REFILL_RATE = 10; // Tokens per second const REFILL_INTERVAL = 1000; // 1 second in milliseconds async function acquireToken(apiKey, limitType, tokensNeeded = 1) { const ddb = new AWS.DynamoDB.DocumentClient(); const now = Date.now(); try { // Optimistic locking with condition expression const result = await ddb.update({ TableName: process.env.RATE_LIMIT_TABLE, Key: { ApiKey: apiKey, LimitType: limitType }, UpdateExpression: ` SET tokens = if_not_exists(tokens, :bucket_size), lastRefillTimestamp = if_not_exists(lastRefillTimestamp, :now), lastUpdateRegion = :region `, ConditionExpression: ` attribute_not_exists(lockUntil) OR lockUntil < :now `, ExpressionAttributeValues: { ':bucket_size': BUCKET_SIZE, ':now': now, ':region': process.env.AWS_REGION }, ReturnValues: 'ALL_NEW' }).promise(); const bucket = result.Attributes; // Calculate token refill const timePassed = now - bucket.lastRefillTimestamp; const tokensToAdd = Math.floor(timePassed / REFILL_INTERVAL) * REFILL_RATE; const newTokens = Math.min(BUCKET_SIZE, bucket.tokens + tokensToAdd); // Check if we have enough tokens if (newTokens < tokensNeeded) { return false; } // Consume tokens with another optimistic lock await ddb.update({ TableName: process.env.RATE_LIMIT_TABLE, Key: { ApiKey: apiKey, LimitType: limitType }, UpdateExpression: ` SET tokens = :newTokens, lastRefillTimestamp = :now, lastUpdateRegion = :region `, ConditionExpression: ` lastUpdateRegion = :oldRegion AND lastRefillTimestamp = :oldTimestamp `, ExpressionAttributeValues: { ':newTokens': newTokens - tokensNeeded, ':now': now, ':region': process.env.AWS_REGION, ':oldRegion': bucket.lastUpdateRegion, ':oldTimestamp': bucket.lastRefillTimestamp } }).promise(); return true; } catch (error) { if (error.code === 'ConditionalCheckFailedException') { // Handle race condition by retrying await sleep(Math.random() * 100); // Random backoff return acquireToken(apiKey, limitType, tokensNeeded); } throw error; } } ``` To handle rate limits across regions: 1. Each region maintains its own token bucket in DynamoDB. 2. Global Tables replicate the state across regions. 3. [Optimistic locking](https://en.wikipedia.org/wiki/Optimistic_concurrency_control) prevents race conditions. 4. Each region gets a share of the global rate limit. The code that makes Stripe API calls can be wrapped to handle rate limiting with this approach: ```javascript const TOKEN_BUCKET_SIZE = 10; // Maximum number of tokens const REFILL_RATE = 1; // How many tokens to add per second let tokensAvailable = TOKEN_BUCKET_SIZE; let lastRefillTimestamp = Date.now(); // Function to simulate token refilling function refillTokens() { const now = Date.now(); const elapsedSeconds = Math.floor((now - lastRefillTimestamp) / 1000); if (elapsedSeconds > 0) { // Refill tokens based on elapsed time, making sure not to exceed the bucket size tokensAvailable = Math.min(TOKEN_BUCKET_SIZE, tokensAvailable + elapsedSeconds * REFILL_RATE); lastRefillTimestamp = now; } } async function acquireToken(apiKey, limitType) { // Refill tokens before trying to acquire one refillTokens(); if (tokensAvailable > 0) { // Token successfully acquired tokensAvailable--; return true; } else { // No tokens available return false; } } async function sleep(ms) { return new Promise(resolve => setTimeout(resolve, ms)); } async function makeStripeRequest(apiKey, limitType, requestFn) { const maxRetries = 3; const baseBackoffMs = 100; let retries = 0; while (retries < maxRetries) { try { // Try to acquire a token const acquired = await acquireToken(apiKey, limitType); if (!acquired) { // No tokens available, implement backoff const backoffMs = Math.min(Math.pow(2, retries) * baseBackoffMs, 30000); // Max backoff of 30 seconds await sleep(backoffMs); retries++; continue; } // Make the actual Stripe API call return await requestFn(); // Ensure requestFn is invoked correctly } catch (error) { // Handle Stripe rate limit errors and implement backoff logic if (error && error.code === 'rate_limit_exceeded') { const backoffMs = Math.min(Math.pow(2, retries) * baseBackoffMs, 30000); // Max backoff of 30 seconds await sleep(backoffMs); retries++; continue; } // Handle any other errors (log or rethrow) console.error('Error while making Stripe request:', error); throw error; // Rethrow unhandled errors } } throw new Error('Rate limit retries exceeded'); } ``` ## Conclusion Multi-region processing architecture provides a robust foundation for applications integrating with Stripe for global payment operations. By using AWS services and following Well-Architected Framework principles, you can create an architecture that's resilient to regional failures, maintains consistent payment state, and efficiently manages API rate limits. For further reading: - [AWS Well-Architected Framework](https://aws.amazon.com/architecture/well-architected/) - [Stripe API Documentation](https://stripe.com/docs/api) - [DynamoDB Global Tables](https://aws.amazon.com/dynamodb/global-tables/) - [Route 53 Application Recovery Controller](https://aws.amazon.com/route53/application-recovery-controller/) - [Using latency-based routing with Amazon CloudFront for a multi-Region active-active architecture](https://aws.amazon.com/blogs/networking-and-content-delivery/latency-based-routing-leveraging-amazon-cloudfront-for-a-multi-region-active-active-architecture/) Remember to thoroughly test your architecture in a staging environment before deploying to production, and always follow security best practices when handling payment information. For more Stripe learning resources, subscribe to our [YouTube channel](https://www.youtube.com/stripedevelopers). This article focuses on how to process Stripe's data in your AWS account with minimal code. You'll learn how to query your business and customer data using SQL, assisted by an LLM ([Large Language Model](https://en.wikipedia.org/wiki/Large_language_model)) for query generation. Additionally, it demonstrates how to enhance the security of your data integration by using the native Stripe-AWS integration, specifically the [Stripe Event Destination to Amazon EventBridge](https://docs.stripe.com/event-destinations/eventbridge) feature. ## Using Stripe Sigma to gain business insights Stripe stores not only the payment data of each user, but also payment-related data, such as subscription contracts and sales information for each plan. You can gain insights from the reports displayed on the dashboard, but sometimes more detailed and complex data is required to support hypotheses in business planning and marketing strategies. This data can help verify the results of implementation. [Stripe Sigma](https://stripe.com/sigma) allows you to use SQL to obtain data on Stripe. It also provides a SQL generation support function using generation AI, so you can obtain information that can be used for analysis by entering text such as "Tell me the conversion rate from trial to contract" or "Identify users who have not purchased for more than a year". To run SQL queries, navigate to the Sigma dashboard and access the query execution screen. You can perform analysis using SQL while referring to the schema displayed in the Schema tab. ![](/images/importing-sales-data-from-stripe-into-aws/image1.png) If you're unfamiliar with writing SQL, [Sigma Assistant](https://docs.stripe.com/stripe-data/write-queries#use-assistant) can help. At the top of the SQL input screen, there's a form where you can enter prompts. For example, you could enter: "Please compile the reasons for canceling subscriptions for the past year by product." Sigma Assistant then generates and executes an SQL query based on your input. In this case, it might generate: ```sql WITH cancelled_subscriptions AS ( SELECT s.id AS subscription_id, s.cancellation_details_reason, s.cancellation_details_comment, s.cancellation_details_feedback, si.price_id FROM subscriptions s JOIN subscription_items si ON s.id = si.subscription_id WHERE s.status = 'canceled' AND s.canceled_at >= DATE_ADD('year', -1, CURRENT_DATE) ), price_product_mapping AS ( SELECT p.id AS price_id, p.product_id FROM prices p ), product_info AS ( SELECT pr.product_id, prd.name AS product_name FROM price_product_mapping pr JOIN products prd ON pr.product_id = prd.id ) SELECT pi.product_name, cs.cancellation_details_reason AS reason, COUNT(cs.subscription_id) AS total_cancellations, ARRAY_AGG(DISTINCT cs.cancellation_details_comment) AS comments, ARRAY_AGG(DISTINCT cs.cancellation_details_feedback) AS feedbacks FROM cancelled_subscriptions cs JOIN price_product_mapping ppm ON cs.price_id = ppm.price_id JOIN product_info pi ON ppm.product_id = pi.product_id GROUP BY pi.product_name, cs.cancellation_details_reason ORDER BY total_cancellations DESC ``` You can also check the results of SQL execution on the Sigma dashboard. Here you can review whether the data you want to analyze has been correctly retrieved. ![](/images/importing-sales-data-from-stripe-into-aws/image2.png) ## Synchronizing report data to AWS without code Stripe Sigma analyses can be [scheduled daily, weekly, monthly, etc](https://docs.stripe.com/stripe-data/schedule-queries). In this case, when data acquisition is completed, you can receive the execution results in the Webhook event of `sigma.scheduled_query_run.created`. In a Node.js application, you can obtain the analysis results with the following code: ```ts // This is a public sample test API key. // Don't submit any personally identifiable information in requests made with this key. // Sign in to see your own test API key embedded in code samples. const stripe = require('stripe')(process.env.STRIPE_SECRET_API_KEY); // Replace this endpoint secret with your endpoint's unique secret // If you are testing with the CLI, find the secret by running 'stripe listen' // If you are using an endpoint defined with the API or dashboard, look in your webhook settings // at https://dashboard.stripe.com/webhooks const endpointSecret = 'whsec_...'; const express = require('express'); const app = express(); app.post('/webhook', express.raw({type: 'application/json'}), (request, response) => { let event = request.body; // Only verify the event if you have an endpoint secret defined. // Otherwise use the basic event deserialized with JSON.parse if (endpointSecret) { // Get the signature sent by Stripe const signature = request.headers['stripe-signature']; try { event = stripe.webhooks.constructEvent( request.body, signature, endpointSecret ); } catch (err) { console.log(`⚠️ Webhook signature verification failed.`, err.message); return response.sendStatus(400); } } // Handle the event switch (event.type) { case 'sigma.scheduled_query_run.created': const report = event.data.object; // await handleSigmaScheduledReport(report); break; default: // Unexpected event type console.log(`Unhandled event type ${event.type}.`); } // Return a 200 response to acknowledge receipt of the event response.send(); }); app.listen(4242, () => console.log('Running on port 4242')); ``` One of the reasons why the Webhook API source code can be complex is security. Almost all Webhook APIs provided by SaaS services require a public HTTP API. This means attackers could potentially call this API to attack your service by sending malicious data if they understand its usage or purpose. Therefore, you must protect your Webhook API from attackers by adding verification for request and event data. If you're using AWS and a serverless stack like [AWS Lambda](https://aws.amazon.com/lambda/) or [AWS Step Functions](https://aws.amazon.com/step-functions/) to build your workload, you can simplify this process by using [Stripe Event Destinations](https://docs.stripe.com/event-destinations/eventbridge) and [Amazon EventBridge](https://docs.aws.amazon.com/eventbridge/latest/userguide/eb-what-is.html). With this setup, Stripe sends your event data directly into your AWS account. Let's try integrating this to capture report data from Stripe Sigma. Open the [Stripe Workbench](https://docs.stripe.com/workbench) and visit the "Event destinations" tab. You can start creating a new Webhook endpoint by clicking the 'Create an event destination' button. ![](/images/importing-sales-data-from-stripe-into-aws/image3.png) You can choose the event type that Stripe will send to your AWS account or webhook API endpoint. If you want to subscribe to the event that occurs when Sigma succeeds in creating a new report, you should choose the `sigma.scheduled_query_run.created` event at this step. Moreover, if you want to get reports regarding your connected accounts, click **Connected accounts** at the top of this form. ![](/images/importing-sales-data-from-stripe-into-aws/image4.png) Then, you can choose the event destination. If you selected EventBridge, you need to enter your AWS account number and the region where you want to process the data. It's helpful to use a descriptive destination name to easily identify the purpose of each destination for future modifications or deletions. ![](/images/importing-sales-data-from-stripe-into-aws/image5.png) ![](/images/importing-sales-data-from-stripe-into-aws/image6.png) Stripe starts to create a new event bus in your AWS account as a Partner event source. You must click **Associate AWS partner event source** to accept this request. ![](/images/importing-sales-data-from-stripe-into-aws/image7.png) Once this event bus is created in your AWS account, you can build a custom workload in your AWS environment. Create a new event rule on this event bus and apply the event pattern JSON to it: ```json { "source": [{ "prefix": "aws.partner/stripe.com" }], "detail-type": ["sigma.scheduled_query_run.created"] } ``` You can then execute AWS resources like Lambda, Step Functions, and more, triggered from Stripe's events through EventBridge. ![](/images/importing-sales-data-from-stripe-into-aws/image8.png) Now let's build a simple example workflow using Lambda. This function sends a notification containing the report details. The function is triggered by EventBridge rules and downloads the report result sent from the Event Destinations. It then converts the CSV data to JSON format for sending a notification via [Amazon SNS](https://aws.amazon.com/sns/). This example can help you understand how to download the report result and parse it for processing according to your business needs. ```ts import https from 'https'; import { SNSClient, PublishCommand } from "@aws-sdk/client-sns"; export const handler = async (event) => { try { // Get the file URL from the event details const fileUrl = event.detail.data.object.file.url; // Stripe API key (preferably from an environment variable) const stripeApiKey = process.env.STRIPE_API_KEY; // Download the file const csvData = await downloadFile(fileUrl, stripeApiKey); // Convert the CSV data to a JS object const results = parseCSV(csvData); // Send a message to SNS await sendToSNS(results); return { statusCode: 200, body: JSON.stringify(results) }; } catch (error) { console.error('Error:', error); return { statusCode: 500, body: JSON.stringify({ error: 'An error occurred while processing the file.' }) }; } }; function downloadFile(url, apiKey) { return new Promise((resolve, reject) => { const options = { headers: { 'Authorization': `Bearer ${apiKey}` } }; https.get(url, options, (res) => { let data = ''; res.on('data', (chunk) => { data += chunk; }); res.on('end', () => { resolve(data); }); }).on('error', (error) => { reject(error); }); }); } function parseCSV(csvString) { const lines = csvString.split('\n'); const headers = parseLine(lines[0]); const results = []; for (let i = 1; i < lines.length; i++) { if (lines[i].trim() === '') continue; const values = parseLine(lines[i]); const obj = {}; for (let j = 0; j < headers.length; j++) { obj[headers[j]] = j < values.length ? values[j] : ''; } results.push(obj); } return results; } function parseLine(line) { const re = /(?:^|,)(?:"([^"]*(?:""[^"]*)*)"|([^,]*))/g; const result = []; let matches; while ((matches = re.exec(line)) !== null) { if (matches[1] !== undefined) { // Field surrounded by double quotes result.push(matches[1].replace(/""/g, '"').trim()); } else { // Field not surrounded by double quotes result.push(matches[2].trim()); } } return result; } async function sendToSNS(data) { const snsClient = new SNSClient({ region: process.env.AWS_REGION }); const topicArn = process.env.SNS_TOPIC_ARN; const params = { TopicArn: topicArn, Message: JSON.stringify(data), Subject: 'Processed CSV Data' }; try { await snsClient.send(new PublishCommand(params)); console.log(`Message successfully sent to SNS topic: ${topicArn}`); } catch (error) { console.error('Error sending message to SNS:', error); throw error; } } ``` As you can see, the integration between Stripe and AWS helps you build your workflow more simply and effectively. You don't need to set up and secure a separate Webhook API for Stripe, as Stripe sends your event data directly into your AWS account. This allows you to focus solely on creating event rules and data processing workflows. Additionally, Stripe Sigma helps you analyze your business and customer data more effectively. Sigma and Event Destinations will share the report CSV data with your AWS account, enabling you to process it using AWS services such as [Lambda](https://aws.amazon.com/lambda/), [Step Functions](https://aws.amazon.com/step-functions/), or [Glue](https://aws.amazon.com/glue/). ## Conclusion In a competitive business, it is essential to analyze business data such as identifying loyal users, upselling and cross-selling opportunities, and factors affecting cash flow like contract trends and payment issues leading to cancellations. Stripe can provide essential information on payments, billing management, and subscription contracts. Stripe Sigma allows you to easily collect and search the data you need for analysis. Many businesses collect information from multiple data sources, such as application usage and email subscription rates, for more detailed analysis. Users who have built an analysis platform on AWS can send information collected with Stripe Sigma to AWS without coding. You can build a platform that enables quick analysis of applications, development of marketing plans, price revisions, and consideration of new pricing models by using Stripe data transferred to [Amazon S3](https://aws.amazon.com/s3/) through Amazon EventBridge. To learn more about developing applications with Stripe, visit our [YouTube Channel](https://www.youtube.com/stripedevelopers). [![](/images/YouTube.png)](https://www.youtube.com/stripedevelopers) In this article, we will guide you on how to set up usage threshold alerts based on consumption for customers with pay-as-you-go plans. By integrating AWS's serverless tools with Stripe, you can create a streamlined and easy-to-manage notification system with minimal coding. This post introduces a new feature based on Sandbox, a new feature launched in 2024. Therefore, several features and APIs may not be available in the conventional test mode. Please refer to the [Stripe documentation](https://docs.stripe.com/sandboxes/dashboard/manage) and prepare a sandbox environment for testing in advance, as several features and APIs may not be available in the conventional test mode. ## Stripe can set up usage alerts for customers To establish a usage alert, you typically create a dedicated database table and build a mechanism to monitor customer usage. This often involves aggregating data or employing batch processing to determine if the alert conditions set by customers are met, followed by triggering a notification process. While this approach allows for independence from payment and cloud providers, it requires the maintenance and operation of systems such as databases, aggregation processes, and notification workflows, along with ongoing monitoring. However, with Stripe, you can bypass the complexity of developing these processes yourself. By using the [Billing Alert API](https://docs.stripe.com/api/billing/alert) provided by Stripe, you can receive webhook notifications for billing alerts, allowing you to promptly inform your customers. To configure an alert for a pay-as-you-go plan, you need the following information: * `customer_id`: Customer ID for which notifications are to be set. * `meter_id`: ID for aggregating usage of the plan requiring alerts. * `usage_threshold`: Threshold for sending notifications to that customer. Collect this information from the Stripe API or your system's database, then use these values to send an API request: ```ts // Set your secret key. Remember to switch to your live secret key in production. // See your keys here: https://dashboard.stripe.com/apikeys const stripe = require('stripe')('{{TEST_SECRET_KEY}}'); const alert = await stripe.billing.alerts.create({ title: 'Usage notification', usage_threshold: { filters: [ { customer: '{{CUSTOMER_ID}}', type: 'customer', }, ], meter: 'mtr_test_61RF5DZqblCUECsq641F3VmqeBU0qEMC', gte: 100, recurrence: 'one_time', }, alert_type: 'usage_threshold', }); ``` If you want to create an alert in another programming language, enter the following command in the **Shell** tab of [Stripe Workbench](https://docs.stripe.com/workbench). You can obtain the SDK code in your desired language by clicking the Print SDK request button. ```bash stripe billing alerts create \ --title="Usage notification" \ -d "usage_threshold[filters][0][customer]={{CUSTOMER_ID}}" \ -d "usage_threshold[filters][0][type]=customer" \ -d "usage_threshold[meter]=mtr_test_61RF5DZqblCUECsq641F3VmqeBU0qEMC" \ -d "usage_threshold[gte]=100" \ -d "alert_type=usage_threshold" \ -d "usage_threshold[recurrence]=one_time" ``` ![](/images/building-serverless-usage-notification-with-aws/image1.png) Let's test whether the alert we created works. First, set up your pay-as-you-go subscription pricing and products according to the [Stripe documentation](https://docs.stripe.com/billing/subscriptions/usage-based/implementation-guide). Then, use the API to send pay-as-you-go usage to Stripe and send the number that exceeds the threshold. ```bash curl -X POST https://api.stripe.com/v2/billing/meter_events \ -H "Authorization: Bearer sk_test_...kni1" \ -H "Stripe-Version: 2024-09-30.acacia" \ --json '{ "event_name": "api_request", "payload": { "stripe_customer_id": "{{CUSTOMER_ID}}", "value": "25" } }' ``` After executing this command, check the Events tab in Workbench. If you refresh the status, you will see that the `billing.alert.triggered` event has been triggered. ![](/images/building-serverless-usage-notification-with-aws/image2.png) By integrating this event into your system, you can trigger usage alerts without the need for a separate aggregation database. ## Sending alert events to Amazon EventBridge without writing code Now you can trigger a usage alert event by using Stripe's Billing Alert API. The next step is to integrate with a system to handle the triggered event. When integrating a SaaS application with a system, the Webhook API is usually used to subscribe to the events. However, to prepare a Webhook API, you need to add a process to verify whether the request is coming from the intended service to prevent unauthorized API requests from third parties. If your system is built on AWS, you can use [Amazon EventBridge](https://aws.amazon.com/eventbridge/) to skip the implementation of this Webhook API and its protection process. When launching the Workbench in the Stripe Dashboard, you can see the ***Event destinations*** tab on the panel. Note: If you don't see the *Event destinations* tab, it's likely that you're not using a sandbox environment or that you haven't enabled the Amazon EventBridge integration. Check the [Stripe Docs](https://docs.stripe.com/event-destinations/eventbridge) to make sure you're in a test or production environment that you can use and that it's enabled. ![](/images/building-serverless-usage-notification-with-aws/image3.png) Click the **Create an event destination** button to open the Stripe event sending configuration screen. First, you will be asked which type of event you want to send, so select `billing.alert.triggered`. ![](/images/building-serverless-usage-notification-with-aws/image4.png) Next, select the type of event destination. As of the time of writing, you can specify two destinations: (1) **Webhook endpoint**, which specifies an HTTPS REST API URL, and (2) **Amazon EventBridge**, which will be introduced later. ![](/images/building-serverless-usage-notification-with-aws/image5.png) This post uses EventBridge as an example to subscribe to the events. After choosing EventBridge as the destination, enter your AWS account ID and the AWS region in which you will use EventBridge for integration, and the name of the event destination as optional data. There is no need to create an IAM user or role, so use your account ID from the AWS management console. Click the **Create destination** button to prepare Stripe to send events to the specified AWS account and region. ![](/images/building-serverless-usage-notification-with-aws/image6.png) Finally, on the AWS account side, set up EventBridge to accept events sent from Stripe. Click the **Associate AWS partner event source** button displayed on the details page of the created event destination. ![](/images/building-serverless-usage-notification-with-aws/image7.png) This takes you to the screen where you can [associate the EventBridge Partner event source](https://docs.stripe.com/event-destinations/eventbridge#associate-partner-event-source) with the event bus on the AWS management console. Once you complete the association, you can route events triggered by Stripe using EventBridge rules. ![](/images/building-serverless-usage-notification-with-aws/image8.png) ## Building usage notifications within AWS Now you are ready to process events triggered by Stripe on AWS. Finally, let's create a simple demo on AWS to notify an email address when an event is received. To send notifications to email, Slack, etc., it is easy to use [Amazon SNS](https://aws.amazon.com/sns/). Using the AWS CLI, you can easily set up a mechanism to send notifications to any email address. First, create an SNS topic and subscribe to it with the following commands: ```bash aws sns create-topic \ --name my-notification-topic aws sns subscribe \ --topic-arn \ --protocol email \ --notification-endpoint your-email@example.com ``` Replace `` with the ARN of the topic you created earlier, and replace your-email@example.com with the email address where you want to receive notifications. When you execute the above command, a confirmation email will be sent to the specified email address. Click the link in the email to confirm your subscription. Next, let's create a new rule using the AWS CLI to handle the billing.alert.triggered event sent from Stripe: ```bash aws events put-rule \ --name "UsageNotification" \ --event-bus-name "Event Bus name starting with aws.partner/stripe.com/ed_test_" \ --event-pattern "{"source":[{"prefix":"aws.partner/stripe.com"}],"detail-type":["billing.alert.triggered"]}" \ --state ENABLED ``` Then, specify the SNS topic as the target of the rule you created: ```bash aws events put-targets \ --rule "UsageNotification" \ --event-bus-name "Event Bus name starting with aws.partner/stripe.com/ed_test_" \ --targets "Id"="1","Arn"="" ``` The connection is now complete. Use the [Stripe Meter Events AP](https://docs.stripe.com/api/v2/billing/meter-event/create)I to send data so that usage exceeds the alert threshold. If the connection is correct, event information will be sent to the email address registered in SNS. ![](/images/building-serverless-usage-notification-with-aws/image9.png) By using [AWS Lambda](https://aws.amazon.com/pm/lambda/) and [Step Functions](https://aws.amazon.com/step-functions/), you can implement a variety of workloads, such as notifying customers by email or reflecting the results in your application. Below is a sample of an email sending process using Lambda and [Amazon SES](https://aws.amazon.com/ses/). ```ts import { SendEmailCommand, SESClient } from "@aws-sdk/client-ses"; import Stripe from 'stripe'; const stripe = Stripe(process.env.STRIPE_SECRET_KEY); const sesClient = new SESClient({ region: "us-east-1" }); export const handler = async (event) => { try { const customer = event.detail.data.object.customer; const value = event.detail.data.object.value; const stripeCustomer = await stripe.customers.retrieve(customer); const email = stripeCustomer.email; const subject = "Usage notification"; const body = `Usage exceeded ${value}!`; const sendEmailCommand = new SendEmailCommand({ Destination: { ToAddresses: [email], }, Message: { Body: { Text: { Charset: "UTF-8", Data: body, }, }, Subject: { Charset: "UTF-8", Data: subject, }, }, Source: "your-verified-email@example.com", }); const response = await sesClient.send(sendEmailCommand); console.log(`Alert email sent to ${email}`); return { statusCode: 200, body: 'Email sent successfully', messageId: response.MessageId }; } catch (error) { console.error('Error:', error); if (error.name === "MessageRejected") { return { statusCode: 400, body: 'Email rejected', error: error.message }; } return { statusCode: 500, body: 'Error processing request', error: error.message }; } }; ``` This approach allows you to implement a usage notification flow with minimal resources and application code, using AWS services. ## **Conclusion** A pay-as-you-go pricing model is an effective way to enhance the value of services for customers. This approach allows customers to pay only for what they actually use, helping service providers minimize the risk of contract cancellations that can arise from cost concerns. However, customers may worry about potential charges exceeding their budgets under a pay-as-you-go model. To address this concern, it's essential to implement a mechanism that notifies customers when their usage approaches an upper limit. In addition to the standard billing process, a system must be developed to monitor customer usage and send alerts. This added complexity may discourage some service providers from embracing a pay-as-you-go model. Fortunately, when using AWS and Stripe, you can establish a streamlined alert notification system with minimal coding. By using Stripe's Event Destinations to send alert events to Amazon EventBridge, and integrating communication services like Amazon SNS and SES, you can create a mechanism that keeps customers informed before exceeding their budgets. To learn more about developing applications with Stripe, visit our [YouTube Channel](https://www.youtube.com/stripedevelopers). [![](/images/YouTube.png)](https://www.youtube.com/stripedevelopers) [https://www.youtube.com/stripedevelopers](https://www.youtube.com/stripedevelopers) In modern cloud architectures, securing payment processing credentials requires sophisticated management solutions that go beyond basic secret storage. While [AWS Parameter Store](https://docs.aws.amazon.com/systems-manager/latest/userguide/systems-manager-parameter-store.html) offers a cost-effective starting point, organizations processing payments at scale need more robust solutions that provide automatic rotation, comprehensive audit capabilities, and zero-downtime deployment strategies. This article explores a production-grade implementation for managing Stripe API keys using [AWS Secrets Manager](https://aws.amazon.com/secrets-manager/), with a focus on enterprise-scale requirements and security best practices. ## Understanding the Challenge Payment processing credentials represent one of the most critical security assets in any organization's infrastructure. A compromised API key could lead to unauthorized transactions, data breaches, and significant financial losses. Traditional approaches to key management often fall short in several critical areas that need to be addressed in a comprehensive solution. Many organizations begin their journey with AWS Parameter Store, attracted by its low cost and basic functionality. However, as payment processing operations scale, several limitations become apparent: First, Parameter Store lacks native rotation capabilities, requiring teams to implement custom rotation logic. This often leads to inconsistent rotation practices, and increased risk of human error during manual rotations. The service also provides limited audit capabilities, making it more difficult to track who accessed secrets and when. Second, Parameter Store's API rate limits can impact high-traffic applications, and its lack of native multi-region replication capabilities complicates global deployments. These limitations become particularly problematic as organizations scale their payment processing infrastructure across multiple regions and environments. Third, basic secret storage solutions often lack sophisticated access control mechanisms and monitoring capabilities, making it difficult to implement the principle of least privilege and detect potential security incidents. AWS Secrets Manager addresses these limitations through a comprehensive set of features designed specifically for managing sensitive credentials. While it comes at a higher cost compared to Parameter Store, the enhanced security capabilities and reduced operational overhead often justify the investment for production payment processing systems.It can handle larger secrets (up to 64KB) and allows for cross-account access, making it suitable for enterprises managing secrets across multiple AWS accounts. The decision to use AWS Parameter Store or AWS Secrets Manager depends largely on specific organizational requirements. Parameter Store is ideal for teams looking to manage general configuration data alongside some sensitive information, while Secrets Manager is better suited for organizations with strict security requirements and the need for automated secret management. Many organizations use both services in tandem, using Parameter Store for general configuration and Secrets Manager for their most sensitive credentials. ## Main Features for Payment Processing Several features make Secrets Manager particularly well-suited for managing Stripe API keys. First, the service provides built-in [automatic rotation capabilities](https://docs.stripe.com/keys#rolling-keys) that can be customized to meet specific requirements. This eliminates the need for custom rotation implementations and ensures consistent rotation practices across all environments. Second, Secrets Manager offers comprehensive audit trails through [AWS CloudTrail](https://aws.amazon.com/cloudtrail/), allowing organizations to track every access attempt and modification to their secrets. This capability is crucial for maintaining compliance with security standards and investigating potential security incidents. Third, the service integrates deeply with [AWS IAM](https://aws.amazon.com/iam/), enabling fine-grained access control and the implementation of least privilege principles. Organizations can define precise permissions for who can access secrets and under what conditions. ## Implementation Strategies A production-grade implementation of Stripe API key management requires careful consideration of several key aspects. ### Multi-Environment Key Management When implementing Stripe API key management across multiple environments (development, staging, production), it's important to maintain strict isolation while enabling efficient automation. A practical approach is to use environment-specific paths in Secrets Manager combined with IAM roles that enforce access boundaries. This allows you to maintain separate rotation schedules - for example, rotating development keys every 7 days while keeping production on a 30-day cycle - while ensuring that development workloads can never accidentally access production credentials. The real power of this approach comes from combining environment-specific paths with dynamic IAM policies. By implementing a naming convention like `/{environment}/stripe/api-key` and using IAM policy conditions that reference environment tags on both the secret and the accessing resource, you can create a single template that safely deploys across all environments. Here's an example of how this can be implemented using CloudFormation with ECS tasks: ```yaml Parameters: Environment: Type: String AllowedValues: ['dev', 'staging', 'prod'] Resources: StripeApiKeySecret: Type: 'AWS::SecretsManager::Secret' Properties: Name: !Sub '/${Environment}/stripe/api-key' Description: !Sub 'Stripe API key for ${Environment} environment' Tags: - Key: Environment Value: !Ref Environment ApplicationRole: Type: 'AWS::IAM::Role' Properties: AssumeRolePolicyDocument: Version: '2012-10-17' Statement: - Effect: Allow Principal: Service: ecs-tasks.amazonaws.com Action: 'sts:AssumeRole' Policies: - PolicyName: StripeKeyAccess PolicyDocument: Version: '2012-10-17' Statement: - Effect: Allow Action: 'secretsmanager:GetSecretValue' Resource: !Ref StripeApiKeySecret Condition: StringEquals: 'aws:ResourceTag/Environment': !Ref Environment ``` This configuration ensures applications can access only the secrets corresponding to their environment, while maintaining a consistent and automatable deployment pattern across your infrastructure. The combination of path-based naming and IAM conditions provides multiple layers of security, adhering to the defense-in-depth principle. ### Zero-Downtime Rotation Strategy To achieve zero-downtime during API key rotations, you can implement a graceful transition period where both the old and new keys remain valid. This requires maintaining both keys in your secrets management and implementing intelligent retry logic in your application code. When Secrets Manager initiates a rotation, it creates a new version of the secret containing both the current and new API keys. This allows your applications to fall back to the previous key if they encounter any authentication failures with the new key during the transition period. The implementation requires your application code to handle potential authentication failures intelligently. When a request fails with an authentication error, the code should automatically attempt to refresh its cached key from Secrets Manager and retry the operation. This pattern ensures that even if an application instance has a stale key cached when rotation occurs, it can seamlessly transition to the new key without disrupting payment processing. Here's an example implementation of this pattern: ```python import time import json import stripe from some_module import SecretCache # Adjust this based on where SecretCache is defined class StripeKeyManager: def __init__(self, secret_name): self.secret_name = secret_name self.secret_cache = SecretCache() self._stripe_key = None self._last_refresh = 0 def get_stripe_key(self): """Get current Stripe API key with caching and refresh logic""" current_time = time.time() if current_time - self._last_refresh > 300: # Refresh every 5 minutes try: secret = self.secret_cache.get_secret_string(self.secret_name) secret_dict = json.loads(secret) self._stripe_key = secret_dict['STRIPE_API_KEY'] self._last_refresh = current_time except Exception as e: # Add more specific exceptions if possible # Handle errors, such as logging the error or re-raising exceptions print(f"Error fetching secret: {e}") raise return self._stripe_key def execute_stripe_operation(self, operation): """Execute Stripe operation with automatic retry on auth failure""" max_retries = 2 for attempt in range(max_retries): try: stripe.api_key = self.get_stripe_key() return operation() except stripe.error.AuthenticationError: if attempt == max_retries - 1: raise # Force cache refresh and retry with new key self._last_refresh = 0 self.secret_cache.invalidate(self.secret_name) time.sleep(1) # Brief pause before retry except Exception as e: # Handle any other exceptions print(f"Unexpected error: {e}") raise ``` For full implementations of this logic, see this [GitHub repo](https://github.com/aws-samples/aws-secrets-manager-rotation-lambdas) with a collection of key rotation Lambda functions. This approach ensures that your payment processing system remains fully operational during key rotations, with no dropped requests or errors visible to your end users. The retry logic handles the transition period automatically, while the caching mechanism prevents excessive calls to Secrets Manager. ## Monitoring and Alerting Framework A comprehensive monitoring solution is essential for maintaining the security and reliability of payment processing credentials.First, implement real-time monitoring of secret access patterns through CloudWatch metrics. This helps detect unusual access patterns that might indicate a security incident, such as attempted unauthorized access or potential credential leakage. Next, create alerts for key rotation events, including both successful rotations and failures. This ensures immediate notification if a rotation fails or if a key approaches its rotation deadline. Also, implement monitoring for application-level metrics related to key usage, such as authentication failures or API call patterns. This helps identify potential issues before they impact payment processing capabilities. Despite preventive measures, organizations must be prepared for potential security incidents involving credentials. A comprehensive emergency response plan should include immediate key rotation procedures that can be triggered manually in response to a suspected compromise. This should include automated processes for creating new keys, updating applications, and revoking compromised credentials. ## Multi-Region Deployment Patterns Global organizations often need to process payments across multiple geographic regions. This requires careful consideration of key management strategies. You can implement cross-region replication of secrets to ensure high availability and disaster recovery capabilities. AWS Secrets Manager supports automatic replication of secrets across regions, maintaining consistency while reducing operational overhead. Also, consider region-specific rotation schedules to minimize the risk of simultaneous rotations across all regions. This helps maintain system stability and simplifies troubleshooting if issues arise. Additionally, you can implement region-specific monitoring and alerting to account for different access patterns and compliance requirements across geographic locations. ## Cost Considerations While AWS Secrets Manager comes at a higher cost compared to Parameter Store, several factors may justify the investment. The built-in rotation capabilities eliminate the need for custom rotation implementations, reducing development and maintenance costs. Comprehensive audit capabilities simplify compliance reporting and incident investigation, reducing administrative overhead. Automated multi-region replication capabilities eliminate the need for custom replication solutions. ## Conclusion Implementing a production-grade solution for managing Stripe API keys requires careful consideration of multiple factors, from technical implementation details to security and compliance requirements. While AWS Secrets Manager provides a solid foundation, successful implementation requires thoughtful design of rotation strategies, monitoring solutions, and emergency procedures. By following the patterns and practices outlined in this article, organizations can build a robust key management solution that ensures secure and reliable payment processing operations while maintaining compliance with industry standards and best practices. Remember that security is an ongoing process, not a one-time implementation. Regularly review and update key management practices to address new threats and changing business requirements. Maintain open communication channels between security, development, and operations teams to ensure that security practices evolve alongside technical infrastructure. The future of payment processing will likely bring new challenges and requirements for credential management. Building a flexible and robust foundation today will help organizations adapt to these changes while maintaining the security and reliability of their payment processing infrastructure. For more Stripe learning resources, subscribe to our [YouTube channel](https://www.youtube.com/stripedevelopers). As more businesses shift into digital commerce, merchants want to understand their customers’ spending patterns across multiple channels—from websites and mobile apps to physical stores to shelf edge selling models. This data helps to create a personalized customer experience, enhancing operations, and guiding business decisions. Getting a complete view of customer activity is difficult due to the fragmentation of payment systems. Customers pay across different methods such as physical cards, digital wallets (like Apple Pay, Google Pay), or other tokenized payment methods. These payments can happen across different channels and payment processors, making tracking the full customer journey hard. The [Payment Account Reference (PAR)](https://www.securetechalliance.org/wp-content/uploads/EMVCo-PAR-WP-FINAL-April-2018.pdf) helps to solve these challenges. In this post, we’ll look at what PAR is, how merchants can use it, and the benefits it brings to both businesses and their customers. ## What Is a Payment Account Reference? The Payment Account Reference (PAR) is a 29-character alphanumeric identifier introduced by [EMVCo](https://www.emvco.com/) to help merchants link transactions and accounts without compromising sensitive payment data. It was introduced by EMVCo in 2014, with an aim of reducing the usage of PANs for merchants, as this has significant PCI burdens for them by bringing different systems in scope for a PCI audit. Many merchants were moving over to tokenization strategies, where PANs are tokenized; however, this brought additional complexity with a token being mapped 1:1 with a PAN, meaning any changes to the PAN would result in a new token. The question that PARs answer is “How can we store a non-sensitive value that provides better insights than a token and does not reduce functionality”. ## Key Characteristics of PAR: * Unique Relationship: PAR has a one-to-one relationship with a primary account number (PAN) but supports a one-to-many relationship with tokens. For example, PAR links the physical card PAN and its corresponding digital wallet tokens (e.g., device PANs for Google Pay and Apple Pay). * Non-Financial Reference: PAR is not usable for initiating payments or financial transactions. It’s solely a reference tool for linking transactions across systems. * Non-Reversible: PAR cannot be reverse-engineered to derive the PAN or payment tokens, making it secure and compliant with data protection regulations like [PCI DSS](https://www.pcisecuritystandards.org/standards/pci-dss/). * Cross-Channel and Cross-Processor Visibility: Since it’s independent of the payment processor and payment method, a PAR remains the same regardless of where or how the cardholder transacts. The PAR’s purpose is to empower merchants with better visibility into customer activities across payment ecosystems, without exposing sensitive payment information. In effect the PAR represents the cardholders payment account with the issuing bank, rather than a specific PAN or token. ![](/images/tracking-customer-spend-omnichannel-multiprocessor-environment/image1.png) ## The Evolution: From PAN to Tokenization to PAR Historically, merchants relied on the primary account number (PAN) to link transactions to cards. However, the PAN is sensitive data, subject to stringent PCI DSS requirements, and cannot always account for shifts in customer behavior—such as the use of digital wallet tokens or new card issuance after a card replacement. Tokenization addressed some of these security challenges, enabling the use of dynamic PANs (e.g., device-specific PANs for mobile wallets) without exposing the actual card details. However, tokenization didn’t solve the fragmentation issue, as each token remains unique to a specific channel, environment, or platform. That’s where PAR comes in: By aggregating all of these variations under a single reference that spans across cards, tokens, and payment processors, PAR provides a unified view of customer activity. ## PAR in Action: An Omnichannel Use Case Let’s take a closer look at how merchants can benefit from PAR with a typical omnichannel example, imagine a retail brand with both an online presence and a nationwide chain of brick-and-mortar stores. If we visualize this approach, a retail customer buys a pair of trainers, and has a monthly subscription for a delivery pass both using a physical card. They then buy a coffee from the restaurant in a retail location where they pay with Apple Pay on their Apple Watch, and then buy the gift wrapping service for the trainers they just bought using Apple Pay with their iPhone. Even if all these transactions are processed by different payment processors, you would still have the same PAR value returned, meaning you can now attribute that spend to the right customer. Even if the customer replaces their card due to loss, you’d still get the same PAR value returned, this helps you build a true picture of your customers' overall lifetime spending, helping you to further optimize and understand their needs, and supplement their experience with targeted marketing campaigns. ![](/images/tracking-customer-spend-omnichannel-multiprocessor-environment/image2.png) To dive into this in more detail, with the different customer journeys we’ve highlighted; 1. **Online Purchase with a Digital Wallet**: A customer places an order on the retailer’s website using Apple Pay. Along with other payment details, the transaction returns a PAR value from the card network, captured by the retailer’s systems for future reference. 2. **In-Store Purchase with Chip & PIN**: The same customer visits a physical store and pays using their physical card. Even though the in-store transaction takes place in a different channel and is processed by a different payment provider, the PAR returned by the card network matches the one linked to the Apple Pay transaction. 3. **Continuity Despite Card Replacement**: Months later, the customer loses their card and receives a replacement with a new PAN. Both in-store and online purchases still return the same PAR value—ensuring continuity in linking the customer’s past and future transactions. Using the PAR, the retailer can stitch together the customer’s transaction history into a cohesive picture, regardless of the payment method, channel, or processor. ## Benefits of PAR for Merchants The introduction of PAR offers several tangible technical and business benefits for merchants, especially those operating across multiple channels or processors: ### 1. Enhanced Customer Profile and Personalization PAR enables merchants to aggregate customer purchase data into a unified profile. This can unlock powerful insights into preference trends, spending behavior, and cross-channel activities. With this data, merchants can design personalized marketing offerings (such as loyalty rewards or product recommendations) and improve the overall customer experience. The unique identifier of a PAR ensures that even if customers replace their payment cards or switch devices, their transactional journey remains intact and visible to the merchant. By breaking down the barriers of fragmented data, PAR makes it feasible for merchants to personalize interactions at every touchpoint, enhance customer satisfaction, and strengthen customer loyalty. ### 2. Cross-Channel Visibility For omnichannel merchants, PAR bridges the gap between transactions made via physical cards, mobile wallets, or online payments. By providing a single reference point across these diverse payment methods, PAR helps to reduce the silos of transactional data, enabling merchants to implement cohesive loyalty programs, reconcile complex sets of payments effortlessly, and accurately measure performance across all channels. This not only streamlines operational workflows but also enables merchants to discover actionable insights from a comprehensive view of customer activities, which ultimately leads to a more unified customer experience. ### 3. Reduced Security Risks Since PAR is a non-financial token and is not considered PCI account data, merchants can reduce their reliance on PAN storage, mitigating the risks associated with sensitive payment data and reducing compliance overhead. By minimising the need to handle and store PANs, merchants not only enhance their security posture but also decrease the burden of compliance with stringent regulations like PCI DSS. This reduction in data sensitivity allows companies to innovate and expand their payment systems without compromising security. ### 4. Resilience to Account Changes Customers frequently replace their cards for various reasons—such as loss, expiration, or fraud. As PAR remains consistent regardless of PAN or token changes, merchants can maintain seamless continuity in transaction tracking and customer accounts. By using a stable reference (the PAR), this allows businesses to preserve the historical continuity of a customer's transaction history, ensuring that individualized customer insights are not disrupted by changes in payment credentials. This resilience helps maintain a consistent customer experience, bolstering customer trust and loyalty in the face of inevitable account updates. ### 5. Processor Independence When working with multiple payment processors, maintaining a consistent view of transactions can be complex. PAR’s processor-agnostic nature ensures that merchants get the same referencing system across multiple platforms or processors, simplifying data analysis. This consistency allows merchants to switch between or integrate additional processors without the risk of losing customer transaction continuity, enhancing operational flexibility and enabling more strategic partnerships and innovations in payment processing. As a result, businesses can optimize their payment systems to better suit their evolving needs without being hindered by technological constraints. ### 6. Customer Benefits As a customer, PAR brings significant benefits that directly enhance your shopping experience and security. With PAR enabling merchants to create a unified view of your purchasing journey across multiple channels and payment methods, you enjoy more personalized and relevant interactions. This means you receive tailored offers, loyalty rewards, and product recommendations that truly match your interests and needs, making your shopping experience more enjoyable and engaging. The use of PAR also contributes to increased security for your personal payment information. Since PAR is a non-financial reference that does not store sensitive card data, merchants are better equipped to protect your information against data breaches, leading to a safer transactional environment. ## Conclusion: Unlocking New Opportunities with PAR The Payment Account Reference (PAR) is more than just a technical addition to payment infrastructure—it’s a step forward in empowering merchants to adapt to modern customer behaviors and complex payment ecosystems. By enabling a unified view of transactions across cards, wallets, processors, and even PAN changes, PAR helps merchants deliver better customer experiences, make data-driven decisions, and stay secure in an ever-evolving payments landscape. Whether you’re an omnichannel merchant, a multiprocessor business, or an enterprise looking to deepen customer insights, PAR is a valuable tool to add to your toolkit. Useful resources: - [American Express PAR guide](https://developer.americanexpress.com/products/payment-account-reference-public/overview) - [Visa PAR guide](https://developer.visa.com/capabilities/visa-par-inquiry) - [Mastercard PAR guide](https://developer.mastercard.com/payment-account-management/documentation/api-overview/get-par/) - [Discover PAR guide](https://www.discoverglobalnetwork.com/content/dam/discover/en_us/dgn/docs/payment-account-reference-overview.pdf) - [Role of the Payment Account Reference (PAR) Within the Payments Lifecycle](https://www.uspaymentsforum.org/role-of-the-payment-account-reference-par-within-the-payments-lifecycle/) To learn more about developing applications with Stripe, visit our [YouTube Channel](https://www.youtube.com/stripedevelopers). Every day, thousands of developers trust Stripe to handle their critical payment infrastructure, from small startups to Fortune 500 companies. While Stripe's APIs are powerful and well-documented, there are several key areas where attention to detail can make the difference between a smooth integration and potential challenges down the road. The good news is that with proper planning and understanding of core concepts, you can build an integration that's both robust and maintainable. This guide explores ten essential tips that will help you build production-ready Stripe integrations from day one. Whether you're implementing your first payment form or building a complex subscription system, these insights will help you create reliable payment experiences for your users. ## 1. Perfect the Art of Webhook Handling Webhooks are the backbone of real-time payment processing so getting them right is crucial for your application's reliability. A robust webhook implementation starts with proper event verification. Each webhook event payload that Stripe sends includes a signature in the Stripe-Signature header,This signature is your first line of defense against unauthorized requests. When implementing webhook handling, start by using Stripe's built-in verification tools to ensure events are legitimately from Stripe and haven't been tampered with. This verification process is straightforward but essential - think of it as checking ID at the door of your application. The process involves using your webhook secret (available in your [Stripe dashboard](https://dashboard.stripe.com/)) to verify the cryptographic signature of each incoming event: ```python # Python example sig_header = request.headers.get('stripe-signature') endpoint_secret = 'whsec_...' try: event = stripe.Webhook.construct_event( payload, sig_header, endpoint_secret ) except stripe.error.SignatureVerificationError as e: print('Webhook signature verification failed.' + str(e)) return jsonify(success=False) ``` Use the [interactive webhook event builder](https://docs.stripe.com/webhooks/quickstart?lang=python) to set-up and deploy your webhook, and find more examples for common runtimes. The next aspect of webhook handling is implementing [idempotency](https://en.wikipedia.org/wiki/Idempotence). Stripe may occasionally send the same webhook event multiple times to ensure delivery, so your workload needs to handle these duplicate events gracefully. The solution is to store webhook event IDs and check for duplicates before processing. Think of this like maintaining a guest list at an event - you want to ensure each guest only enters once, even if they show up at the door multiple times. This prevents double-processing of events, which could lead to issues like duplicate refunds or incorrect inventory updates. Here's a practical pseudo-code implementation: ```python def handle_webhook(event): if already_processed(event.id): return success_response() # Process the event process_webhook_event(event) store_processed_event_id(event.id) return success_response() ``` Another important aspect of webhook handling is the response timing. Stripe expects a quick acknowledgment of webhook receipt, in the form of a 2xx HTTP status code. However, processing the webhook event might take time - you might need to update your database, send emails, or perform other business logic. The solution is to separate the concerns of acknowledging receipt and processing the event. The best practice is to return a 2xx response quickly and handle the actual webhook processing asynchronously. This approach is similar to a restaurant taking your order (quick acknowledgment) before preparing your food (longer processing time). This prevents timeouts and ensures Stripe knows you received the event, while giving your application the time it needs to process the event properly. Most common web server frameworks have native approaches or additional packages to implement task queues asynchronously, such as [Celery](https://github.com/celery/celery) in Python. ## 2. Navigate Test and Live Environments Like a Pro One of the most critical aspects of a successful Stripe integration is managing the transition between test and live environments. This separation isn't just a development convenience - it's a key safety mechanism that prevents accidental processing of real payments during development and testing. The foundation of environment management starts with proper API key handling. Every Stripe account comes with two sets of API keys: one for testing and one for live transactions. These keys should never be hardcoded in your application. Instead, implement a robust configuration management system that uses environment variables. This approach allows you to easily switch between environments and keeps your sensitive keys secure: ```javascript const stripe = require('stripe')(process.env.STRIPE_SECRET_KEY); ``` An important but often overlooked aspect of environment management is webhook configuration. Your application should maintain separate webhook endpoints for test and live modes. This separation serves multiple purposes: it allows you to test webhook handling without affecting production data, enables different logging levels for each environment, and prevents test webhooks from triggering production systems. Consider implementing a configuration structure as shown in this JavaScript example: ```javascript // config.js module.exports = { development: { webhookSecret: process.env.STRIPE_TEST_WEBHOOK_SECRET, webhookUrl: 'https://dev.yourapp.com/stripe/webhook' }, production: { webhookSecret: process.env.STRIPE_LIVE_WEBHOOK_SECRET, webhookUrl: 'https://yourapp.com/stripe/webhook' } }; ``` Beyond API keys and webhooks, maintaining distinct logging and monitoring systems for test and live environments is essential for operational excellence. This separation allows you to catch issues early in the test environment while keeping your production logs clean and focused. Consider implementing different log levels and monitoring thresholds for each environment, and ensure your team has clear visibility into both systems while maintaining proper access controls. Your monitoring strategy should include tracking key metrics like successful payment rates, webhook delivery success rates, and API response times. These metrics often differ between test and live environments, and understanding these differences can help you spot issues before they affect your customers. ## 3. Implement Bulletproof Error Handling In payment processing, errors are not just possible - they're inevitable. The key to building a robust system lies in how you handle these errors. A well-implemented error handling system can mean the difference between a minor hiccup and a major service disruption. The first step in building robust error handling is understanding and properly categorizing different types of Stripe errors. Each error type requires a different response strategy. For instance, a card decline due to insufficient funds should trigger a different response than an API timeout. Here's how to implement if-based error handling immediately after creating a Payment Intent: ```javascript try { const paymentIntent = await stripe.paymentIntents.create({ amount: 2000, currency: 'usd', }); } catch (error) { if (error.type === 'StripeCardError') { // Handle card errors (e.g., insufficient funds) handleCardError(error); } else if (error.type === 'StripeInvalidRequestError') { // Handle invalid parameters handleInvalidRequest(error); } else if (error.type === 'StripeAPIError') { // Handle API errors handleAPIError(error); } else { // Handle other errors console.error(error); } } ``` For a truly resilient system, implementing proper retry logic is essential. Not all errors are fatal - many are temporary and can be resolved by simply trying again after a short delay. However, implementing retry logic requires careful consideration to avoid overwhelming your systems or Stripe's API. The key is to implement an [exponential backoff strategy](https://en.wikipedia.org/wiki/Exponential_backoff), where each retry attempt waits longer than the previous one. This approach helps prevent [thundering herd problems](https://en.wikipedia.org/wiki/Thundering_herd_problem) while maximizing the chances of eventual success. Here's a retry implementation that handles transient errors gracefully while knowing when to give up on truly failed operations: ```javascript const maxRetries = 3; const backoffMultiplier = 2; // Function to simulate sleeping for a given amount of time function sleep(ms) { return new Promise(resolve => setTimeout(resolve, ms)); } // Function to determine if the error is retryable function isRetryableError(error) { // Define the conditions for an error to be considered retryable // This is where you would check for specific types of Stripe errors return error.type === 'StripeAPIError' || error.type === 'StripeConnectionError'; // Add others as needed } async function retryableStripeOperation(operation, initialDelay = 1000) { let currentTry = 0; let delay = initialDelay; while (currentTry < maxRetries) { try { return await operation(); } catch (error) { if (!isRetryableError(error) || currentTry === maxRetries - 1) { throw error; // Re-throw the error if it's not retryable or if we've exhausted retries } await sleep(delay); // Wait before retrying delay *= backoffMultiplier; // Exponential backoff currentTry++; // Increment the attempt count } } } ``` ## 4. Understand Payment Intent Lifecycle Management Payment Intents are Stripe's way of tracking the entire [payment lifecycle](https://docs.stripe.com/payments/paymentintents/lifecycle), from initial creation through final settlement. They're designed to handle complex scenarios like authentication requirements and asynchronous processing while maintaining a consistent record of the payment's status. One of the most important principles in working with Payment Intents is that they should always be created server-side. This isn't just a best practice - it's crucial for security and maintaining control over your payment flow. Creating Payment Intents server-side ensures that critical parameters like amount and currency can't be tampered with by malicious clients. It also allows you to attach important metadata and implement your business logic before the payment process begins: ```javascript const paymentIntent = await stripe.paymentIntents.create({ amount: calculateOrderAmount(items), currency: 'usd', automatic_payment_methods: { enabled: true, }, metadata: { orderId: order.id, } }); ``` Authentication requirements, particularly [3D Secure](https://docs.stripe.com/payments/3d-secure) (3DS), represent another critical aspect of the Payment Intent lifecycle. With the growing adoption of Strong Customer Authentication (SCA) requirements worldwide, handling authentication flows gracefully has become more important than ever. The key is to implement a flexible system that can adapt to different authentication requirements while providing a smooth user experience. Your implementation should be prepared to handle various authentication scenarios, from simple card verification to full 3DS2 flows. Here's one way to implement more robust authentication handling: ```javascript stripe.confirmCardPayment(clientSecret, { payment_method: { card: card, } }).then(function(result) { if (result.error) { if (result.error.code === 'authentication_required') { // Handle 3DS authentication handleAuthenticationRequired(result.error); } else { // Handle other errors handlePaymentError(result.error); } } else { // Payment successful handlePaymentSuccess(result.paymentIntent); } }); ``` ## 5. Handle Currencies and Amounts with Precision Currency handling might seem straightforward at first glance, but it's an area where small mistakes can have significant consequences. The fundamental principle to remember is that Stripe always expects amounts in the smallest currency unit - cents for USD, pence for GBP, and so on. This design choice helps to eliminate floating-point arithmetic issues, but it requires careful attention when converting between display amounts and API amounts. This means that $20.00 should be sent to Stripe as 2000 cents. While this conversion is simple for some currencies, it becomes more complex when dealing with currencies that have different divisibility rules. Japanese Yen, for example, doesn't use decimal places at all. To handle these cases consistently, it's essential to implement proper conversion functions: ```javascript // Good: Amount in cents const amount = 2000; // $20.00 // Better: Helper function for conversion function convertToCents(dollars) { return Math.round(dollars * 100); } const amount = convertToCents(20.00); ``` When performing calculations involving currencies, accuracy is key. This becomes especially important when calculating order totals, taxes, or splitting payments. Using standard floating-point arithmetic can lead to rounding errors that, while small, can accumulate over time. Instead, implement precise decimal handling and ensure rounding occurs at appropriate steps in your calculations. Here's an example of a more robust approach to handling order calculations that maintains precision while properly accounting for taxes and other adjustments: ```javascript function calculateOrderTotal(items, taxRate) { const subtotal = items.reduce((sum, item) => { return sum + (item.price_in_cents * item.quantity); }, 0); // Always round after multiplication const tax = Math.round(subtotal * taxRate); return subtotal + tax; } ``` ## 6. Implement Smart Customer Data Management Customer data management is the foundation of a great payment experience. A well-designed customer management system not only simplifies recurring billing but also enables personalized experiences and better support interactions. The core of this system is the [Customer object](https://docs.stripe.com/api/customers/object), which serves as a persistent record of your user's payment methods and transaction history. Creating and maintaining customer objects for all users should be a standard practice in your integration. This approach might seem like extra work initially, but it pays dividends in the long run. When a customer returns to make another purchase or needs support, having their complete payment history readily available is invaluable. One of the most powerful features of Stripe's customer management system is metadata. Metadata allows you to attach structured data to Stripe objects, creating a bridge between your application's data model and Stripe's system. When used effectively, metadata can simplify reconciliation, improve search capabilities, and enable powerful reporting. Consider metadata as a way to enhance your customer records with business-specific information. You might want to track things like user IDs from your system, account types, or referral sources. This information becomes particularly valuable when handling support requests or analyzing payment patterns. Here's an example of metadata usage: ```javascript await stripe.customers.create({ email: user.email, metadata: { userId: user.id, accountType: user.accountType, referralSource: user.referralSource } }); ``` ## 7. Build Flexible Subscription Management Subscription billing adds another layer of complexity to payment processing. While Stripe's subscription APIs handle many of the underlying mechanics, building a flexible subscription system requires careful planning and implementation. The key is to design your system to handle various scenarios that might arise during a subscription's lifecycle. Trial periods are often the first step in a subscription journey. Implementing them correctly can significantly impact your conversion rates. A well-designed trial system should handle both the initial trial period and the transition to paid status smoothly. You'll want to consider scenarios like what happens if a customer hasn't added a payment method by the end of their trial, or how to handle early upgrades from trial to paid status: ```javascript const subscription = await stripe.subscriptions.create({ customer: customerId, items: [{ price: 'price_H5ggYwtDq4fbrJ', }], trial_period_days: 14, trial_settings: { end_behavior: { missing_payment_method: 'cancel' } } }); ``` Plan changes represent another critical aspect of subscription management. Users might want to upgrade to a higher tier, downgrade to a lower one, or switch between monthly and annual billing. Each of these scenarios requires careful handling of prorations and billing cycle adjustments. Your implementation should consider timing (when changes take effect), billing implications (how to handle credits or additional charges), and communication (how to notify users of changes). For example: ```javascript const subscription = await stripe.subscriptions.update( subscriptionId, { items: [{ id: subscriptionItemId, price: newPriceId, }], proration_behavior: 'always_invoice', billing_cycle_anchor: 'now', } ); ``` ## 8. Tackling Refunds and Disputes Refunds and disputes are inevitable in any payment system, and handling them well is important for maintaining customer satisfaction and protecting your business. Your refund system should be flexible enough to handle various scenarios while maintaining accurate records for accounting and customer service purposes. When implementing refunds, consider both full and partial refund scenarios. Partial refunds are particularly important for businesses that might need to refund shipping costs while retaining product costs, or handle partial returns of multi-item orders. Your refund implementation should also maintain clear records of why refunds were issued, which can be invaluable for analyzing patterns and improving your business processes: ```javascript const refund = await stripe.refunds.create({ payment_intent: 'pi_123456', amount: 1000, // Partial refund of $10 reason: 'requested_by_customer', metadata: { refundReason: 'Product damaged during shipping', orderNumber: 'ORDER-123' } }); ``` Disputes (also known as chargebacks) require their own comprehensive handling system. When a customer disputes a charge with their bank, time becomes a critical factor. You have a limited window to respond with evidence, and the quality of your response can significantly impact the outcome. Implementing a systematic approach to dispute handling ensures you're prepared when disputes arise. Your dispute handling system should automatically gather relevant transaction data, collect evidence based on the dispute reason, and ensure timely submission of documentation. Consider implementing an alert system that notifies relevant team members immediately when disputes occur, as quick action is often critical for a successful resolution: ```javascript async function handleDisputeWebhook(dispute) { // Log dispute details await logDispute(dispute); // Gather evidence const evidence = await collectDisputeEvidence(dispute.payment_intent); // Submit evidence if not too late if (canSubmitEvidence(dispute)) { await stripe.disputes.update( dispute.id, { evidence: evidence } ); } // Notify relevant team members await notifyDisputeTeam(dispute); } ``` ## 9. Build Comprehensive Testing Systems A testing strategy is essential for maintaining reliable payment processing. Payment systems are complex, with many moving parts and potential failure points. Comprehensive testing helps catch issues before they affect your customers and gives you confidence when deploying changes. Testing payment integrations requires a systematic approach that covers various payment scenarios. Stripe provides a comprehensive set of [test card numbers](https://docs.stripe.com/testing) that simulate different payment outcomes. Your testing suite should utilize these cards to verify your system's handling of successful payments, declines, authentication requirements, and other scenarios. Here's one approach to implement a testing strategy: ```javascript const TEST_CARDS = { success: '4242424242424242', declined: '4000000000000002', insufficient_funds: '4000000000009995', requires_3ds: '4000000000003220' }; describe('Payment Processing', () => { test('handles successful payment', async () => { const result = await processPayment({ card: TEST_CARDS.success, amount: 2000 }); expect(result.status).toBe('succeeded'); }); test('handles declined payment', async () => { await expect(processPayment({ card: TEST_CARDS.declined, amount: 2000 })).rejects.toThrow('Card declined'); }); }); ``` Webhook testing deserves special attention in your testing strategy. Webhooks are asynchronous by nature, which can make them challenging to test thoroughly. However, Stripe provides tools to help [simulate webhook events](https://docs.stripe.com/cli/trigger) in your test environment. This allows you to verify your webhook handling logic without having to trigger actual payment flows. Your webhook testing suite should verify both the technical aspects (signature verification, response timing) and business logic (proper handling of different event types, idempotency). ## 10. Keep up to date. Stripe releases new features and services frequently, and the Developer Relations team produces content to help simplify using Stripe in real-world use cases. There are a number of places to visit to learn more about Stripe as a developer: * [Stripe Developers on YouTube](https://www.youtube.com/@StripeDev): subscribe to our channel for the latest ideas, Q&A, walk-throughs, coding sessions, interviews, and more. * [Stripe Meetups](https://www.meetup.com/pro/stripe/) in-person: We host regular meetups in cities around the world, bringing together customers, partners, users, and developers to share insights and grow our networks. Become a member of our Meetup page to get notified about new events in your area. * [Stripe Insiders](https://insiders.stripe.dev/): To learn more about upcoming betas, product changes, and ideas from our Product teams, become a member of Stripe Insiders. This gives you the inside scoop on all the latest features being developed at Stripe. All our Developer Relations programs are free to join and we love to hear about what integrations you are building. ## Conclusion Building a robust Stripe integration requires attention to detail and consideration of varied scenarios. By following these best practices, you'll be well-equipped to create reliable, secure payment processing systems that can scale with your business. Remember that payment processing is not just about moving money - it's about creating seamless experiences for your customers while maintaining the security and reliability they expect. The key to success lies in thinking through edge cases, implementing proper error handling, and maintaining comprehensive testing coverage. Take the time to implement proper logging and monitoring systems, and regularly review your integration as your business needs evolve. The investment in building a solid foundation will help reduce maintenance costs and increase customer satisfaction. For more Stripe developer learning resources, subscribe to our [YouTube Channel](https://www.youtube.com/@StripeDev). Processing webhook events reliably at scale presents significant challenges for modern distributed systems. As businesses grow their payment processing operations with Stripe, the need for robust webhook handling becomes increasingly critical. In this post, we'll explore an enterprise-grade architecture for processing Stripe webhooks using AWS services, with particular attention to handling failures, implementing retry mechanisms, and maintaining consistent event ordering. ## Understanding the Webhook Reliability Challenge When building systems that depend on webhooks for critical business processes like payment processing, several reliability challenges emerge. Network issues or service outages can result in lost webhook events, leading to inconsistencies between your system and Stripe's state. Events may arrive out of sequence due to network conditions or retry attempts, potentially causing race conditions and invalid state transitions. Additionally, Stripe's built-in retry mechanism can result in duplicate webhook deliveries, requiring careful handling to prevent double-processing of events. Before diving into the implementation, it's important to understand how Stripe events work: 1. **Event Generation**: Stripe generates events for all actions in your account (payments, refunds, disputes, etc.) 2. **Delivery Guarantees**: Stripe attempts to deliver each event for up to 3 days with an exponential backoff. 3. **Ordering**: While events are generally delivered in order, network conditions can cause out-of-order delivery. 4. **Idempotency**: Each event has a unique ID that should be used to prevent double-processing. Let's explore an approach that addresses these challenges using AWS services while adhering to [AWS Well-Architected Framework](https://aws.amazon.com/architecture/well-architected/) principles. ## Architecture Overview ![](/images/building-resilient-webhook-handlers-aws-dlqs-stripe-events/1.png) This solution uses the following AWS services: * **API Gateway**: Webhook endpoint and request validation. * **Amazon SQS FIFO Queues**: Ordered event processing and deduplication. * **AWS Lambda**: Event processing with retry logic. * **Amazon DynamoDB**: Idempotency tracking. * **Amazon CloudWatch**: Monitoring and alerting. * **Dead Letter Queues (SQS)**: Failed event handling. [API Gateway](https://aws.amazon.com/api-gateway/) serves as the secure entry point for Stripe webhook events in this architecture, offering several critical features that make it ideal for this use case. Its request validation capabilities allow us to [verify Stripe's webhook signatures before processing](https://docs.aws.amazon.com/apigateway/latest/developerguide/apigateway-use-lambda-authorizer.html), while its native integration with Lambda enables either direct event processing or forwarding to SQS. API Gateway's built-in throttling protects our backend services from traffic spikes, and its CloudWatch integration provides detailed metrics about request patterns and latencies. The service's ability to handle high concurrent connections makes it suitable for webhook processing at scale, while features like custom domain names and TLS termination ensure secure communication with Stripe's servers. You can also use API Gateway's resource policies to restrict incoming traffic to Stripe's IP ranges, adding an extra layer of security. When combined with [AWS WAF](https://aws.amazon.com/waf/), you can implement additional protection against common web exploits. The service's integration with [AWS X-Ray](https://aws.amazon.com/xray/) enables detailed request tracing, making it easier to debug issues in the webhook processing pipeline. From a cost perspective, API Gateway's pay-per-use pricing model aligns well with webhook processing's event-driven nature. ## Implementation Details The infrastructure can be defined in an infrastructure-as-code (IaC) tool, such as CloudFormation. The following template snippet defines the SQS FIFO queue, the dead-letter queue (DLQ), and DynamoDB table for idempotency tracking: ```yaml AWSTemplateFormatVersion: '2010-09-09' Description: 'Stripe Webhook Handler Infrastructure' Resources: # FIFO Queue for ordered event processing StripeEventQueue: Type: AWS::SQS::Queue Properties: QueueName: stripe-events.fifo FifoQueue: true ContentBasedDeduplication: true DeduplicationScope: messageGroup FifoThroughputLimit: perMessageGroupId VisibilityTimeout: 300 RedrivePolicy: deadLetterTargetArn: !GetAtt StripeEventDLQ.Arn maxReceiveCount: 3 # Dead Letter Queue for failed events StripeEventDLQ: Type: AWS::SQS::Queue Properties: QueueName: stripe-events-dlq.fifo FifoQueue: true ContentBasedDeduplication: true # DynamoDB table for idempotency tracking IdempotencyTable: Type: AWS::DynamoDB::Table Properties: TableName: stripe-idempotency AttributeDefinitions: - AttributeName: event_id AttributeType: S KeySchema: - AttributeName: event_id KeyType: HASH BillingMode: PAY_PER_REQUEST TimeToLiveSpecification: AttributeName: ttl Enabled: true ``` This architecture uses SQS FIFO queues to maintain event ordering while providing message deduplication capabilities. The DLQ captures failed processing attempts for analysis and replay. DynamoDB serves as our idempotency store, with automatic cleanup through time-to-live (TTL) to manage storage costs. This means that the DynamoDB service will automatically delete items once their age passes the TTL defined. The webhook processing logic is implemented through a Lambda function that handles the core event processing. This function parses events from SQS, checks idempotency IDs against the DynamoDB table store, then processes the event and updates the idempotency ID store if the event is new. ```python import json import os import time from datetime import datetime, timedelta import boto3 import stripe from botocore.exceptions import ClientError dynamodb = boto3.resource('dynamodb') idempotency_table = dynamodb.Table(os.environ['IDEMPOTENCY_TABLE']) def lambda_handler(event, context): for record in event['Records']: stripe_event = json.loads(record['body']) if not is_duplicate_event(stripe_event['id']): try: process_stripe_event(stripe_event) store_processed_event(stripe_event['id']) except Exception as e: print(f"Error processing event {stripe_event['id']}: {str(e)}") raise e def is_duplicate_event(event_id): try: response = idempotency_table.get_item( Key={'event_id': event_id} ) return 'Item' in response except ClientError as e: print(f"Error checking idempotency: {str(e)}") # In case of error, assume not duplicate to ensure processing return False def store_processed_event(event_id): ttl = int((datetime.now() + timedelta(days=7)).timestamp()) try: idempotency_table.put_item( Item={ 'event_id': event_id, 'processed_at': int(time.time()), 'ttl': ttl } ) except ClientError as e: print(f"Error storing processed event: {str(e)}") raise e def process_stripe_event(stripe_event): event_type = stripe_event['type'] if event_type.startswith('payment_intent'): handle_payment_intent_event(stripe_event) elif event_type.startswith('charge'): handle_charge_event(stripe_event) elif event_type.startswith('invoice'): handle_invoice_event(stripe_event) elif event_type.startswith('subscription'): handle_subscription_event(stripe_event) elif event_type.startswith('refund'): handle_refund_event(stripe_event) else: print(f"Unhandled event type: {event_type}") ``` The Lambda service by default implements sophisticated retry logic with exponential backoff to handle transient failures gracefully. When processing fails, the system implements a graduated retry strategy, doubling with each attempt up to a maximum of three retries. This exponential backoff helps prevent system overload during recovery while maximizing the chances of successful processing. By defining a [dead-letter queue](https://docs.aws.amazon.com/AWSCloudFormation/latest/UserGuide/aws-properties-lambda-function-deadletterconfig.html) in the CloudFormation template, the Lambda function failed events are automatically routed to the DLQ after multiple retry attempts, ensuring no events are lost while preventing infinite retry loops. This combination of Lambda's built-in retry capabilities and the custom backoff strategy provides robust handling of transient failures while maintaining system stability. ## Managing Idempotency with DynamoDB DynamoDB serves as an ideal idempotency store for webhook processing due to its consistent single-digit millisecond performance at scale and built-in TTL capabilities. We store each processed event ID as a partition key, along with metadata such as processing timestamp and outcome. The TTL attribute automatically removes old records, typically after 24-72 hours, preventing table growth while maintaining a sufficient window for redelivery detection. For high-volume systems processing millions of events daily, you can use DynamoDB's on-demand capacity mode to handle spiky workloads without pre-provisioning. One important pattern is implementing conditional writes with DynamoDB's atomic operations - attempting to insert the event ID with a condition that it doesn't exist ensures thread-safe deduplication even under concurrent processing conditions. ## Monitoring and Alerting Strategy A comprehensive monitoring strategy ensures operational visibility and helps maintain a quick response to issues. This CloudFormation definition can set up an alarm in Amazon CloudWatch for when messages appear in the DLQ: ```yaml DLQAlarm: Type: AWS::CloudWatch::Alarm Properties: AlarmName: StripeWebhookDLQNotEmpty AlarmDescription: Alert when messages appear in DLQ MetricName: ApproximateNumberOfMessagesVisible Namespace: AWS/SQS Statistic: Sum Period: 300 EvaluationPeriods: 1 Threshold: 0 ComparisonOperator: GreaterThanThreshold Dimensions: \- Name: QueueName Value: stripe-events-dlq.fifo AlarmActions: \- \!Ref AlertingTopic ``` CloudWatch is a powerful tool for observing the state of the webhook processing application. You can monitor processing latency, error rates, and queue depths to provide early warning of potential issues, and custom metrics can track business-specific success rates and processing patterns. What you choose to monitor will be determined by your use-case, and also any cost limitations. ## Implementing Regional Failover For global applications requiring very high availability, implementing regional failover capabilities requires careful consideration of several factors. The secondary region maintains parallel infrastructure, ready to handle traffic if the primary region experiences issues, but this comes with additional complexity and costs. When using VPCs, you may need to implement cross-region VPC connectivity through VPC peering or AWS Transit Gateway, ensuring secure communication between regions while managing the associated data transfer costs. [DynamoDB Global Tables](https://aws.amazon.com/dynamodb/global-tables/) provide consistent idempotency checking across regions, but they introduce additional latency for writes which must be replicated across regions. This replication also incurs costs for both the data transfer and the additional write capacity needed in each region. The multi-region deployment significantly impacts the total cost of the solution: you'll pay for redundant infrastructure in each region (including API Gateway endpoints, Lambda executions, and SQS queues), cross-region data transfer, and Global Tables replication. Route 53 health checks enable automatic failover when needed, but proper testing is crucial to ensure failover behavior works as expected under various failure conditions. While this level of redundancy provides excellent availability, many applications may not require this complexity—in single-region implementations, Stripe will continue to retry webhook delivery during AWS regional outages, often providing sufficient reliability for most use cases. Before implementing cross-region failover, carefully evaluate your actual availability requirements against the operational complexity and cost implications of a multi-region architecture. ## Performance Testing and Operational Considerations Before deploying to production, thorough performance testing validates the system's behavior under various conditions. Using tools like [Apache JMeter](https://jmeter.apache.org/) or [Distributed Load Testing on AWS](https://aws.amazon.com/solutions/implementations/distributed-load-testing-on-aws/), you can simulate different webhook delivery patterns including steady-state load, sudden traffic spikes, and component failure scenarios. The architecture can handle millions of events daily, with SQS FIFO queues processing up to 300 messages per second with batching, or 3,000 messages per second per message group ID. ## Conclusion Building reliable webhook handlers in AWS requires careful attention to event ordering, idempotency, and error handling. The architecture presented here provides a robust foundation for processing Stripe webhooks at scale while maintaining data consistency and operational excellence. Through comprehensive monitoring, regional failover capabilities, and careful attention to performance characteristics, this solution supports enterprise-grade webhook processing needs while remaining cost-effective and maintainable. Remember to test thoroughly, especially failure scenarios, and maintain comprehensive monitoring of your webhook processing pipeline in production. The combination of SQS FIFO queues, Lambda, and DynamoDB provides a scalable and reliable solution for webhook processing that can grow with your business needs. For more Stripe learning resources, subscribe to our [YouTube channel](https://www.youtube.com/stripedevelopers). Stripe is designed for developers, making it easy to integrate payments into your applications and workloads quickly. However, due to its extensive feature set and specific terminology, knowing a few key concepts can help you build your integrations even faster. This post walks you through the most important concepts and terms you'll encounter when integrating Stripe into your applications for the first time. ### It all starts with the Payment Intent At the heart of Stripe's functionality is the [Payment Intent](https://docs.stripe.com/api/payment_intents), which represents your intent to collect payment from a customer. A Payment Intent tracks the entire payment lifecycle, from initial creation through successful completion or failure. When you create a Payment Intent, you specify the amount and currency you want to collect, and Stripe generates a [client secret](https://docs.stripe.com/api/payment_intents/object#payment_intent_object-client_secret) that you can use to complete the payment flow on the frontend. Here's a simple example of creating a Payment Intent: ```javascript const stripe = require('stripe')('sk_test_your_key'); const paymentIntent = await stripe.paymentIntents.create({ amount: 2000, // Amount in smallest currency unit (e.g., cents) currency: 'usd', payment_method_types: ['card'], }); ``` It’s recommended to create the Payment Intent once the chargeable amount is known (it can be updated later in the payment flow if needed). Each has a unique ID you can use to retrieve it later, and you can store the ID with the shopping cart or session in your application to make it easy to reference. You can reuse Payment Intents for the same transaction, which gives you access to any failed payment attempts for a cart or session. Connected to Payment Intents are [Payment Methods](https://docs.stripe.com/payments/payment-methods/overview), which represent the various ways customers can pay. These include credit cards, bank transfers, digital wallets like [Apple Pay](https://www.apple.com/apple-pay/), and many other local payment methods. Each Payment Method has its own specific properties and requirements, but Stripe abstracts away much of this complexity through a unified API. ### Managing your customers The [Customer object](https://docs.stripe.com/api/customers/object) is central to recurring billing and customer relationship management in Stripe, and helps you track who is making payments. While you can track this in your workload and store it in a database, Stripe can make this tracking easier by storing it for you. This is the preferred choice for many developers, since it simplifies the organization process and tracking payment history. Instead of processing one-off payments, you can create a Customer and attach Payment Methods to them for future use. This is particularly useful for subscription-based businesses or platforms where users make repeated purchases. ```javascript const stripe = require('stripe')(process.env.STRIPE_SECRET_KEY); async function createCustomer(email, name) { try { const customer = await stripe.customers.create({ email, name, description: 'New customer created via API' }); console.log('Customer created successfully:', customer.id); return customer; } catch (error) { console.error('Error creating customer:', error.message); throw error; } } async function createSetupIntent(customerId) { try { const setupIntent = await stripe.setupIntents.create({ customer: customerId, payment_method_types: ['card'], usage: 'off_session' // Indicates the intent to use the payment method for future payments }); console.log('Setup Intent created successfully:', setupIntent.id); return setupIntent; } catch (error) { console.error('Error creating setup intent:', error.message); throw error; } } async function attachPaymentMethod(paymentMethodId, customerId) { try { const paymentMethod = await stripe.paymentMethods.attach( paymentMethodId, { customer: customerId } ); // Set this payment method as the default for the customer await stripe.customers.update(customerId, { invoice_settings: { default_payment_method: paymentMethodId } }); console.log('Payment method attached successfully:', paymentMethod.id); return paymentMethod; } catch (error) { console.error('Error attaching payment method:', error.message); throw error; } } // Example usage async function setupCustomerPayment(email, name, paymentMethodId) { try { // 1. Create a new customer const customer = await createCustomer(email, name); // 2. Create a setup intent for the customer const setupIntent = await createSetupIntent(customer.id); // 3. Attach the payment method to the customer const paymentMethod = await attachPaymentMethod(paymentMethodId, customer.id); return { customerId: customer.id, setupIntentId: setupIntent.id, paymentMethodId: paymentMethod.id, setupComplete: true }; } catch (error) { console.error('Error in payment setup process:', error.message); throw error; } } ``` ## Subscription and billing concepts Subscriptions are a common billing approach in many software-as-a-service products but can be difficult to manage by yourself. Typically, an end-user pays a set amount of money for a billing period to retain access to a service. However, there are many complexities, such as trial periods, discounts for longer commitments, and handling business flows if payments fail. These are all simplified by using Stripe, and the subscription model builds on the basics outlined above. For subscription-based businesses, Stripe provides several key objects. A [Product](https://docs.stripe.com/api/products/object) represents what you're selling, while a Price defines how much it costs and the billing frequency. Together, these objects power Stripe's subscription system. Products can be either goods or services, and they can have multiple Prices associated with them. For example, a software service might have monthly and annual pricing tiers: ```javascript // Create a product const product = await stripe.products.create({ name: 'Premium Subscription', description: 'Monthly access to premium features', }); // Create prices for the product const monthlyPrice = await stripe.prices.create({ product: product.id, unit_amount: 1999, // $19.99 currency: 'usd', recurring: { interval: 'month', }, }); ``` A Subscription ties together a Customer with a Price, establishing recurring billing. The Subscription object tracks important details like the current period, status, and any trial periods: ```javascript const subscription = await stripe.subscriptions.create({ customer: 'cus_123', items: [{ price: 'price_H5ggYwtDq4fbrJ' }], trial_period_days: 14 }); ``` Once a subscription is established, Stripe will continue to take payments on the frequency you’ve established. Stripe uses webhooks to let you know the result of these transactions. Developers should listen for relevant events such as `invoice.payment_succeeded`, `invoice.payment_failed`, `customer.subscription.updated`, etc. This allows your application to respond to changes in subscription status and process any necessary actions (e.g., access permissions, updates to the subscription status in your database). ## Working with events and webhooks Many payment processes are asynchronous, meaning that the state will change after the completion of the original API call. To avoid needing to poll for changes, Stripe uses events and webhooks to alert your application of important changes in state. Stripe's event system is crucial for keeping your application in sync with payment-related activities. Events are notifications about specific occurrences in your Stripe account, such as successful payments, failed charges, or subscription updates. Each event has a type (e.g., 'payment\_intent.succeeded') and contains the relevant object data. To handle these events, you'll need to set up Webhooks. A [Webhook Endpoint](https://docs.stripe.com/api/webhook_endpoints/create) is a URL where Stripe sends event notifications. To set up a webhook, first you need to let Stripe know which events you are listening to, and where they should be routed: ```javascript const stripe = require('stripe')('sk_test_key'); const webhookEndpoint = await stripe.webhookEndpoints.create({ enabled_events: ['charge.succeeded', 'charge.failed'], url: 'https://example.com/my-webhook-handler, }); ``` Once this is created, Stripe will send events to that Webhook Endpoint. Securing your Stripe webhook with a signing secret is essential for ensuring that the requests your application receives from Stripe are genuine and have not been tampered with. When you set up a webhook endpoint in your application, Stripe provides a unique signing secret that you should store securely and use to verify incoming webhook requests. For every event sent to your webhook URL, Stripe includes a signature in the `Stripe-Signature header`. By using the signing secret and the timestamp provided in the signature, you can construct a hash using the request body and confirm that it matches the signature sent by Stripe. This verification step helps protect against replay attacks and ensures that only payments and events originating from your Stripe account are processed, thereby enhancing the security of your financial transactions and user data. Read [Verify webhook signatures with official libraries](https://docs.stripe.com/webhooks#verify-webhook-signatures-with-official-libraries) to learn more about this process. In a Node.js Express application, here's an example of handling a webhook: ```javascript app.post('/webhook', async (req, res) => { const sig = req.headers['stripe-signature']; let event; try { event = stripe.webhooks.constructEvent( req.body, sig, 'whsec_your_webhook_secret' ); } catch (err) { return res.status(400).send(`Webhook Error: ${err.message}`); } switch (event.type) { case 'payment_intent.succeeded': const paymentIntent = event.data.object; // Handle successful payment break; case 'customer.subscription.deleted': const subscription = event.data.object; // Handle subscription cancellation break; } res.json({received: true}); }); ``` ## Handling disputes and refunds For any application taking payments, you must also handle exceptions to the regular billing process, either initiated by your application or by your customer. In the payment world, [Disputes](https://docs.stripe.com/disputes) (also known as chargebacks) occur when customers contest charges with their bank. Stripe provides objects and workflows to handle these situations. A Dispute object contains details about the challenge and lets you submit evidence to respond. [Refunds](https://docs.stripe.com/refunds), on the other hand, are when you voluntarily return funds to a customer. A new refund must specify either a Charge or a Payment Intent, and the Refund object tracks these transactions: ```javascript const refund = await stripe.refunds.create({ payment_intent: 'pi_123', amount: 1000, // Partial refund of $10 }); ``` ## Expanding responses to simplify your development Expanded responses in the Stripe API provide developers with a powerful tool to access additional information about certain resources within a single response. This feature allows developers to receive more comprehensive data without the need for multiple API calls, significantly reducing both the number of requests made and the associated latency. By consolidating related data \- such as customer information, payment methods, and transaction details \- expanded responses streamline the development process and simplify the handling of data. This enhances clarity by offering a complete view of the information tied to a specific resource, making it easier for developers to understand the relationships between various entities within their applications. The benefits of using expanded responses extend to improved efficiency in both development and application performance. By minimizing the number of separate API calls required, developers can quickly prototype and test their applications, leading to faster iteration cycles. This ultimately contributes to quicker feature rollouts and a better overall user experience. For instance, when retrieving subscription details, an expanded response can present crucial information like upcoming charges or related invoices in a single call, rather than necessitating multiple requests. By leveraging expanded responses, developers can build more performant and effective applications while reducing the complexity of data management. Using this feature is straight forward, as shown below: ```javascript const paymentIntent = await stripe.paymentIntents.retrieve( 'pi_123', { expand: ['customer', 'payment_method'] } ); ``` ## Conclusion For more detailed information about any of these concepts, you can refer to [Stripe's comprehensive documentation](https://docs.stripe.com/). The documentation includes detailed API references, tutorials, and best practices for implementing these features in your application. Remember that while this guide covers the most important concepts terminology, Stripe's feature set is extensive and constantly evolving. Staying updated with Stripe's documentation and the changelog will help you make the most of the platform's capabilities. When building with Stripe, always start in test mode and make use of the dashboard's extensive debugging tools. The dashboard provides detailed logs of all API requests, webhook events, and other activities, making it invaluable for development and troubleshooting. For more Stripe learning resources, subscribe to our [YouTube Channel](https://www.youtube.com/@StripeDev). Developers often tell us they face some challenges while testing Stripe Connect. When you take into account different aspects of a marketplace business such as payment methods, various US states and/or international countries supported, the Connect test matrix can get quite unwieldy. Additionally, the existing test mode that comes with each Stripe account maintains synchronized settings with live mode, making it challenging to test your integration independently without impacting live payment traffic. Stripe’s new Sandbox feature aims to make this easier by providing an isolated way for platform developers to replicate their live setup for testing, while keeping the two environments separate. This blog post shows how you can use Sandboxes to accelerate your Connect testing. ## **Setting up Connect** Before you can use Connect to accept payments for your business, there are 2 major configuration steps you must take: 1) First, you need to set up and activate your actual Stripe account itself: this means providing information about yourself and your business, such as address, ownership, bank account for payouts etc. As part of this account setup process, Stripe performs various verification checks to ensure that your business is in compliance with financial regulations. For instance, you are required to provide a valid address that Stripe validates. 2) After successfully setting up your Stripe account, you can then configure it to be a Connect platform. This is done using the Connect onboarding wizard which you can access [in your dashboard](https://dashboard.stripe.com/connect/accounts/overview). It walks you through all the key steps in configuring a Connect platform and provides a [custom integration guide](https://docs.stripe.com/connect/onboarding/quickstart#init-stripe) with code at the end of the process. For more information, check out the [video](https://www.youtube.com/watch?v=UtN3c6hnils) on Connect onboarding, and the [Connect documentation](https://docs.stripe.com/connect/onboarding/quickstart). Once you’re done configuring your platform, the wizard presents you with a summary of your setup. Consider a platform with the following configuration. ![](/images/testing-connect-onboarding-with-sandboxes/image_1.png) You can use the new [Workbench debugging tool](https://docs.stripe.com/workbench) to view the underlying JSON object corresponding to your platform account. To do that, first make sure Workbench is enabled by navigating to Settings \> Developers \> Workbench in your dashboard, then launch Workbench, navigate to the Inspector tab and insert the ID of your platform account. You can copy your account ID from Settings \> Business \> Account Details. You can even use API Explorer in Workbench to directly edit your account \- if you want to update your email address, for instance. Check other posts on our [developer blog](https://stripe.dev/) for more on how to use Workbench. ![](/images/testing-connect-onboarding-with-sandboxes/image_2.png) ## **Onboarding accounts to your platform** Once your platform account is activated, you can proceed with onboarding connected accounts. Depending on your platform settings, this onboarding process either involves merchants going through a Stripe provided onboarding flow or a custom one that you have built. The previously mentioned example uses Stripe [embedded components](https://docs.stripe.com/connect/get-started-connect-embedded-components) as the building blocks for its onboarding process. Similar to what you did with your platform, onboarding merchant accounts involves them providing various details to register their businesses with Stripe. The account verification process is a common stumbling block for businesses as they onboard, which can delay their ability to fully go live and get paid. This involves issues such as incorrect ID numbers, typos in the website URL and others. The following screenshot shows a typical example where Stripe cannot verify a merchant’s website, which means they’re blocked from conducting business. ![](/images/testing-connect-onboarding-with-sandboxes/image_3.png) You can use Sandboxes to reproduce the verification issue, update your onboarding flow as needed and send your merchant back through the verification process so they can update their website. ## **Creating Sandboxes** With Sandboxes, you can create an environment completely separate from live mode to simulate payment traffic and test out your integration. You can also create [Sandboxes](https://dashboard.stripe.com/sandboxes) while replicating the same settings from your live account. Prior to Sandboxes, most users created a separate account and manually configured it to match their live account. In this example, that would have meant creating another Connect platform account from scratch and making sure its settings matched the original live account. This is a longer process, which affects your ability to properly test your integration and can ultimately cause delays and cost your business money. Sandboxes save you from that hassle by creating this new platform account with matching settings for you. To start the Sandbox creation process, navigate to the account list dropdown on the left hand side of your dashboard, and choose the “Sandboxes” option. On the resulting page, choose the “Create” button and you should be presented with the popup below. ![](/images/testing-connect-onboarding-with-sandboxes/image_4.png) Visually, a Sandbox is just like any other Stripe account. Once yours is created, navigate to the [Connect page](https://dashboard.stripe.com/test/connect/accounts/overview) in its dashboard. ## **Testing Connect in your Sandbox** Your Connect account list shows up as empty, but you can create some test accounts by using the wizard in the dashboard. To start that process, click on the “Create” button in the upper right-hand corner of the Connect overview page. In the resulting popup, you are able to validate that the Connect settings which you chose in the live mode onboarding wizard were preserved in the Sandbox. For instance, you can see that the Sandbox platform is set up for Stripe to handle the negative liability, conforming to the live mode configuration. All the other settings were kept as well. ![](/images/testing-connect-onboarding-with-sandboxes/image_5.png) To replicate the issue with URL verification, you can either proceed with the OAuth flow to complete the onboarding process for the connected account, or choose to create a different account type for your testing. For example, if you choose to create a “custom” account type, you can use the dashboard UI to fill in the required fields to complete the onboarding process. You can set the business website to a [test value](https://docs.stripe.com/connect/testing#test-business-url-verification) of “[https://inaccessible.stripe.com](https://inaccessible.stripe.com)” to reproduce the issue with the URL. Once you’re able to simulate the merchant’s problem in your Sandbox, you can use either the dashboard or Workbench API Explorer to update the URL field to “https://accessible.stripe.com”, which is the test value for simulating a functioning business website. Now that you’ve confirmed that your onboarding flow works and you’re able to successfully update the URL in your sandbox, you can send the merchant back through the onboarding flow in production so they can update the URL on their end and get unblocked processing their payments. ## **Conclusion** With Sandboxes, Connect platforms can replicate the exact settings from their live environment to test out the onboarding flow that their merchants go through. Just like in the old test mode, platforms can use all the existing [Connect test materials](https://docs.stripe.com/connect/testing) to simulate failure conditions in their Sandboxes. After reproducing and testing a fix in their Sandbox, platforms can port it to their production environment to make sure their merchants are able to update their accounts as needed so they can conduct their business. To learn more about developing applications with Stripe, visit our [YouTube Channel](https://www.youtube.com/stripedevelopers). Errors are an inevitable reality of any live integration. In a payment flow, it is crucial to adequately handle them to avoid missing out on transactions from your customers. This blog post covers some of the different classes of errors your payment integration may encounter and provides a strategy for handling them. It also shows how you can use the newly introduced [Sandboxes](https://docs.stripe.com/sandboxes) feature to reproduce the errors in an isolated environment. ## **Sandboxes** One major frustration developers encounter is that Stripe’s live mode and test mode share the same general [account settings](https://dashboard.stripe.com/settings) (such as payment methods, etc), which can’t be independently modified. This can be a hindrance when testing your integration because whatever changes you make to your test mode settings are replicated in live mode. Developers often worked around this limitation by creating dedicated test accounts. Sandboxes address this problem by allowing you to spin up a new environment completely isolated from your live mode. This way, you can make modifications and test various configurations without the risk of impacting your live payment traffic. You can access Sandboxes by clicking on your account list and selecting “Sandboxes” in the dropdown. . ![](/images/crush-errors-with-sandbox-testing/image_1.png) The following example shows how you may use Sandboxes to reproduce and test payment errors in your integration. ## **Error types** There are many types of errors your Stripe integration may run into, but they fit in two broad categories: * Errors due to external events, like network issues or outages. * Errors due to bugs in your integration. Regardless of the cause, your integration must be prepared to handle errors gracefully to avoid breaking the payment flow and jeopardizing your business. Consider a payment [integration](https://docs.stripe.com/payments/quickstart?lang=python&platform=web) using Stripe’s UI building blocks (i.e [Elements](https://stripe.com/payments/elements)) as the frontend with a Python server on the backend. On the server side, the following code block is used to create a [Payment Intent](https://docs.stripe.com/api/payment_intents) which initiates the payment process. ```py def create_payment(): # Create a PaymentIntent with the amount, currency, and a payment method type. intent: PaymentIntent = stripe.PaymentIntent.create( amount=1000, currency='usd', automatic_payment_methods={ 'enabled': True, } ``` Creating a Payment Intent is the prerequisite to render the Payment Element at the frontend. It’s possible to hit errors during the Payment Intent creation. If that happens, the code in this example most likely results in the stalled page, with no actionable steps for the customer. This results in a bad user experience for the customer and lost business for the merchant. The process below gives you a solution for preventing this type of scenario. ## **Diagnosing the error** First, you need to diagnose and understand the error. You can do that using use Stripe’s new Workbench debugging tool, which allows you to monitor all aspects of your integration without leaving the dashboard \- check out this [blog post](https://stripe.com/blog/workbench-a-new-way-to-debug-monitor-and-grow-your-stripe-integration) for more information on using Workbench Starting in the dashboard of your integration, launch Workbench and check out the Errors tab. You see a summarized view of all the recent errors in your integration ![](/images/crush-errors-with-sandbox-testing/image_2.png) Select the most recent error chronologically (i.e the one at the top of the summarized list). In this case, the customer received a [*card\_declined*](https://docs.stripe.com/error-codes#card-declined) error. This happens when the customer’s card is declined by the issuing bank. It’s one of the error types that happens outside of Stripe, but can stall your payment flow if not handled properly. ![](/images/crush-errors-with-sandbox-testing/image_3.png) There’s also a detailed view of the API requests which triggered the error, which can be helpful for more granular debugging. ![](/images/crush-errors-with-sandbox-testing/image_4.png) ## **Reproducing the error** Now that you’ve identified the error, proceed with reproducing it: 1) Navigate to the Sandboxes menu as previously shown and create a new sandbox \- make sure that the option to copy settings from your live account is selected. This saves you from having to reconfigure your sandbox to match your live account. ![](/images/crush-errors-with-sandbox-testing/image_5.png) This feature allows you to preserve some settings and make it faster to spin up a test environment, similar to your live mode. This is particularly useful here, given that you want to replicate the exact conditions that led to the error in your live traffic. For instance, suppose your business operates in France. You’d likely enable “Cartes Bancaires” in your dashboard [payment settings](https://dashboard.stripe.com/test/settings/payment_methods), as it’s a popular payment method in this country. You’re able to carry this setting forward with this feature. Once your sandbox is created, the settings don’t get synchronized with your live mode. This enables you to modify your test integration as much as you like, without impacting your live settings. The complete list of settings that can be copied from live mode to a new sandbox is available [here](https://docs.stripe.com/sandboxes/dashboard/sandbox-settings). 2) You are taken to your sandbox once it’s created. One important feature of your sandbox is that, unlike the old test mode, it is completely isolated from your live mode. Any changes you make to it persists only here and don’t affect any of your actual payment traffic. The sandbox is a full Stripe account, so its look and feel should be familiar to you. You can enable Workbench by navigating to the Developers page in your [dashboard setting](https://dashboard.stripe.com/settings), just like you would in a normal account. ![](/images/crush-errors-with-sandbox-testing/image_6.png) 3) To simulate the customer flow that triggered the error, you can use one of Stripe’s test cards to reproduce the [card\_declined](https://docs.stripe.com/testing#declined-payments) error. Update your test code to use this payment method and make sure to use the [secret and public keys](https://dashboard.stripe.com/apikeys) from your sandbox, so that your test payment traffic is routed appropriately. 4) You now see the *card\_declined* error in the Logs tab of your sandbox Workbench. Now that you’ve reproduced the error in your sandbox, proceed to see how to handle it to prevent bugs in your payment flow. ## **Handling the error** The customer's UI issue arose from the existing code's failure to handle errors properly. At the minimum, your code needs to catch and handle exceptions. This stops your application from crashing if an error occurs which prevents Stripe from proceeding through the payment flow. The updated code snippet below shows an example of handling exceptions using Python’s *try/except* syntax. Code samples from other Stripe supported languages are available [here](https://docs.stripe.com/error-handling?lang=ruby#catch-exceptions). ```py def create_payment(): # Create a PaymentIntent with the amount, currency, and a payment method type. try: intent: PaymentIntent = stripe.PaymentIntent.create( amount=1000, currency='usd', automatic_payment_methods={ 'enabled': True, } ) # Send PaymentIntent details to the frontend. return jsonify({'clientSecret': intent.client_secret}) except stripe.error.StripeError as e: return jsonify({'error': {'message': str(e)}}), 400 except Exception as e: return jsonify({'error': {'message': str(e)}}), 400 ``` It’s written to handle the different types of errors your integration might encounter: * The *stripe.error.CardError* handles the *card\_declined* error you diagnosed previously. * The *stripe.error.InvalidRequestError* for invalid requests in your code. * A generic *Exception* to address all other cases. With this code configuration, you handle the 2 broad categories of errors discussed earlier in the post, i.e. those errors due to external events (the generic *Exception)* and those due to code bugs (*InvalidRequestError).* ## **Sandbox management** There is currently a limit of 5 sandboxes per Stripe account, so you may need to reclaim some of them once your updated error handling code is deployed to your production environment. You have a couple of options: 1) Delete the sandbox \- this frees up space for a new sandbox. You can do this by navigating to the Sandboxes list as previously shown and clicking the recycle bin icon on the sandbox you want to delete. ![](/images/crush-errors-with-sandbox-testing/image_7.png) 2) Delete the test data and preserve your sandbox \- the advantage here is that your settings are preserved, so you wouldn’t have to start from scratch if you want to run more tests in an environment like your previous one. You can delete test data from the Workbench Overview tab. ![](/images/crush-errors-with-sandbox-testing/image_8.png) ## **Conclusion** Using Sandboxes, you’re able to reproduce errors from your live integration in a new isolated test environment. This improves on the old test mode which shared synchronized settings with your live mode. With this updated approach, you can test your fixes and change settings without impacting your live payment traffic and without needing to create a new separate Stripe account just for testing. To prevent various errors from crashing your payment flow, you should handle exceptions at the very least. Other [error handling](https://docs.stripe.com/error-handling) strategies can be found here. To learn more about developing applications with Stripe, visit our [YouTube Channel](https://www.youtube.com/stripedevelopers). Imagine an online marketplace experience where customers can reserve and pay for solar installations, smart home devices, energy storage solutions, and much more \- directly with a utility provider and their partners. In this blog, we will unpack the initial use case utilities can leverage to quickly capture more energy-related revenue while setting an innovative roadmap for future offerings. Utilities have a crucial role in sustainably powering homes and businesses. Leading utilities help customers make decisions and purchases around smart meters, demand response programs, and renewable energy options, while the very best are exploring pre-emptive energy management and efficient grid distribution. Disintermediating access to the customer also unlocks new data streams which utilities can use to better understand their energy consumption patterns. We think about a series of phases in utility innovation, and the first phase is to lay the foundations for growth. The first interaction a customer often has with their utility is setting up their energy tariff, account and payment methods, and it must reflect the standards customers have come to expect from their experience across the retail sector. You can use [Stripe's Online Payment Flows](https://stripe.com/guides/introduction-to-online-payments) to implement a seamless payment experience. By optimizing their checkout experience, utilities can capture value otherwise left on the table due to poor authorization rates; but a modern payment platform will also enable utilities to begin monetizing their services in more mature ways \- like recognizing regular customers and offering them dynamic rate subscriptions through [Stripe Billing](https://stripe.com/docs/billing), driving monthly recurring revenue. The importance of seamless, tailored customer journeys in enriching customer engagement is immense. Harnessing the synergy of cloud providers (e.g. [AWS](https://aws.amazon.com/energy-utilities/)) serverless technologies and Stripe's payments and money movement solutions, can bring transformative potential to improve customer interactions, smoothing out the entire purchasing flow \- from customer enrollment to payment \- thereby reducing transactional complexities. Through [Stripe's global payments](https://stripe.com/docs/payments) and [billing](https://stripe.com/docs/billing) functions, a provider can seamlessly manage utility transactions, program subscriptions, invoice creation, and payment processing. Let's imagine a customer enrolls into an energy tariff program through a provider's web or mobile application. Once they've made the commitment via our integrated Stripe platform, [webhooks](https://stripe.com/docs/webhooks) are automatically initiated, signifying successful enrollment. This response uses AWS's event-driven serverless event bus, [Amazon EventBridge](https://aws.amazon.com/eventbridge/), providing real-time updates. Through the combination of Customer 360 data insights and Stripe's [Reporting](https://stripe.com/docs/reports) and [Data](https://docs.stripe.com/stripe-data) Analytics, we can delve into a detailed understanding of a provider’s customers' energy usage patterns and preferences. When integrating this with [AWS Analytics](https://aws.amazon.com/big-data/datalakes-and-analytics/), a provider can unlock robust analytical capabilities and extensive reporting. For example, utilizing [Stripe Data Pipeline](https://stripe.com/gb/data-pipeline), [Amazon Redshift](https://aws.amazon.com/redshift/), and [Amazon QuickSight](https://aws.amazon.com/quicksight/) allows you to harness rich data to create dashboards, delivering valuable insights about operations and customer behavior. **A Scalable Architecture to meet Energy Demands** ![](/images/developing-modern-architecture-energy-utilities-embedded-finance/image2.png) The above integration architecture demonstrates how energy utilities can use Stripe's payment infrastructure alongside AWS's cloud services to create a comprehensive payment and customer engagement solution. The system begins with customer interactions through various frontend applications, where users can access payment services and account management features. When customers initiate transactions, the energy utility services backend processes these through [Stripe's Billing and Payments](https://stripe.com/enterprise) systems. The architecture implements a sophisticated event-driven workflow where successful payments trigger [AWS Lambda](https://aws.amazon.com/lambda/) handlers through [Amazon EventBridge](https://aws.amazon.com/eventbridge/), enabling real-time transaction processing and updates. A personalized recommendation engine analyzes transaction patterns and customer behavior to generate tailored energy usage insights and product recommendations. The system stores and processes customer data within [Amazon DynamoDB](https://aws.amazon.com/dynamodb/) and [Redshift](https://aws.amazon.com/redshift/) databases, while [Stripe Data Pipeline](https://stripe.com/gb/data-pipeline) acts as a critical data producer, feeding into [AWS's analytics](https://aws.amazon.com/big-data/datalakes-and-analytics/) infrastructure including [Amazon S3](https://aws.amazon.com/s3/). [Amazon QuickSight](https://aws.amazon.com/quicksight/) is used for comprehensive [data visualization and business intelligence](https://aws.amazon.com/blogs/big-data/ingest-stripe-data-in-a-fast-and-reliable-way-using-stripe-data-pipeline-for-amazon-redshift/). This integrated approach enables utilities to not only process payments efficiently but also use transaction data to enhance customer engagement and drive sustainable energy initiatives through personalized recommendations and programs. **Ensuring Compliance and Regulation** Energy companies are heavily regulated industries, maintaining robust security and compliance standards is paramount. The above architecture leverages [Stripe's security](https://docs.stripe.com/security?), including [PCI](https://stripe.com/guides/pci-compliance) Level 1 certification and secure encryption, the highest level of payment security compliance, alongside [AWS's comprehensive security](https://docs.aws.amazon.com/whitepapers/latest/aws-overview/security-and-compliance.html) infrastructure. Stripe's security features, including [Radar for fraud prevention](https://stripe.com/docs/radar) and [Strong Customer Authentication (SCA)](https://stripe.com/docs/strong-customer-authentication), work in concert with AWS's security services such as [AWS KMS](https://aws.amazon.com/kms/) for encryption, [AWS Shield](https://aws.amazon.com/shield/) for DDoS protection, and [AWS WAF](https://aws.amazon.com/waf/) for web application security. For energy-specific regulations, the architecture implements role-based access control (RBAC) through [AWS IAM](https://aws.amazon.com/iam/), while Stripe's regulatory compliance tools ensure adherence to payment industry standards. All sensitive customer data is encrypted both in transit and at rest, with Stripe's [built-in encryption](https://stripe.com/docs/security/stripe) handling payment data and AWS's encryption services protecting utility-specific information. Regular security audits and compliance assessments can be automated through [AWS Config](https://aws.amazon.com/config/) and [AWS Security Hub](https://aws.amazon.com/security-hub/), while Stripe's security logs integrate seamlessly with [AWS CloudWatch](https://stripe.dev/blog/enhance-your-monitoring-by-integrating-stripe-events-with-aws-cloudwatch-log-groups) for comprehensive monitoring and alerting. **Building an Ecosystem of Partners** This architecture goes beyond optimizing the customer's consumption use case. After implementing Stripe's payment platform on AWS and creating a seamless payment solution, we can shift towards broader monetization opportunities. This includes facilitating renewable energy installations using [Stripe Connect](https://stripe.com/docs/connect) or harnessing Stripe on an online platform to retail smart home devices and energy efficiency products, such as EV charging devices, directly to customers. By employing Stripe's sophisticated reporting tools, you gain unparalleled insights into transaction trends, customer preferences, and untapped revenue streams. ![](/images/developing-modern-architecture-energy-utilities-embedded-finance/image1.png) When it comes to integrating payment systems for utility merchants, Stripe's Connected Account Setup offers a robust and secure payment flow architecture. The setup shown above operates through three essential stages that ensure both efficiency and merchant control. Initially, the system establishes API connections that bridge multiple payment sources – whether customers are paying online or in person – directly to the Energy Utility Platform. 1. This creates a seamless entry point for all transactions. As payments flow through the system, all real money movement is automatically directed to the merchant's actual account, ensuring direct and secure fund transfers 2. What makes this setup particularly merchant-friendly is the level of control it maintains: the merchant account retains full authority over all transactions, with the ability to manage refunds, handle payouts, and intervene in the payment process whenever necessary 3. This thoughtful architecture strikes the perfect balance between automated efficiency and merchant autonomy, making it an ideal solution for utility companies looking to streamline their payment operations while maintaining complete control over their financial transactions and offering a means to segregate funds. Disintermediating access to the customer also unlocks new data streams, which utilities can use to better understand their customers. Knowledge of energy consumption behaviors, preferences, and spending patterns was previously fragmented across the supply chain with limited insights for utilities to glean. Reflecting on the foundation use case of account setup, capturing customer information and payment methods unlocks access for further energy management offerings, including customized efficiency programs. **Conclusion** The transformation of energy utilities through embedded finance represents a fundamental shift in how providers engage with customers and deliver value in the modern energy landscape. By leveraging Stripe's payment infrastructure and AWS's cloud capabilities, utilities can create a robust foundation that goes beyond basic billing to enable innovative energy solutions. This architecture not only streamlines payment operations but also unlocks powerful data insights that drive personalized energy services, sustainable program adoption, and new revenue streams. As the energy sector continues its transition toward sustainability, utilities equipped with this integrated payment and analytics infrastructure will be better positioned to meet evolving customer needs, accelerate clean energy adoption, and build lasting customer relationships. The future of energy utilities lies in this convergence of financial technology, data analytics, and sustainable energy solutions – creating a more efficient and customer-centric energy ecosystem. To learn more about developing applications with Stripe, visit our [YouTube Channel](https://www.youtube.com/stripedevelopers). Whether you're running a global online marketplace or operating a physical store, persisting and updating inventory quantities is critical to ensure accurate stock levels, prevent overselling, and maintain customer satisfaction by fulfilling orders promptly and reliably. This post walks through setting up an event-driven architecture that reacts to Stripe payment events, processes these events, updates inventory levels using AWS cloud services, and pushes changes to a frontend client in near real-time. ## Real-Time Inventory updates The demo application for this post is the DevRel Swag Store, a real app used during the [GOTO Chicago technology event.](https://gotochgo.com/2024) Attendees could purchase swag by scanning a QR code from a headless frontend SPA (single page application). The QR code loads a [Stripe payment link](https://stripe.com/gb/payments/payment-links) page for the customer to complete the transaction. Each successful transaction triggers an update to the store's inventory numbers, the payment link is disabled once all the inventory for a product is sold. Additionally, inventory levels are reflected immediately in both the inventory management system (backend) and the SPA (frontend) for all customers to see. When designing the inventory management system for the DevRel Swag Store, we faced a critical decision: whether to use [Stripe metadata](https://docs.stripe.com/api/metadata) for managing inventory data or to adopt a separate database solution. Each approach offered distinct advantages and challenges. ## Using Stripe Metadata for Inventory Management Stripe's metadata attribute enables you to store additional product data directly within Stripe. For example, you can embed inventory levels as metadata in each product object. Here’s a sample representation of a product using Stripe metadata: ``` { "id": "prod_ABC123", "name": "DevRel T-Shirt", "description": "High-quality cotton t-shirt for tech enthusiasts.", "metadata": { "inventory": "20", "size": "Large", "color": "Black" } } ``` ​ Each time a purchase is completed, an event such as **checkout.session.completed** is posted to a backend application via a webhook endpoint. This backend application verifies the event and makes an API call to Stripe to update the metadata attribute, reflecting the new inventory level. If the new inventory level is zero, it makes an additional API call to disable the payment link to prevent future payments from being processed. Since the application architecture [requires a backend to handle these events,](https://docs.google.com/document/u/0/d/14zjPjmONL5E4qxT7XY6C81qJVVonlrukqcXlWPwYrmo/edit) and call back to the Stripe API securely, we evaluated the necessity and efficiency of storing the inventory data within the backend infrastructure, and not within Stripe metadata. ## A Serverless Database for Inventory Management Storing the inventory levels within the backend infrastructure eliminates the need for additional API calls to Stripe, simplifying our operational workflow. Given that the backend infrastructure was already running on AWS services, it was decided to use [Amazon DynamoDB](https://aws.amazon.com/dynamodb/) to persist product inventory data. Here’s an example of how we represented a product in DynamoDB in instead of using stripe metadata attributes: ``` { "PK": "prod_ABC123", "SK": "store_XYZ789", "name": "DevRel T-Shirt", "description": "High-quality cotton t-shirt for tech enthusiasts.", "inventory": 20, "attributes": { "size": "Large", "color": "Black", "supplier": "Local Merchandiser" } } ``` DynamoDB provided additional capability to manage high transaction volumes, particularly for the burst of activity the store experiences during peak times. The final application architecture is made up of [Amazon EventBridge](https://aws.amazon.com/eventbridge/), [AWS Lambda](https://aws.amazon.com/lambda/), [Amazon DynamoDB](https://aws.amazon.com/dynamodb/), and [AWS IoT Core](https://aws.amazon.com/iot-core/), integrated with Stripe to handle payments. Each product in the store exists as a product object in Stripe with essential information such as a title, image, description and a corresponding price ID. All additional information, such as colors, sizes, long descriptions, tags, inventory numbers, and more, is stored in DynamoDB. The Stripe product ID is used as the mapping ID and stored in DynamoDB as the PK (Partition Key). The physical Store ID is used as the secondary key and stored in Dynamo DB as the SK (Sort Key). ![](/images/how-do-i-store-inventory-data-in-my-stripe-application/image1.png) With the backend architecture decided, the next decision is how best to update inventory levels in real time. Since the architecture is running on serverless services in the AWS cloud, we are able to make use of [Stripe Event Destinations](https://docs.stripe.com/event-destinations), and publish events to EventBridge instead of standing up a webhook endpoint. The following architecture diagram shows the data flow when a successful payment is taken: ![](/images/how-do-i-store-inventory-data-in-my-stripe-application/image4.png) 1. A Customer scans a QR code to load the Stripe payment link in their smartphone. 2. Customer purchases item using payment link. 3. A \`Checkout.session.complete\` event is raised, and published to Amazon EventBridge 4. The event is routed downstream to a Lambda function. 5. A Lambda function transforms the event payload, updates DynamoDB with the new inventory number, and publishes a message into an IoT Core topic. 6. The IoT Core topic pushes the message to the frontend application, where the new inventory level is updated for all customers to see. ## Handling race conditions A key challenge in this application is managing race conditions, where simultaneous events try to update the inventory levels in DynamoDB at the same time, leading to potential data inconsistencies. To prevent this and ensure data integrity, especially in high-volume environments, we've implemented an atomic decremental counter on the backend. DynamoDB facilitates this by providing atomic operations through its \`UpdateItem\` feature, which allows us to precisely adjust inventory counts as a single, indivisible action. This means that even when multiple transactions occur simultaneously, each update to the inventory is processed in isolation, without interference from other operations. The use of condition expressions ensures that decrements occur only if sufficient stock is available, thereby maintaining consistency and preventing negative stock levels. This robust approach guarantees that inventory levels remain accurate and conflicts are avoided, even under intense transactional loads. However, there is a short delay between the update in DynamoDB and the calls to the Stripe API to deactivate the payment link, both on Stripe's platform and on the frontend QR code. During this brief window, which might last a second or so, a customer could potentially complete a payment for an item that is no longer in stock. To automatically resolve this issue, we have implemented a post-payment validation process. This post-payment check involves verifying the inventory immediately after a payment is completed. When a payment event is received, the backend system cross-references the available inventory levels using a \`checkout.session.completed\` event from Stripe. If the inventory levels are found to be zero or inadequate, indicating that the purchase cannot be fulfilled, we automatically initiate a refund for the transaction by making a request to the [Stripe refund API](https://docs.stripe.com/api/refunds). This approach ensures that customers are not charged for unavailable products and are promptly informed about the initiation of a refund. ![](/images/how-do-i-store-inventory-data-in-my-stripe-application/image2.png) Issuing refunds in this way can lead to losses from non-refundable transaction fees collected by Stripe. Payment Links do not natively allow for backend inventory checks to conditionally facilitate the payment based on stock availability. Therefore, they don't inherently support pre-payment stock checks unless used in conjunction with additional backend logic for post-payment validation and potential refunds if stock isn't available. ## Going a step further with dynamic inventory checks As an alternative to Stripe Payment Links, a custom payment process allows the backend to verify stock levels before creating a Payment Intent using Stripe’s APIs directly. When a customer initiates a purchase, the system's frontend sends product information and the desired quantity to an API endpoint on the backend. This endpoint queries the inventory data in DynamoDB. If the stock levels are sufficient, it responds affirmatively, allowing the customer to proceed toward payment. If inventory is insufficient, it immediately notifies the customer, preventing them from advancing in the checkout process and offering alternatives or waitlist options as appropriate. Upon confirming inventory availability, the next step involves creating a Payment Intent using Stripe's API. In this implementation, the `capture_method` is set to `manual`. This means that the payment is authorized but not immediately captured, providing an additional safeguard against potential inventory discrepancies with a 7 day [authorisation validity window](https://docs.stripe.com/payments/place-a-hold-on-a-payment-method?locale=en-GB#authorization-validity-windows). Once the Payment Intent is established, the client secret is sent to the frontend of the application, which uses Stripe Elements to collect and securely handle customer card details. The frontend then confirms the Payment Intent with Stripe, facilitating the payment process on the customer’s side. As payments are confirmed, the `payment_intent.succeeded` event is published. This event notifies the backend system of successful payments, at which point the inventory database is updated to reflect the new stock levels post-purchase. The final step is to manually capture the payment after a successful inventory update. In this custom payment processing implementation, the chance of issues such as insufficient stock occurring between the inventory check and payment confirmation is greatly reduced. Additionally, should any issues occur, these are handled gracefully with customers promptly refunded, thus minimizing the risk associated with non-refundable transaction fees. ![](/images/how-do-i-store-inventory-data-in-my-stripe-application/image3.png) This robust and responsive payment infrastructure not only ensures accurate pre-payment inventory validation but also optimizes the purchasing experience, maintaining customer trust and satisfaction by dynamically handling inventory in real-time and mitigating the risk of overselling. ## Summary Managing real-time inventory updates is crucial for maintaining accurate stock levels and ensuring a smooth customer experience. The DevRel Swag Store, created for the GOTO Chicago event, exemplifies a robust system where inventory changes are reflected in near real-time through an event-driven architecture, integrating AWS services and Stripe for payment processing. The system's ability to update inventory plays a vital role in maintaining transparency with customers and preventing overselling. By using AWS and WebSocket connections, the store ensures that every purchase immediately impacts inventory visibility for all customers. To address race conditions—where multiple transactions could simultaneously affect inventory levels—the application employs DynamoDB's atomic operations. This approach safeguards data integrity by handling updates as singular, consistent actions, even during high transaction volumes. While Stripe Payment Links offer a straightforward solution for payments, a custom payment process allows for pre-payment inventory validation. This ensures that stock levels are confirmed before payment processing. If any discrepancies occur, automatic refunds are promptly issued using the Stripe refund API. This architecture not only strengthens inventory reliability but also optimizes the purchasing experience, fostering trust and customer satisfaction in a fast-paced retail environment. To learn more about developing applications with Stripe, [visit our YouTube Channel.](https://www.youtube.com/stripedevelopers) This article highlights development tips for efficiently developing and operating Stripe at a lower cost, as presented by the Japanese Stripe user community "JP\_Stripes". We'll focus on content from two events held in September 2024 in Aizuwakamatsu, Fukushima Prefecture, and Sapporo, Hokkaido. You'll learn about Stripe's new development environment, Sandbox, how to streamline product launches using Stripe Connect, and methods to address credit card fraud and the resulting revenue decline, all based on real-world cases. Discover insights from long-time Stripe users and in-house experts, based on actual projects and experiences, to find hints for improving your ongoing projects and web services. ## Simplifying Stripe-related Testing with Sandboxes At an event in Aizuwakamatsu, Fukushima Prefecture, a developer from a local Mobility as a Service company shared insights on testing Stripe-integrated applications. The session highlighted the challenges of E2E testing for features that interact with external services, such as increased test duration, flaky tests due to rate limits, and difficulty reproducing error scenarios. ![](/images/japan-community-highlights-2024-09/image1.jpg) [https://x.com/hidetaka\_dev/status/1837079154245914739/photo/1](https://x.com/hidetaka_dev/status/1837079154245914739/photo/1) However, these blockers were largely non-existent when using Stripe. The presenter emphasized that Stripe's rich API allows for intentionally triggering error cases like payment failures, reproducing state transitions using only the API, and smooth design, implementation, and operation of E2E tests. The speaker also noted that using actual service APIs for testing is feasible due to high rate limits and the availability of CI-specific Sandboxes. This prevents noise from test-created resources during development and debugging. This approach significantly simplifies the testing process for Stripe-integrated applications, allowing developers to create more robust and reliable tests with less effort. ### Sandboxes helps developers to improve their development and test flow As introduced in this session, Stripe offers sandboxes where you can set up to five test environments for different purposes. By using these sandboxes, you can prevent common issues that occur during team development, such as webhook events triggered by other developers becoming noise, or unintentionally modifying existing resources and interfering with the development of other features. Furthermore, you can set developer access rights for each sandbox. Create users with the Sandbox User role from [Settings \> Team](https://dashboard.stripe.com/settings/team) and security. [Sandbox User role](https://docs.stripe.com/get-started/account/teams/roles#sandbox_user) users are not allowed to operate or view the production account. By using this when external or partner company developers implement or investigate Stripe integration, you can prevent risks such as leakage of important data. ![](/images/japan-community-highlights-2024-09/image2.png) If you are developing an API that integrates with Stripe Webhooks in a sandbox, the Stripe CLI command to forward events to your local API changes slightly. Run the [*stripe preview use* comman](https://docs.stripe.com/sandboxes/dashboard/manage#switch-to-a-sandbox-in-the-cli)d to specify the sandbox account from which you want to receive events. ```bash stripe preview use You are currently operating on Default Sandbox ({{SANDBOX_ID}}) * indicates your active workspace. Use the arrow keys to navigate: ↓ ↑ → ← ? Select the sandbox you'd like to use: ▸ * Default Sandbox {{SANDBOX_ID}} QA Team Sandbox {{SANDBOX_ID}} Developer Sandbox {{SANDBOX_ID}} ``` ## Rapid Platform Development with Stripe Connect At an event in Sapporo, Hokkaido, the CEO of a content monetization platform (codoc) built using Stripe Connect shared their experience. They revealed that their platform was launched by a team of three in just nine months using Stripe Connect. To ensure smooth user onboarding and content monetization, they implemented two key strategies. First, they staggered the timing between service account creation and Stripe Connect account creation. Second, they implemented embedded UIs for payouts and payment management within the service dashboard. These approaches allowed users to seamlessly integrate with the platform and start monetizing their content quickly. The speaker emphasized how Stripe Connect's features enabled them to focus on their core business logic while relying on Stripe for complex payment processing and management tasks. ### Leveraging Embedded Component reduces time to market As of 2024, Stripe Connect has significantly simplified the implementation of its features into service dashboards. Traditional methods required developers to fetch data using Stripe API and implement UI based on that information. The new approach for platforms allows for substantial reduction in UI implementation costs and effort for feature additions by [embedding Stripe-provided iframes](https://docs.stripe.com/connect/supported-embedded-components) into the site. ![](/images/japan-community-highlights-2024-09/image3.png) To embed the iframe, all you need is the Connected Account ID from Stripe Connect. Retrieve this ID from your user database, then specify the data and operational features you want to display on the user's page through parameters. ```js app.post('/account_session', async (req, res) => { try { const accountSession = await stripe.accountSessions.create({ account: "{{CONNECTED_ACCOUNT_ID}}", components: { payments: { enabled: true, features: { refund_management: true, dispute_management: true, capture_payments: true, } } } }); res.json({ client_secret: accountSession.client_secret, }); } catch (error) { console.error('An error occurred when calling the Stripe API to create an account session', error); res.status(500); res.send({error: error.message}); } }); ``` After creating a session on the server-side API and obtaining the client\_secret, pass the data to the [loadConnectAndInitialize()](https://docs.stripe.com/connect/get-started-connect-embedded-components#load-and-initialize-connect.js) function provided by Stripe.js. Finally, specify the HTML tag where you want to mount the component. ```js import { loadConnectAndInitialize } from "@stripe/connect-js"; const fetchClientSecret = async () => { // Fetch the AccountSession client secret const response = await fetch('/account_session', { method: "POST" }); const {client_secret: clientSecret} = await response.json(); document.querySelector('#container').removeAttribute('hidden'); document.querySelector('#error').setAttribute('hidden', ''); return clientSecret; } const instance = loadConnectAndInitialize({ // This is your test publishable API key. publishableKey: "pk_test_xxxx", fetchClientSecret: fetchClientSecret, appearance: { overlays: 'dialog', variables: { colorPrimary: '#625afa', }, }, }); const container = document.getElementById("container"); const paymentsComponent = instance.create("payments"); container.appendChild(paymentsComponent); ``` By utilizing Stripe Connect in this way to provide your platform, you can create three types of user experiences: redirect, component embedding, and full scratch implementation. Choose the integration method based on your business stage, development resources, and the user experience you wish to provide. This approach not only streamlines the development process but also ensures that your platform stays up-to-date with the latest Stripe Connect features without requiring constant updates to your custom UI. ## Early Fraud Detection Using Webhooks A Stripe Technical Account Manager presented a session on fraud prevention and 3D Secure authentication, addressing the mandatory 3D Secure authentication requirement in Japan from March 2025 and Stripe's fraud prevention capabilities. ![](/images/japan-community-highlights-2024-09/image4.jpg) [https://x.com/hide69oz/status/1839629967648493925/photo/1](https://x.com/hide69oz/status/1839629967648493925/photo/1) The session highlighted the significant increase and sophistication of credit card fraud, as well as the issue of false positives in fraud prevention tools. These false positives can lead to failed legitimate orders and potential customer loss, with up to 75% of users experiencing failures on valid orders and 40% of those users stating they wouldn't attempt to purchase from that site again. To address these challenges efficiently, the presenter recommended enabling Stripe's fraud prevention tools (Radar / Radar for Teams) and implementing automation using Stripe Webhooks and APIs. A key strategy for fraud detection involves utilizing [Early fraud warning](https://docs.stripe.com/api/radar/early_fraud_warnings) Webhook events (radar.early\_fraud\_warning.created and radar.early\_fraud\_warning.updated) to identify high-risk transactions. For cases where the dispute fee exceeds the transaction amount, businesses can preemptively cancel orders and issue refunds to minimize fraud-related costs and occurrences. By combining Stripe's features with Webhooks and APIs, developers can mitigate the impact of fraud while reducing response costs and additional fees. This approach allows businesses to tackle the growing global issue of fraud more effectively, minimizing both direct financial losses and the indirect costs associated with fraud prevention and management. ## Conclusion Participating in Stripe's developer community provides valuable insights from experienced users who have developed and operated e-commerce and SaaS applications using Stripe. This knowledge can help you optimize your projects, increase sales, and improve operational efficiency. As community members share their experiences, it creates a cycle of continuous learning and improvement. Stripe offers various community engagement options: 1. User communities: [JP\_Stripes in Japan](https://jpstripes.connpass.com/). 2. Developer events: Hosted by the Developer Advocate team in the US, UK, and other countries [Meetup group](https://www.meetup.com/pro/stripe/). 3. Online communication: the [Discord group](https://discord.gg/stripe) and [Stripe Insiders](https://insiders.stripe.dev/) forum. To get involved, choose the format and area that best suits your interests. By engaging with these communities, you can stay updated on Stripe's latest developments and best practices, enhancing your skills and knowledge as a developer. To learn more about developing applications with Stripe, visit our [YouTube Channel](https://www.youtube.com/stripedevelopers). [![](/images/YouTube.png)](https://www.youtube.com/stripedevelopers) [https://www.youtube.com/stripedevelopers](https://www.youtube.com/stripedevelopers) Stripe events are an essential tool for notifying you about changes to objects in your Stripe account—whether it's a successful charge, a failed invoice payment, or an available reconciliation report. These events, triggered whenever the status of an object changes, are critical for tracking the lifecycle of Stripe objects and building event-driven processes. For instance, they enable automatic provisioning of services once a customer completes their subscription payment, or to automatically start preparing an order for shipment. Additionally, maintaining your own records of these events supports long-term analysis and troubleshooting. While Stripe retains events for 13 months, those older than 30 days are only accessible as summaries, and you might have a business need to store these events for a longer period of time. With Stripe's recent integration with [Amazon EventBridge](https://aws.amazon.com/eventbridge/), routing these events directly into your AWS account is now seamless, freeing you from managing the underlying logic. EventBridge allows you to integrate with over 20 AWS services, such as [AWS Lambda](https://aws.amazon.com/lambda/) for serverless processing or [Amazon SQS](https://aws.amazon.com/sqs/) for queue management, to enable asynchronous processing, allowing for decoupling of the publisher and processor of events to help support increased scalability. If you require extended retention and analysis capabilities, integrating Amazon EventBridge with [Amazon CloudWatch](https://aws.amazon.com/cloudwatch/) offers a powerful solution. Using the [Log Groups feature](https://docs.aws.amazon.com/AmazonCloudWatch/latest/logs/Working-with-log-groups-and-streams.html) in Amazon CloudWatch you can collate sequences of events originating from your Stripe account, enabling you to create advanced filter patterns for targeted insights. For example, if you wanted to build a custom metric based on the number of successful payments, you can write your own filter pattern regex for charge.succeeded events, and then create a custom metric based off of this. In this post, we will explore how you can leverage this integration to build dynamic dashboards and conduct in-depth analyses of your Stripe events, as show in the following example: ![An example of this integration to have Stripe events into a CloudWatch dashboard](/images/enhance-your-monitoring-by-integrating-stripe-events-with-aws-cloudwatch-log-groups/image1.png) By integrating Stripe events with CloudWatch, you gain enhanced capabilities for monitoring and storing event data. This setup allows you to efficiently process and analyse the data in several ways. You can create CloudWatch alarms to notify you of specific events, ensuring timely responses to critical issues. With [CloudWatch Logs Insights,](https://docs.aws.amazon.com/AmazonCloudWatch/latest/logs/AnalyzingLogData.html) you can run queries on your log data to identify patterns and anomalies, helping you troubleshoot problems faster. Additionally, you can set up dashboards to visualise trends and metrics related to your Stripe events, making it easier to understand the behaviour of your payment processes. This integration simplifies data handling and provides you with robust tools to turn raw event data into actionable insights for your applications. ## Real-Time Event Monitoring By visualising key metrics on custom CloudWatch dashboards, you can monitor key financial indicators at a glance. Widgets such as event counts for successful charges or failed payments enable immediate recognition of transaction trends and anomalies. This real-time insight is vital for maintaining the financial health of your operations and provides cues for timely interventions when anomalies occur. Using metric filters, you can extract and quantify specific event types, creating custom metrics that capture crucial aspects of your Stripe activity. For example, tracking charge.succeeded events allows you to monitor transaction success rates, providing a direct measure of your payment processing efficiency, or tracking invoice.payment\_failed events allows you to monitor failed invoice payments. These metrics can be visualised on dashboards or set as alarms, alerting you to unexpected fluctuations, all in near real time: ![](/images/enhance-your-monitoring-by-integrating-stripe-events-with-aws-cloudwatch-log-groups/image2.png) We can expand on this, for example, if you wanted to build an alarm to notify you for failed invoice payments, this can be achieved using native AWS functionality. To do this you’ll need to go through a few steps which are detailed in this section, at a high level the steps are: 1. Creating a filter pattern to match events 2. Create a metric filter based on that pattern 3. Build relevant alarms based on the value of that metric filter 4. Create notifications from those alarms ### Create a filter pattern To build real-time monitoring for invoice.payment\_failed events in CloudWatch, start by accessing the CloudWatch console. Here, navigate to the Logs section where you'll select the log group designated for Stripe events. Begin by creating a metric filter designed to detect invoice.payment\_failed events. Craft a filter pattern to match these events accurately, such as { $.type \= "invoice.payment\_failed" }. This pattern targets just the logs where an invoice payment has failed, ensuring that only relevant events are captured. ### Create a metric filter You’ll now need to create a metric filter, provide a suitable name, such as “InvoiceFailedFilter” and then in the metric details provide the metric namespace (to allow you to group similar metrics together in a single namespace), a metric name (to identify this specific metric), and a default value (typically we’d set this to 1), and then create the filter. Now you’ve got a filter pattern and metric filter created, you can go onto creating the alarms and notifications. ### Create an alarm Begin by navigating to the CloudWatch console and selecting Alarms from the menu to initiate the process of creating a new alarm. Here, explore the StripeEvents namespace and choose the FailedInvoices metric, which you've set up earlier. Selecting this metric allows you to track the frequency of failed invoices in real time. With the metric selected, the next step is to configure the alarm settings. Set the observation Period to every 5 minutes or a timeframe that suits your operational needs, ensuring timely incident detection. For Statistics, opt for 'Sum' to monitor the total number of failed events over each period. You will then set a threshold value; this should be a number that indicates an unusually high volume of failures, potentially affecting business processes. You may need to analyse the number of failed invoice payment events you typically expect to see to set this threshold, alternatively you can also look at using the built in [anomaly detection feature](https://docs.aws.amazon.com/AmazonCloudWatch/latest/monitoring/Create_Anomaly_Detection_Alarm.html) in CloudWatch. ### Create notifications In the Notification settings, define actions to be triggered when the alarm state changes. Set the alarm to notify stakeholders via Amazon SNS, selecting existing topics or creating new ones for email or SMS alerts. This immediate notification allows teams to respond swiftly to potential issues. Complete the setup by providing a clear and descriptive alarm name and description before creating the alarm. You should now have an event driven solution to handling Stripe events for failed invoice payments, along with robust monitoring when the number of failed payments breaches a set threshold, allowing you real time insights into potential issues. ## Analysing Long-Term Trends Visualising long-term trends is key for strategic planning. By charting historical data on transaction volumes and success rates, you can identify seasonal spikes or patterns, informing marketing strategies and operational scaling. This aids in optimising service readiness to align with business cycles and maximise customer satisfaction. Using CloudWatch Logs Insights enables sophisticated querying of your logs for deeper analysis. Whether performing detailed audits of financial transactions or spotting patterns of recurring errors, Logs Insights empowers you to unlock hidden insights within your data. This analytical depth supports strategic planning and strengthens your operational efficiency. ## Enhancing Troubleshooting and Debugging Dashboards and Metric Filters are vital for proactive issue resolution. By setting up detailed monitoring of transaction failures or unexpected patterns, you can swiftly pinpoint root causes. For example, by creating a filter pattern for charge.failed events and then building a metric from this, you can see the failed charges in real time, both plotting the historical trend on a graph, but also being able to have real time alerting if the number of failed charges exceeds a set threshold. Real-time alerts coupled with historical data visibility enable you to deploy corrective measures swiftly, minimising downtime and enhancing customer satisfaction. Detailed analysis of logs using Logs Insights aids in thorough debugging and performance evaluation. Querying error logs for contextual information about transaction failures provides clarity, helping diagnose and rectify issues effectively, ensuring smooth operational continuity. ## Conclusion By integrating Stripe events with Amazon EventBridge and Amazon CloudWatch, you unlock a powerful suite of tools for monitoring, analysing, and optimising your payment operations. This setup not only enhances your ability to respond to real-time events but also supports long-term strategic initiatives, ensuring your business remains agile and resilient in the face of a dynamic financial landscape. Are you confident that your data storage and access strategy supports the growth of your Stripe integration? Choosing the right data storage approach can enhance security, boost performance, and enable scalability. As your application evolves, where you store and manage your data becomes important not only for operational efficiency but also for maintaining user trust. This blog post explores various options focusing on product data, from using Stripe’s built-in data management capabilities to maintaining a separate database, and provides best practices for accessing that data and optimizing your integration. ## Using Stripe for Data Management Stripe is primarily designed for managing financial transactions online, but it also offers capabilities for managing core product data, including basic product descriptions, images, and pricing. Using Stripe alone for your data management may seem tempting as it simplifies your architecture and maintains a single source of truth, reducing potential discrepancies between the product and payment information. However, this approach may limit your options as your application grows and requires you to think about how to access the data securely via the [Stripe API](https://docs.stripe.com/api). Stripe has various types of [API keys](https://docs.stripe.com/): * **The secret API key** must be stored securely on the server side and is used for making authorized API calls to Stripe, as it provides full access to your account, available in test mode, sandboxes, and live environments. * **The publishable API key** is safe to include in client-side code and is used to securely collect payment information without accessing sensitive operations, and it is available in test mode, sandboxes, and live environments. * **The restricted API key** limits access to specific operations based on customized permissions, providing an additional layer of security while interacting with Stripe, and it can also be utilized in test mode, sandboxes, and live environments. If your integration consists of a client-side application running in the browser, you might attempt to use the publishable API key to retrieve product data that is stored within Stripe. However, this returns an 'invalid\_request' error, as publishable API keys can only be used to collect payment information, such as creating tokens or processing payments, not for accessing other API endpoints like retrieving product details. ![](/images/data-access-patterns-for-simple-stripe-Integrations/image4.png ) You might then decide to use the private API key to access Stripe data directly from the client; however, **this is highly inadvisable** because it exposes sensitive credentials to anyone who can inspect the client-side code, significantly increasing the risk of malicious use, data breaches, and the potential for unauthorized actions on your Stripe account: ![](/images/data-access-patterns-for-simple-stripe-Integrations/image1.png) Use publishable keys for public operations while keeping sensitive operations securely handled on the server side. ### Using a Web Backend A web backend is a common solution to securely integrate with Stripe in a client-side application. It acts as a bridge between the client and the Stripe API. When a user requests product information, the client app makes an HTTP request to a public endpoint on the backend, designed specifically for fetching product data. Upon receiving the request, the backend uses your Stripe private API key, or restricted API key to securely interact with the Stripe API, retrieving the necessary product details without exposing sensitive credentials. After processing the request, the backend formats the data and sends it back to the client application. This structure allows for efficient data transfer while keeping API keys confidential, ensuring a secure environment and providing a seamless user experience. ![](/images/data-access-patterns-for-simple-stripe-Integrations/image6.png) ### Using Serverless Functions (Microservices) An alternative to a traditional web backend is serverless functions, which integrate seamlessly into a microservices architecture. This approach uses independent, stateless functions for specific tasks, such as retrieving product information. Serverless functions offer significant advantages. They automatically scale to handle increased demand, accommodating common spikes without manual intervention. Additionally, you only pay for the time the functions run, leading to cost savings compared to maintaining dedicated server infrastructure. This architecture allows developers to focus on writing individual functions by reducing the complexity of managing a whole server. Ultimately, adopting serverless functions provides a scalable, cost-effective solution for modern applications. In the following example, the client-side application invokes an [AWS Lambda function](https://aws.amazon.com/lambda/) via a public HTTPS endpoint generated by [Amazon API Gateway](https://aws.amazon.com/api-gateway/). API Gateway then proxies the request and the response to and from the Lambda function, which calls out to the Stripe API using the private or restricted API key. ![](/images/data-access-patterns-for-simple-stripe-Integrations/image5.png) ### Adding a Global CDN Integrating a [content delivery network (CDN)](https://en.wikipedia.org/wiki/Content_delivery_network) like [Amazon CloudFront](https://aws.amazon.com/cloudfront/) can significantly enhance the performance of applications using serverless functions and APIs, particularly when interacting with the Stripe API or API Gateway. Rather than constantly "hammering" these APIs for data, using CloudFront allows for direct access to cached data, reducing the number of API calls made and thereby decreasing both costs and response delays associated with Lambda and API Gateway usage. This setup provides a more responsive experience for end users too, ensuring that they receive data quickly without the latency involved in server-side processing. However developers must also implement a strategy to update the CloudFront cache at an appropriate cadence to ensure that users are served the most current information, balancing performance with data freshness efficiently. ### Adding User Authentication Another important consideration is to restrict access to live product information so that only authenticated users can retrieve it. You can achieve this by implementing authentication in your client-side application and changing the API Gateway endpoint from a public endpoint to one that requires authentication. This modified setup needs either a JWT or a Cognito user authentication before proxying the request to the Lambda function. By doing so, you would not only reduce traffic and associated costs to your Lambda function but also decrease the rate of calls made to the Stripe API, ensuring that only authenticated users can invoke these operations. ## Maintaining a Separate Database If your application requires detailed product metadata, inventory tracking, or custom attributes, you may need to build additional functionality. Using a separate database (like [Amazon DynamoDB](https://aws.amazon.com/dynamodb/), [PostgreSQL](https://www.postgresql.org/), or [MongoDB](https://www.mongodb.com/)) to store your application data can provide you with greater flexibility and scalability. With a database, you can store extensive product details, including variants, inventory levels, and additional metadata unique to your business model. Design your database schema to fit your specific application needs, allowing for complex data structures and relationships. Having a dedicated database can also improve data retrieval speeds and enable more efficient querying for reports and analytics. Storing relevant product IDs in DynamoDB, applications can create a more efficient and scalable architecture that allows for quick data retrieval. In the following updated example, once the client-side app requests product information, a Lambda function retrieves the product ID from the DynamoDB table. It then fetches additional data from the Stripe API as needed, such as payment links, price IDs, or any dynamic attributes related to that product. This approach not only enhances performance by reducing the number of direct API calls to Stripe but also enables the application to maintain a robust mapping of products that may include custom metadata or configurations not present in Stripe. By using the combination of a dedicated database and serverless functions, developers can create a versatile and efficient system that provides users with richer product data while optimizing API usage and cost. ![](/images/data-access-patterns-for-simple-stripe-Integrations/image2.png) However, managing a separate database introduces additional overhead, particularly when it comes to ensuring that product data remains synchronized with Stripe. To maintain up-to-date consistency, it's essential to implement synchronization mechanisms that can handle changes. You can achieve this with [Event Destinations](https://stripe.dev/blog/growing-your-stripe-integration-with-event-destinations) or [webhook endpoints](https://docs.stripe.com/api/webhook_endpoints) from Stripe, to notify your backend of relevant events such as product updates or successful payments. By setting up a mechanism to listen for these events, your backend can automatically update the database to reflect any modifications made in Stripe. For a detailed use case on how to implement this synchronization using event destinations, refer to the "**Reacting to Stripe events in Real-Time"** blog, which provides insights into creating a robust solution for real-time inventory management. ![](/images/data-access-patterns-for-simple-stripe-Integrations/image3.png) ## Conclusion Choosing where to store, and access data in your Stripe integration is a pivotal decision that impacts the security, performance, and scalability of your application. While Stripe provides useful capabilities for managing core product data, using a separate database like DynamoDB can offer enhanced flexibility and detailed metadata management. Incorporating serverless functions can further streamline operations and reduce infrastructure overhead, making the application more responsive to user demands. Integrating a CDN like CloudFront helps optimize API interactions by reducing the need for repetitive calls to Stripe, ensuring a smoother experience for end-users. Ultimately, the combination of these strategies can lead to an efficient ecosystem that not only meets business needs but also delivers a seamless experience to users. Implementing synchronization mechanisms via event destinationsor webhooks is essential for maintaining data consistency across platforms. To learn more about event destinations, check out the videos on our [Stripe developers YouTube channel](https://www.youtube.com/stripedevelopers). The new [Stripe sandboxes](https://docs.stripe.com/sandboxes) feature makes it easier to manage multiple test environments from a single Stripe account. Sandboxes provide richer functionality than the existing test mode feature and enable you to map test environments more easily to multiple developers in your AWS accounts. This blog post summarizes the key differences between test mode and sandboxes, shows how to use sandboxes from an AWS-hosted application, and explains how to manage sandbox access if you have more than one developer working on a project. ## **The differences between test mode and sandboxes** Stripe’s existing [test mode](https://docs.stripe.com/test-mode) feature is useful for developers testing integrations, offering different API keys from production. It’s designed to allow you to simulate successful payments, card errors, disputes, refunds, and authentication scenarios. Its purpose is to allow you to ensure your application responds correctly to the variety of outcomes that can happen in payment flows, and isn’t intended for load-testing or representing all Stripe objects available. Stripe sandboxes provide a significant evolution of functionality that improves the testing experience for developers. A sandbox is a completely isolated account containing its own set of data, separate from production accounts or other sandboxes. Unlike test mode, which is available to all users who have access to your production account, you can define who has access to sandboxes. With Sandboxes, you can simulate external events to test payments, accumulating a fake balance instead of real money movement, and use the Test Payouts functionality using API v2 keys, calling API v2. You can use the CLI or SDK to interact with sandboxes by simply changing the API keys used. While sandboxes are intended to replace test mode, you can continue to use the legacy test mode if preferred. Sandboxes are intended as an additive product experience, and do not require you to migrate or make any changes to your development workflow. | | Legacy test mode | Sandboxes | | :---- | :---- | :---- | | *Number per account* | 1 | 5 | | *API key access* | Unique API key per account | Unique API key per sandbox | | *Isolation* | Some settings changed in test mode also affect your live account | Complete isolation per sandbox, separate from your production account | | *Access control* | Users who can access the account can also access both production and test modes | You can define which users can access sandboxes, separate from production access | ## **Using sandboxes from an AWS-hosted application** From the Stripe dashboard, you can access sandboxes from the account picker menu in the upper left. One sign-in may have access to multiple accounts, and each account may have up to 5 sandboxes. ![](/images/managing-multiple-stripe-test-environments-from-aws/image4.png) Sandboxes must be created in the Dashboard UI by clicking **Create sandbox** from this page. Each sandbox must have a name that can be changed after creation. You can also choose to copy settings from your live account, such as the country where the account is based \- see the [sandbox settings page](https://docs.stripe.com/sandboxes/dashboard/sandbox-settings) in the documentation to see exactly which attributes are copied. Once you have created all the sandboxes needed, you can access the list from the account dropdown or by visiting [https://dashboard.stripe.com/sandboxes](https://dashboard.stripe.com/sandboxes). As with sandbox creation, the deletion process is also managed in this page \- click the trashcan icon to delete a sandbox when finished. ![](/images/managing-multiple-stripe-test-environments-from-aws/image2.png) You can access a sandbox from your AWS-hosted application by using its API keys. To see these, click **Open** next to the sandbox you want to use. The **Home** tab shows the publishable and secret keys. Generally, for server-based apps, you use the secret key from your workload hosted in AWS. Unlike production secret keys, which are only presented once, you can reveal secret keys in sandbox mode anytime from this screen. ![](/images/managing-multiple-stripe-test-environments-from-aws/image1.png) Depending on your configuration and security preferences, you may prefer to use a restricted API key even in the sandbox. These keys can be scoped to specific read and write permissions per resource. This can be good practice for more complex payment configurations with many developers or teams, or where you want to mirror restricted keys in production. You can control access to the sandbox from the **Team and security** option in the **Settings** menu, or from [https://dashboard.stripe.com/settings/team](https://dashboard.stripe.com/settings/team). Once a developer has an API key, they have the ability to take any action that the API key has access to. As a result, if you are running your application in AWS, you should only provide login access to the Stripe dashboard to administrators or other roles as needed, and separately guard your API keys. While a sandbox will never have access to production and cannot be used to move real money, [it’s recommended that you treat API keys](https://www.google.com/url?q=https://docs.stripe.com/keys-best-practices&sa=D&source=docs&ust=1724797609980886&usg=AOvVaw1U2IklVnlHh6uR5ndZ8knp) for these the same way as you do for production. Specifically: * Don’t embed API keys in code, or pass keys around in chat, email, or other unsecure means. Use services like [AWS Secrets Manager](https://docs.aws.amazon.com/secretsmanager/) to retrieve the key dynamically at runtime and don’t log the key in your code. * Don’t store keys in source repositories like [GitHub](https://github.com/), even if the repo is private since this can result in key leakage later. * Rotate your keys periodically in the Stripe dashboard, and then update AWS Secrets Manager. Restrict who has access to create, modify or delete keys in both Stripe and AWS. With the keys set up, you can then save production and sandbox keys in AWS Secrets Manager. By using the secret name as an alias when you [retrieve the secret](https://docs.aws.amazon.com/secretsmanager/latest/userguide/retrieving-secrets.html), you can confidently use the same code in test and production environments. This is because you haven’t embedded the key directly or used any logic pathing based on the environment, which helps to limit bugs caused by human error. ## **Managing sandbox access with more than one developer** Many Stripe customers use AWS to host their applications, and for enterprise workloads they often [use multiple AWS accounts](https://docs.aws.amazon.com/whitepapers/latest/organizing-your-aws-environment/organizing-your-aws-environment.html) to separate their development environments. [AWS Identity & Access Management](https://docs.aws.amazon.com/iam/) allows you to configure granular permissions for your developers to control precise access to resources in those accounts. In larger development teams, you can integrate with directory services (like Active Directory) and use groups so that as employees join and leave your organization or its team, access control is synchronized accordingly. Once you have configured sandboxes in the dashboard and secured the secrets in AWS Secrets Manager, you should then use IAM resource policies to control access by IAM principals. You can grant access to a single secret to multiple users and roles, or grant access to users and roles in other AWS accounts. To add a secret in Secrets Manager, you can use the AWS Management Console, [AWS SDKs](https://aws.amazon.com/developer/tools/), or [AWS CLI](https://aws.amazon.com/cli/). For the CLI, enter the following command in the terminal: ```bash aws secretsmanager create-secret \ --name mySandboxSecret \ --secret-string file://mysecret.json ``` While the JSON payload for mysecret.json can store any arbitrary text, in this case it could contain the following: ```bash { "name": "mySandbox", "apiKey": "<< YOUR API KEY >>" } ``` *Learn more about [creating secrets in AWS Secrets Manager](https://docs.aws.amazon.com/secretsmanager/latest/userguide/create_database_secret.html) using the AWS SDKs.* For AWS accounts running beta accounts of your software, you can restrict access to the production Stripe keys to ensure they never accidentally call production APIs. Similarly, you can prevent the production AWS account from accessing sandbox secrets. By embedding this logic into policies instead of logic in code, you can systematically enforce key access and implementation and reduce human error. *Learn more about [configuring permission policies](https://docs.aws.amazon.com/secretsmanager/latest/userguide/auth-and-access_examples.html) or read the [AWS Secrets Manager User Guide](https://docs.aws.amazon.com/secretsmanager/latest/userguide/auth-and-access_examples.html) for details.* ## **Conclusion** With Stripe sandboxes, you can work in test environments that provide greater functionality than the legacy test mode, with strict isolation between each other and production accounts. For AWS developers using multiple AWS accounts to manage application environments with teams of developers, you can then secure the API keys in AWS Secrets Managers and use IAM resource policies to limit access to those keys. This helps to avoid sharing keys openly, and allows you to apply rigorous access control best practices. You can take advantage of integration with directory services and other automations in your AWS account to lock-down API key access to your developers. To learn more about developing applications with Stripe, visit our [YouTube Channel](https://www.youtube.com/stripedevelopers). ![](/images/managing-multiple-stripe-test-environments-from-aws/image3.png) If you're a developer venturing into the bustling e-commerce landscape of the United Arab Emirates (UAE), you need a payment processing system that is not only reliable but also efficient. Since its public debut in the UAE in April 2021, Stripe has become a powerful tool for businesses aiming to thrive in the digital age. From accepting payments and making payouts to enhancing security and mitigating fraud, Stripe provides a comprehensive suite of services that cater to both local and international markets. This guide explains the robust features that Stripe offers, assists you in setting up your Stripe account, and arms you with the navigation tips you need to excel in using Stripe’s Dashboard and its myriad capabilities. ## Stripe in the UAE Stripe is much more than a payment gateway; it’s a dynamic platform designed to support a variety of payment methods, currencies, and business models. For developers building solutions for businesses in the UAE, understanding Stripe's extensive capabilities is critical. ### A Powerful Suite of Products When you think of payment processing, your first thoughts might revolve around receiving payments, but Stripe goes far beyond that. Its extensive array of products caters to a diverse set of business needs. For instance, [Stripe Billing](https://stripe.com/ae/billing) allows for the automation of recurring billing for subscription models, while [Stripe Connect](https://stripe.com/ae/connect) serves as a payment solution specifically for marketplaces or platforms, managing payments between multiple stakeholders. [Stripe Radar](https://stripe.com/ae/radar) uses machine learning to help shield businesses from fraudulent activities. Tools like [Sigma](https://stripe.com/ae/sigma) offer customized reporting, while Climate allows companies to contribute to climate solutions, underscoring Stripe's commitment to social responsibility. ### Comprehensive Payment Method Support Stripe's support for a broad range of payment methods is one of its standout features. Visa and Mastercard are standard, but Stripe also embraces modern digital payment solutions like Apple Pay and Google Pay. Such flexibility ensures that developers can create user experiences that cater to various customer preferences without elaborate customizations. In the context of the UAE, where a multitude of currencies coexists, Stripe accommodates not only the Emirati Dirham (AED) but also over 135 other currencies, including less common denominations like the Bahraini dinar (BHD) or the Kuwaiti dinar (KWD). ### Developer-Friendly API One of Stripe's most popular attributes for developers is its robust API, which simplifies integration into websites and mobile applications. For developers, the cleanliness and comprehensibility of Stripe’s API documentation can significantly reduce the time spent in development and troubleshooting. Whether you're integrating payment processing in a complex e-commerce platform or a simple website, the API will allow you to focus on your application's functionality rather than getting bogged down by the nuances of payment processing. ## Setting Up Your Stripe Account in the UAE Getting started with Stripe is relatively straightforward, but proper attention to detail during the setup process is essential for smooth operation. As a developer, you’ll want to ensure compliance and readiness from the outset. Here’s a detailed look at the steps required to set up your Stripe account specifically for UAE businesses. ### Step-by-Step Account Creation To begin your journey with Stripe, navigate to the Stripe [website](https://stripe.com/ae) and click on “Start now”. Here, you will be prompted to provide your email address and create a password for your account. Once this is completed, check your inbox for a confirmation email and follow the link to verify your email address. Next, log in to your Stripe account and complete your business profile. It’s important to provide accurate information, including your business name, address, and phone number, as this will be used to establish your identity and compliance within the UAE. ### KYC Compliance Documentation Stripe adheres to "Know Your Customer" (KYC) regulations, requiring detailed information and documentation for [account verification](https://support.stripe.com/questions/uae-business-verification-requirements). The requirements vary depending on the nature of your business entity: * Sole Establishments and Free Zone Entities: You will need to provide your trade license or freelancer permit issued in the UAE. * Limited Liability Companies (LLCs) and Branches of LLCs: Similar documentation, including the memorandum of association and proof of an active bank account, will be required. * For any holding companies that own 25% or more of your business, relevant documentation is also necessary, including their memorandums of association. Additionally, owners and company representatives with significant ownership stakes must supply color copies of passports, Emirates IDs, and residence visas (if applicable). ### Linking Your Bank Account Upon completing your business profile and KYC documentation, the next step is to link a [supported](https://support.stripe.com/questions/supported-banks-in-the-uae) bank account to Stripe to facilitate payouts. For sole proprietors and free zone establishments, linking a personal bank account is acceptable, while single-member LLCs can opt for either. Conversely, multi-member LLCs must strictly use a business bank account. Once your bank account is linked, take a moment to review all the information you've inputted, ensuring accuracy and clarity. When everything checks out, click the “Activate your account” button, and Stripe will process your information. You’ll receive a confirmation once your account is active, which typically occurs quickly, assuming all documentation is accurate and complete. ### Quick Approval Tips To expedite the account approval process, ensure that all details match your official documentation precisely. Upload high-quality images of required documents, and complete all fields to avoid unnecessary delays. ## Navigating the Stripe Dashboard for UAE Businesses The Stripe [Dashboard](https://dashboard.stripe.com/) serves as your command center for managing all payment operations effectively. Keeping track of transactions and customer data can be daunting for developers, but Stripe’s user-friendly interface simplifies these tasks significantly. **Home Page Overview**: Upon logging in, the home page greets you with an overview of your account activity. Here, you can monitor recent payouts, ongoing transactions, and important notifications that may require your attention. **Balances and Transactions Tabs**: The Balances tab is important for monitoring your scheduled and processed payouts, providing developers with a clear view of your funds. Ensuring that linked bank account details are accurate here is quintessential to preventing payout delays. **The Transactions tab** is your go-to for reviewing payment history. You can filter results to locate specific transactions, which is invaluable for debugging potential issues or just tracking payments efficiently. **The Customers tab** allows you to manage your customer database effectively. You can view individual customer details and transaction histories, which is particularly beneficial for delivering customer support or analyzing user behavior. **The Products Catalogue tab** is another essential feature where you can create and manage products and their respective prices for your business. This centralized management helps streamline operations as you make adjustments to your offerings. ## Accepting Payments Locally and Internationally with Stripe One of the key selling points for developers integrating Stripe into their applications is its capability to handle payments from both local and international customers seamlessly. ### Streamlined Payment Process Stripe automates currency conversion when accepting payments, allowing you to display prices in AED while converting international payments to your local currency behind the scenes, simplifying the customer experience and eliminating potential confusion at checkout. Moreover, Stripe supports charges in various [three-decimal currencies](https://docs.stripe.com/currencies#three-decimal), such as the Bahraini dinar (BHD) and the Omani rial (OMR), further enhancing its compatibility with regional payment behaviors. ### Enhancing User Experience with Mobile Payments In an increasingly mobile-dominant world, Stripe’s support for [Apple Pay](https://docs.stripe.com/apple-pay) and [Google Pay](https://docs.stripe.com/google-pay) facilitates swift and secure transactions. By allowing customers to make payments with a single touch using previously saved card information, you can significantly enhance the checkout efficiency in your applications. Additionally, the Stripe [Link](https://stripe.com/ae/payments/link) enables customers to use a saved payment method, making transactions even faster. It’s worth noting that while systems like Benefit, Fawry, and Tabby provide additional payment options, they require separate integrations and agreements, which necessitates coordination with respective payment providers. ### Handling Cross-Border Transactions Stripe’s multi-currency support amplifies your business's global reach by allowing you to process payments in over [135 currencies](https://docs.stripe.com/currencies#presentment-currencies). This feature positions you to expand your business beyond the borders of the UAE, providing a seamless payment solution for international customers that balances convenience and accessibility. ### Real-Time Transaction Monitoring Your Stripe Dashboard offers real-time updates, ensuring that you are always in the loop concerning your financial activities. The built-in analytics tools provide insights into your sales performance, customer behavior, and growth trends, greatly aiding in business decision-making. For further analysis, exporting transaction and customer data into CSV formats is straightforward, enabling developers to conduct more detailed evaluations outside of the Stripe ecosystem if necessary. ## Efficient and Reliable Payouts Understanding the payout structure is critical for developers, as this impacts cash flow management for businesses using Stripe. Payouts are made in AED and USD, directly deposited into your UAE bank account following a T+5 business day schedule. Following the processing of a payment, funds are typically disbursed five business days later, with the payouts adhering to a Monday-to-Friday schedule. Importantly, no payouts occur on weekends or public holidays, which is a standard operating procedure that developers should factor into their financial planning. ### Tax Considerations with Stripe As a UAE-based business, it’s essential to comprehend how tax regulations affect your Stripe fees. Stripe does not charge VAT on fees for account holders in the UAE, provided a valid UAE VAT ID has been submitted. However, if you fail to provide this information, VAT will be applied to all Stripe fees. Developers can easily manage [tax rates](https://dashboard.stripe.com/test/tax-rates) and invoicing through the Dashboard, defining any number of tax rates to apply to invoices and payments. Whether you opt for exclusive or inclusive tax rates, you’ll find that Stripe facilitates the necessary functionality to remain compliant with local regulations. ## Using Stripe Payment Links for Quick Transactions For SMEs or social sellers who may not have a full-fledged website, Stripe [Payment Links](https://stripe.com/ae/payments/payment-links) offer an easy method to accept payments without complicated setups. ### Creating Payment Links To create a payment link, simply navigate to the [Payment Links](https://dashboard.stripe.com/payment-links) tab in your Stripe Dashboard, where you can specify the product or service you’re selling, including pricing and currency. Once created, share this link via email, social media, or messaging apps to initiate transactions quickly. ### Advantages of Payment Links The simplicity intrinsic to Payment Links translates into convenience for both businesses and customers. With minimal setup, businesses can access their payment functionalities swiftly, while customers enjoy a seamless transaction experience. ## Conclusion In conclusion, Stripe’s comprehensive suite of features positions it as a leading payment processing solution for businesses in the UAE. For developers, understanding how to set up an account, navigate the Dashboard, and leverage powerful tools can significantly streamline payment operations, enabling businesses to concentrate on what they do best—growing. As you embark on your journey with Stripe, remember that this guide serves as a foundational resource. Stay tuned for future blog posts where we will dive deeper into specific advanced features and strategic insights to maximize your Stripe experience in the vibrant UAE landscape. Embrace the potential of Stripe, and watch your business thrive in the digital era. Many Stripe customers use AWS to host their applications and use CI/CD tools to manage and deploy changes to their production and test environments. Stripe has always provided a [test mode](https://docs.stripe.com/test-mode) for testing integrations but for complex applications additional capabilities may be needed. With the new [Stripe sandboxes](https://docs.stripe.com/sandboxes) feature, developers can manage multiple test environments from a single Stripe account. It provides richer functionality than test mode and enables you to map test environments more easily to multiple developers in your AWS accounts. With Sandboxes, you can simulate external events to test payments, accumulating a fake balance instead of real transactions, and use the Test Payouts functionality using API v2 keys, calling API v2. You can use the CLI or SDK to interact with sandboxes by simply changing the API keys used. This blog post shows how to use demo data in Stripe sandboxes for AWS-hosted applications and how to store the resulting API key securely for use in CI workflows. ## **Seeding sandboxes with test data locally** Using the [Stripe API](https://docs.stripe.com/api), you can create test data for customers, products, prices, and other Stripe objects that can help test the accuracy of your Stripe integration. To import a custom set of data for your sandbox, you can optionally export data from other sandboxes or production accounts, or create test data from a script. This section focuses on [Product](https://docs.stripe.com/api/products) data but the same process applies to other objects, such as [Customers](https://docs.stripe.com/api/customers/object). To export product data from a production account: 1. Navigate to the **Product catalog** tab in the [Stripe dashboard](https://dashboard.stripe.com/) for the production account. 2. Choose **Export products** to open the export configuration dialog: ![](/images/using-demo-data-for-testing-stripe-integrations-in-aws/image1.png) 3. Under *Date range*, choose **All** to include all products configured in the account, then choose **Export**. This creates a CSV file containing all your products. ![](/images/using-demo-data-for-testing-stripe-integrations-in-aws/image3.png) 4. To import this data into a Sandbox, you can [iterate through the CSV file](https://github.com/stephanie56/stripe-batch-subscribe/blob/master/createCustomers.js) and use the SDK to [create each product](https://docs.stripe.com/api/products/create). If you only want to use test data, you can build a test script to run from your local development machine. To build this script: 1. Run stripe login in your terminal and [log into](https://docs.stripe.com/cli/login) your preferred sandbox account. Any subsequent CLI commands will be run against this account. 2. In your text editor, create a new file with the name `create-test-data.sh`. 3. Ensure you update the file’s permissions in your terminal. In macOS or Linux, run `chmod 755 create-test-data.sh`. 4. To create products, add the following line per product, replacing the attributes with your product’s value: `stripe products create \--name "Your product name" \--description “Your description”` 5. Run the script from the terminal: `./create-test-data.sh` ![](/images/using-demo-data-for-testing-stripe-integrations-in-aws/image2.png) ## **Creating test data from CI processes and automation tools** You can also use this script in your [GitHub Actions](https://docs.github.com/en/actions) or [continuous integration](https://aws.amazon.com/devops/continuous-integration/#:~:text=Continuous%20integration%20is%20a%20DevOps,builds%20and%20tests%20are%20run.) tools to populate sandboxes. However, you must update it to ensure the [script has a valid API key to run against the appropriate sandbox](https://www.google.com/url?q=https://docs.google.com/document/d/1ESNC_iD7ndrxhzlSgN5nFAHqRJl0ElpfZXzlfWKJjlQ/&sa=D&source=docs&ust=1724777703563355&usg=AOvVaw1eZbHDJ3nTKkSMF30S-rmZ). Since the interactive mode of stripe login requires input in a terminal, the easier way is to pass the API key into each CLI action: ```bash stripe products create --name "Your product name" --description “Your description” --api-key "sk_test_YOUR_KEY" ``` Although you can use an API key as a variable, it’s recommended that you store this information securely, and access it via an environment variable. You should not use the following example, or commit this code to source control, to avoid potentially leaking API keys later: ![](/images/using-demo-data-for-testing-stripe-integrations-in-aws/image5.png) *Read more about [Best Practices for Key Management](https://docs.stripe.com/keys-best-practices)..* From AWS-hosted applications, you can store the sandbox API key in [AWS Secrets Manager](https://docs.aws.amazon.com/secretsmanager/) to retrieve the key dynamically at runtime and don’t log the key from code. Secrets Manager allows you to securely store and rotate secrets and use [AWS Identity & Access Management](https://docs.aws.amazon.com/iam/) to limit access. You can enable read or write access per IAM user or IAM role or principal, and grant access over multiple AWS accounts if you using accounts to manage different environments. You can use the [AWS CLI](https://aws.amazon.com/cli/) to access the secret via the script. You can also use the [AWS SDK](https://aws.amazon.com/developer/tools/) to access the secret directly from code, if you are using services like AWS Lambda or AWS Fargate. In the CLI, for Linux or macOS, you can use the following command to extract a secret and then use the `SECRET_KEY` variable in your script: ```bash SECRET_ARN=arn:aws:secretsmanager:us-east-1:abcd123:secret:/example SECRET_KEY=STRIPE_SANDBOX_API_KEY aws secretsmanager get-secret-value --secret-id $SECRET_ARN --query SecretString --output text | grep -o '"$SECRET_KEY":"[^"]*' | grep -o '[^"]*$' ``` Similarly, PowerShell developers can use the following to extract the secret via the Secrets Manager CLI: ```PowerShell $secret_key = aws secretsmanager get-secret-value --region --secret-id | ConvertFrom-Json ``` Once your test scripts finish running, you may optionally run a script that uses the [product delete API](https://docs.stripe.com/api/products/delete) to remove these from your sandbox. While a sandbox will never have access to production and cannot be used to move real money, it’s recommended that you treat API keys for these the same way as you do for production. Specifically: * Don’t embed API keys in code, or pass keys around in chat, email, or other unsecure means. Use services like [AWS Secrets Manager](https://docs.aws.amazon.com/secretsmanager/) to retrieve the key dynamically at runtime without logging the key in your code. * Don’t store keys in source repositories like [GitHub](https://github.com/), even if the repo is private since this can result in key leakage later. * Rotate your keys periodically in the Stripe dashboard, and then update AWS Secrets Manager. Restrict who has access to create, modify or delete keys in both Stripe and AWS. ## **Conclusion** Stripe’s new sandbox feature makes it easier to create an isolated testing environment loaded with test data. You can use the built-in templates to automatically populate a sandbox with data. Alternatively, for more control, you can export your production data and import into a sandbox, or create test data using the CLI via scripting. This post shows how you store your API keys securely using AWS Secrets Manager for your AWS-hosted applications. Your CI scripts can then access those secrets at runtime, store the secret in an environment variable, and pass this into the Stripe CLI with each request. This helps create test scripts that handle secrets securely and you can commit to code repos without leaking API keys. To learn more about developing applications with Stripe, visit our [YouTube Channel](https://www.youtube.com/stripedevelopers). ![](/images/using-demo-data-for-testing-stripe-integrations-in-aws/image4.png) Once your Stripe integration is live, it’s easy to set it and forget it. You can continue your work and focus on other elements of your application. However, trouble may be brewing behind the scenes. Unless you’ve set up robust logging and alerting in your application you may not be aware of increasing Stripe API error rates which could impact your bottom line. Luckily, using Workbench, the new developer-centric view of your Stripe data, you can analyze API and webhook failures without any changes to your existing code. We can examine this in practice by taking a look at an account in the Stripe Dashboard. ![image a](/images/avoiding-silent-errors/a.png) At first glance, the account looks healthy. A few failed payments isn’t unusual and sales are consistently flowing. There is nothing to immediately indicate any issues in the application. However if you dig a bit deeper you’ll see a different story. ### Getting started with Workbench To dig deeper, we'll use Workbench. This tool provides a more convenient way for developers to access and search logs at scale. It doesn’t require you to set a logging level, storing all available information by default while still obfuscating credit card numbers and other sensitive data. To see Workbench: 1. Navigate to https://dashboard.stripe.com/ in your preferred browser and log into your Stripe account. 2. If you have multiple accounts configured, use the drop-down in the top-left to select the store whose API activity you wish to view. Workbench reports and content are scoped to the store level. 3. In the bottom-right corner of the browser, hover over the terminal icon to expand the menu, then select the caret symbol to open Workbench. ![image b](/images/avoiding-silent-errors/b.png) *Workbench is not a browser extension and does not rely on CLIs or other tools in your development machine, so you can use it immediately without installing additional software.* ### Debugging with Workbench Once you have opened Workbench you’ll see exactly what I meant. ![image c](/images/avoiding-silent-errors/c.png) The API requests graph is showing a lot of failures. Here’s a closer look at that graph: ![image d](/images/avoiding-silent-errors/d.png) According to the data, each day around 50% of the API calls result in some form of error. That’s alarmingly high. This could be caused by many different sources depending on the application’s structure. It could be something on the backend failing and retrying too much, it could be an issue on the frontend causing real transactions to fail, or it could be some form of attack or abuse from a leaked secret key. You’ll have to dig deeper to pinpoint the cause, but there is definitely something interesting going on. With a busy account, there are many API requests every week. It would be a frustrating task to attempt to sift through those logs and determine what is failing. Luckily, you don’t need to filter and categorize all of those by hand. Inside Workbench, the “Errors” tab shows a simplified overview of the types of errors you’re experiencing. ![image e](/images/avoiding-silent-errors/e.png) This view has three areas - the list of errors from the last week on the left, a sample failing request in the middle, and a list of relevant logs of this error type on the right. This lets you quickly see which types of errors are happening a lot versus errors which are less common. According to our data, there are four types of errors occurring 20+ times this week. Those errors are: * “invalid_cvc” * “invalid_expiry_month” * “invalid_expiry_year” * “incorrect_number” If you open the Stripe documentation for [payment decline codes](https://docs.stripe.com/declines/codes), you see that all of these errors relate to verifying credit card information. This means there is probably some issue in the backend which is retrying failed cards. Choosing one of the “incorrect_number” API calls allows us to glean more information. ![image f](/images/avoiding-silent-errors/f.png) The rightmost pane displays data for one of the recent instances of the “incorrect_number” failures. In that pane, you can see the abridged “API Key”. This key begins with “sk_” so you know it’s a secret key (e.g., one used server-side) so we’d expect the “Source” and “IP” fields to align with the backend servers. Let's say your application runs several backend server instances in multiple regions, this would make figuring out which of those backend instances is making these API calls a bit tricky. However, let’s say we do know that this backend application is written entirely in .NET and there is no production Golang code in the stack. That means the “Source” field claiming the request is from “Go-http-client/1.1” doesn’t line up. Either the backend is using a custom user-agent or there is some other code being run elsewhere. To verify that the API key associated with this request is actually the production API key, copy the last 4 characters of the key and open the API Keys section of the Dashboard. ![image g](/images/avoiding-silent-errors/g.png) The names of the keys here indicate that a lot of keys are in Live mode but being used for testing. That’s not right! It’s like your team has never heard of [Sandboxes](https://docs.stripe.com/sandboxes) - the successor to Test Mode which allows dozens of Stripe developers to each have their own testing space. Sandboxes would allow a much shorter list of keys and make sure that developers don’t step on each other’s toes or worse step on production data Anyway, let's look for the key which made that failing request. ![image h](/images/avoiding-silent-errors/h.png) The key is named *“Attacker Engineering Test Key”*. That explains a lot - it looks like this key is being used by a team who is testing API calls which resemble potential attack scenarios. At this point, you are able to track down this team in your organization, tell them about Sandboxes, and let them know just how much they’re polluting your production logs. In this case, these failing API calls were coming from another good natured team but along the way you still managed to find a lot of ways to improve your organization's Stripe integration. For example, you should stop issuing production keys for testing, stop making test API calls in production, and start using Sandboxes. ### Conclusion Workbench allows you to better understand your Stripe integration so instead of worrying you were able to quickly track back the source of these invocations in a way which was not possible before. The best part is you’ve hardly scratched the surface of the type of observability Workbench provides. Whether you’re looking to understand trends in your webhook invocations, life cycles of Stripe objects like customers and subscriptions, or API logs like we did today then Workbench is a great place to start. To learn more about Workbench check out the [Workbench documentation](https://docs.stripe.com/workbench). If there are more features you would like to see, let us know by clicking the Send feedback button at the top of the Workbench panel. To learn more about developing applications with Stripe, visit our [YouTube Channel](https://www.youtube.com/stripedevelopers). [Large language models](https://en.wikipedia.org/wiki/Large_language_model) (LLMs) can be used to create a broad spectrum of automations, often personified as “AI agents.” These automations can translate prompts into sequences of programmatic actions to interact with other systems. These agents are built using new frameworks that blend prompting and [function calling](https://platform.openai.com/docs/guides/function-calling). This post explores how to integrate the [Stripe agent toolkit](https://github.com/stripe/agent-toolkit) into these new frameworks and some common use cases. Stripe can enhance your agents’ functionality by enabling access to financial services and tools to allow your agents to help you earn and spend funds, facilitate common support operations, and bill for usage with metered billing. ### What is an agentic workflow? An “agentic workflow” combines large language models and function calling to achieve an objective. For example, consider searching for and purchasing a flight. A user may query, “Book a flight from New York to San Francisco on 4/24 for under $500.” To achieve this, we need to be able to: 1. Turn the query into variables – `origin`, `destination`, `departure_time`, and `budget`. 2. Search and filter a flight database provided those variables. 3. Present the user with the options and enable them to select. 4. Purchase the flight. Frameworks including [Vercel’s AI SDK](https://sdk.vercel.ai/), [LangChain](https://www.langchain.com/), and [CrewAI](https://www.crewai.com/) make it easier to build multi-agent workflows, breaking down each task and assigning to specialized agents. “Tools” can be provided to an agent – in this case to search online or to execute a purchase. These tools are code snippets that the LLM provider can “ask” the agent framework to execute. ![](/images/adding-payments-to-your-agentic-workflows/adding-payments-to-your-agentic-workflows.png) ### Integrate function calling With [Stripe’s agent toolkit](http://github.com/stripe/agent-toolkit), you can provide your agents access to the Stripe API. It natively supports [Vercel’s AI SDK](https://sdk.vercel.ai/), [LangChain](https://www.langchain.com/), and [CrewAI](https://www.crewai.com/), and works with any LLM provider that supports function calling. It’s built on top of Stripe’s [Node.js](https://github.com/stripe/stripe-node) and [Python](https://github.com/stripe/stripe-python) SDKs. For example, imagine we want to build a “business partner” agent that can help facilitate tasks like invoicing users. We can instantiate a new `StripeAgentToolkit` with our secret key and pass its tools to the agent. ```javascript import {StripeAgentToolkit} from '@stripe/agent-toolkit/ai-sdk'; import {openai} from '@ai-sdk/openai'; import {generateText} from 'ai'; const toolkit = new StripeAgentToolkit({ secretKey: "sk_test_123", configuration: { actions: { // ... enable specific Stripe functionality }, }, }); await generateText({ model: openai('gpt-4o'), tools: { ...toolkit.getTools(), }, maxSteps: 5, prompt: 'Send <> an invoice for $100', }); ``` The toolkit can be used alongside any other set of tools allowing for complex, multi-step operations. For example, you can combine Stripe and Slack together to create powerful automations. ```py from langchain.agents import AgentExecutor, create_structured_chat_agent from langchain_community.agent_toolkits import SlackToolkit from stripe_agent_toolkit.langchain.toolkit import StripeAgentToolkit stripe_agent_toolkit = StripeAgentToolkit( secret_key=os.getenv("STRIPE_SECRET_KEY"), configuration={ "actions": { "payment_links": { "create": True, }, "products": { "create": True, }, "prices": { "create": True, }, } }, ) slack_toolkit = SlackToolkit() tools = stripe_agent_toolkit.get_tools + slack_toolkit.get_tools() agent = create_structured_agent(llm, tools, prompt) agent_executor = AgentExecutor(agent=agent, tools=tools) agent_executor.invoke({ "input": "Create a new payment link for $100 and post it to #my-channel" }) ``` This SDK is an early exploration of integrating Stripe into agentic workflows. As the behavior of agents is non-deterministic, we recommend exploring the SDK in test mode and running evaluations to assess the performance of your application. Additionally, we recommend using [restricted API keys](https://docs.stripe.com/keys#create-restricted-api-secret-key) to scope access to the functionality your agent requires. ### Use financial services Agentic workflows need not have exclusively virtual outcomes. Imagine a travel *agent* that can book flights for your company. Using LLMs and function calling we can assemble a set of agents that can search for flights online, return options, and ultimately identify a booking URL. With Stripe, you can embed financial services and enable the automation of the purchase flow as well. Using [Stripe Issuing](https://stripe.com/issuing), you can generate single-use virtual cards that agents can use for business purchases. This enables your agents to spend funds. The [Issuing APIs](https://docs.stripe.com/issuing) allow you to approve or decline authorizations programmatically, ensuring your purchase intent matches the authorization. Spending controls allow you to set budgets and limit spending for your agents. For example, consider the intermediate step that returns a list of possible flights, and the agent presents them to the human user. ``` Airline 1, New York -> SFO, $250, #ABC Airline 2, New York -> SFO, $300, #DEF ``` In response to a selection, a card can be generated restricted to that amount ```py stripe.issuing.Card.create( cardholder="ich_123", currency="usd", type="virtual", spending_controls={ spending_limits=[{ amount="30000", interval="all_time" }] } ) ``` You can monitor card usage with Stripe’s real-time authorization handling, allowing your system to approve or decline agent purchases, matching against the user intent. The card can also be deactivated after the purchase has been confirmed. Paired together, this takes the best of each integration pattern – the search and assessment capabilities of LLMs and function calling with the programmatic constraints, controls, and determinism of APIs. Users expect that the proposed purchase is the purchase that is occurring. Presenting the options and confirming the selection to the user is valuable, but more critically is having the backing controls and monitoring to validate that intent matches action. ### Measure usage with metered billing Conducting agentic workflows have material cost – typically measured by token use or time. With [usage-based billing](https://docs.stripe.com/billing/subscriptions/usage-based), you can charge based on a customer’s usage of your product. The toolkit provides middleware to easily track prompt and completion token counts and send billing events for that customer. ```javascript import {StripeAgentToolkit} from '@stripe/agent-toolkit/ai-sdk'; import {anthropic} from '@ai-sdk/anthropic'; import { generateText, experimental_wrapLanguageModel as wrapLanguageModel, } from 'ai'; const stripeAgentToolkit = new StripeAgentToolkit({ secretKey: 'sk_test...', configuration: { // ... } }); const model = wrapLanguageModel({ model: anthropic('claude-3-5-sonnet-20240620'), middleware: stripeAgentToolkit.middleware({ billing: { customer: 'cus_123', meters: { input: 'input_tokens', output: 'output_tokens', }, }, }), }); const result = await generateText({ model: model, prompt: 'Tell me a joke!' }); ``` We have a quickstart guide to help you quickly launch a chatbot with usage-based billing at [https://docs.stripe.com/agents/quickstart](https://docs.stripe.com/agents/quickstart). ### Testing and reliability Because agent behavior is non-deterministic, we recommend starting with the SDK in test mode and running evaluations to assess your application’s performance. Additionally, use restricted API keys to limit access to the functionality your agent requires. The toolkit can be configured to use a subset of Stripe functionality, and we recommend selecting the tools required for the task you’re giving to your agent. For example, if you are building an agent to manage an inventory of your products, you can configure the toolkit to only include functions related to products and prices. ```javascript const toolkit = new StripeAgentToolkit({ secretKey: "sk_test_123", configuration: { actions: { products: { create: true, }, prices: { create: true }, }, } }) ``` Further, we’ve minimized the surface area of our SDK to only focus on a subset of the Stripe API and we will expand supportability. Over time we’ll also provide richer configuration options to help you manage the available functionality and data of the SDK. This is motivated by two reasons. First, as the number of available tools increases, the likelihood of selecting the right set of tools decreases. Secondly, although restricted access keys limit access at the authentication level, making the API unavailable removes any attempt whatsoever, helping guide the agent to the preferred outcome and avoiding tool failure mid-task. For similar reasons, we’ve also reduced the request and response bodies of Stripe API requests that are returned to the LLM – for example, when creating a Payment Link, the response is abbreviated to only the ID and the URL – although the raw API response contains far more fields. By reducing the request and response shape to only the necessity, the LLM has better “focus” on what values to key on. This is even more important in multi-step flows where multiple function calls have to occur in sequence and depend on the values of previous calls. ### Conclusion With the Stripe agent toolkit you can now easily integrate Stripe into the most popular agent frameworks. This enables you to automate common workflows that depend on Stripe and also helps unlock new use-cases by providing agents access to financial services on tools. In addition, usage-based billing can quickly integrate in these agent frameworks to bill your customers. Take a look at [agent toolkit documentation](https://docs.stripe.com/agents) to explore more of its capabilities and how Stripe is supporting agent businesses. This article shows you how to use [Stripe's sandbox](https://docs.stripe.com/sandboxes) to simplify your development process. You'll learn to create isolated test environments, simulate real-world scenarios, and debug your subscription logic efficiently. Building a robust subscription system can be challenging. By following this article, you'll gain practical skills to handle complex situations like trial periods, plan changes, and payment failures. Whether you're new to Stripe or an experienced developer, you'll discover how to use Stripe's tools to build a more reliable and flexible subscription system. ## Create a clean test environment with a single click When considering the introduction of a new SaaS or API, it's important to have test data or a demo account. Ideally, these test environments should be free of any data unrelated to the test. If multiple people are conducting testing at the same time, it is also good to have an environment where their operations and logs do not get mixed up. Stripe addresses these concerns by using a sandbox environment. Sandboxes are disposable test environments for developers, and a single Stripe account allows for the creation of up to five of them. The following scenario creates a new test environment for investigating how to build a new subscription system. To create a new test environment (sandbox), click the **Create** button on [the Dashboard](https://dashboard.stripe.com/test/sandboxes). The sandboxes page provides the ability to manage each sandbox, allowing you to [create, delete, and access](https://docs.stripe.com/sandboxes/dashboard/manage) them. ![](/images/developing-and-investigating-subscription-data-flow/image1.png) When creating a sandbox, a new test environment is prepared, completely isolated from production. In this sandbox, API keys, webhook settings, customer data, and everything else is provided in a clean state. This allows you to freely experiment when testing specific features or integrations without affecting existing data or settings. ![](/images/developing-and-investigating-subscription-data-flow/image2.png) Create the first subscription and customer by clicking the **\+** button on the header navigation. ![](/images/developing-and-investigating-subscription-data-flow/image3.png) Stripe provides a simple web form to create a new subscription. You can create it by filling out the following details: customer email address, product name, price, billing frequency, and quantity. ![](/images/developing-and-investigating-subscription-data-flow/image4.png) ## Trace dashboard operations at the API / event level When developing a new system, first clarify how it should behave. Consider not only successful application scenarios but also contract and system integration changes after trial periods end. Include workflows for plan changes. This approach helps prevent unintended behavior and overlooked use cases. In Stripe, use a sandbox account on the dashboard to identify these scenarios. The workbench helps you check data changes based on operations and send webhook events. Analyze the behavior when modifying subscription plans on the dashboard to gain deeper insights. Navigate to the [subscription management page](https://dashboard.stripe.com/test/subscriptions) to find your first subscription. You can check the details by clicking on the subscription you want to examine. ![](/images/developing-and-investigating-subscription-data-flow/image5.png) To use [Workbench](https://docs.stripe.com/workbench), access it through the Stripe dashboard by clicking on the **Developers** link and then selecting **Workbench**. You can also launch it by pressing the \`\~\` key on your keyboard when in the Stripe Dashboard. If you don't see this link or button, you need to enable Workbench in the [Developers Settings page](https://dashboard.stripe.com/settings/developers) in order to use it. ![](/images/developing-and-investigating-subscription-data-flow/image6.png) After opening the **Workbench**, you will see an **Inspector** examining the subscription. The inspector allows you to view the resource data as JSON code and displays lists of API calls and events. If you don't see this link or button, you need to enable Workbench in the [Developers Settings page](https://dashboard.stripe.com/settings/developers) in order to use it. ![](/images/developing-and-investigating-subscription-data-flow/image7.png) To learn how to create a similar subscription using API calls, navigate to the **Logs** tab. You can find the **POST request to "/v1/subscription"**, which is used to create a subscription. ![](/images/developing-and-investigating-subscription-data-flow/image8.png) The **Request POST Body** of this log reveals the API request details for the plan change. Compare these parameter values with the API documentation to confirm your implementation. ![](/images/developing-and-investigating-subscription-data-flow/image9.png) To understand how to integrate Stripe with your system, check the **Events** tab. There, you can see what types of events Stripe sends when a new subscription is created. The *customer.subscription.created* event notifies you when a new subscription is created, and the *invoice.created* event means the invoice has been generated. You can learn more about subscription-related events on the [Stripe documentation page](https://docs.stripe.com/billing/subscriptions/webhooks). ![](/images/developing-and-investigating-subscription-data-flow/image10.png) As demonstrated above, the workbench provides crucial information for implementation planning, particularly API request parameters. In the **Inspector** tab's **Logs** section, you can examine request contents for API calls, Stripe CLI operations, and dashboard actions. ## Time advancement with the Test clock In the case of a subscription system, you need to test various scenarios like plan updates, cancellations, and late payment scenarios. The easiest way to test each scenario is by modifying subscriptions from the dashboard.The following scenario cancels a subscription at the end of the billing period. Schedule a subscription cancellation by selecting **Cancel subscription** from the **Actions** menu. ![](/images/developing-and-investigating-subscription-data-flow/image12.png) To immediately check its cancellation behavior, Stripe provides a subscription simulator called [**Test Clocks**](https://docs.stripe.com/billing/testing/test-clocks?). You can simulate the passage of time by clicking **Run simulation** on the dashboard. ![](/images/developing-and-investigating-subscription-data-flow/image13.png) After the modal pops up, set the new date beyond the end of the subscription period. Then, click the "Advance" button to start simulating the passage of time. This simulates the state change that occurs during a subscription cancellation, allowing you to test your system's response to this event. ![](/images/developing-and-investigating-subscription-data-flow/image14.png) Once the test clock simulation is complete, the subscription status changes to **Canceled**. You can see what events Stripe sent to your system when the customer subscription was canceled by visiting the **Events** tab in the **Workbench**. The *customer.subscription.deleted* event is a notification about the subscription cancellation. You can examine the event data to see what information your system will receive from this event. ![](/images/developing-and-investigating-subscription-data-flow/image15.png) This browser-based approach provides easy access to information crucial for planning your Stripe integration. ## Implementation methods through in browser shell In the Stripe dashboard, you can investigate data and test API requests, which helps clarify your implementation strategy. To test an API request, open the **Shell** tab in Workbench. Here, you can use the Stripe CLI directly in your browser. To simplify the process, the UI includes an **API Explorer** on the right. It allows you to check API parameters and set their values. Once you configure the API and its parameters, the values are converted into CLI commands that you can execute immediately. ![](/images/developing-and-investigating-subscription-data-flow/image16.png) The **Shell** tab provides a feature to convert commands into implementation code. By clicking the **Print SDK Request** button, you can generate source code in the language you choose. You can then copy this code into your application, and replace the values with variables to continue developing your Stripe integration. ![](/images/developing-and-investigating-subscription-data-flow/image17.png) Using these developer-oriented features in the Stripe Dashboard, you can streamline the entire process—from defining subscription and payment system requirements to designing workflows, testing API requests, and converting them into application code—all within a single browser tab. ## **Conclusion** Remember that thorough testing across various scenarios is crucial for building a robust subscription system. You need to consider not only when, who, how, and how much to charge but also various payment scenarios. These include managing plan changes, handling service suspensions due to lost or stolen credit cards, and addressing non-payment issues caused by expired cards. Stripe sandbox provides powerful tools for implementing and testing your subscription-based services. You can quickly set up a clean test environment, and simulate complex scenarios like plan changes, trial expirations, and payment failures. And Stripe dashboard helps you analyze API calls and events to understand the subscription lifecycle, and streamline the development process for testing to implementation. To learn more about developing applications with Stripe, visit our [YouTube Channel](https://www.youtube.com/stripedevelopers). ![](/images/YouTube.png) This post introduces how to manage SaaS feature entitlements efficiently using [the Stripe API](https://docs.stripe.com/api). It explains why it's important to provide multiple plans to your customers and how to differentiate each plan through entitlement management. With the Stripe API, managing entitlements can become more straightforward, allowing you to focus on building and improving your core services. ## Implement entitlements management linked to plans One of the key challenges when offering multiple pricing plans for SaaS products is managing access rights for each plan. This involves generating a list of features and relationships for each plan, referencing subscription, pricing, and access information, and manipulating related databases and resources when new features are released or when customers change their plans. This section provides insights into these issues and offers solutions to manage them effectively. SaaS products offer multiple pricing plans to customers, which typically include: * A free or low-cost plan that allows customers to evaluate the service and consider it for future large-scale projects. * A top-tier plan that provides essential features and support for major customers. * A mid-range plan that balances price and features. For many SaaS companies, a significant portion of their revenue comes from these high-end plans. Profitability data shows that high-end plans contribute significantly to revenue. For instance, in many SaaS businesses, [70% of revenue often comes from top-tier plans.](https://www.youtube.com/watch?v=BzB5xtGGsTc) This emphasizes the need to strategically design and price higher-level plans to maximize profitability. For more information on SaaS pricing, refer to [the guide published by Stripe](https://stripe.com/guides/atlas/saas-pricing), which provides case studies and insights on pricing strategies. To address the challenge of managing access rights efficiently, companies can use databases or APIs to manage permissions. However, for startups or project teams launching new businesses, this approach may not be ideal due to getting the development resources required. When developing a new web service from scratch, it is essential to focus on creating a product that is as attractive and valuable to customers as possible. By using Stripe, you can manage the flow and billing of your application while handling access permissions for each plan via API calls. ## Centralized plan and permission management with Stripe entitlements API Stripe provides an Entitlement management API. You can use this API to register features to be offered to customers and associate them with products. To experience the configuration flow and operation, first create a pricing plan and an entitlement management system. In the following example, a media site offers three types of content distribution: | Product Name | Price | Permissions | | :---- | :---- | :---- | | Free | $0 | View free articles | | Personal | $98/month | View free articles / View paid articles | | Business | $980/month | View free articles / View paid articles / View business reports | ### Creating products and entitlements [Stripe's API](https://stripe.com/docs/api) can be tested using the [Workbench](https://docs.stripe.com/workbench) in the Stripe dashboard. [Workbench](https://docs.stripe.com/workbench) allows you to perform development, testing, and debugging all within the browser without installing any software or browser extensions. Open the workbench and navigate to the Shell tab, where you can run Stripe's CLI. To create the pricing plans, run: ```bash stripe products create --name="Free" \ -d "default_price_data[currency]=usd" \ -d "default_price_data[unit_amount]=0" \ -d "default_price_data[recurring][interval]=month" stripe products create --name="Personal" \ -d "default_price_data[currency]=usd" \ -d "default_price_data[unit_amount]=9800" \ -d "default_price_data[recurring][interval]=month" stripe products create --name="Business" \ -d "default_price_data[currency]=usd" \ -d "default_price_data[unit_amount]=98000" \ -d "default_price_data[recurring][interval]=month" ``` This returns a JSON response with an id starting with prod\_ which means the creation succeeded. The command's output is also reflected in the API Explorer on the right. ![](/images/managing-saas-access-control-with-stripe-entitlements-api/image1.png) You can also convert the CLI command into code using the SDK of the specified language by clicking the Print SDK request link. ![](/images/managing-saas-access-control-with-stripe-entitlements-api/image2.png) By using the Shell tab's functions, you can check the operation of the Stripe API and create implementation code in the following flow: 1: Copy the CLI command described in the documentation or tutorial. 2: Paste the CLI command into the Shell tab of the Workbench. 3: Execute the CLI command and check the implementation method and the created resources. 4: Change the values displayed in the API Explorer and consider how to realize the settings you want to build. 5: Convert the CLI command or the contents set in the API Explorer into source code with Print SDK request. 6: Incorporate the created source code into your application. ### Setting up access permissions When managing access permissions with Stripe, first create Entitlements resources using the [Entitlements API](https://docs.stripe.com/api/entitlements/feature). Here, you prepare three Entitlements: viewing free articles, viewing paid articles, and viewing business reports. To set this up, run the following commands in the Shell tab: ```bash stripe entitlements features create \ --lookup-key="free_posts" \ --name="Free article viewing" stripe entitlements features create \ --lookup-key="paid_posts" \ --name="Paid article viewing" stripe entitlements features create \ --lookup-key="biz_reports" \ --name="Business report viewing" ``` ![](/images/managing-saas-access-control-with-stripe-entitlements-api/image3.png) ### Registering the created Entitlements with the pricing plan By associating Stripe Products and Entitlements, you can obtain a list of Entitlements owned by customers based on the information of the Products the customers have subscribed to. To register Entitlements for each Product, run the command using the Product ID you created earlier, which starts with \`prod\_\`, and the Entitlements ID, which starts with \`feat\_\`. **Product ID of Free:** ```bash stripe product_features create \ "Product ID of Free" \ --entitlement-feature="Feature ID of Free article viewing" ``` **Product ID of Personal:** ```bash stripe product_features create \ "Product ID of Personal" \ --entitlement-feature="Feature ID of Free article viewing" stripe product_features create \ "Product ID of Personal" \ --entitlement-feature="Feature ID of Paid article viewing" ``` **Product ID of Business:** ```bash stripe product_features create \ "Product ID of Business" \ --entitlement-feature="Feature ID of Free article viewing" stripe product_features create \ "Product ID of Business" \ --entitlement-feature="Feature ID of Paid article viewing" stripe product_features create \ "Product ID of Business" \ --entitlement-feature="Feature ID of Business report viewing" ``` ![](/images/managing-saas-access-control-with-stripe-entitlements-api/image4.png) This completes the linking of plans and Entitlements. You can now use the product ID to obtain a list of Entitlements available for each pricing plan from the API. ![](/images/managing-saas-access-control-with-stripe-entitlements-api/image5.png) ### Creating a new subscription To create a new subscription, use the dashboard or Checkout and Payment Links. When a customer purchases a subscription, a list of Entitlements associated with the subscribed product can be obtained via an API request using the Customer ID. Your application can use the response from this API to determine whether specific features are available to the customer. ```bash stripe entitlements active_entitlements list \ --customer="customer ID starting with cus_" \ --expand "data.feature" ``` ![](/images/managing-saas-access-control-with-stripe-entitlements-api/image6.png) This API checks permissions across multiple subscriptions. Even if you are considering a pricing structure for a service that offers optional plans with additional features on top of the basic plan, you can still manage permissions using the Entitlements API. This allows you to create pricing plans and products in Stripe, and connect them to lists of access permissions. You can also obtain a list of permissions for each user easily. ## Access permission changes are synced with the application via webhooks Some services may need to execute a workflow if permissions are granted or revoked, such as when there are changes to infrastructure configurations or system settings. These types of changes in permissions can also be integrated using Stripe's webhook events. To handle permission changes associated with plan changes or cancellations, use the newly added entitlements.active\_entitlement\_summary.updated event. This event includes information such as the "target customer ID" and "before and after permission settings". ```json { "object": { "object": "entitlements.active_entitlement_summary", "customer": "cus_OYXmEvKfYDp7DA", "entitlements": { "object": "list", "data": [], "has_more": false, "url": "/v1/customer/cus_OYXmEvKfYDp7DA/entitlements" }, "livemode": false }, "previous_attributes": { "entitlements": { "data": [ { "id": "ent_test_61QSA7cL7mjHYxePl41IDF6qBhttt65Y", "object": "entitlements.active_entitlement", "feature": "feat_test_61QS9o4tAnK9ATPJX41IDF6qBhttt7Cq", "livemode": false, "lookup_key": "paid_posts" }, { "id": "ent_test_61QSA7cYW9h6XG8zt41IDF6qBhttt27s", "object": "entitlements.active_entitlement", "feature": "feat_test_61QS9nd2kxnCe1ksR41IDF6qBhttt6Ui", "livemode": false, "lookup_key": "free_posts" } ] } } } ``` Using this data, you can set up configurations with logic like "if there are permissions that only exist in previous\_attributes, execute a workflow that modifies related resources or the database." ## **Conclusion** In developing a Software as a Service (SaaS) product, many things must be created in addition to the core functions of the service. These include authentication and billing payment functions, as well as the definition and assignment of access rights for each user—a crucial aspect of monetizing a service, as introduced in this article. To focus resources on the development and maintenance of functions that are the core value of the service, these functions should be implemented efficiently and with minimal code. Stripe's Entitlement API is a new solution to address these challenges for service developers. By managing the list of functions provided to customers on Stripe, you can also manage which functions are granted access rights for each fee plan presented to users. Furthermore, by consolidating the feature list on Stripe, you can easily offer special plans to important customers and heavy users by creating dedicated products and rates and assigning Entitlement to them. In addition, changes to subscription plans, price revisions, and system changes due to the release of new features can be synchronized using the Webhook events provided by Stripe. To try out these features or validate the data sent by the webhook event, use the Workbench feature built into the dashboard. To learn more about developing applications with Stripe, visit our [YouTube Channel](https://www.youtube.com/stripedevelopers). ![](/images/YouTube.png) While Stripe offers powerful [pre-built solutions,](https://docs.stripe.com/no-code) many companies may wish to adapt their setup without disrupting existing integrations. By using Stripe’s [Event Destinations](https://docs.stripe.com/event-destinations) with cloud services, businesses can create tailored payment workflows that enhance functionality without modifying their core systems. One of the primary advantages of Stripe's offerings is that they reduce the time-to-market for businesses. With minimal setup, companies can start accepting payments, often within a matter of hours. While the base features are powerful, they may not cover every unique requirement a business might have. This is where customization comes into play. Stripe provides developers with the ability to extend its core functionalities through various [events](https://docs.stripe.com/api/events) and [APIs](https://docs.stripe.com/api). This flexibility allows businesses to adapt Stripe's capabilities to better match their specific workflows and customer experiences. Event Destinations is now in GA and rolling out to all accounts. This blog post discusses the benefits of using Event Destinations with [Amazon EventBridge](https://aws.amazon.com/eventbridge/), and showcases practical use cases demonstrating how companies can achieve effective customizations. ## **Using Event Destinations and Amazon EventBridge** Think of EventBridge as an optional target or event destination for Stripe webhooks. With event destinations you can send events to an [AWS account](https://aws.amazon.com/) using EventBridge, or deliver them to a [webhook endpoint](https://docs.stripe.com/webhooks). Incorporating Event Destinations and EventBridge into your payment processing architecture offers a host of advantages that make event handling easier and more efficient. Typically, receiving webhooks at a webhook endpoint often requires developers to manage server maintenance and scalability, and implement authentication with [header security checks](https://docs.stripe.com/webhooks?#verify-official-libraries). This can lead to complexity and additional overhead, particularly for teams more focused on product development than infrastructure management. [Using EventBridge as an event destination](https://docs.stripe.com/event-destinations/eventbridge?locale=en-GB) simplifies this process by allowing businesses to route events directly from Stripe to a variety of targets such as [AWS Lambda](https://aws.amazon.com/lambda/), [AWS Step Functions](https://aws.amazon.com/step-functions/) or [Amazon SQS](https://aws.amazon.com/sqs/) without the need to manage server-side-code. This decoupling of event producers and consumers simplifies the development lifecycle, empowering developers to focus on the core functionality of their applications while avoiding the challenges of managing webhook HTTP endpoints. With EventBridge, authentication and security become significantly simpler. All events are sent securely to EventBridge so merchants can trust each event is from Stripe without needing to verify webhook signatures in their code. EventBridge provides a secure way to route incoming events with built-in features like event filtering, logging, and transformation. Developers can define specific patterns for events that they wish to capture, ensuring that only the relevant data triggers downstream processes. ## **Near-limitless customization** The integration of Event Destinations and EventBridge in your payment processing architecture, paired with Stripe’s APIs, opens the door to a world of almost limitless customizations. The true strength of AWS lies in its serverless capabilities, which allow businesses to run applications without the burden of managing and provisioning servers. This can transform how you process transactions, handle events, or interact with other services. Using Lambda functions, developers can execute custom code in response to events triggered by Stripe. This provides an unparalleled level of flexibility and customization that goes beyond what traditional integrations can offer. Lambda automatically manages compute capacity, meaning that whether your events are few or many, performance remains consistent. This responsiveness is especially useful for businesses that experience variable traffic, as resources are allocated just in time on a pay-per-use basis to meet demand without the overhead of constant infrastructure management. Additionally, with simple API calls, you can link Lambda with services like [Amazon DynamoDB](https://aws.amazon.com/dynamodb/) for data storage, [Amazon S3](https://aws.amazon.com/s3/) for object storage, or [Amazon SNS](https://aws.amazon.com/sns/) for messaging notifications. This allows you to build complex workflows and multi-step processes that can respond dynamically to events. ## **Example customizations** The many customization possibilities allow for a future-ready solution that can grow and adapt as your business does. Below, we explore use cases that illustrate how businesses have recently accomplished this. ### **Use Case 1: Offering a Free membership until a set date.** Consider a scenario where a business wants to offer a free one season membership upon payment. The challenge lies in managing the member's subscription, particularly ensuring that the membership expires on a specified date. Here, Event Destinations publishes events to EventBridge which invokes a Lambda function that runs a snippet of custom code in response to [Stripe subscription events](https://docs.stripe.com/api/subscriptions). This function calculates and updates the subscription’s end date in real time, ensuring users never have to think about renewing or canceling their membership at the end of the term. By managing this logic through serverless functions, the implementation occurs without the need to change the underlying integration with Stripe. ![](/images/growing-your-stripe-integration-with-event-destinations/1.png) ### **Use Case 2: Flexible Partial Payment Options for Students** Educational institutions often require flexible payment solutions to accommodate student needs. In this example, a university implements a system that allows for partial payments by using a dedicated “Checkout” Lambda function. This Lambda function creates a subscription schedule after a student triggers a [PaymentIntent event](https://docs.stripe.com/api/payment_intents). Following the creation of the subscription, a separate Lambda function generates invoice metadata copied from the subscription details. This enables a more flexible payment plan for students, allowing for adjustments and modifications without altering the core integration with Stripe. By employing Event Destinations and serverless functions in this manner, the university can provide a tailored experience that meets the diverse needs of its student population. ![](/images/growing-your-stripe-integration-with-event-destinations/2.png) ### **Use case 3: Broadcast tipping event to multiple viewers in real-time** In a live video streaming application, viewers can send donations or tips to broadcasters using Stripe for payment processing. The app developers want to broadcast every tip event to all connected viewers of a stream, without altering the existing integration. The flow involves listening for successful payment events and communicating these events in real time to all app viewers using [AWS IoT Core](https://aws.amazon.com/iot-core/) and [WebSockets](https://docs.aws.amazon.com/iot/latest/developerguide/protocols.html). This approach enhances viewer engagement and provides an easy way for supporters to contribute financially during live broadcasts. A key advantage of this setup is scalability. As event-handling needs grow, EventBridge and IoT Core can accommodate increasing numbers of events without compromising performance. This elasticity is critical for businesses experiencing rapid growth or seasonal spikes in transaction volumes. ![](/images/growing-your-stripe-integration-with-event-destinations/3.png) ## Summary Stripe’s core products provide a foundation for payment processing, but as your business grows, customizing these functionalities becomes essential. Stripe provides developers with the ability to extend its core functionalities through various events and APIs. By using Stripe’s Event Destinations, you can create a robust, event-driven architecture that enhances your existing integration without any disruptive changes. Event Destinations enables you to capture and respond to key events within your payment processing lifecycle, while EventBridge facilitates orchestration of these events, allowing you to route them into AWS services. This combination allows developers to implement customizations and automations tailored specifically to their business goals. Routing Stripe events to AWS services like S3, SQS, and Lambda not only enhances your payment workflows but also ensures that your integration remains flexible and adaptable. If Event Destinations has not rolled out to your account yet, you can enable it now in your Dashboard in the [Product preview settings](https://dashboard.stripe.com/settings/early_access). To learn more about Event Destinations, check out the videos on our [Stripe developers YouTube channel](https://www.youtube.com/stripedevelopers). Upgrading the API version of a service your application depends on can result in new features, bug fixes, and even breaking changes. Before applying updates to third party dependencies in production, it is critical that you evaluate how your application reacts to these changes in a test environment. This allows you to safely verify that new API versions integrate smoothly with your application without disrupting your customers. As a Stripe customer, you can now use the new [Sandboxes](https://docs.stripe.com/sandboxes) feature in the [Dashboard](https://dashboard.stripe.com/). Sandboxes let you create multiple isolated test environments with the option of copying settings from your production account. Within a sandbox account you can build new features, address issues, or explore other Stripe capabilities without the worries of compromising your production environment. Each sandbox comes with its own set of [API keys](https://docs.stripe.com/keys) and access control rules that can be assigned as needed to various members of your team. If you are exploring the idea of upgrading the Stripe API version in your production account, then Sandboxes provides a good option for creating safe isolated environments to analyze the effects on your software. Before exploring that use case, here’s a brief overview of how Stripe approaches API versioning. ## Stripe API Versioning Every request sent to the Stripe API targets a particular API version, regardless of whether it is explicitly set or not. The API version defines the behavior of API responses and webhook events. Stripe accounts are automatically assigned the most recent API version from when the first API request is made. This behavior protects users from accidentally receiving breaking changes and reduces the amount of configuration required when getting started. New versions of the Stripe API get published whenever breaking changes are introduced, and are named based on the date they are released. At the time of writing, the current version of the Stripe API is **2024-06-20**. Backwards-compatible changes are frequently made to the current version but do not result in a new published API version. It is possible to override the API version manually on each request by setting the [**Stripe-Version**](https://docs.stripe.com/libraries/set-version) HTTP header. It is also possible to change the default API version from within the Stripe Dashboard. To keep track of Stripe API updates, refer to the [Changelog](https://docs.stripe.com/changelog) for an exhaustive list of all changes and the [API Upgrades](https://docs.stripe.com/upgrades#api-versions) documentation for a list of breaking changes. After you have reviewed the list of changes in the upgrades documentation, you should create a safe workspace to examine how your application reacts before moving forward with a production upgrade to a new Stripe API version. As mentioned earlier, you can create one using the Sandboxes feature, which are explored next. ## Provisioning a Sandbox Before creating a new sandbox to evaluate an API upgrade, confirm what the current default API version is as well as the available version upgrade. To do this, open Workbench in the Stripe Dashboard and open the **Overview** tab. The API versions section shows what the default version for the account is and what the latest version is. > To enable Workbench in your Stripe account, turn it on via the Dashboard [settings](https://dashboard.stripe.com/settings/developers?). ![](/images/prepare-for-api-upgrades/01.png) The screenshot above shows this is using a version of the API that is almost 2 years older than the latest one. Clicking on **Upgrade available** opens a dialog that gives you the ability to upgrade the account immediately. **Do not** press the **Upgrade** button until the changes have been properly evaluated. ![](/images/prepare-for-api-upgrades/02.png) Notice that accounts can only upgrade between the account’s current version and the latest available one. It is not possible to upgrade to an intermediate version once a new one has been released. To create a new sandbox, click on the account picker menu in the top left corner of the Dashboard and select **Sandboxes** from the dropdown menu. ![](/images/prepare-for-api-upgrades/03.png) Once you are on the Sandboxes page, click on the **Create** button and give your sandbox a name. Optionally, toggling the settings switch beneath the text box copies over configuration from your production account into the sandbox. These settings do not include any data such as product, customer or transaction information. A list of what settings are copied into the sandbox is available on the [Sandbox settings](https://docs.stripe.com/sandboxes/dashboard/sandbox-settings) documentation page. ![](/images/prepare-for-api-upgrades/04.png) Copying account settings speeds up your time to productivity by eliminating the need to verify and activate business details in the sandbox environment. Changes to configuration settings within the sandbox are not copied back to the production account. After creating the sandbox, it’s set as the current context within the Dashboard. ![](/images/prepare-for-api-upgrades/05.png) ## Upgrading the API Version Opening Workbench in the newly created sandbox account and navigating to the **Overview** tab reveals the default API version is set to the same value as the production account. You now have a safe space to test your application against the target version. As shown before, API upgrade requests are made through the upgrade dialog in Workbench. After the upgrade is complete, the **Overview** highlights that the default API version is to the latest available. ![](/images/prepare-for-api-upgrades/06.png) If needed, you can roll back to the previous API version you upgraded from through the API versions section in Workbench. In production, you have 72 hours before the upgrade becomes permanent. ## Using the Sandbox To test your application against the newer API version, configure its setting to use the API keys provided by the sandbox. These can be retrieved from the **Overview** tab of Workbench. Clicking on **Manage** in the [API keys](https://dashboard.stripe.com/test/apikeys) section takes you to the Developers page where they can be copied. The default API version of the main Stripe account is 2022-11-15, but in the sandbox it is set to 2024-06-20. If the application uses one of the Stripe SDKs, it must be one that is compatible with that version of the API. In the case of .NET, that maps to version [41.0.0](https://github.com/stripe/stripe-dotnet/blob/master/CHANGELOG.md#4100---2022-11-16) of [Stripe.net](https://github.com/stripe/stripe-dotnet) for API version 2022-11-15. > SDKs for strongly-typed languages like Go, Java and .NET are fixed to the latest version at the time of release. SDKs for dynamic languages like Ruby, Python, and Node.js allow you to set the configured API version globally and on a per request basis. The code sample below shows a minimal API created with ASP.NET Core and v41.0.0 of the Stripe .NET SDK. Imagine that this is your application. ```csharp using Stripe; var builder = WebApplication.CreateBuilder(args); var app = builder.Build(); StripeConfiguration.ApiKey = ""; const string webhookSecret = ""; app.MapPost("/stripe/webhook", async(HttpRequest request) => { var payload = await new StreamReader(request.Body).ReadToEndAsync(); var stripeEvent = EventUtility.ConstructEvent( payload, request.Headers["Stripe-Signature"], webhookSecret); // Do something fun return Results.Ok(); }); app.Run(); ``` The code creates an endpoint that receives and processes events from the configured Stripe account using the Secret and Webhook key. Before executing the code, you need to forward events from Stripe to your machine using the [Stripe CLI](https://docs.stripe.com/stripe-cli). Open a new command prompt on your machine and enter the following command to authenticate the CLI with your sandbox. ```bash stripe login ``` The response instructs you to visit a URL in your browser to grant permission to your sandbox. ![](/images/prepare-for-api-upgrades/07.png) After authenticating the CLI, return to your command prompt and run the following command to forward Stripe events to the endpoint on your machine. ```bash stripe listen --forward-to http://localhost:5000/stripe/webhook ``` Next, start a debugging session for the application and trigger an [event](https://docs.stripe.com/api/events/types). Test events can be triggered through the Stripe CLI using the trigger command. ```bash stripe trigger customer.created ``` At this point, the code fails with the following exception message. ```bash Stripe.StripeException: Received event with API version 2024-09-30.acacia, but Stripe.net 41.0.0 expects API version 2022-11-15. ``` This happens because there is an API mismatch between what the account is configured with and what the application supports. By using a sandbox, these types of errors can be caught and fixed in isolation before promoting an API upgrade to production. Luckily, this error can be fixed quickly by upgrading Stripe.net to 46.0.0. After making the update, running the code and triggering a new event shows the API mismatch error has been resolved. ## Conclusion Navigating API upgrades for third party services can be challenging, especially if there isn’t a safe space to evaluate them before incorporating them into production code. Using isolated environments for development and testing enables developers to deploy application updates with more confidence. By testing API upgrades in a sandbox, you can identify potential issues and fine-tune your implementation without impacting your production environment. This approach not only minimizes risks but also accelerates the development process by allowing teams to experiment and iterate more freely. To learn more about developing applications with Stripe, visit our [YouTube Channel](https://www.youtube.com/stripedevelopers). In ecommerce, the payment process is the final step in converting a potential sale into revenue. However, many businesses struggle with optimizing their payment methods, often due to concerns about potential negative impacts or the complexity of implementing changes. [Stripe's Payment Method A/B testing](https://docs.stripe.com/payments/a-b-testing) can offer a powerful solution to this common challenge. Stripe's A/B testing feature allows businesses to experiment with different payment methods and configurations without the need for complex coding or risky full-scale deployments. By enabling easy testing and optimization of payment flows, businesses can significantly improve their conversion rates and overall customer experience. This post explores how Stripe's Payment Method A/B testing works, its benefits, and how you can use it to boost online sales. It discusses the importance of offering the right payment methods, how to conduct effective A/B tests, and how to use Stripe's Workbench for in-depth analysis of your payment flows. insights can help you make data-driven decisions to optimize your payment process and drive business growth. ## Optimizing the payment methods can improve conversion rates Providing the appropriate payment methods tailored to your customer base can significantly impact your online payment conversion rates (CVR). A [2022 surve](https://stripe.com/jp/guides/state-of-north-american-checkouts-2022)y revealed that 81% of customers frequently abandon their carts if their preferred payment method isn't available. This allows customers to choose their familiar payment method to complete the payment flow. For example, credit cards are popular in North America, while European customers often prefer options like [SEPA Direct Debit](https://docs.stripe.com/payments/sepa-debit) or [iDEAL](https://docs.stripe.com/payments/ideal). Payment preferences vary not only by country or region, but also by demographic. For example, a younger audience may not be able to apply for credit cards so you need to support digital wallets such as [Apple Pay](https://docs.stripe.com/apple-pay)/[Google Pay](https://docs.stripe.com/google-pay) and [BNPL payments](https://docs.stripe.com/payments/buy-now-pay-later) such as [Klarna](https://docs.stripe.com/payments/klarna). If you sell high-value items to seniors in Japan, consider also supporting bank transfers. Displaying multiple payment methods may seem like it would require complex code with various conditional branches. The following sample code implements changing the payment methods presented depending on three currencies and the purchase amount. ```javascript app.post("/create-payment-intent", async (req, res) => { const { items } = req.body; const orderAmount = calculateOrderAmount(items) const orderCurrency = calculateOrderCurrency(items) let paymentMethodTypes = ["card"]; // Add specific payment methods based on currency and amount switch(orderCurrency) { case "eur": paymentMethodTypes.push("giropay"); break; case "gbp": paymentMethodTypes.push("klarna"); if (orderAmount >= 100 && orderAmount <= 100000) { paymentMethodTypes.push("afterpay_clearpay"); } break; case "usd": paymentMethodTypes.push("paypal"); break; default: } // Create PaymentIntent with payment_method_types const paymentIntent = await stripe.paymentIntents.create({ amount: orderAmount, currency: orderCurrency, payment_method_types: paymentMethodTypes, }); res.send({ clientSecret: paymentIntent.client_secret, }); }); ``` There are challenges with hard-coding such payment method conditions. The first is that the amount of code to be maintained grows, which increases the number of pre-release test items and maintenance targets. The second is that changing the conditions requires deployment, making it difficult to quickly trial and error to improve conversion rates. You can solve these problems using [Stripe Elements](https://docs.stripe.com/payments/elements) and the Dashboard. By using Payment Elements and enabling the dynamic payment method function, you can control the country/region and amount by simply changing the settings on the Dashboard. ![](/images/optimize-payment-flow-reduce-complexity-stripe-ab-testing/image9.png) This is all you need to write in the API code to create a [Payment Intent:](https://docs.stripe.com/api/payment_intents/create) ```javascript app.post("/create-payment-intent", async (req, res) => { const { items } = req.body; const orderAmount = calculateOrderAmount(items) const orderCurrency = calculateOrderCurrency(items) // Create PaymentIntent with payment_method_types const paymentIntent = await stripe.paymentIntents.create({ amount: orderAmount, currency: orderCurrency, }); res.send({ clientSecret: paymentIntent.client_secret, }); }); ``` The functions of Stripe Elements allow you to customize payment methods to increase conversion rates more easily. ## Using A/B testing to conduct optimization experiments While adjusting payment methods and their usage conditions can significantly increase conversion rates, these changes may also carry risks. Adjustments might decrease sales if not implemented correctly. To mitigate this risk, A/B testing is a technique that allows you to experiment with various configurations, ensuring data-driven decisions that align with your business goals. Let's look at how to experimentally add the BNPL payment method Klarna to your application. On the Payments Settings page of your [Stripe dashboard](https://dashboard.stripe.com/settings/checkout), in the Payment methods tab, you find a **'Create an experiment'** button to start a new A/B test. Click this to start setting up display rules for the payment methods you want to experiment with. ![](/images/optimize-payment-flow-reduce-complexity-stripe-ab-testing/image5.png) On the experiment creation screen, you can turn each payment method on and off and set custom rules. If you want to introduce Klarna as an experiment, click the toggle to enable it. Click **[...]** to the right of the toggle to customize the conditions for displaying Klarna by amount, region, etc. | ![](/images/optimize-payment-flow-reduce-complexity-stripe-ab-testing/image4.png) | ![](/images/optimize-payment-flow-reduce-complexity-stripe-ab-testing/image3.png) | | :---- | :---- | You can also add multiple payment methods at the same time and customize the rules. However, if you set multiple conditions, it can be difficult to measure the effectiveness of the experiment and investigate causal relationships. Was the improvement in conversion rate due to supporting [Klarna](https://docs.stripe.com/payments/klarna), or was it because [Amazon Pay](https://docs.stripe.com/payments/amazon-pay) was also supported at the same time? The purpose of an A/B test experiment is to verify a hypothesis that you have thought up in advance. Therefore, when starting an experiment, set it up in a way that makes it easier to determine causal relationships from the experiment results. Once you have decided on the payment methods you want to experiment with, the last step is to set the percentage of traffic to test. By default, 50% of payment transactions are processed using the experimental settings. To experiment with less, set it to a lower percentage (such as 30%). Once you have reviewed the experiment content, you can start the experiment. The experiment begins at the percentage you set as soon as you click Start Experiment. ![](/images/optimize-payment-flow-reduce-complexity-stripe-ab-testing/image6.png) Now you can start experiments on a small scale to verify the effects of customizing how payment methods are provided. ### Use the Workbench to investigate individual payment flows For developers, investigating and debugging where an A/B test is taking place can seem difficult. This is because you need to determine whether the behavior you want to check is in A or B of the A/B test and intentionally reproduce it. When it comes to payment form experiments, while you can set up the experiment without any development resources, you may be asked to test and investigate what kind of UI and payment methods are displayed for the customer during the payment process. Stripe makes it easier to conduct these investigations using the Workbench and Dashboard features. First, identify the Payment Intent of the payment you want to investigate. When you access the details page of that Payment Intent from the Dashboard, you can check the resource details from the Inspector tab of the Workbench. The Inspector tab offers several functions, including the Overview tab. Here you can view the raw JSON data of the resource. For example, if you want to check which payment methods were presented to the customer in that payment, check the `payment_method_types` attribute from the JSON data in the **Overview** tab. The payment methods presented to the customer by Stripe are stored here in an array. For instance, you might see that one payment methods were presented: a credit card payment and Link. ![](/images/optimize-payment-flow-reduce-complexity-stripe-ab-testing/image8.png) You can also use the Workbench to see what API request created this Payment Intent. Click the **Logs** tab to view the API request history related to the resource you are currently viewing. By looking at the request `POST` body, you can determine whether the list of payment methods presented to customers was created by your application code or by settings in the Stripe Dashboard. In some cases, the request might not include `payment_method_types`. This would indicate that the Payment Intent was applied according to the payment method display rules set in the Stripe Dashboard. ![](/images/optimize-payment-flow-reduce-complexity-stripe-ab-testing/image2.png) If you want to investigate what information Stripe sent to the integrated application, use the **Events** tab. Here you can check the history of Webhook events related to the resource you're investigating in a list. The **Events** tab is particularly useful if you want to customize customer emails based on payment methods or send data to an external analysis platform. You can use it to check what data is sent and when. ![](/images/optimize-payment-flow-reduce-complexity-stripe-ab-testing/image1.png) By utilizing Stripe's dashboard and tools in this way, developers can respond to requests from business teams more efficiently. This approach not only reduces the time required to develop payment-related functions but also lightens the operational and maintenance burden by minimizing application code. Furthermore, you can quickly investigate customer inquiries and internal questions using the workbench. ## **Conclusion** In online payments, offering customers their preferred payment methods leads to improved conversion rates and sales. For example, some Stripe user implemented BNPL payments through Klarna to attract younger customers. This strategy increased their average order value (AOV) by 16%. Using Stripe, they deployed new payment methods within four days, creating a system to quickly test and implement sales-boosting strategies. To optimize payment methods, you need a variety that is tailored to customer location and order amount. However, these customizations can complicate code and make testing and troubleshooting more challenging. Stripe Elements allows for optimization through localization and rearrangement of payment methods without additional coding. You can enable desired payment methods in the dashboard, specifying amount limits and geographic availability as needed. To minimize risk, you can conduct A/B testing experiments directly from the dashboard. These features help recapture potentially lost sales. During the experimental period, you can use the Inspector function in the Workbench to quickly investigate payments and gather information for testing and debugging your application. Start optimizing your payment form with Stripe today to prevent lost sales at the final stage of your order flow. A variety of processes and services are executed behind the scenes from the moment a customer submits their credit card information to when the store receives the payment. These processes include fraud risk assessment by [Radar](https://stripe.com/radar), additional authentication like [3DS](https://docs.stripe.com/payments/3d-secure), securing credit limits with card issuers, and currency exchange processes. Normally, developers don't need to worry about these operations until errors occur. Then, you need to know how to investigate what went wrong in your payment flow and how to fix it. Consider a scenario where you're tasked with examining the specifics of the 3DS authentication process. The current 3DS authentication flow, known as EMV 3DS, allows for the possibility of authentication occurring without presenting an authentication UI to the user. In such cases, the user may complete the payment without being aware that 3DS authentication happened in the background. This requires investigating not only if the authentication happened, but also determining whether it was done through risk-based assessment or with the identity verification UI. Such investigations can be easily carried out in the [Stripe dashboard](https://dashboard.stripe.com/), using our newly released [Workbench](https://docs.stripe.com/workbench). ## How to test 3DS with Workbench Workbench allows you to perform development, testing, and debugging all within the browser without installing any software or browser extensions. Workbench offers capabilities including checking API error history and summaries, viewing logs of API requests and webhook events, testing API requests, and generating SDK code. It also makes testing for fraud and authentication errors much easier. ![](/images/easily-debug-your-3ds-authentication-with-stripe-workbench/image13.png) [https://docs.stripe.com/workbench](https://docs.stripe.com/workbench) To use Workbench, access it through the Stripe dashboard by clicking on the **Developers** link and then selecting **Workbench**. You can also launch it by pressing the `~` key on your keyboard when in the Stripe Dashboard. If you can not see the Workbench link, you need to enable it by [the setting page](https://dashboard.stripe.com/settings/developers). ![](/images/easily-debug-your-3ds-authentication-with-stripe-workbench/image3.png) To understand the process of investigation and debugging, let's check if 3DS authentication is performed correctly. You can view debug information including raw JSON data, API history, and Webhook event data using the **Inspector** tab in Workbench on each Payment Intent detail page. ![](/images/easily-debug-your-3ds-authentication-with-stripe-workbench/image5.png) The 3DS authentication process can be completed in two ways: either the authentication UI is displayed to the user or it is not displayed. You can use Workbench to investigate whether 3DS authentication is executed and if the authentication UI is shown to the user. If the payment has been completed, you can see the [Charge object](https://docs.stripe.com/api/charges/object) on the **Inspector** tab. If you cannot see the Charge object, the payment process is not completed. Customers should complete the payment process before you debug the 3DS auth flow. ![](/images/easily-debug-your-3ds-authentication-with-stripe-workbench/image10.png) When examining the Charge object, the `three_d_secure` property can be found on the `payment_method_details.card` object. The 3DS authentication flow type is indicated by the [`authentication_flow` field](https://docs.stripe.com/api/charges/object#charge_object-payment_method_details-card-three_d_secure-authentication_flow) within this object. In the provided screenshot, this field has a value of `challenge`, indicating that the 3DS authentication UI is presented to the customer during the payment flow. Furthermore, examining the [`result` property](https://docs.stripe.com/api/charges/object#charge_object-payment_method_details-card-three_d_secure-result) reveals a value of `authenticated`. This indicates that the 3DS authentication UI completed successfully. And if the `payment_method_details.card` object was empty, the payment might be preceded by the non-card payment method. ![](/images/easily-debug-your-3ds-authentication-with-stripe-workbench/image9.png) For instance, while supporting a customer whose transaction was declined by the card network, you can investigate why the transaction was rejected using Workbench. Stripe shows the reason why the 3DS flow failed in the [`payment_method_details.card.three_d_secure.result_reason`](https://docs.stripe.com/api/charges/object#charge_object-payment_method_details-card-three_d_secure-result_reason) property. If you see card_not_enrolled, it means the credit card the customer used for the transaction does not support 3D Secure or has not been set up for 3D Secure. In this case, you can guide them on the next steps to complete their transaction. Moreover, we can investigate the API request and Webhook event history on the **Inspector** tab. By clicking the **Events** tab on the Charge object, you can see what types of events Stripe sends and when the webhook events are delivered. ![](/images/easily-debug-your-3ds-authentication-with-stripe-workbench/image12.png) For a more detailed investigation of the payment flow, select the **Events** tab on the Payment Intent object. There, you can see the following events that occur during the payment process: * `payment_intent.created` * `payment_intent.requires_action` * `charge.succeeded` * `payment_intent.succeeded` * `checkout.session.completed` ![](/images/easily-debug-your-3ds-authentication-with-stripe-workbench/image2.png) You can observe the `payment_intent.requires_action` event occurring before the `charge.succeeded` event. This indicates that the payment flow requires 3DS authentication, as determined by Stripe Radar or the card issuer. Upon further examination of this event, you see that next_action.type is set to "use_stripe_sdk". This signifies that the application processes this payment using either the stripe.js [JavaScript SDK](https://docs.stripe.com/libraries/stripejs-esmodule), [iOS SDK](https://docs.stripe.com/libraries/ios), and [Android SDK](https://docs.stripe.com/libraries/android), or the redirect-type payment flow. For more detailed information about these authentication flows, please refer to [this document](https://docs.stripe.com/payments/3d-secure/authentication-flow?platform=web#when-to-use-3d-secure). ## Investigate past payment events in the Events tab While the Inspector tab is useful for debugging flows like 3DS authentication for individual payments, let's explore how to investigate historical 3DS authentication events. The Events tab in the Workbench provides a comprehensive list of past events. You can filter these events based on type and occurrence time, allowing you to analyze event frequency during specific periods. Let's focus on examining the frequency of 3DS authentication events. ![](/images/easily-debug-your-3ds-authentication-with-stripe-workbench/image7.png) To do this, set the `Event type` to `payment_intent.requires_action`. Then, adjust the `Date` filter to `Last 30 days`. This configuration displays the number of 3DS authentications over the past 30 days, along with detailed data for each associated payment. ![](/images/easily-debug-your-3ds-authentication-with-stripe-workbench/image1.png) Once you've identified a payment of interest, locate the payment intent ID (starting with `pi_`) in the 'Event data' section on the right-hand panel. Click on this ID to reveal a dropdown menu. Within this menu, click the 'Show in dashboard' link to view the detailed page for that specific payment intent. ![](/images/easily-debug-your-3ds-authentication-with-stripe-workbench/image11.png) ## Simulating the 3DS authentication flow in the dashboard To simulate or test your application triggered by webhook events from Stripe, you can easily do so using the workbench. Navigate to the 'Shell' tab to open a command line interface. This allows you to execute [Stripe CLI](https://docs.stripe.com/stripe-cli/overview) commands without installing additional tools on your machine. ![](/images/easily-debug-your-3ds-authentication-with-stripe-workbench/image8.png) Now let's simulate the 3DS authentication flow. At the bottom of the UI, enter the following in the command input area: `stripe trigger payment_intent.requires_action`. This command simulates the payment flow, including 3DS authentication. Once you run the command, you see both the request and response data in the CLI interface. ![](/images/easily-debug-your-3ds-authentication-with-stripe-workbench/image4.png) Now let's return to the Events tab to check the simulated event. You should find a new `payment_intent.requires_action` event listed. This way, you can easily obtain new payment intent data and event information without running the payment flow in your test application environment. If you don't see this event, click the 'Refresh events' link on the right side of the panel. ![](/images/easily-debug-your-3ds-authentication-with-stripe-workbench/image6.png) You can learn about the types of events simulated by referring to [the CLI documentation](https://docs.stripe.com/cli/trigger). Additionally, the CLI interface in the workbench features input completion for Stripe CLI commands. This means you can easily complete the necessary commands by pressing the tab key while typing. There's no need to memorize and manually type out entire commands. ## Summary Stripe's Workbench is a powerful tool that allows you to easily investigate what's happening behind the scenes of the payment process. Workbench allows you to: * Check the Charge object in the Inspector tab to understand the 3DS authentication flow and results * Track the sequence of events that occurred during the payment process in the Events tab * Filter and analyze past payment events * Use CLI commands to simulate the 3DS authentication flow and generate test data These features enable developers to efficiently address various challenges, such as responding to customer inquiries, testing subscription auto-renewals, and handling 3DS authentication results. By using Workbench, debugging and optimizing complex payment processes becomes significantly simplified. This tool provides a user-friendly interface for developers to gather necessary information with just a few clicks, obtain event data for testing code related to subscription renewals, and learn how to handle 3DS authentication flows and results effectively. Ultimately, Workbench streamlines the development and troubleshooting process for Stripe integrations, saving time and reducing potential errors. Next time you debug a tricky payment issue, remember to use these powerful tools. To learn more about developing applications with Stripe, visit our [YouTube Channel](https://www.youtube.com/stripedevelopers). [![](/images/YouTube.png)](https://www.youtube.com/stripedevelopers) When new software engineers join a team, it can take weeks to set up development machines with the right configuration of tools, permissions, and project dependencies. However, technologies such as containerization and cloud-based development environments can reduce the time it takes for new engineers to start being productive by using pre-configured development environments that spin up relatively quickly. These environments also come with the added benefit of helping enforce consistency across the team regarding operating system, runtime, and library versions. If your project includes a payment integration with Stripe, pairing these development environments with [Stripe Sandboxes](https://docs.stripe.com/sandboxes) provides engineers with a safe, isolated workspace where they can observe and experiment on the project without disrupting live data. Within a Stripe sandbox account, engineers have full access to the Stripe API and can test payment functionality without needing to execute real transactions. Sandboxes can be populated with account data for testing using one of the Stripe SDKs. This allows new team members to familiarize themselves quickly with the solution’s payment workflows and understand the integration points without waiting for production access. ## Preparing a Sandbox For a given live Stripe account, there can be up to 5 sandboxes. To create a sandbox for onboarding, open the account selection menu in the top left corner of the Stripe Dashboard and select **Sandboxes**. ![](/images/reusable-dev-environments-sandboxes/01.png) In the **Create a new sandbox** dialog, the only requirement is to provide a unique name for the sandbox. Optionally, settings from the live account can be [copied](https://docs.stripe.com/sandboxes/dashboard/sandbox-settings) into the sandbox to help minimize setup time even more. ![](/images/reusable-dev-environments-sandboxes/02.png) Account settings are not synchronized between sandboxes and their associated live accounts. This means that further changes can be made to sandbox settings to try out new behaviors without affecting other environments. The information copied from the production account does not include any customer, product, or transaction data. It can be beneficial if your new team members had some fake data to play around with in the sandbox. The two most common ways of doing this are by using either the [fixtures feature](https://docs.stripe.com/cli/fixtures) in the [Stripe CLI](https://docs.stripe.com/stripe-cli) or one of the supported [language SDKs](https://docs.stripe.com/libraries). The following code samples demonstrate how to use C# and [Stripe.net](https://github.com/stripe/stripe-dotnet) SDK to populate the sandbox account with fake product data. Before making requests using any Stripe SDK, you first have to retrieve the secret key for the account that will be used to authenticate API requests for the given environment. Using the **Developers** menu in the top right navigation in the Dashboard, select **API Keys** and **Reveal test key** to get access to the secret key. ![](/images/reusable-dev-environments-sandboxes/03.png) In your .NET project, install [Stripe.net](https://www.nuget.org/packages/Stripe.net/) as well as the [Bogus](https://www.nuget.org/packages/Bogus) library that is used to create the fake data. The following code uses the Faker class from Bogus to create a list of random products. ```csharp // Generate Fake product data using Bogus; public record Product(string UniqueCode, string Name, string Description, string ImageUrl, decimal Price); public class ProductRecordFaker : Faker { public ProductRecordFaker() { this.CustomInstantiator(_ => FormatterServices.GetUninitializedObject(typeof(Product)) as Product); RuleFor(p => p.UniqueCode, f => f.Random.AlphaNumeric(7).ToUpper()); RuleFor(p => p.Name, f => f.Commerce.ProductName()); RuleFor(p => p.Description, f => $"This is such an awesome product made out of {f.Commerce.ProductMaterial()}"); RuleFor(p => p.ImageUrl, f => f.Image.PicsumUrl()); RuleFor(p => p.Price, f => Decimal.Parse(f.Commerce.Price(min:15, max:200))); } } var productFaker = new ProductRecordFaker(); var products = productFaker.Generate(10); ``` Next, loop through those fake products and pass them to the ProductService in Stripe.net to create Stripe products in the sandbox. ```csharp // Set your secret key StripeConfiguration.ApiKey = “sk_test_xxx”; // Create products using the generated fake data var service = new ProductService(); foreach(var product in products) { var options = new ProductCreateOptions { Name = product.Name, Description = product.Description, Images = new List{ product.ImageUrl}, Shippable = true, Metadata = new Dictionary { ["code"] = product.UniqueCode } }; await service.CreateAsync(options); } ``` After running this code, the [Product catalog](https://dashboard.stripe.com/test/products) in the Dashboard has new product data available. Depending on your use case, the SDKs can be used to further populate additional data in the account such as customer information, product pricing, and transaction records. ## Configuring the development environment Now that a sandbox has been created for the Stripe account, the next phase involves setting up a reusable developer environment that can be used by the existing team members as well as engineers being onboarded. Companies like [Microsoft](https://azure.microsoft.com/en-us/products/dev-box/), [GitPod](https://www.gitpod.io/), and [GitHub](https://github.com/features/codespaces) all provide scalable offerings for cloud-based development environments (CDEs) that can be hosted for you or you can host yourself. This section shows how to configure an environment using [development containers](https://containers.dev/). With development containers, you can create full featured development environments that contain all the tools, libraries and services needed to work on a software project. Using container runtimes, like [Docker](https://www.docker.com/), allows development containers to create isolated environments that can run locally or remotely. This provides engineers with the flexibility to have a consistent workspace even if they change development machines. This approach safeguards the local filesystem since all dependencies are installed within the container, easing setup concerns and ensuring a seamless development experience for everyone on the team. Source code editors like [Visual Studio Code](https://code.visualstudio.com/) provide [extensions](https://marketplace.visualstudio.com/items?itemName=ms-vscode-remote.remote-containers) that enable the use of development containers within a workspace. The following screenshot shows the layout of a sample .NET API project. It relies on a .env file to retrieve the configuration information such as the Stripe secret key and connection credentials to [Redis](https://redis.io/docs/latest/get-started/). ![](/images/reusable-dev-environments-sandboxes/04.png) To add development container support to this project, first make sure you have both Docker and the [Dev Containers](https://marketplace.visualstudio.com/items?itemName=ms-vscode-remote.remote-containers) extension for Visual Studio Code installed. In the project’s root folder, add a **.devcontainer/devcontainer.json** file which defines the settings for the container workspace. A list of supported properties can be found in the development container [metadata reference](https://containers.dev/implementors/json_reference/) page. Below sample shows the configurations of your development container including how you can customize your environment with “customizations” property. This defines the name of the workspace, the folder path VS Code opens inside of the development container when the environment is running, and VS Code specific extensions that should be installed within the workspace. ```json { "name": "Products API (Dev)", // The path VS Code should open by default when connected. "workspaceFolder": "/workspace", "customizations": { "vscode": { "extensions": [ "ms-dotnettools.vscode-dotnet-pack", "ms-dotnettools.csdevkit", "humao.rest-client", "Stripe.vscode-stripe" ] } } } ``` For the next step, you need to add configuration for the container image that is used to run the project code. You can think of a container image like a blueprint for a miniature operating system with its own file system and processes running in an isolated space. Before running a dev container, you first have to create a blueprint. In Docker, multiple images can be customized and run with a Docker compose file. With this project depending on Redis, an instance of a Redis server should be included in the workspace environment as well. Within the .devcontainer folder, create a compose.yml and include the following configuration. ```yaml services: redis: image: "redis/redis-stack:7.4.0-v0" ports: - "6379:6379" - "8001:8001" environment: - REDIS_ARGS="--requirepass ${REDIS_PSWD}" ``` The snippet above defines a [Redis](https://redis.io/) service using the [redis/redis-stack image](https://hub.docker.com/r/redis/redis-stack), exposes two ports for communication, and sets the server password with an environment variable. Since the project is built on .NET, the image must have the correct versions of the .NET runtime and SDK installed. While you are free to create your own image, the development containers [images repository](https://github.com/devcontainers/images) on GitHub hosts a collection of reusable container images for you to get started with. You can use one of the .NET develpment container [images](https://github.com/devcontainers/images/tree/main/src/dotnet) that already has the SDK installed as the baseline to build on. The configuration below shows how to define a docker compose service for this API project. ```yaml productsapi: image: mcr.microsoft.com/devcontainers/dotnet:1-8.0-bookworm volumes: - ..:/workspace:cached command: sleep infinity network_mode: service:redis ``` The service configuration uses a container image based on Debian ([bookworm](https://www.debian.org/releases/bookworm/)) and has the .NET 8 SDK included. It mounts the root project directory into the /workspace folder of the container, and configures the network. Redis is now available via localhost inside the development container. A completed version of the compose.yml resembles the following. ```yaml services: productsapi: image: mcr.microsoft.com/devcontainers/dotnet:1-8.0-bookworm volumes: - .:/workspace:cached command: sleep infinity network_mode: service:redis redis: image: "redis/redis-stack:7.4.0-v0" restart: unless-stopped ports: - "6379:6379" - "8001:8001" environment: - REDIS_ARGS="--requirepass ${REDIS_PSWD}" ``` In the .devcontainer.json file, update the development container settings to use the compose file. ```json { "name": "Products API (Dev)", // The compose files to use for your service "dockerComposeFile": [ "compose.yml" ], // The name of the service for the container that VS Code should use. "service": "productsapi", // Tthe path VS Code should open by default when connected. "workspaceFolder": "/workspace", // Use 'forwardPorts' to make a list of ports inside the container available locally. "forwardPorts": [ 5064 ], "customizations": { "vscode": { "extensions": [ "ms-dotnettools.vscode-dotnet-pack", "ms-dotnettools.csdevkit", "humao.rest-client", "Stripe.vscode-stripe" ] } } } ``` With Docker running, use the command palette in Visual Studio Code to run the **Dev Containers: Reopen in Container** command. In a few minutes, the development container runs with the API project mounted into the workspace. ## Adding the Stripe CLI to the workspace The VS Code customizations section above installs the Stripe extension into the workspace. For the extension to work, it requires the Stripe CLI to be installed and available on the command path. You can manually install Stripe CLI yourself with the [apt](https://docs.stripe.com/stripe-cli#install) command, or use bash shell script to install it automatically Development containers allow scripts to be run at different stages of the [lifecycle](https://containers.dev/implementors/json_reference/#lifecycle-scripts). This means you can write bash scripts that run after the container is created to install the Stripe CLI. In the .devcontainer.json file, add the following property. ```json "postCreateCommand": "bash .devcontainer/postCreate.sh" ``` In the .devcontainer folder, create a file named postCreate.sh with the following contents. ```bash #!/bin/bash # Add Stripe CLI to sources list echo "Installing Stripe CLI..." curl -s https://packages.stripe.dev/api/security/keypair/stripe-cli-gpg/public | gpg --dearmor | sudo tee /usr/share/keyrings/stripe.gpg echo "deb [signed-by=/usr/share/keyrings/stripe.gpg] https://packages.stripe.dev/stripe-cli-debian-local stable main" | sudo tee -a /etc/apt/sources.list.d/stripe.list # Install dependencies sudo apt update sudo apt install stripe ``` Using the command palette in Visual Studio Code to run the **Dev Containers: Rebuild Container** command. This builds a new container image, runs the container, and executes the script. With the completed development container configuration, check in these new configuration files into source control. Now all your engineers can work on the project in a completely isolated environment. ## Conclusion The less time engineers spend getting their environments configured, the more time for them to make valuable contributions to the team. Spending a little time upfront to build out a consistent development environment for the team can save countless hours battling configuration and versioning issues. Stripe Sandboxes and development containers make an excellent pairing to provide consistent, isolated environments that can benefit the entire team. To learn more about developing applications with Stripe, visit our [YouTube Channel](https://www.youtube.com/stripedevelopers). Subscriptions involve recurring payments that can have billing cycles that span weeks or months. When integrating a subscription feature, you need to be able to trigger scenarios on demand and observe any changes that happen in your system to validate the expected behavior. This becomes challenging for any use case that occurs over large periods of time. Stripe’s test clocks along with Workbench can reduce the time and effort required for verifying your system’s behavior for situations that are dependent on time . Both test clocks and Workbench are features available in your account at no additional cost. With test clocks, you simulate the passage of time while your account is in test mode, so you don’t have to wait hours or even days to see how your system behaves. You can observe any state changes and react to any events that get triggered. With Workbench, you have a browser based tool to manage and observe the activities that occur in your Stripe integration. This article shows how to use these tools together to ensure your payment integration is ready for production. ### Creating the tiered offerings Before setting up a test clock simulation, you should have the subscription offerings provisioned in your product catalog. The screenshot below shows three tiers for customers to choose from. These tiers are modeled as [products](https://docs.stripe.com/products-prices/manage-prices) that each include a unique name, tax category, and a recurring price with a monthly billing period. ![Product catalog](/images/testing-subscriptions-with-testclocks/test-clocks-subscriptions-01.png) ### Setting up the simulation A test clock is attached to one or more customers and advanced to a target date. This causes any time dependent objects in the Stripe account to update as well, such as subscriptions and webhook events. To create a test clock, you have the option of going the no-code route via the Stripe Dashboard, programmatically using the REST API, or using one of the supported language SDKs. The code samples here are written in C\# and make use of the [Stripe .NET SDK](https://github.com/stripe/stripe-dotnet), but the steps are similar for other languages. First, you need to use the TestClockService class from the SDK to create a new test clock instance. At creation time, a test clock must be given a name and have its [FrozenTime](https://docs.stripe.com/api/test\_clocks/object?lang=dotnet\#test\_clock\_object-frozen\_time) property set. This property represents the starting point for the respective clock and is specified as a Unix Epoch timestamp. You can set it to time in the future or in the past, but remember the test clock can only move forward in time after it is created. ```csharp // Retrieve API key from appsettings.json var apiKey = _configuration.GetSection("Stripe")["SecretKey"]; var requestOptions = new RequestOptions{ ApiKey = apiKey }; // Create test clock var currentTime = DateTimeOffset.UtcNow.DateTime; var tcCreateOptions = new TestClockCreateOptions { Name = $"Subscription Clock", FrozenTime = currentTime }; var testClockService = new TestClockService(); var newTestClock = await testClockService.CreateAsync(tcCreateOptions, requestOptions); ``` Next, create the customer and subscription objects for the scenario you want to test. Existing customers cannot be used for test clock simulations, but you are able to add up to three new ones. Using the CustomerService class, create a new customer with the Name, Email and PaymentMethod properties assigned. The following example uses `pm_card_visa`, which is one of the available [test cards](https://docs.stripe.com/testing\#cards) that always results in a successful test payment. Also, the `TestClock` property of the new customer must be set at creation time to the ID of the previously created clock. ```csharp // Create a new customer and attach the test clock var ccOptions = new CustomerCreateOptions { Name = "Fake Customer", Email = "customer@fake.com", Description = "Faker User Account", PaymentMethod = "pm_card_visa", TestClock = newTestClock.Id, InvoiceSettings = new() { DefaultPaymentMethod = "pm_card_visa"} }; var customerService = new CustomerService(); var newCustomer = await customerService.CreateAsync(ccOptions, requestOptions); var originalPMID = newCustomer.InvoiceSettings.DefaultPaymentMethodId; ``` The final object to create is the subscription for a test customer. Supply the [SubscriptionService](https://docs.stripe.com/api/subscriptions/create?lang=dotnet) class with the price ID from one of the subscription tiers in the product catalog along with the customer ID. ```csharp // Create a new subscription var priceId = ""; var options = new SubscriptionCreateOptions { Customer = newCustomer.Id, Items = new List { new SubscriptionItemOptions {Price = priceId} } }; var subscriptionService = new SubscriptionService(); var newSubscription = await subscriptionService.CreateAsync(options, requestOptions); ``` After running the code, you will see that the customer, subscription, and test clock objects all have the option of advancing time for the simulation. ![Advance time highlight](/images/testing-subscriptions-with-testclocks/test-clocks-subscriptions-02.png) You can use Workbench to inspect the activity within a Stripe account. It is built into the Stripe Dashboard, so there isn’t anything that needs to be installed. Once it is enabled, you can access the various logs, errors, and events occurring in an account. Inside the **Inspector** tab of Stripe Workbench, you can view details about what has happened with the subscription so far. Looking at the **Logs** and **Events** tab for the subscription reveals a collection of activity, triggered as a result of the code that was executed. These events signal that an initial invoice was paid and the subscription was successfully started. You can even dive deeper into the events and inspect the properties for each of them. ![Workbench Inspector](/images/testing-subscriptions-with-testclocks/test-clocks-subscriptions-03.png) ### Running the simulation To move the test clock simulation forward in time, make a call to the [Advance](https://docs.stripe.com/api/test\_clocks/advance?lang=dotnet) method from the TestClockService and provide it with the future time you want it to progress to. To simulate a billing cycle for a monthly subscription, you must add one month to the initial frozen time the test clock was set to. ```csharp var tcAdvanceOptions = new TestClockAdvanceOptions{ FrozenTime = currentTime.AddMonths(1) }; await testClockService.AdvanceAsync(newTestClock.Id, tcAdvanceOptions, requestOptions); ``` Back in the subscriptions details page in the Stripe Dashboard, the invoice for the subscription is successfully paid and the account is in a new billing period. Opening up the **Events** tab in Stripe Workbench, you can see events for the account like `invoice.created` and `customer.subscription.updated`, and also events for the test clock simulation like `test_helpers.test_clock.ready` and `test_helpers.test_clock.advancing`. ![Workbench Events](/images/testing-subscriptions-with-testclocks/test-clocks-subscriptions-04.png) The following example runs a simulation for a failed subscription payment and shows which activities get generated via Workbench. The current default payment method for the customer is set to a test card that only returns successful payments. An additional card must be attached to the customer and set as the new default. The `pm_card_chargeCustomerFail` test card is a good option for this. First, use the [Attach](https://docs.stripe.com/api/payment\_methods/attach?lang=dotnet) method from the PaymentMethodService class to add it as an additional payment method for the customer. Next, update the customer by setting this new payment method as the default. ```csharp var pmAttachOptions = new PaymentMethodAttachOptions { Customer = newCustomer.Id }; var pmService = new PaymentMethodService(); var newPaymentMethod = await pmService.AttachAsync("pm_card_chargeCustomerFail", pmAttachOptions, requestOptions); var cuOptions = new CustomerUpdateOptions { InvoiceSettings = new() { DefaultPaymentMethod = newPaymentMethod.Id } }; await customerService.UpdateAsync(newCustomer.Id, cuOptions, requestOptions); ``` Advance the test clock simulation to the next billing period. ```csharp var tcAdvanceOptions = new TestClockAdvanceOptions{ FrozenTime = currentTime.AddMonths(2) }; await testClockService.AdvanceAsync(newTestClock.Id, tcAdvanceOptions, requestOptions); ``` In the subscriptions details page, the fake customer’s subscription shows `canceled` and the last invoice is `failed`. Looking at the triggered events through Workbench displays a number of failed events. Specifically, inspecting the `cancellation_details` property of the `customer.subscription.deleted` event reveals the subscription was canceled because Stripe was unable to collect payment from the customer. Using the information collected from these two simulation runs equips you with the insights that help you know what events and properties are important for your application. That also means you know what events you should test for and where to look whenever issues arise in your subscriptions. ### Conclusion Testing time-sensitive scenarios can be challenging, especially when they extend over long periods. This post shows that tools like Stripe Workbench and test clocks can help validate your development cycle when validating the behavior of your subscription integration. To learn more about developing applications with Stripe, visit our [YouTube Channel](https://www.youtube.com/stripedevelopers) and take a look at the additional resources linked below. [Stripe sandboxes](https://docs.stripe.com/sandboxes) provide isolated environments for testing all available Stripe features within your business account without impacting your live integration. Additionally, you have the ability to control access to these sandboxes, defining who can use them. How you implement sandboxes can make all the difference. It’s important to decide on a sandbox strategy that best suits your organization's development approach and team size. This blog provides a comprehensive guide to choosing the right sandbox strategy based on your organizational context. ## Getting Started An admin user can grant access to multiple accounts, with each Stripe live account allowing for up to five sandboxes. To access sandboxes from your Stripe dashboard, navigate to the account picker menu in the upper left corner. ![image1](/images/choosing-the-right-sandbox-strategy/1.png) To create a new sandbox, choose the **\+Create** button from the Sandboard Dashboard UI. Each sandbox must have a name, which you can modify after creation. You have the option to copy settings from your live account. For detailed information on which attributes are copied, refer to the [sandbox settings page](https://docs.stripe.com/sandboxes/dashboard/sandbox-settings) in the documentation. ![image2](/images/choosing-the-right-sandbox-strategy/2.png) After creating your sandboxes, you can view the complete list through the account dropdown or by visiting [https://dashboard.stripe.com/sandboxes](https://dashboard.stripe.com/sandboxes). From this page, you can delete sandboxes \- simply choose the trash can icon to remove a sandbox when it is no longer needed. With your sandboxes ready, it’s important to consider how to best use them based on your organizational structure and development goals. Choosing the right sandbox setup can influence the effectiveness of your testing process. By evaluating different strategies that align with your team's size, workflow, and specific needs, you can optimize your testing environments. The following sections explore various sandbox setup examples, ranging from a single project focus for startups to department-specific arrangements for larger organizations. ## Single Project Focus For startups and small teams, the development landscape is often characterized by a singular focus – bringing a product to market quickly and efficiently. With limited resources and tight timelines, every minute spent on testing is crucial for accelerating development. In this environment, dedicated sandboxes become pivotal assets for small teams. Start by allocating your five available sandboxes to various stages of the development cycle. This segmented approach not only increases efficiency but also enhances the clarity of the testing process. ![image3](/images/choosing-the-right-sandbox-strategy/3.png) **Development Sandbox** is the first stage where new features and code changes are tested. Here, developers can explore new functionality, resolve bugs, and refine user interfaces without worrying about repercussions on the live environment. Each change can be scrutinized in isolation, enabling developers to experiment freely while still adhering to deadlines. Next comes the **Integration Testing Sandbox**, where the focus shifts to ensuring that all components work seamlessly together. It’s one thing to have an independent feature functioning correctly, but it’s another to confirm that the integration with other systems, such as payment gateways, databases, and backend services, operates as intended. With a dedicated sandbox for this phase, teams can methodically test interactions in a safe environment, quickly identifying and addressing issues that may arise during integration. After integration is [User Acceptance Testing (UAT)](https://en.wikipedia.org/wiki/Acceptance_testing#User_acceptance_testing), a critical stage where actual users or stakeholders validate whether the product meets their requirements and expectations. A dedicated **UAT Sandbox** provides a realistic setting that closely mirrors the live environment, enabling teams to gather meaningful feedback. This stage is not just about functionality; it’s about delivering an experience that resonates with users, making it essential to test under conditions that simulate actual usage. Lastly, two **Spare Sandboxes** can be used for overflow needs, accommodating unexpected testing scenarios that arise throughout development. Whether it’s a sudden requirement change or the need for quick tests on new integrations, having these extra environments ensures that the team can respond agilely without disruption. By maintaining a focused approach with dedicated sandboxes, small teams can simplify their development process. Gain clarity in testing, minimizing the confusion and chaos often associated with overlapping testing environments. In doing so, you can quickly deliver high-quality products and set a solid foundation for future scalability and development within the organization. ## Department-specific and Rotating Sandboxes In larger organizations or established businesses, the complexity of projects often necessitates a more structured approach to testing. With multiple departments, such as development, quality assurance (QA), marketing, and product management all contributing to a product’s lifecycle, overlapping efforts can create confusion and inefficiency. This is where department-specific and rotating sandboxes come into play, providing a streamlined and organized way to manage testing activities. ![image4](/images/choosing-the-right-sandbox-strategy/4.png) The first step in this strategy is to allocate specific sandboxes to different departments. Each department can have its own dedicated sandbox tailored to its unique workflow and testing needs. For instance, the development team may use one sandbox for feature testing, ensuring that new code integrates seamlessly with existing functionalities. Meanwhile, the QA team can use another sandbox focused on stress testing and performance evaluation, validating that the application performs under varying conditions. This separation allows for clear delineation of responsibilities and activities. Each team can work independently without the risk of impacting another’s testing environment. Developers can freely make changes and experiment with new features while QA conducts thorough tests to catch bugs and usability issues. Once your team concludes your testing phase, the sandbox can be deleted, with a new one created and reassigned to another department for their next project or testing cycle. This provides fresh environments that can accommodate the new testing needs of different departments. Department-specific and rotating sandboxes create a dynamic and organized testing framework for larger organizations. With the ability to adapt quickly to new needs and integrate shared learnings, your development team is better equipped to deliver high-quality products in an increasingly competitive landscape. ## **Iterative Testing and Feedback Loops** Agile methodologies prioritize flexibility, with iterative testing and feedback loops. By using Stripe sandboxes in this manner, development teams can expedite their delivery processes. At the core of this strategy is the principle of rapid prototyping. By using dedicated sandboxes for specific iterations of a project, teams can test new features, functionality, and changes to the application without the fear of disrupting the live environment. This sandbox approach allows developers to experiment with various configurations and solutions. Each sandbox iteration is a chance to prototype ideas quickly, validate them with controlled testing, and gather immediate data on performance and usability. ![image5](/images/choosing-the-right-sandbox-strategy/5.png) Next comes the significance of real-time feedback mechanisms. As developers work in their sandboxes, incorporating feedback loops ensures that insights are captured at every stage of the development process. Stakeholders, including product managers and user representatives, can interact with sandboxes during designated review phases, providing critical feedback that informs further development. This continuous stream of feedback allows teams to make meaningful adjustments throughout the lifecycle of a project, rather than waiting until the end to identify issues. The advantages of an iterative approach extend beyond just testing new features; they foster a culture of continuous improvement. By integrating feedback at each stage, teams can learn and adapt, refining not just the product but also their development processes. For example, if a feature isn’t meeting user expectations, rather than remaining in a lengthy feedback and revision loop, developers can quickly implement changes in the sandbox, retest, and validate in real time. This leads to a faster pace of improvement, where products not only survive but thrive in user environments. With each iteration documented, the knowledge gained from real-time testing becomes invaluable. Teams can maintain logs of what changes were made, what worked, and what didn’t, creating a repository of insights that guide future iterations. This clear record not only serves to educate new team members but also allows for informed decision-making in subsequent projects. ## Conclusion Stripe sandboxes offers a new way for developers to test their Stripe integrations in an isolated environment. Sandboxes reduce the need to create multiple accounts to test different features during the development phase, and offer greater control and granularity over the permissions of each test environment. The flexibility of creation, deletion, and granular permissions lends sandboxes to multiple implementation approaches. Smaller development teams or startups may work best with a single project approach, Larger organizations may be more suited to a department or rotating sandbox strategy. Alternatively you may choose an approach that is based on your development methodology. By tailoring your strategy to your organizational context you can maximize the benefits of these environments. With proper management and usage, sandboxes become a vital resource in your development toolkit, helping you navigate challenges and deliver quality products faster than ever. To learn more about developing applications with Stripe, visit our [YouTube Channel](https://www.youtube.com/stripedevelopers). In online commerce, security is paramount. As a developer building integrations with Stripe, it’s critical to continuously implement the latest security practices. Earlier this year, Stripe introduced two new authentication methods, [restricted API keys (RAK)](https://docs.stripe.com/stripe-apps/api-authentication/rak?) and [OAuth 2.0](https://docs.stripe.com/stripe-apps/api-authentication/oauth?) to help developers create more secure integrations. This post guides you on how to implement these methods in your Stripe plugins and explains why moving away from traditional unrestricted secret API keys is not just recommended, but necessary. ## What is a Stripe plugin? A Stripe plugin is a component that integrates with the Stripe API to facilitate payment processing, subscription management, and other financial transactions. These plugins are often built to work with third-party platforms, such as CRMs or CMSs, and are consumed by merchants using these platforms. Plugins typically require API keys to authenticate requests to the Stripe API, allowing the plugin to perform actions such as processing payments, retrieving customer data, and managing subscriptions. API keys are popular because they offer a straightforward way to establish a connection between the plugin and the Stripe API, enabling seamless transactions without requiring extensive setup. Many plugins require the merchant user to manually copy their Stripe unrestricted secret API key onto the third-party platform to authenticate the plugin with their Stripe account. This introduces significant risk because these secret API keys grant full access to the merchant's Stripe account. If the key is mishandled, exposed, or compromised, it could lead to unauthorized transactions, data breaches, and potentially catastrophic financial losses. This level of access makes unrestricted secret API keys a prime target for attackers, and their widespread use in plugins, without sufficient safeguards, can expose merchants to unnecessary risks. To mitigate these risks, Stripe introduced restricted API keys (RAK) and OAuth 2.0. These methods offer more granular control over the permissions granted to third parties, significantly enhancing security by moving from a castle and moat security model to a zero trust. ![](/images/upgrading-your-stripe-plugin-security/castle_moat_v2.png) The traditional castle and moat security model, illustrated by full access API key usage, relies on perimeter defense, wherein the moat (the API key) protects the castle (the account). This approach assumes that anyone within the moat is trustworthy; however, if bad actors gain access to the API key, they can navigate the account freely, exposing it to significant vulnerabilities. In contrast, the zero trust security model, exemplified by RAK and OAuth 2.0, operates on the principle that no user or system should be trusted by default, regardless of their location. Access is granted based on strict identity verification and least privilege permissions, meaning that even if third parties integrate with the system, they are limited to the specific data and actions authorized for them. This paradigm shift not only enhances security by minimizing exposure, but also significantly reduces the risk of unauthorized access, making it essential for developers to adopt RAK and OAuth for safer integrations. Here are two options for implementing a zero trust model in your Stripe plugins: 1. **Restricted API keys (RAK)** exemplify this evolution in security. They enforce the principle of least privilege, allowing developers to define specific permissions for their plugins. This means a plugin can only access the data and perform actions that are absolutely necessary. For instance, if your plugin only requires the ability to view customer data, you can create a RAK with read-only access, effectively minimizing the risk of unauthorized actions and data breaches. 2. **OAuth 2.0** further enhances this security model by enabling tokenized, one-click authorization. Instead of requiring the sharing of a secret key, merchants can authorize plugins through Stripe’s OAuth interface, which issues a token with precisely the necessary permissions. This not only streamlines the authentication process, but it also empowers merchants to revoke access easily if needed, all without compromising their entire account. Together, RAK and OAuth provide a robust framework for securing integrations while ensuring that user controls remain paramount. ## Updating existing plugins If you have pre-existing plugins using a full access Stripe API Key, you have several options to update. Here’s a brief overview of the approaches: ### 1. Turn your plugin into a Stripe App Converting your plugin into a [Stripe App](https://docs.stripe.com/stripe-apps) is an excellent way to use Stripe’s built-in tools for secure and seamless integration. Stripe Apps offer a streamlined setup process, enhanced security features, and the ability to display relevant user interfaces directly in the Stripe Dashboard. This option is ideal for developers looking to provide a more integrated experience for merchants. Stripe App authentication with RAK ![](/images/upgrading-your-stripe-plugin-security/2.png) Stripe App authentication with OAuth ![](/images/upgrading-your-stripe-plugin-security/3.png) Check Stripe Documentation for a comprehensive guide on how to [migrate your plugin to a Stripe App](https://docs.stripe.com/stripe-apps/plugins/decide-migration). ### 2. Use Stripe Connect [Stripe Connect](https://stripe.com/connect) is designed for platforms that need to facilitate payments between third-party users. By upgrading your plugin to use Stripe Connect, you can take advantage of its secure onboarding process, robust payment features, and automated compliance management. This option is particularly useful for platforms that operate as marketplaces or need to manage multiple accounts under a single integration. Check Stripe Documentation to learn how to migrate your [plugin to Stripe Connect](https://docs.stripe.com/stripe-apps/plugins/decide-migration#migrate-to-connect). ### 3. Manual setup of restricted API keys (RAK) If you prefer to maintain a more hands-on approach, manually setting up restricted API keys (RAK) allows you to define specific permissions for your plugin without converting it into a full Stripe App or using Stripe Connect. This method gives you complete control over the scope of access your plugin has, ensuring that it operates securely within the limits you set. Check Stripe Documentation to learn how to [migrate your plugin to a manual RAK](https://docs.stripe.com/keys#limit-access). Each of these options offers a path to modernizing your Stripe plugins, enhancing security, and ensuring compliance with [Stripe’s upcoming requirements](https://support.stripe.com/questions/plugin-user-migration-guide). ## The cost of non-compliance Starting on October 29, 2024, Stripe will require all merchants using plugins to authenticate via restricted API keys or OAuth 2.0. This mandate is part of Stripe's ongoing efforts to enhance security across its platform. If you haven’t updated your plugins by June 2025, Stripe may begin charging a fee to those merchants who are still using traditional full access API keys. ## Summary Securing your Stripe plugin is essential to protecting merchant accounts from unauthorized access and data breaches. Traditional full access API keys, while common, present significant risks as they grant full access to a merchant’s Stripe account. If mishandled, they can lead to severe security issues. To combat these vulnerabilities, Stripe introduced restricted API keys (RAK) and OAuth 2.0. These methods offer more secure ways to authenticate third-party integrations. RAKs allow developers to define specific permissions, limiting access to only the necessary data and actions. OAuth 2.0 enhances security further by providing granular access control, tokenized, one-click authorization, giving merchants greater control over their integrations. Stripe will mandate the use of RAK or OAuth 2.0 for all plugins starting October 29, 2024\. Merchants must ensure that their plugins are updated by June 2025 to avoid potential compliance fees and adhere to Stripe’s latest security standards. By adopting RAK or OAuth 2.0, you significantly reduce the risk of unauthorized access and enhance the security of your integrations. Upgrading your Stripe plugins is not just about compliance, it’s about safeguarding your clients’ data and maintaining the integrity of their financial transactions. Refer to the documentation for more information on [migrating your plugin to Stripe Apps or Stripe Connect](https://docs.stripe.com/stripe-apps/plugins/decide-migration). Testing your Stripe integration can be challenging, especially when balancing secure environments with the risks of exposing sensitive information. Stripe sandboxes offer a solution by allowing developers to set up multiple separate testing areas that mimic real-world situations without affecting live transactions. Connecting Stripe sandboxes to [GitHub](https://github.com/) automates the testing process, making development smoother, and reducing the test tangles previously encountered by having only a single test mode for each Stripe account. This blog post examines the importance of using these Sandboxes and outlines methods for managing sandbox API keys securely, ensuring that your payment integration works effectively and protects user data. All the code samples featured in this post are available in this [GitHub repository](https://github.com/benjasl-stripe/stripe-sandbox-test/). ## A Simple Sandbox Integration Example Stripe uses the API keys linked to a sandbox to authenticate API requests directed at the corresponding sandbox environment. If a request is made without a key, an invalid request error is returned; conversely, an authentication error is raised if the key is incorrect or outdated. If you don't have a Stripe account yet, sign up and [register a Stripe account](https://dashboard.stripe.com/register), and [create your first Sandbox](https://docs.stripe.com/sandboxes/dashboard/manage#create-a-sandbox).The following steps show you how to find your Sandbox key,: The following steps show you how to find a sandbox key: 1. To view a complete list of all the Sandboxes in your account, visit [https://dashboard.stripe.com/sandboxes](https://dashboard.stripe.com/sandboxes) or choose the account drop down from the top left corner of the dashboard: 2. Choose the sandbox you want to access programmatically, and then choose the **Developer** button at top right corner, and **API keys**. 3. From the API Keys dashboard you can reveal, revoke, and create API keys. Check the documentation to learn how to [manage API keys](https://docs.stripe.com/keys). To see the API key for your Sandbox environment, choose **Reveal test key**: API keys include both a publishable and secret key. The publishable key can be viewed in public and cannot be compromised. The secret **API key** is used to authenticate requests on your server when interacting with the Sandbox. By default, you can use the secret key to perform any API request without restriction. To avoid accidentally making an API call to the wrong sandbox, account, or having your secret API key compromised, ensure that it is stored securely in your web or mobile app’s server-side code (such as in an environment variable or credential management system) to call Stripe APIs. Don’t expose this key on a website or embed it in a mobile application. The following steps show how to save this key as an environment variable in a server side Node.js application using the [Express framework](https://expressjs.com/): ### Step 1: Set Up the Environment Install Dependencies: Ensure you have [Node.js and npm installed](https://docs.npmjs.com/downloading-and-installing-node-js-and-npm). Then create a new project folder and run the following commands to initialize a new Node.js project and install the required dependencies: ```bash mkdir stripe-sandbox-example cd stripe-sandbox-example npm init -y npm install express stripe dotenv ``` 1. **Create an Environment Variable**: Create a .env file in the root of your project and add your Stripe Sandbox API key there: ```text STRIPE_API_KEY=sk_test_key ``` ### **Step 2: Create the Express Application** Create a file named app.js in your project folder, and add the following code: ```javascript // app.js require('dotenv').config(); // Load environment variables from .env file const express = require('express'); const Stripe = require('stripe'); const app = express(); const port = process.env.PORT || 3000; // Initialize Stripe with the Sandbox API key from the environment variable const stripe = Stripe(process.env.STRIPE_API_KEY); // Middleware to parse JSON requests app.use(express.json()); // Example route to create a payment intent app.post('/create-payment-intent', async (req, res) => { const { amount, currency } = req.body; try { const paymentIntent = await stripe.paymentIntents.create({ amount: amount, currency: currency, }); res.status(200).json({ clientSecret: paymentIntent.client_secret }); } catch (error) { console.error('Error creating payment intent:', error); res.status(500).json({ error: error.message }); } }) // used later for testing connections app.get('/account', async (req, res) => { try { const account = await stripe.accounts.retrieve(); res.status(200).json(account); } catch (error) { console.error('Error retrieving account:', error); res.status(500).json({ error: error.message }); } }); // Start the server app.listen(port, () => { console.log(`Server is running on http://localhost:${port}`); }); ``` ### Step 3: Run the Application Start your Express Server: Run the following command in your terminal to start the server: ```bash > node app.js ``` Access the \`/create-payment-intent\` endpoint by sending a POST request. Use a tool like [Postman](https://www.postman.com/) or [curl](https://en.wikipedia.org/wiki/CURL). The following example uses curl: ```bash curl -X POST http://localhost:3000/create-payment-intent \ -H "Content-Type: application/json" \ -d '{"amount": 1000, "currency": "usd"}' ``` In your [Stripe dashboard](https://dashboard.stripe.com/), first ensure that you are in the correct sandbox, and then open [Stripe Workbench](https://docs.stripe.com/workbench) to see the results of the request: ![image1](/images/avoiding-test-mode-tangles-with-stripe-sandboxes/test-mode-tangles-1.png) ## Integrating Sandbox deployments with Github Integrating Stripe Sandboxes into your version control system’s deployment workflow is essential for managing testing environments efficiently and securely. For example, using GitHub’s capabilities alongside Stripe Sandboxes, you can simplify and secure your deployment processes, increase collaboration among team members, and maintain tight control over sensitive configurations. Here’s how to manage this integration. ### Step 1: Ensure GitHub is ignoring sensitive files A well-configured [.gitignore](https://docs.github.com/en/get-started/getting-started-with-git/ignoring-files) configuration file is important to prevent accidentally uploading sensitive files like .env. The previous Node.js example sets the sandbox API key as an environment variable using a .env file. To ensure this file is never committed to GitHub, the following script is included in the .gitignore file. This is the first file to be committed to the repository: ```text # dotenv environment variable files .env .env.development.local .env.test.local .env.production.local .env.local ``` This `.gitignore` configuration varies according to the runtime and framework you are working with. ### Step 2: Set Up GitHub Secrets When using [GitHub Actions](https://docs.github.com/en/actions) for CI/CD, manage sensitive data securely using GitHub Secrets: 1. Go to your GitHub repository. Choose **Settings** from the toolbar. On the left sidebar, navigate to **Secrets and variables** and choose **Actions** then choose **New repository secret**. 2. Add your secrets one at a time: ![image2](/images/avoiding-test-mode-tangles-with-stripe-sandboxes/test-mode-tangles-2.png) ### Step 4: Reference Secrets in GitHub Actions GitHub Actions allows you to automate your workflows and CI/CD processes. Start by creating a workflow that incorporates your Sandbox environment for testing. In your GitHub Actions workflow file (usually located in `.github/workflows/ci.yml`), reference the secrets you added. The following workflow automates the process of testing the application whenever changes are pushed to the main branch. It checks out the latest code, sets up the necessary environment, installs any required dependencies, and runs tests that interact with Stripe to verify that the code is executing in the correct sandbox. This helps ensure the integrity and functionality of the application in a continuous and efficient manner, while maintaining secure practices in handling sensitive credentials like API keys: ```text name: CI/CD with Stripe Sandboxes on: push: branches: - main jobs: devSandbox: runs-on: ubuntu-latest steps: - name: Checkout Code uses: actions/checkout@v2 - name: Set up Node.js uses: actions/setup-node@v2 with: node-version: '18' - name: Install Dependencies run: npm install - name: Run Tests Using Sandbox env: STRIPE_API_KEY: ${{ secrets.STRIPE_API_KEY }} run: npm run test # Ensure tests use correct Sandbox API ``` ### **Step 4. Creating a test file** The test script defined in `app.test.js` is designed to validate the integration of the application with Stripe's Sandbox environment. It uses the [supertest](https://www.npmjs.com/package/supertest) library to send HTTP requests to the Express application imported from `app.js`. To set up tests for your Node.js application using [Jest](https://jestjs.io/) and supertest, follow these steps: 1. Install Jest for running tests and supertest for making HTTP requests in your test suite by running the following command: ```bash npm install --save-dev jest supertest ``` 2. Modify your package.json file to include a test script that runs jest. Add the following line in the "scripts" section: ```javascript { "scripts": { "test": "jest" } } ``` 3. Create a test file named app.test.js in your project root or a designated tests folder. In this file, write the test suite using Jest and supertest. The test suite begins by verifying that the environment variable `STRIPE_API_KEY` is set, ensuring that the application has the necessary credentials to interact with the Stripe API. ```javascript // __tests__/app.test.js const request = require('supertest'); // For making HTTP requests in tests const app = require('../app'); // Adjust the path as necessary require('dotenv').config(); // Load environment variables describe('Stripe Sandbox Integration', () => { beforeAll(() => { // Ensure the environment variables are set expect(process.env.STRIPE_API_KEY).toBeDefined(); }); // New test: Verify GET request to Stripe account test('GET /account should return the correct sandbox name', async () => { const response = await request(app).get('/account'); expect(response.status).toBe(200); expect(response.body).toHaveProperty('id'); // Check for the existence of an account ID expect(response.body.business_profile).toHaveProperty('name', 'Sandbox'); // Confirm business profile name expect(response.body.settings.dashboard).toHaveProperty('display_name', 'dev-sandbox'); // Check for display_name // Output the name of the sandbox console.log('Sandbox Name:', response.body.settings.dashboard.display_name); }); }); ``` The script then verifies the connection to the Stripe API by making a GET request to the `/account` endpoint of the Node.js Express application. This route is designed to fetch the account details from Stripe. Upon receiving the response, the test asserts that the status is 200, indicating a successful request, and checks that the response body contains the correct ‘dashboard.display_name property’ of ‘dev-sandbox’, confirming that the connection to the Stripe sandbox is correctly established and functioning as expected. This approach not only validates the API integration but also ensures that sensitive configurations are correctly set. Now each time a new commit is made to the main branch, this workflow runs and verifies the application is configured for the correct sandbox environment. This is the successful result of a recent commit: ![image3](/images/avoiding-test-mode-tangles-with-stripe-sandboxes/test-mode-tangles-3.png) Here are the corresponding logs in the associated Stripe sandbox: ![image4](/images/avoiding-test-mode-tangles-with-stripe-sandboxes/test-mode-tangles-4.png) ## **Conclusion** Using Stripe Sandboxes helps to reduce the test tangles previously encountered by having only a single test mode for each Stripe account. Setting up individual sandboxes for testing allows for focused validation of features, minimizing the risk of affecting live operations. Connecting these environments with GitHub automates the testing process and leads to quicker updates. Securing your sandbox API keys is equally important. Utilize environment variables or managed key services whenever possible to safeguard sensitive information. This approach not only improves the reliability of your integration but also builds confidence in your payment solutions. Learning how to work with Stripe Sandboxes helps you deliver dependable payment solutions that are easier to and free from interference by others. Explore the sample [GitHub repository](https://github.com/benjasl-stripe/stripe-sandbox-test/) to access all the code samples featured in this post and enhance your Stripe integration experience. To learn more about developing applications with Stripe, [visit our YouTube Channel](https://www.youtube.com/stripedevelopers). In [Simple error handling strategies with Stripe Workbench](/blog/simple-error-handling-strategies-with-stripe-workbench), you learn how to implement simple error handling strategies with the help of Stripe Workbench. This post demonstrates some more advanced patterns to help you build resilient and robust payment systems to integrate Stripe with your enterprise applications. As your integration grows in complexity and volume, these patterns become crucial for maintaining system stability and providing a smooth user experience. In distributed systems, network issues or unexpected spikes in traffic can occasionally lead to temporary API slowdowns or connectivity problems. When integrating with external services like Stripe, it's crucial to design your application to gracefully handle these scenarios. Without proper safeguards, your application might experience slower response times or resource exhaustion while repeatedly attempting to connect during these periods. ### Getting started with Stripe Workbench Use Workbench to detect when your Stripe account is experiencing high volumes of traffic, unusually high error rates, or regular webhook delivery failures. To see Workbench: 1. Navigate to [https://dashboard.stripe.com/](https://dashboard.stripe.com/) in your preferred browser and log into your Stripe account. 2. If you have multiple accounts configured, use the drop-down in the top-left to select the store API activity you wish to view. Workbench reports and content are scoped to the store level. 3. In the bottom-right corner of the browser, hover over the terminal icon to expand the menu, then select the caret symbol **^** to open Workbench. 4. Workbench opens in the lower portion of the window *Workbench is not a browser extension and does not rely on CLIs or other tools in your development machine, so you can use it immediately without the need for installing additional software.* ### Detecting high traffic periods The **Overview** tab provides a snapshot of your Stripe account's API activity. You can also view a breakdown of API versions used in recent requests, with the ability to upgrade your account's default version if needed. Visual representations of your API requests and webhook activity are presented through intuitive graphs, giving you a clear picture of recent interactions. The Insights tab offers actionable recommendations to enhance your Stripe integration, helping you resolve errors, boost performance, and optimize your use of Stripe's APIs. The following example shows that there was recently a significant increase in API requests made to this Stripe account. ![](/images/error-handling-advanced/error-handling-advanced3b.png) A surge of requests occurred on September 9, with a significant number of these requests failing. ![](/images/error-handling-advanced/error-handling-advanced4b.png) The **Errors** tab provides an overview of recent issues in your Stripe account. In this example, it’s clear that a recent error was caused by exceeding Stripe's API rate limits. This occurred due to a scheduled job that was triggered across thousands of accounts at the same time, creating reports for monthly usage of metered billing. The job attempted to create usage records for all customers at once, resulting in a high volume of API requests in a short time frame, triggering Stripe's rate limiting protection: ![](/images/error-handling-advanced/error-handling-advanced-error-tabb.png) ### Too many requests? Stripe implements API [rate limits](https://docs.stripe.com/rate-limits) to ensure system stability and prevent abuse. These limits cap the number of API requests that can be made within a specific timeframe, with different thresholds for live and test modes. In live mode, Stripe allows up to 100 read and 100 write operations per second, while test mode permits 25 of each. Certain API resources, such as the Files API and Search API, have stricter limits. If these limits are exceeded, you may encounter 429 error responses. It's important to design your integration to handle these limits gracefully. It is also good practice to treat the limits as maximums and take proactive measures to reduce the likelihood of receiving a 429 response in the first place. There are several common patterns you can implement to mitigate the chances of reaching the rate limits. ### Request Spacing Pattern This pattern focuses on the temporal aspect of rate limiting, ensuring a steady, spaced-out stream of requests rather than enforcing a strict count within a time window. The Request Spacing Pattern is implemented here using [Limiter](https://www.npmjs.com/package/limiter), a lightweight rate limiter library for Node.js. It ensures a minimum time interval between successive API calls, effectively spacing out requests to prevent overwhelming the API endpoint and to comply with rate limits. ```javascript const { RateLimiter } = require('limiter'); const stripe = require('stripe')('your_stripe_secret_key'); //Allow one message to be sent every 600ms: const limiter = new RateLimiter({ tokensPerInterval: 1, interval: 600 // 60000ms / 100 = 600ms between each request }); const putMeterEvent = async (customerId, value) => { await limiter.removeTokens(1); try { const meterEvent = await stripe.billing.meterEvents.create({ event_name: 'llama_ai_tokens', payload:{ value, stripe_customer_id: customerId, } }); console.log('Meter event created:', meterEvent.id); return meterEvent; } catch (error) { console.error('Error creating meter event:', error); throw error; } }; ``` The following diagram shows how the Request Spacing Pattern works to ensure each API request is spaced out into 600 ms windows: ![](/images/error-handling-advanced/error-handling-advanced6.png) ### Concurrency Control Pattern When multiple processes are running concurrently, they can collectively exceed API rate limits. Managing concurrency without proper controls increases the likelihood of encountering 429 errors. The following example adds a concurrency setting using a node package called [p-queue](https://www.npmjs.com/package/p-queue) to limit the number of concurrent requests. ```javascript const { RateLimiter } = require('limiter'); const PQueue = require('p-queue'); const stripe = require('stripe')('your_stripe_secret_key'); const rateLimiter = new RateLimiter({ tokensPerInterval: 1, interval: 600 }); const queue = new PQueue({ concurrency: 5 }); // set a max concurrency of 5 requests const putMeterEvent = async (customerId, value) => { try { const meterEvent = await stripe.billing.meterEvents.create({ event_name: 'llama_ai_tokens', payload:{ value, stripe_customer_id: customerId, } }); console.log('Meter event created:', meterEvent.id); return meterEvent; } catch (error) { console.error('Error creating meter event:', error); throw error; } }; const putMeterEventWithLimits = async (customerId, value) => { await rateLimiter.removeTokens(1); return queue.add(() => putMeterEvent(customerId, value)); }; ``` The concurrency setting limits the number of requests that can simultaneously start to five. After that, new requests will only start after one of the running requests completes and at least 600 ms has passed since the last request started. This helps prevent overwhelming the API even if multiple processes or a large batch job is running. ![](/images/error-handling-advanced/error-handling-advanced7.png) ### Token bucket pattern This pattern is particularly useful for handling bursts of requests while maintaining a consistent overall rate. It controls the rate at which requests are processed by using a “bucket” that holds tokens. Each token represents the permission to make one request. Tokens are generated at a steady rate and added to the bucket. The rate at which tokens are generated determines the average rate limit for requests. The bucket has a maximum capacity (often called the reservoir). If the bucket is full, any additional tokens are discarded. This capacity allows the system to accept bursts of requests. When a request is made, it must obtain a token from the bucket. If tokens are available, the request is processed. If the bucket is empty (no tokens available), the request is either delayed or rejected until tokens become available. Tokens are periodically added back to the bucket at the predefined rate, allowing the system to recover from bursts and resume processing requests at a consistent rate. In the following example, a token bucket algorithm is used to manage request rate limits, with concurrency handled using p-queue. This approach allows for a burst of requests up to a certain limit and then enforces a steady rate of requests: ```javascript const { TokenBucket } = require('limiter'); const PQueue = require('p-queue'); const stripe = require('stripe')('your_stripe_secret_key'); // Token bucket: 100 tokens, refills 100 tokens every 60 seconds const tokenBucket = new TokenBucket({ bucketSize: 100, tokensPerInterval: 100, interval: 60 * 1000 }); // Concurrency queue: max 5 concurrent requests const queue = new PQueue({ concurrency: 5 }); const putMeterEvent = async (customerId, value) => { try { const meterEvent = await stripe.billing.meterEvents.create({ event_name: 'llama_ai_tokens', payload:{ value, stripe_customer_id: customerId, } }); console.log('Meter event created:', meterEvent.id); return meterEvent; } catch (error) { console.error('Error creating meter event:', error); throw error; } }; const putMeterEventWithLimits = async (customerId, value) => { // Check token bucket if (!(await tokenBucket.removeTokens(1))) { throw new Error('Rate limit exceeded (token bucket)'); } // Add to concurrency queue return queue.add(() => putMeterEvent(customerId, value)); } ``` The following image shows how a combination of rate limiting, max concurrency, and token bucket system work together to ensure a steady rate of requests. ![](/images/error-handling-advanced/error-handling-advanced8.png) The following chart taken from the Workbench overview demonstrates the results from before this pattern was implemented (in the red box), and after the pattern was implemented (in the green box). The results show that the updated implementation can process a high volume of API calls while staying within Stripe's rate limits. This approach minimizes errors, improves efficiency, and provides a more stable and predictable interaction with the Stripe API. ![](/images/error-handling-advanced/error-handling-advanced9.png) ### Conclusion As your Stripe integration grows and evolves, regularly monitoring your API usage with Workbench and fine-tuning your rate limiting strategies is key to maintaining a robust and efficient payment processing integration. As demonstrated in this post, the combination of Request Spacing, Concurrency Control, and Token Bucket patterns offers a comprehensive approach to managing API requests. By understanding how to implement these patterns, you're well-equipped to handle the complexities of high-volume payment processing, ensuring your Stripe integration remains robust and ready for enterprise-scale challenges. We’ve heard from the Stripe community that it is too hard to find data about errors which resulted from your Stripe API invocations. We have also heard that it would be helpful to provide more context and actionable advice once you do find the error. Now with the launch of the [Stripe Workbench](https://docs.stripe.com/workbench), developers have a birds-eye view of their integration which shows many potential issues in one place. This makes it easier to see the impact of each incident, see how often it’s happening, and receive actionable advice for resolving the issue. ### What is a Stripe error Stripe’s error handling system covers a wide array of potential issues which can arise during payment processing and API interactions. These include payment-specific errors like [declined transactions](https://docs.stripe.com/declines) and fraud prevention blocks, to technical hiccups such as network failures and authentication problems. Each of these errors is categorized into distinct groups called “error types.” These types include [StripeCardError](https://docs.stripe.com/error-handling?lang=node\#payment-errors) for payment-related issues, [StripeInvalidRequestError](https://docs.stripe.com/error-handling?lang=node\#invalid-request-errors) for incorrect API usage, [StripeConnectionError](https://docs.stripe.com/error-handling?lang=node\#connection-errors) for network problems, and [several others](https://docs.stripe.com/api/errors) for authentication, permissions, rate limits, and webhook verification. Each error type is tailored to provide specific insights into what went wrong, allowing developers to implement targeted solutions and create robust, fault-tolerant integrations. You can utilize Workbench to maintain a good understanding of these diverse error types and how to properly handle them. This will help you to build smoother, higher conversion payment experiences. ### Getting started with Workbench To see Workbench: 1. Navigate to [https://dashboard.stripe.com/](https://dashboard.stripe.com/) in your preferred browser and log into your Stripe account. 2. If you have multiple accounts configured, use the drop-down in the top-left to select the store API activity you wish to view. Workbench reports and content are scoped to the store level. 3. In the bottom-right corner of the browser, hover over the terminal icon to expand the menu, then select the caret symbol **^** to open Workbench. 4. Workbench opens in the lower portion of the window: *Workbench is not a browser extension and does not rely on CLIs or other tools in your development machine, so you can use it immediately without the need for installing additional software.* ### Finding errors with Stripe Workbench Workbench features an **Errors** tab which provides a comprehensive overview of recent issues encountered in your Stripe account. This tab not only summarizes these errors but also offers guidance on resolving each specific type of API error. Additionally, it allows you to examine recent API request logs associated with each error, giving you valuable context for troubleshooting and improving your integration. To view recent errors, choose the **Errors** tab. This view consists of three components, from left to right: * A filterable list of recent errors within a given period (1 hour, 1 day, 7 days). * A summary of the selected error. * Logs associated with the error. ![](/images/error-handling-workbench/error-handling-workbench3b.png) Errors which have occurred multiple times are grouped together and counted to help you identify those which are occurring most often. In the following example, you see that the `payment_intent_unexpected_state` error has occurred 7 times during the past 7 days: ![](/images/error-handling-workbench/error-handling-workbench4.png) Choosing this error, opens the **Summary** and **Logs** view. This gives additional context about the error, and information about how to resolve it. ``` “You cannot confirm this PaymentIntent because it's missing a payment method. You can either update the PaymentIntent with a payment method and then confirm it again, or confirm it again directly with a payment method or ConfirmationToken.” ``` It also shows the request body sent with the API call that generated the error. The Logs view shows the 7 API requests that produced the error message. Select any of these logs to dig deeper into that particular API request: ![](/images/error-handling-workbench/error-handling-workbench5.png) Choosing one of the logs displays in-depth information about the request such as the origin, the source, the API version and the request and response body of the API call: ![](/images/error-handling-workbench/error-handling-workbench6.png) Stripe integrations that are built using one of the [Stripe SDKs](https://docs.stripe.com/libraries) each contain an error object with a `type` attribute. Use this to look up the [types of error and responses](https://docs.stripe.com/error-handling\#error-types) from the Stripe docs page. Once you locate the error type, select it to view detailed actionable solutions. You can also use the `doc_url` attribute which links directly to the error-code handling page within the Stripe docs. ![](/images/error-handling-workbench/error-handling-workbench9.png) ### Strategies for handling errors Stripe workbench helps you find, group, and solve errors within your Stripe integrations, but in addition to this there are some best practices you can use to handle errors as they occur in your integrations. #### Catching inside your code Try/catch blocks allow you to try an action and then if an exception occurs, catch the exception (error) and deal with it gracefully rather than crashing the entire application. This allows you to catch the specific error thrown by Stripe, interpret it, and provide a friendly, informative message to your user. When you catch an exception, you can [use its type attribute to choose a response](https://docs.stripe.com/error-handling?lang=node#error-types). How you implement try/catch blocks will differ depending on the SDK runtime you are using. The following example shows a try/catch exception block using the [Node.js SDK](https://docs.stripe.com/libraries): ```javascript const stripe = require('stripe')('your_stripe_secret_key'); async function myFunction(args) { try { const paymentIntent = await stripe.paymentIntents.create(args); console.log('No error.'); } catch (e) { switch (e.type) { case 'StripeInvalidRequestError': console.log('An invalid request occurred.'); break; case 'StripeCardError': console.log(`A payment error occurred: ${e.message}`); break; default: console.log('Some other problem occurred, maybe unrelated to Stripe.'); break; } } } ``` This script handles two different types of errors. If it's a `StripeCardError`, it logs that a payment error occurred along with the error message. If it's a `StripeInvalidRequestError`, it logs that an invalid request occurred. For any other type of error, it logs a generic message. ### Reacting to events Stripe can send events to webhook endpoints and cloud services, such as [Amazon EventBridge](https://aws.amazon.com/eventbridge/) to notify you of activity within your Stripe account. This can include errors. These events can occur both immediately after an API request or at a later time, such as when a payment is settled, a subscription renews, or when a payment fails. Webhooks ensure that your application stays in sync with the latest object updates allowing you to respond to events in near real-time and maintain accurate records of transactions and account activities. You can use the [Interactive webhook builder](https://docs.stripe.com/webhooks/quickstart) to set up and deploy a webhook that “listens” to Stripe events. When creating your webhook, you can use Workbench to specify which events to listen for. The following webhook is configured to listen only for `payment_intent.payment_failed` events. ![](/images/error-handling-workbench/error-handling-workbench7b.png) When receiving events that relate to an error there are some sequential steps you should follow to “unpack” the event, pinpoint the error and take action to resolve: 1. Access `event.data.object` to retrieve the affected object: When Stripe sends a webhook event, the payload includes information about the event in the event.data.object property. This object contains details about the Stripe resource that triggered the event. 2. Obtain stored information about failures from `event.data.object.last_payment_error`. The webhook event object often includes an error object with additional context about what happened, including any errors that occurred. 3. Use the error type attribute (`event.data.object.last_payment_error.type`) to choose an appropriate response. The following code example demonstrates how to implement these three steps in Node.js: ```javascript // Define a POST route to receive a payment intent error app.post('/webhook', express.json({type: 'application/json'}), (request, response) => { // 1. Get an event object const event = request.body; if (event.type == 'payment_intent.payment_failed') { //2. Use stored information to get an error object const error = event.data.object.last_payment_error; //3. Use its type to choose a response switch (error.type) { case 'card_error': console.log(`A payment error occurred: ${error.message}`); break; default: console.log('Another problem occurred, maybe unrelated to Stripe.'); break; } } response.send(); }); ``` Webhooks deliveries can also fail for various reasons. You can view the delivery success of each webhook in the Workbench **Webhooks** tab. Here you can also filter by delivery status. ![](/images/error-handling-workbench/error-handling-workbench8b.png) ### Retrieve historical errors The previous example receives a webhook event when a paymentIntent failure occurs and accesses the `last_payment_error` attribute to retrieve additional information about the error. Many other Stripe objects store previous error information in this way. Use this same technique on these objects to access the previous error type and refer to the documentation for each type for advice about how to respond: These are common objects that store information about failures, and the attribute you should use to access that information. | OBJECT | ATTRIBUTE | VALUES | | :---- | :---- | :---- | | [Payment Intent](https://docs.stripe.com/api/payment\_intents) | `last_payment_error` | [An error object](https://docs.stripe.com/error-handling?lang=node\&locale=en-GB\#work-with-error-objects) | | [Setup Intent](https://docs.stripe.com/api/setup\_intents) | `last_setup_error` | [An error object](https://docs.stripe.com/error-handling?lang=node\&locale=en-GB\#work-with-error-objects) | | [Invoice](https://docs.stripe.com/api/invoices) | `last_finalization_error` | [An error object](https://docs.stripe.com/error-handling?lang=node\&locale=en-GB\#work-with-error-objects) | | [Setup Attempt](https://docs.stripe.com/api/setup\_attempts) | `setup_error` | [An error object](https://docs.stripe.com/error-handling?lang=node\&locale=en-GB\#work-with-error-objects) | | [Payout](https://docs.stripe.com/api/payouts) | `failure_code` | [A payout failure code](https://docs.stripe.com/api/payouts/failures) | | [Refund](https://docs.stripe.com/api/refunds) | `failure_reason` | [A refund failure code](https://docs.stripe.com/api/refunds/object\#refund\_object-failure\_reason) | For example, use the following Node.js code to access previous failure information for a SetupIntent: ```javascript const setup_intent = await stripe.setupIntents.retrieve('{{SETUP_INTENT_ID}}') const e = setup_intent.last_setup_error if (e !== null) { console.log(`SetupIntent ${setup_intent.id} experienced a ${e.type} error.`) } ``` ## Conclusion Workbench addresses common challenges you face when handling errors in building Stripe integrations. It centralizes error reporting, providing you with a comprehensive view of recent issues, their frequency, and contextual information for efficient troubleshooting. Using Workbench, combined with established error handling strategies enables more robust integrations. Some approaches discussed include implementing try-catch exceptions to gracefully manage errors, using webhooks to react to events, and accessing stored error information on Stripe objects. By employing these methods and using Workbench's features such as grouped error views, detailed logs, and actionable advice, you can more effectively identify, understand, and resolve integration issues. This approach to error management supports the creation of more reliable payment systems, ultimately improving the overall user experience in online transactions. We’ve spent hundreds of hours interviewing founders and development teams at high-growth companies to learn how they manage their API integration with Stripe. They all told us the same thing: while they love our docs and code snippets, they wish they could get guidance and debugging tools in situ, as they build, without having to bounce between various tabs. In particular, developers want to maximize their flow state. The conditions to achieve flow state are well-known: knowing what to do, being free from distractions, and having a clear challenge along with the right set of skills and tools. Stripe Workbench is our new home for developers within the Dashboard that helps you debug, monitor, and grow your Stripe integration. Workbench provides an at-a-glance summary of your integration’s behavior so you can explore your account’s API and event history, prototype and build new integrations, and receive critical account alerts. It’s now available for everyone, on every Dashboard surface, with a single keystroke. As you’re building, Workbench highlights errors and helps you resolve them, and it recommends ways to improve the efficiency of your integration. If you want to learn more about Workbench, start by reading our [docs](https://docs.stripe.com/workbench?utm_medium=marketing-email&utm_source=2df1&utm_campaign=GLOBAL_4d7b&utm_content=a625&utm_term=bccd88b40bf8). And if you have any product feedback, please create a new [post](https://insiders.stripe.dev/c/workbench/5?utm_medium=marketing-email&utm_source=8c51&utm_campaign=GLOBAL_4b2a&utm_content=916c&utm_term=5224491bbc4c) in the Workbench category on [Stripe Insiders](https://insiders.stripe.dev?utm_medium=marketing-email&utm_source=cbac&utm_campaign=GLOBAL_4c39&utm_content=9901&utm_term=4708ec9f4dc5). — Michael Glukhovsky and Tomer Elmalem Developer Products, Stripe ![](/images/2024-08-dev-digest/image4.png) **Updates** **Tap to Pay on iPhone:** Tap to Pay on iPhone is now available with Stripe in Australia, Canada, France, Italy, the Netherlands, the United Kingdom, and the United States. With Tap to Pay on iPhone and the Stripe Terminal SDK, you can [accept in-person contactless payments](https://docs.stripe.com/terminal/payments/setup-reader/tap-to-pay?utm_medium=marketing-email&utm_source=15c9&utm_campaign=GLOBAL_426a&utm_content=b671&utm_term=47937e7e0a49) with a compatible iPhone—without extra hardware. With Tap to Pay on iPhone, every transaction is protected by the security and privacy features built into the iPhone. **Sandboxes:** Sandboxes is now in [public beta](https://docs.stripe.com/sandboxes?utm_medium=marketing-email&utm_source=44d1&utm_campaign=GLOBAL_4023&utm_content=9da3&utm_term=9af1971ea96a). Create multiple isolated testing environments, test Stripe functionality, collaborate more easily, and experiment with new features—all without affecting your live integration. **Event Destinations:** Event Destinations is also now in [public beta](https://docs.stripe.com/event-destinations?utm_medium=marketing-email&utm_source=b0e2&utm_campaign=GLOBAL_42f6&utm_content=9c62&utm_term=94cc6e2c9221). Set up an event destination to send Stripe events to webhook endpoints and Amazon EventBridge. **Community** If you’re building on Stripe Tax, we have some new videos that will help make your integration experience much smoother. We’ve also been focused on creating a better developer experience across our tooling and open source extensions, so you can keep building with ease. Learn how the [Stripe Tax API](https://www.youtube.com/watch?v=hb7t6OuyOVU&utm_medium=marketing-email&utm_source=46f8&utm_campaign=GLOBAL_4202&utm_content=8ee5&utm_term=9f85bcadda4a) records completed transactions and reversals. [Automate taxes](https://www.youtube.com/watch?v=3QBRs4IfDNo&utm_medium=marketing-email&utm_source=8657&utm_campaign=GLOBAL_4485&utm_content=97c7&utm_term=8eb487f7b87b) on a subscription offering. Level up your workflow with the [Stripe CLI](https://www.youtube.com/watch?v=iFwBGI-kqeE). Use [Stripe Payment Links](https://www.youtube.com/watch?v=aotUFvYtmys) for no-code payments. Bring together authentication and payments with [AirBadge](https://www.youtube.com/watch?v=6w3v9QD2ae4). — Cecil Phillip Developer Advocate, Stripe [Stripe invoicing](https://docs.stripe.com/invoicing) enables you to create and manage invoices for one-time or recurring payments. Whether caused by infrastructure issues or coding bugs, integration failures do sometimes happen, which can prevent invoices from being paid in a timely manner. Using the new [Stripe Workbench](https://docs.stripe.com/workbench) tool, this post shows you how to debug and fix errors in your invoice integration. ### Stripe Workbench [Workbench](https://docs.stripe.com/workbench) is a context-aware tool that allows you to build and debug your Stripe integrations from anywhere in the Dashboard. In response to feedback from Stripe developers, this new feature centralizes previously disparate developer tooling into one central and constantly accessible location. Among other things, you can use Workbench to inspect API objects and run requests on them using the [built-in Shell](https://docs.stripe.com/workbench/shell). To get started, navigate to the [Workbench](https://dashboard.stripe.com/workbench) page in your Dashboard and turn the feature on. Workbench is organized by tabs, each showing you a different aspect of your integration. A natural starting spot to explore is the **Overview** tab, where you can see: * API keys and versions. * activity trends in your integration. * recent errors. * useful references to help you get unblocked and submit feedback. ![](/images/invoice-debugging/invoice-debugging1.png) ### The Invoice Object Invoices are sent by merchants to customers for payment, in exchange for goods and services. In its simplest form, an invoice has a number of key parameters including a [Customer](https://docs.stripe.com/api/customers/object) and an associated [Payment Method](https://docs.stripe.com/api/payment\_methods). ![](/images/invoice-debugging/invoice-debugging2.png) A common developer error with Invoice integrations is not properly sending all the required parameters as part of your API call. The following example shows how Workbench makes it easy to debug such errors. ### Debugging errors in your integration In Workbench, the **recent errors** section of the **Overview** tab gives an early indication of potential problems with your integration. To dig deeper, you can look at the **Errors** tab, which gives a holistic view of errors over the last week. The leftmost pane of the **Errors** tab contains a list of all the errors. You can choose each individual error for more details, including the actual API request that caused it. ![](/images/invoice-debugging/invoice-debugging3.png) This example shows that there was a [`parameter_missing`](https://docs.stripe.com/error-codes#parameter-missing) error. The details show that the Invoice create call was missing a Customer object. As previously mentioned, this prevents the Invoice from being created since there’s no customer to charge ![](/images/invoice-debugging/invoice-debugging4.png) ### Fixing the error Now that you’ve located the error, navigate to the **Shell** tab for options to fix it. The Shell allows you to run [Stripe CLI](https://docs.stripe.com/stripe-cli) commands from within the dashboard. This saves you having to run the CLI in a separate terminal window. To address the error above, you need a Customer object. You can get that by running the `Stripe customers list` command in the Shell prompt at the bottom of the screen. In the response, expand the list of Customers and copy one of the IDs by clicking on the clipboard icon next to it. ![](/images/invoice-debugging/invoice-debugging5.png) Still within the **Shell** tab, the **API Explorer** offers a surface for understanding endpoints in the Stripe API and their associated parameters. This helps you learn about the different objects in the API and what actions can be performed on them. It saves you from having to switch back and forth between a CLI window and the Stripe docs. Use the API explorer to build out whatever command you’re looking to test and then run it. To remediate the invoice creation bug, follow these steps: 1) Find the Invoices object and its corresponding Create endpoint in the dropdown list. 2) Paste the Customer ID that you previously copied in the corresponding customer parameter field 3) The **Shell** prompt auto-populates as you modify fields in the **API explorer**. You can use this to learn how to construct CLI commands. 4) Another feature in the API explorer is the **Print SDK request** option at the bottom, which allows you to generate code in the [SDK](https://docs.stripe.com/libraries) language of your choosing. You can then reuse this code in your integration, saving you time and potential errors. ![](/images/invoice-debugging/invoice-debugging6-7-8.png) 5) Run the command by clicking on the **Run** button in the lower right corner. Your invoice is now created. Check the response in the Shell and make sure there are no errors. ### Inspecting the fix To take a deeper look at the resulting invoice, copy its ID from the **Shell** and switch to the **Inspector** tab. This pane provides a way of drilling into any Stripe object down to its JSON representation. The data map feature shows you a hierarchical view of the object, so you can see all the dependencies it has. In this case, you see the newly created Invoice and its attached Customer object. ![](/images/invoice-debugging/invoice-debugging9.png) The **Inspector** also provides a **Logs** tab where you can see details of the API calls associated with the invoice. ![](/images/invoice-debugging/invoice-debugging10.png) The **Events** tab in the **Inspector** shows the various events that get fired as invoices move through their lifecycle, from creation to payment. ![](/images/invoice-debugging/invoice-debugging11.png) ### Going a step further After fixing the invoice creation process, it’s worth checking that it can actually be paid. To check, run the `Pay` command on the invoice using the **API Explorer** once again. Looking at the **Events** list again, you can see that new ones have been added. Notably, the invoice payment was successful but for $0. Trial periods are a common use case for zero-dollar invoices. ![](/images/invoice-debugging/invoice-debugging12.png) As previously mentioned, the example in this article looks at the base case. In order to actually process payments of non-zero monetary value, invoices require [Invoice Items](https://docs.stripe.com/api/invoiceitems) as well, to specify which products or services were sold. Follow these steps to create Invoice Items using Workbench: 1. Start by creating a [Product](https://docs.stripe.com/api/products) using the API explorer, to represent the goods or services being sold. Make sure to specify a name and price. To specify a price, use the `default_price_data` hash and add a `unit_amount`. ![](/images/invoice-debugging/invoice-debugging13-14.png) 2. After running the command, copy the Product ID and Price ID (`default_price`) from the response. 3. Next, create an Invoice Item with these parameters: 1. the Price ID from the previous step 2. a Customer ID: you can re-use your previous customer or create a new one. 3. A new Invoice ID: your previous invoice has been paid, so it can no longer be used. ![](/images/invoice-debugging/invoice-debugging16.png) Run the command in the **API explorer** 4. Using the **Inspector**, you can verify that the Invoice has been updated with an item. ### Wrapping Up Workbench offers a powerful new suite of tools for identifying errors in your invoice integration, understanding their causes and fixing them - all without ever exiting your Stripe dashboard. This post highlights how you can leverage Workbench to not only debug your invoicing integration, but also inspect all its associated objects. The `parameter_missing` example can be extended to more complex use cases, but the approach stays the same. For more details on Invoices, check out how you can [use Workbench to analyze their lifecycle](/blog/peeking-under-the-hood-of-stripe-invoicing). This post shows how to use the [Stripe Workbench](https://docs.stripe.com/workbench) **Inspector** to examine the lifecycle of a PaymentIntent object. This helps you to track object state transitions, such as `requires_payment_method`, `processing`, and `succeeded`, and to find issues in your payment workflows. Apply the techniques in this post to reduce context switching and gain greater insight into Stripe objects to build efficient payment integrations. ### Everything in Stripe is an object In the world of Stripe, everything is an object. Stripe represents your account balance with a [Balance object,](https://docs.stripe.com/api/balance/balance_object) tracks customers through [Customer objects](https://docs.stripe.com/api/customers), and uses [PaymentMethod](https://docs.stripe.com/api/payment_methods) objects to hold payment information. To accept payments, your Stripe integration orchestrates multiple objects through a number of lifecycle states. For example, as the [PaymentIntent object](https://docs.stripe.com/api/payment_intents/object) transitions from one state to the next, the [*status*](https://docs.stripe.com/payments/payment-intents/verifying-status) property updates to reflect these changes. As payments have grown in complexity, we've often heard frustration from developers having to track API object state transitions in multiple windows and tabs in the dashboard. To improve your development experience, we've consolidated your view of API objects in the new **Inspector** tab, part of our new Workbench feature. ### Using the Workbench Inspector To use **Inspector**: 1. Navigate to [https://dashboard.stripe.com/workbench](https://dashboard.stripe.com/workbench) and choose the **Inspector** tab. By default the **Inspector** is contextual, automatically updating based on the resource displayed in the dashboard 2. Open an existing payment to inspect the PaymentIntent object. Choose **Payments** from the left navigation menu, then choose one of the listed payment items. ![](/images/objects-life/objects-life1.png) A PaymentIntent is represented by the `payment_intent` object, shown previously. This is the source of truth for your payment flow. As a payment progresses, the `payment_intent` object transitions through a number of states: * `requires_payment_method` * `requires_confirmation` * `requires_action` * `processing` * `requires_capture` * `succeeded` * `canceled` It's important that you understand the timing and meaning of state transitions. This knowledge helps you quickly pinpoint issues and optimize your application's performance. It's also critical to checkout conversion since it's part of the checkout flow and customers may bounce if errors are not resolved quickly. ### Modeling Stripe payment flow as a state machine A state machine is an architectural pattern that can model and manage states based on inputs and decisional logic. Take the example of a vending machine which transitions through states like 'waiting', 'coin inserted', 'selection made', and 'dispensing item', based on user actions and internal processes. State machines help developers to design robust, scalable applications. The following example models a Stripe payment flow as a state machine. To start a new payment, [launch the Stripe Shell](https://docs.stripe.com/stripe-shell/launch) from Workbench and run the following command: `stripe payment_intents create --amount="99" --currency="usd" --payment-method-types="card"` Choose the newly created PaymentIntent from the payments page. Notice that the *status* is in the `requires_payment_method` state. The PaymentIntent object requires additional input before it can transition to the next state. ![](/images/objects-life/objects-life-2b.png) This payment flow can be modeled with the following state machine, where green represents previous and current states, and grey represents the states that have not yet been reached. ![](/images/objects-life/objects-life3b.png) The PaymentIntent is created with the initial state `requires_payment_method`. Stripe needs details about the customer’s payment method, either a card number or credentials for some other payment system before it can transition to the next state. Transition the PaymentIntent object to the next state by running the following command in the Stripe Shell, replacing “pi_xxx” with the ID of your PaymentIntent. Locate the PaymentIntent ID using the Inspector: `stripe payment_intents confirm pi_xxx --payment-method="pm_card_visa"` This updates the PaymentIntent object by confirming that your customer intends to pay with the provided payment method. In this case, `pm_card_visa` is the payment method ID of a Visa credit card in the Stripe test environment: ![](/images/objects-life/objects-life4b.png) The PaymentIntent object transitions to the `succeeded` state. Card payments usually transition from the `requires_payment_method` state to the next (`succeeded`) in seconds, whereas other methods can take much longer to complete. ### Modeling complex payment flows Stripe can accept a number of different payment methods in multiple countries. These payment flows differ according to the payment method used and the inputs provided during the lifecycle. Asynchronous payment methods, such as bank debits can take up to a few days to process. Other payment methods, such as credit cards, are processed more quickly. Cards that require [Strong Customer Authentication](https://docs.stripe.com/strong-customer-authentication) such as those issued by banks in the EU, require [3DS authentication](https://docs.stripe.com/payments/3d-secure). This is an authentication method that provides an additional layer of security for credit card transactions. These more complex workflows are modeled with the following state machine: ![](/images/objects-life/objects-life7b.png) To emulate this, create a new PaymentIntent by running the following command in the Stripe shell: `stripe payment_intents create --amount="99" --currency="usd" --payment-method-types="card"` Add a payment method to it with a test card that requires 3DS authentication by running the following command in the Stripe shell: `stripe payment_intents confirm pi_xx --payment-method="pm_card_threeDSecure2Required"` The following screenshot shows that the PaymentIntent object transitions to the `requires_action` state. ![](/images/objects-life/objects-life8.png) The **Inspector** also shows that the PaymentIntent object has a `next_action` attribute of type `use_stripe_sdk`. ![](/images/objects-life/objects-life6.png) To complete the payment flow, pass the `client_secret` to a client-side application and call `stripe.handleCardAction(client_secret)` to manage the 3D Secure process. If authentication fails, the PaymentIntent automatically detaches the PaymentMethod and transitions back to the `requires_payment_method` state. ![](/images/objects-life/objects-life5b.png) ### Reacting to state changes To create a responsive and robust payment system, it's important to react to PaymentIntent state changes as fast as possible. Stripe provides [event destinations](https://docs.stripe.com/event-destinations) for this purpose, allowing your application to automatically respond to various payment scenarios. ### Sending events to an endpoint URL Configure your Stripe account to [send events to an HTTP endpoint](https://docs.stripe.com/webhooks) hosted on your server. This involves specifying a URL endpoint in your dashboard where Stripe can send HTTP POST requests when events, like state changes, occur. Your server should be set up to receive these events. Common events to listen for include: * `payment_intent.succeeded`: Payment was successful * `payment_intent.payment_failed`: Payment failed * `payment_intent.requires_action`: Additional action (like 3DS authentication) is required When your server receives an event, it should verify the event's authenticity using the `Stripe-Signature` header, then process the event accordingly. ### Sending events to an event bus Configure your stripe account to send events directly to your AWS account via [Amazon EventBridge](https://aws.amazon.com/eventbridge/). EventBridge then routes events directly to multiple AWS target services to process or trigger business automations. This configuration offloads the burden of scaling and authentication to Stripe and AWS, eliminating the need for you to host servers, HTTP endpoints, and manage integration code. ### Troubleshooting The **Inspector** tab in Workbench helps you pinpoint the exact state of an object when a payment is abandoned or there's friction in your checkout flow. For example, if you observe a large amount of PaymentIntents in the `requires_action` status, this suggests there are friction points in the 3DS implementation that might be causing customers to abandon their transactions. Maintaining real-time visibility into API objects and their states is essential for ensuring the reliability, accuracy, and security of your payment processing system. Without this insight, you risk operational failures, data inconsistencies, and potential revenue loss. We've designed the Inspector to give you a "single pane of glass" view of the API objects in your integration and their current state. ### Conclusion Various types of object power your Stripe integrations. Each object progresses through several state changes, and you can inspect these objects using the Stripe Workbench Inspector. This helps you to identify breakdowns at specific stages of the transaction cycle. Use the Stripe Workbench object inspector as you are building to locate problems in your integrations, debug issues more quickly, and build more robust payment workflows. [Stripe Invoicing](https://docs.stripe.com/no-code/invoices) offers a no-code solution for sending invoices to customers. Because this option handles the complexity of all underlying API calls, developers sometimes struggle to understand the different phases a Stripe invoice goes through, which is problematic when attempting to debug payment failures. This post uses the new [Stripe Workbench](https://docs.stripe.com/workbench) debugging tool to analyze what happens behind the scenes as an Invoice goes through its lifecycle. ### What is Workbench? [Workbench](https://docs.stripe.com/workbench) is a context-aware tool that allows you to build and debug your Stripe integrations from anywhere in the Dashboard. In response to feedback from Stripe developers, this new feature centralizes previously disparate developer tooling into one central and constantly accessible location. Among other things, you can use Workbench to inspect API objects and run requests on them using the [built-in Shell](https://docs.stripe.com/workbench/shell). To get started, navigate to the [Workbench](https://dashboard.stripe.com/workbench) page in your dashboard and turn the feature on. ### Invoice creation in the dashboard Navigate to the **Invoices** tab in the dashboard and click on the **Create test invoice** option in the upper right corner. You’re then presented with the Invoice creation wizard, where you can populate all the relevant fields for your invoice. Specifically, make sure to add values for **Customer** and **Items** (from your [product catalog](https://docs.stripe.com/products-prices/getting-started#create-products-prices)). Make sure to have Workbench viewable so you can observe the underlying API calls. ![](/images/invoice-peek/peek-1.png) ![](/images/invoice-peek/peek-2.png) Exit the wizard by clicking the **X** in the upper left corner. At this point, your invoice is saved in a draft state. Now take a look at the data map in the **Inspector** tab of Workbench. This shows you the JSON representation of all the objects created so far, and their hierarchy. Notably: * The Invoice is the top level object. It has a two associated objects: * Customer - the individual making the transaction * Invoice item - the item being purchased The Invoice object itself comprises numerous fields, like `status` which tells you what phase it is currently in. This status is initially set to `draft`. * A Price object with an associated Product. This is a standalone object and not a direct child of the Invoice, which makes sense as products have a one to many relationship with invoices. ![](/images/invoice-peek/peek-3.png) Next, switch to the **Logs** tab. This tab shows the recent API calls that have been made in your integration. In this example, there are two calls: one for Invoice creation and another for the Invoice Item creation. ![](/images/invoice-peek/peek-4.png) Lastly, look at the **Events** tab to see which ones get fired as part of the invoice creation process. ![](/images/invoice-peek/peek-5.png) The [invoice.created](https://docs.stripe.com/api/invoices/create) and [invoiceitem.created](https://docs.stripe.com/api/invoiceitems/create) events align with what you see in the **Logs** tabs, namely the fact that an Invoice was created and an Invoice Item added to it. There’s also an `invoice.updated` event that’s worth analyzing further. One way to do that is to look at the `previous_attributes` section at the bottom of the Event JSON. This shows you what attributes changed from the previous variation of the Invoice object, leading to the `invoice.updated` event being fired. The lines attribute seems particularly interesting for a further look. ![](/images/invoice-peek/peek-6.png) In the same JSON for the `invoice.updated` event, look at the updated lines attribute. It shows that the Invoice Item was added as expected, but there’s also a new [Invoice Line Item](https://docs.stripe.com/api/invoices/line_item) object. This is a nested resource automatically generated by Stripe to represent the individual line items in the invoice. It cannot be created directly through the API. ![](/images/invoice-peek/peek-7.png) To recap, for Invoices created in the dashboard: 1. An underlying Invoice object is created, via a call to the `v1/invoices` endpoint. It starts in a `draft` status. This process fires an `invoice.created` event. 2. An Invoice Item is created separately, via the `v1/invoiceitems` endpoint, and appended to the Invoice. This process fires an `invoiceitem.created` event, followed by an `invoice.updated` event. 3. There’s an underlying Invoice Line Item object automatically generated by the API With the invoice is created, what happens next? ### Sending the invoice to your customer Navigate back to the previously created invoice in your dashboard, and click the **Send invoice** button to simulate sending it to your customer. ![](/images/invoice-peek/peek-8.png) ![](/images/invoice-peek/peek-9.png) Check back to the data map in the **Inspector** tab of Workbench. There’s a new object in the Invoice hierarchy: a [Payment Intent](https://docs.stripe.com/api/payment_intents). This object is at the core of Stripe’s payment API. It’s a [state machine](https://en.wikipedia.org/wiki/Finite-state_machine) which transitions through different phases over the course of the payment process. ![](/images/invoice-peek/peek-10.png) Switching over to the **Events** tab, you see the events that are fired as part of sending the invoice. ![](/images/invoice-peek/peek-10a.png) One way to analyze `invoice.updated` events is to look at the `previous_attributes` section. In this case, the `status` is included here, which means its value is updated as part of this event. ![](/images/invoice-peek/peek-11.png) The value of the `status` attribute in the Event JSON has changed to `open`. ![](/images/invoice-peek/peek-12.png) Another noteworthy event is `invoice.finalized`. The event description indicates that finalizing is an operation on draft invoices. This changes the invoice’s status to `open`, meaning it’s ready for payment. ![](/images/invoice-peek/peek-13.png) When an invoice is sent to the customer: * A Payment Intent object is created, indicating that you’re ready to collect a payment. * The Invoice is finalized and its status changes from `draft` to `open`. Now you can simulate collecting payment from the customer. ### Charging the customer Navigate once again to the previously created invoice in your dashboard, and click the **Charge customer** button. ![](/images/invoice-peek/peek-14.png) In the resulting pop-up window, you see a message about the invoice not being editable after payment attempts. This is important to note, as it signifies that whatever state the invoice ends up in after this process is terminal. ![](/images/invoice-peek/peek-15.png) Proceed with charging the customer and switch back to the Inspector. There is another new object in the data map: a [Charge](https://docs.stripe.com/api/charges). This represents an atomic charge operation and is created as part of the Payment Intent flow. ![](/images/invoice-peek/peek-16.png) Switching to the **Logs** tab, there was a call to the Pay endpoint, as expected. ![](/images/invoice-peek/peek-17.png) The **Events** tab shows various activities. The `payment_intent.` and `charge.` events confirm what you see in the **Logs** and **Inspector** tabs. Take a closer look at the `invoice.updated` event specifically. ![](/images/invoice-peek/peek-18.png) Once again, the `status` shows up in the `previous_attributes` hash, which means it changed as part of this event. ![](/images/invoice-peek/peek-19.png) The updated status is `paid`, which aligns with the `invoice.payment_succeeded` event that is fired. ![](/images/invoice-peek/peek-20.png) As part of the invoice payment process: * The Payment Intent is captured - which creates a charge * The invoice transitions from `open” to “paid” ### Canceling an invoice There are two cases to consider here: an invoice has not been sent to the customer, or an invoice has already been sent. 1. Invoice has not been sent to the customer To simulate this, create a new invoice using the wizard. Exit out of the wizard to keep the invoice in draft state. Make sure you can see the invoice in the Inspector. In the invoices page of the dashboard, click on the **ellipsis** and select the **delete draft invoice** option in the dropdown. ![](/images/invoice-peek/peek-22.png) You are presented with a message about this action being irreversible, so this is a terminal state for the invoice, meaning that it cannot be further modified. ![](/images/invoice-peek/peek-23.png) You can confirm with Workbench that the invoice record is gone from Stripe and is no longer accessible. ![](/images/invoice-peek/peek-24.png) 2. Invoice has been sent to the customer To simulate this, create an invoice using the wizard and send it to the customer, as previously shown. Then, find the invoice in the dashboard and choose the **Change invoice status** under the ellipsis in the right hand corner. ![](/images/invoice-peek/peek-25.png) Here, additional statuses can potentially apply to invoices. Choose the **Void** status in the list and click on **Update status**. ![](/images/invoice-peek/peek-26.png) The **Logs** tab confirms a call to the `/invoices/void` endpoint. ![](/images/invoice-peek/peek-27.png) There are a few events triggered as part of this process: * The previously created Payment Intent gets canceled (`payment_intent.canceled` event), given that you no longer want to collect a payment on this invoice. * There’s an `invoice.voided` event corresponding to the `/invoices/void` call. ![](/images/invoice-peek/peek-28.png) In the `invoice.updated` event details, the status once again changes. It was previously set to `open`: ![](/images/invoice-peek/peek-29.png) After the void operation, the invoice status changes to `void`: ![](/images/invoice-peek/peek-30.png) To recap, there are two ways of canceling invoices: 1. By deleting an invoice that’s in `draft` status. This deletes the invoice record from Stripe. 2. By voiding an invoice that’s in `open` status. This option preserves the invoice record, so you can use it for bookkeeping as needed. ### Wrapping up Using the various tools in Workbench, you can analyze any object in the Stripe dashboard and map out its hierarchy and observe its different state changes through the payment lifecycle. The approach you followed here with Invoices can be replicated to other parts of the Stripe API. Stripe supports a diverse range of payment methods that you can choose from to collect funds from your customers. Each method has a set of unique attributes tailored to different business types and customer locations. When choosing the payment methods you want to enable for your application, it is important to understand how their characteristics will affect customers as well as how the business implements them. This post explores how different payment methods behave with regards to payment confirmation. Stripe categorizes payment confirmation as either immediate or delayed, representing the speed at which payment methods return a status after an attempted payment. Credit cards, for example, return a payment status immediately while other payment methods like bank debits require some more time to process. In the [Stripe Dashboard](https://dashboard.stripe.com/), you can quickly toggle on or off the payment methods as needed. However, if your application isn't equipped to handle the varying behaviors of different payment methods, it could lead to issues for your business. ### Immediate Confirmation Credit cards are one of the more commonly used payment methods that offer immediate notification when a transaction is attempted. They are usually enabled by default in a Stripe account. You can verify this by navigating to the **Payment Methods** section of the **Payment** settings in the Dashboard. Stripe payment options like Checkout, Payment Links and the Payment Element inspect the configured payment methods to know what options to display to the user. These options use a [**dynamic payment methods**](https://docs.stripe.com/payments/payment-methods/dynamic-payment-methods) strategy which takes into account factors such as the customer’s location, device type, and local currency. To learn how credit card payments behave in Stripe, you can use [Workbench](https://docs.stripe.com/workbench) along with the [Stripe CLI](https://docs.stripe.com/stripe-cli/overview) in the browser to observe all the generated activity. If you are unfamiliar with Workbench, it is an in-browser tool for debugging and monitoring Stripe payment integrations. It is integrated into the Dashboard experience so there is no need to install or pay anything to use it. If Workbench isn’t available in your Stripe account, navigate to the following link to enable it: [https://dashboard.stripe.com/workbench](https://dashboard.stripe.com/workbench). Assuming that the Stripe account you are logged into has prices and products already setup, create a Checkout session using one of the products using the Stripe CLI. Also, make sure the account is in test mode so that any changes made do not affect the production environment. To do this, open Workbench by selecting it from the Developers menu in the upper right side of the Dashboard screen. ![](/images/observing-delayed/observing-delayed1.png) Within Workbench, select the **Shell** tab. This activates a terminal session in your browser where you can issue commands against your Stripe account using the Stripe CLI. ![](/images/observing-delayed/observing-delayed2.png) To create a Checkout session, enter the following command into the terminal, remembering to replace the price ID in the line items property with one of your own. ```py stripe checkout sessions create --success-url="https://example.com/success" --mode=payment -d "line_items[0][price]"=your-own-price-id -d "line_items[0][quantity]"=1 ``` Click on the link provided in the url property of the response to open up the checkout sessions in your browser. Choose Card as the payment method, fill out the payment information using one of Stripe’s [test cards](https://docs.stripe.com/testing#cards), and submit the form. Back in the Workbench, click on the **Events** tab and you will see a number of events have been triggered from that Checkout session. The three important ones to pay attention to are c`harge.succeeded`, `payment_intent.succeeded`, and `checkout.session.completed`. These are the events your application must watch for to know whether a card payment was successful or not. Clicking on any one of these events allows you to review the respective event details. ![](/images/observing-delayed/observing-delayed3.png) The `checkout.session.completed` event has a `payment_status` property that can be set to either `paid`, `unpaid`, or `no_payment_required`. This is the property your payment integration code must inspect to confirm the checkout payment. This is often confused with the status property on the `checkout.session.completed` event, which can be set to `open`, `complete`, or `expired`. A completed checkout session does not mean that there was a successful payment. Instead, it is an indication that the customer successfully submitted the form on the checkout page. The `charge.succeeded` and `payment_intent.succeeded` events also signal that there was a successful payment but they do not contain any information that relates back to the initial checkout session. ### Delayed Confirmation Other payment methods like bank debits, bank transfers, and cash-based vouchers can take a few days to process before they return a payment confirmation. Because of this, your integration has to look out for additional events from Stripe when working with these types of payments. In the **Payment Methods** section of the Dashboard, the various payment method options are shown for your account along with a brief summary of what they support. ![](/images/observing-delayed/observing-delayed4.png) The image above shows the supported bank debit options for an account. Notice that for ACH Direct Debit payment confirmation supports refunds, recurring payments, and can take up to five days to process. To see how delayed payment confirmations work with a checkout session, enable one of these payment methods and execute the same command from above in the in-browser shell. ```py stripe checkout sessions create --success-url="https://example.com/success" --mode=payment -d "line_items[0][price]"=your-own-price-id -d "line_items[0][quantity]"=1 ``` After opening the generated checkout link in your browser, you should see the option to use the bank debit method that was just enabled. If the option doesn’t show, check that the payment method was successfully enabled and that it supports the currency of the price you provided. ![](/images/observing-delayed/observing-delayed5.png) To try out ACH Direct Debit without providing real banking information, complete the payment form using the Test Institution option on the form. After submitting the payment, return to the Dashboard, open the **Events** tab in Workbench. A different batch of events are triggered for this new checkout session. Inspecting the payload of the `checkout.session.completed` event reveals that payment status is unpaid even though the checkout session was successfully completed. ![](/images/observing-delayed/observing-delayed7.png) The associated payment intent and charge objects enter an intermediary state before successfully completing. A new event named `checkout.session.async_payment_succeeded` is also triggered. In test mode, this event shows up almost immediately but it can take a few days to be seen in production. When working with payment methods that have delayed notifications, this is one of the events your application must listen for to find out the status of the payment. A `checkout.session.async_payment_failed` event is sent instead if the payment failed. Inspecting the payload of `checkout.session.async_payment_succeeded` event in Workbench reveals that the payment status for this checkout session is now paid. ![](/images/observing-delayed/observing-delayed8.png) ### Conclusion It is important to understand how different payment methods behave when building out a payments integration. Knowing what events and properties to look for can save you time and prevent the business from losing money. The tools available in Workbench provide deeper insights into how different payment methods behave in Stripe and how your application can properly integrate with them. Take a look at the Workbench documentation to delve deeper into its other capabilities. For AWS developers integrating with third-party APIs outside of your AWS account, there are several common problems that can cause your production application to behave unexpectedly. With Workbench, [Stripe](https://docs.stripe.com/development) provides next-generation debugging tools that make it easier and faster to pinpoint, understand, and resolve production problems. Stripe logs detailed information about every API request in your account without additional charges. Workbench provides powerful filtering and insights capabilities to help search logs quickly and find application requests. This blog post shows how to find and resolve common production issues by using Workbench and provides recommendations for addressing those issues. ### Getting started with Workbench To use Workbench: 1. Navigate to [https://dashboard.stripe.com/](https://dashboard.stripe.com/) in your preferred browser and log into your Stripe account. 2. If you have multiple accounts configured, use the drop-down in the top-left to select which account API activity you want to view. Workbench reports and content are scoped to the account level. 3. In the bottom-right corner of the browser, hover over the terminal icon to expand the menu, then select the caret symbol to open Workbench. ![](/images/workbench-common/caret-dark3.png) 4. Workbench opens in the lower portion of the window: ![](/images/workbench-common/workbench-screen.png) *Workbench is not a browser extension and does not rely on CLIs or other tools in your development machine, so you can use it immediately without the need for installing additional software.* ### Detecting duplicate API calls from an application In this scenario, you expected code to call an API endpoint once but instead the endpoint was called twice or more. The code worked as expected in development and this issue only appears sporadically in production. ![](/images/aws-resolve/aws-resolve3.png) AWS offers a range of options to host your application, from serverless compute like AWS Lambda to containerized services like Amazon ECS. Some of these services provide high availability by hosting your code or application in multiple underlying availability zones. The trade-off is that there may not be an exactly-once processing guarantee. In the case of Lambda, if the function errors out unexpectedly or if there is a transient network error, the service will retry executing your code. This means that an API call can be retried again, and Stripe is unaware that you didn’t explicitly retry in code. This can also happen if the Lambda service experiences issues in an availability zone, so you should expect that it’s possible for the code to be executed more than once. While you often don’t see these issues in the development process, as systems receive more traffic, these transient failures become more common in the long tail of traffic. To mitigate this issue, when calling a Stripe POST API, it’s recommended that you use an [idempotency](https://en.wikipedia.org/wiki/Idempotence) header in your request to prevent duplicate requests from having unintended side effects. Most common client libraries can add idempotency requests to API calls automatically, but the feature usually must be enabled first. Since you have limited control over compute services that may invoke your code more than once, the idempotency header allows Stripe to ignore requests that it may have seen before. Stripe’s GET and DELETE APIs are already guaranteed idempotent without needing this key. *Learn more about [designing with idempotency with AWS Lambda](https://aws.amazon.com/blogs/compute/handling-lambda-functions-idempotency-with-aws-lambda-powertools/) and [making retries safe in AWS compute services](https://aws.amazon.com/builders-library/making-retries-safe-with-idempotent-APIs/).* ### Using Workbench to find duplicate API calls If your application unexpectedly calls an API more than once, you can use Workbench to detect this behavior. Go to the **Logs** tab and search by the resource ID to quickly filter the logs for a specific request. You can use additional filters to drill down by HTTP method and API endpoint if needed. In the example below, this AWS-hosted application calls the `/v1/prices` endpoint multiple times with the same payload. The *Idempotency* header is different for each request, indicating that it either hasn’t been set correctly, or hasn’t been used by the client. Choosing one of the requests shows the multiple pricing requests in the UI. ![](/images/aws-resolve/aws-resolve4.png) ### Identifying why an application’s API request has failed If your AWS logs confirm that an API request has been sent, you can search in Workbench to ensure that Stripe received it. If the log is missing, it was not processed by Stripe, and you should check that the code has the necessary permission to reach the API. You should also verify the URL used in the API call, and any egress restrictions in your AWS account that may prevent the traffic from reaching the endpoint. The HTTP status code in the response defines the broad type of error. You can see this in your AWS application logs, but it doesn’t always indicate there is an issue with your code or the Stripe service. Code 401 and 403 indicate issues with your API key, while 402 means there is a problem with the payment details provided. Response codes in the 5xx range are rare and are caused by a problem at Stripe. *Learn about [Stripe’s HTTP error codes](https://docs.stripe.com/error-low-level\#errors-in-http).* ### Learning more in Workbench The **Logs** tab in Workbench allows you to filter by *Status* (e.g. “Failed”) to list all the failed API calls from your application. From here, you can drill down into any request and learn more about the request and response bodies. While credit card data is masked, the **Error insights** panel can indicate problems with the card information provided. ![](/images/aws-resolve/aws-resolve5.png) This is useful for tracking individual errors but if users of your production application are reporting multiple problems, the **Errors** tab can give you more information and help accelerate problem resolution. This section aggregates errors by type, allowing you to find the common cause of the bulk of the errors, and then drill down into specific data. ![](/images/aws-resolve/aws-resolve6.png) You can also use the **Overview** tab in conjunction with this view to detect rate limiting. This results in 429 HTTP errors to requests and can be seen in busy systems in production. You can [contact Stripe support](https://support.stripe.com/) to request limit increases but in some cases you can rearchitect your AWS-based application to avoid bursts of requests to the Stripe API and smooth out traffic. *Learn more about [Stripe’s rate limits](https://docs.stripe.com/rate-limits).* ### Locating and resending Stripe events that never appear in your AWS account Many Stripe processes are asynchronous and take time to complete. To avoid polling APIs for changes and to help synchronize state closer to real-time, Stripe can push data changes directly to your AWS account as events. Once configured, events arrive in the partner event bus of the [Amazon EventBridge](https://aws.amazon.com/eventbridge/) service, where you can then route to other services to take appropriate action. However, the service does not log if events fail to arrive, so your application is unaware of the missing data. ![](/images/aws-resolve/aws-resolve7.png) ### Using Workbench to detect and replay failed events In the **Event destinations** tab, set the *Status* filter to “Failed/Pending” to show a list of events that have not been delivered successfully. Click on an event to load the detailed view. From here, the **Delivery attempts** panel shows the history of failed delivery, together with the option to resend to the event bus. Clicking one of these delivery attempts shows additional information about why the delivery failed. ![](/images/aws-resolve/aws-resolve8.png) *Learn more about [setting up Stripe events in your AWS account](https://docs.stripe.com/event-destinations/eventbridge).* ### Conclusion Many AWS customers use Stripe for processing payments by calling Stripe’s APIs from their hosted applications. There are many runtime errors that can occur in production, from service failures to errors in user-provider credit card information. While you can use logs from your applications to locate failed calls, in many cases it's faster to use Stripe’s Workbench tool to isolate and resolve the cause of the problem. Workbench logs verbose information about APIs at no extra charge to users and provides rich filtering capabilities and insights. This blog post shows how to use this to identify duplicate API calls, unexpected HTTP errors, and locate and resend events that are not reaching their AWS targets. If there are more features you would like to see, let us know by clicking the **Send feedback** button at the top of the panel. For developers building on AWS, you have various choices for processing payments within your application. Most developers choose a payment processing service to handle this part of their application flow, which involves integrating with a third-party vendor outside of the AWS environment. There are several key benefits to developers taking this approach. First, if your application processes credit cards, you can avoid the security risk of [handling or storing credit card information](https://stripe.com/guides/pci-compliance). Second, if you have a spiky workload, such as processing payments for Black Friday or large-scale events, you can offload to a service that can handle the variability of requests. Third, if you have global payments or multiple payment methods enabled, the payment provider can handle that complexity, and can make it much easier to add additional countries or payment methods in future, as your needs change. ### The difficulty of finding logs for API calls in AWS When you use a third-party service such as [Stripe](https://docs.stripe.com/development), you either embed payment processing logic into the frontend of your web application or use backend APIs to submit payment information to the service’s API. The exact flow depends on if your application is customer-facing or operating as middleware for another workload. You also use the APIs for non-payment activities like creating products, configuring prices, and creating customers. AWS has a broad range of compute services where you can run your application, from [AWS Lambda](https://aws.amazon.com/lambda/) to [Amazon ECS](https://aws.amazon.com/ecs/), and [Amazon EKS](https://aws.amazon.com/eks/). Regardless, your application can make calls to [Stripe’s API](https://docs.stripe.com/api) directly from your code and it’s good practice to log the outcome and other attributes for these calls. However, depending on your compute choice and code configuration, your log files may contain sparse or verbose information about the API calls, and are stored in different places. For example, Lambda stores logs in [Amazon CloudWatch](https://docs.aws.amazon.com/AmazonCloudWatch/latest/monitoring/cloudwatch_architecture.html) which by default create a new log file for each Lambda invocation. This means if you have 10,000 calls in your application to Stripe’s API, you need to search up to 10,000 log files to find specific information. You must then filter for type of call, HTTP response code, and other attributes to identify a specific log. Additionally, by default the logs will not provide an aggregated view of your API calls over time. For cost optimization in logging, it’s also common practice to use verbose mode during the development phase and restrict logs to essential information in production. This can unintentionally result in limiting the information available to debug production issues. Furthermore, the logging usually only captures the payload and associated metadata of the call, and any response received from the endpoint, but lacks any additional information available from the provider. ### Getting started with Workbench Stripe’s Workbench provides a more convenient way for developers to access and search logs at scale. It doesn’t require you to set a logging level, storing all available information by default while still obfuscating credit card numbers and other sensitive data. To see Workbench: 1. Navigate to [https://dashboard.stripe.com/](https://dashboard.stripe.com/) in your preferred browser and log into your Stripe account. 2. If you have multiple accounts configured, use the drop-down in the top-left to select the store API activity you wish to view. Workbench reports and content are scoped to the store level. 3. In the bottom-right corner of the browser, hover over the terminal icon to expand the menu, then select the caret symbol **^** to open Workbench. ![](/images/workbench-common/caret-dark3.png) 4. Workbench opens in the lower portion of the window: ![](/images/workbench-common/workbench-screen.png) *Workbench is not a browser extension and does not rely on CLIs or other tools in your development machine, so you can use it immediately without the need for installing additional software.* Different tabs of Workbench are useful at different stages of development, or during production usage. On the **Overview** tab, you can immediately see the total number of successful and failed API requests by time. This can be useful for finding the time of failures, or for determining if your total number of API calls is likely to reach [rate limits](https://docs.stripe.com/rate-limits). In the left pane, the **API versions** panel allows you to track which API versions your application uses. While Stripe supports API versions for up to six years, here you can identify calls using older versions: ![](/images/easier-debugging-aws/easier-debugging-aws3.png) By clicking the bar graph, this opens the **Logs** tab for the associated version, making it easier to find applications and microservices that can be updated. The **Logs** tab allows you to drill into any individual API call to view the *Response* and *Request* body. This is equivalent to what you might store in a verbose log within AWS, but you are not charged by Stripe to store this data. Additionally, the UI contains quick links to copy the JSON, link to underlying records, and envelope metadata (such as API key and API version) that otherwise might not be captured by the caller. ![](/images/easier-debugging-aws/easier-debugging-aws5.png) Even when Workbench is collapsed, its toolbar contains notifications that can help highlight important information. Click the icons with the red dots to learn more about any specific issues: ![](/images/easier-debugging-aws/easier-debugging-aws6.png) If your application has a recurring issue in an API call, the **Errors** tab makes it easier to view the different types of errors. Instead of parsing log files, use the list view on the left to find the most recent errors generated by an application, and then drill down. ![](/images/easier-debugging-aws/easier-debugging-aws9.png) This links to your individual logs. When you expand a single log entry on the left, the verbose version contains links to helpful documentation. Depending on the error, it may also provide error insights that expand on the exact type of problem that’s occurring. ![](/images/easier-debugging-aws/easier-debugging-aws10.png) ### Debugging events delivery failures Stripe’s [Event Destinations](https://docs.stripe.com/event-destinations) feature makes it easier for you to handle asynchronous processes by delivering changes in state via a JSON event payload. In your AWS account, you receive these events via a [partner event bus](https://docs.aws.amazon.com/eventbridge/latest/userguide/eb-saas.html) in your application’s region. However, when an event is either not delivered or has a failure, this may not be logged by the event bus, depending on if a CloudWatch Logs group has been configured as a target in the event rule. Workbench provides the **Events** and **Event Destinations** tab to simplify the process of debugging event issues. In the events tab, you can see a list of recent events generated in your Stripe account. You can drill down into a single event to find successful and failed deliveries to webhook endpoints and connected platforms. This view aggregates all events including those sent to AWS and other platforms. The **Event destinations** tab provides more information about retries on pending and failed events that Stripe sends to your AWS account. This view shows a graph of event delivery activity, and allows you to drill down into delivery attempts and responses from the endpoint. You can filter by event ID or by delivery status to help locate problematic events more quickly. ![](/images/easier-debugging-aws/easier-debugging-aws12.png) ### Conclusion Using Stripe to process your payments can remove significant complexity from your code base, and help offload scalability and security concerns away from your AWS account. AWS has a broad range of compute options that can result in your application log files being distributed between server logs, CloudWatch Logs, and other places, making them challenging to locate and search. Workbench is designed to help centralize the information developers need for understanding their Stripe integrations without the need for a third-party logging processor. You can quickly navigate large amounts of log data using advanced filters and find common types of errors occurring using aggregation. These logs are stored and made available at no extra cost to you and can provide more insights than are typically provided by verbose logging. If there are more features you would like to see, let us know by clicking the **Send feedback** button at the top of the Workbench panel. It is important for developers to optimize third-party API usage to reduce costs, improve performance, and enhance user experience. An effective strategy to minimize the number of API calls to Stripe while still obtaining the necessary data involves caching and using the response [Expand](https://docs.stripe.com/expand) feature. This article discusses how using the expanding feature helps you retrieve related objects in a single request and tradeoffs of this approach. It also explores the use of caching for additional performance improvements, as well as show you how to inspect requests using tools available in Stripe Workbench. *The code samples in this post use the C\# and Stripe .NET SDK, but the concepts are applicable for all supported languages.* ### Expand resource requests All core resources in the Stripe API, such as [Prices and Products](https://docs.stripe.com/products-prices/how-products-and-prices-work), have unique ID properties used to interact with specific instances. These IDs link related resources, like associating a price with its product or a customer with a subscription. When you retrieve an instance via an API request, you receive a baseline set of properties. For example, when an e-commerce application must display detailed information about a product, it retrieves the product instance using its ID. This includes essential data like the product name, description, and images, which are necessary for providing customers with comprehensive product details on the website. Using the `ProductService` class, pass the ID of a product in your Stripe catalog to the `GetAsync` method. ```c# var requestOptions = new RequestOptions { ApiKey = ""}; var productService = new ProductService(); var product = await productService.GetAsync("", requestOptions: requestOptions); ``` The API response returns a JSON payload that all Stripe SDKs deserialize for you automatically. A typical payload resembles the example below. ```json { "id": "prod_NWjs8kKbJWmuuc", "object": "product", "active": true, "created": 1678833149, "default_price": "", "description": "Black, Long Sleeve, Vintage Horizon Shirt", "images": [], "metadata": {}, "name": "Vintage Horizon Shirt", "tax_code": null, "updated": 1678833149, "url": null } ``` *This sample response shows a reduced set of returned properties.* Depending on what your goal is, this information may be sufficient. Notice the response does not contain any detailed pricing information. If you do need a price for this product, the only thing available for you to work with is the ID returned in the `default_price` property. You can use that property to issue a second request to retrieve the pricing information. ```c# var priceService = new PriceService(); var price = await priceService.GetAsync(product.DefaultPriceId, requestOptions: requestOptions); ``` This is where it becomes important to understand what your applications are trying to accomplish. In some cases, it might be sufficient to not include that additional price data if it’s not needed. Returning less data results in faster response times and less of a payload to process, especially in high traffic scenarios. If your application needs the price along with the other product data, then it makes sense to retrieve them both at the same time if you can. You can return related data, like the `default_price` property of a product, by using the expand parameter in API requests to Stripe. The [API reference](https://docs.stripe.com/api/products/object) docs for the Product object highlights which properties are expandable. ![](/images/doing-more-with-less-reducing-requests-to-the-stripe-api/doing-more-with-less-reducing-requests-to-the-stripe-api-1.png) To replace those two previous requests with a single one that uses the expand parameter, use the ProductGetOptions class from the [.NET SDK](https://github.com/stripe/stripe-dotnet) and provide it with a list of the expandable properties you need. For now it is just the default\_price, but you can add additional properties to the list. ```c# var getOptions = new ProductGetOptions { Expand = new List { "default_price" } }; var productService = new ProductService(); var product = await productService.GetAsync("prod_PnyyMavtgHZNqV", getOptions, requestOptions: requestOptions); ``` That API response from the `ProductService` now contains more information. The `default_price` property is no longer a string but a nested object containing details about the associated price. ```json { "id": "prod_NWjs8kKbJWmuuc", "object": "product", "active": true, "created": 1678833149, "default_price": { "id": "price_1OyN06BY4YhJumpKWZaLyKnJ", "object": "price", "active": true, "billing_scheme": "per_unit", "created": 1711409542, "currency": "cad", "product": "prod_PnyyMavtgHZNqV", "recurring": null, "tax_behavior": "unspecified", "type": "one_time", "unit_amount": 4000, "unit_amount_decimal": "4000" }, "description": "Black, Long Sleeve, Vintage Horizon Shirt", "images": [], "metadata": {}, "name": "Vintage Horizon Shirt", "tax_code": null, "updated": 1678833149, "url": null } ``` *This sample response shows a reduced set of returned properties.* You can use the expand feature in Stripe with Product, Price, and many other resources. This feature allows you to expand multiple properties on the same resource, including nested properties up to four levels deep. For example, if you need to get the currency options for a product's default price, use the dot notation in the expand parameter like this: `default_price.currency_options`. ```json { "id": "prod_PnyyMavtgHZNqV", "object": "product", "created": 1711409542, "default_price": { "id": "price_1OyN06BY4YhJumpKWZaLyKnJ", "object": "price", "billing_scheme": "per_unit", "created": 1711409542, "currency": "cad", "currency_options": { "cad": { "custom_unit_amount": null, "tax_behavior": "unspecified", "unit_amount": 4000, "unit_amount_decimal": "4000" } }, "product": "prod_PnyyMavtgHZNqV", "recurring": null, "tax_behavior": "unspecified", "type": "one_time", "unit_amount": 4000, "unit_amount_decimal": "4000" }, "description": "Black, Long Sleeve, Vintage Horizon Shirt", "livemode": false, "metadata": {}, "name": "Vintage Horizon Shirt", "tax_code": "txcd_30011000" } ``` > This sample response shows a reduced set of returned properties. After issuing that request, you have the available currency options for the price of the specified product. ### Working with resource lists The expand feature is also available when working with lists of resources. Imagine your application contains a product listing page where it needs to show the name, image, description and price for each item. You must make an additional request to get the pricing information. The `ProductService` class contains a [`ListAsync`](https://docs.stripe.com/api/products/list?lang=dotnet) method that you can use to return products that match the supplied list options. ```c# var listOptions = new ProductListOptions(){ Active = true, Limit = 10 }; var productService = new ProductService(); var priceService = new PriceService(); await foreach (var product in productService.ListAutoPagingAsync(listOptions, requestOptions)) { var price = await priceService.GetAsync(product.DefaultPriceId, requestOptions: requestOptions); // add product data to pricing page } ``` In the Stripe Dashboard, you can view the number of requests made to retrieve product information in the **Logs** tab in Workbench. ![](/images/doing-more-with-less-reducing-requests-to-the-stripe-api/doing-more-with-less-reducing-requests-to-the-stripe-api-2.png) The initial request for the list products is accompanied by six additional requests to get the price information. If you inspect the payload for responses that return lists, you can see items inside of an array property named *data*. ```json { "object": "list", "url": "/v1/products", "has_more": false, "data": [ { "id": "prod_NWjs8kKbJWmuuc", "object": "product", "active": true, "created": 1678833149, "default_price": null, "description": null, "images": [], "livemode": false, "metadata": {}, "name": "Gold Plan", "updated": 1678833149, "url": null } ] } ``` You can use the expand feature when working with lists of resources similar to requesting individual ones. To request expandable properties to be included in list request, prefix each property name with `data`. This gives you a way to drill into the response and specify which property you need. ```c# var listOptions = new ProductListOptions() { Active = true, Limit = 10, Expand = new List { "data.default_price" } }; var productService = new ProductService(); await foreach (var product in productService.ListAutoPagingAsync(listOptions, requestOptions)) { var price = product.DefaultPrice; } ``` Back on the **Logs** tab in Workbench, refresh the logs and look at how many requests were made. ![](/images/doing-more-with-less-reducing-requests-to-the-stripe-api/doing-more-with-less-reducing-requests-to-the-stripe-api-3.png) To get all the information to display six products on a listing page, it only required one request to the Stripe API. It is important to note that using the expand feature does come with some performance cost, especially when working with nested expansions. Deeper expansions increase the response payload size leading to longer response times and higher resource consumption. It is recommended that nested expansions are used sparingly. Using techniques like caching can help you find a balance getting the information you need without needing to make frequent requests to the API. ### Adding caching In high traffic scenarios, you can make your API read requests more efficient by adding a caching layer. This approach can significantly reduce the number of requests your application makes to Stripe, helping improve performance while also avoiding hitting rate limits. For instance, product information tends to remain static, meaning subsequent calls often return identical data. By temporarily storing this data in an in-memory cache with sensible expiration defaults, your application can access the needed information more rapidly and with fewer network hops, leading to a smoother and more responsive user experience. ```c# // Create a cache instance somewhere accessible throughout your application var cache = new FusionCache(new FusionCacheOptions { DefaultEntryOptions = new() { Duration = TimeSpan.FromMinutes(5) } }); // User the cache to store product data from Stripe var listOptions = new ProductListOptions() { Active = true, Limit = 10, Expand = new List { "data.default_price" } }; var productService = new ProductService(); // a for loop that iterates 10 times for (int i = 0; i < 10; i++) { var products = await cache.GetOrSetAsync("products", async _ => await productService.ListAsync(listOptions, requestOptions)); } ``` The previous code sample uses the in-memory cache capabilities of the FusionCache .NET library that allow you to configure various settings like the duration for cache entries. The [`GetOrSetAsync`](https://github.com/ZiggyCreatures/FusionCache/blob/main/docs/CoreMethods.md\#getordefaultasync) method accepts a cache key and a factory method that knows how to get the data. Using this method has the added benefit of having FusionCache protect you against issues like [cache stampede](https://github.com/ZiggyCreatures/FusionCache/blob/main/docs/CacheStampede.md). With these changes, your application can reduce API requests to Stripe while improving response times. With the original code sample, the number of requests to view a product listing page for one user would be 11: one request to get the list and 10 more to get the prices for each. For 1,000 concurrent users, that equates to 11,000 requests to Stripe. Using the caching example, it results in one request to Stripe with expansion to get the product and price data. All the other user requests would be served from the cache until it expires. ### Conclusion Understanding your application's data requirements and operational boundaries is crucial for optimal performance. While occasional requests for small data sets might be manageable, scaling your solution and handling more complex data necessitates additional considerations. Tools like Workbench within your Stripe merchant account offer valuable insights into the frequency and nature of your requests. With this knowledge, you can strategically implement request expansion and caching techniques to enhance efficiency and scalability. Sandboxes bring you the power of multiple, isolated testing environments. They can be used to test Stripe functionality, collaborate more easily, and experiment with new features without affecting your live integration. When testing in a sandbox, the payments you create aren’t processed by card networks or payment providers, and funds aren’t moved. If you want to learn more about Sandboxes, start by taking a [tour](https://beta.stripe.dev/?step=sandboxes&utm_medium=marketing-email&utm_source=e0a4&utm_campaign=GLOBAL_43c9&utm_content=bf22&utm_term=6827eb11f9c7). If you’d like to be one of the first users, fill out this [form](https://forms.gle/VzhuEpWbhEFoHacP8)—we’ll enable Sandboxes for your account. And if you want to make our product team’s day, please share feedback by creating a new [post](https://insiders.stripe.dev/c/sandboxes/6?utm_medium=marketing-email&utm_source=83c4&utm_campaign=GLOBAL_4ffa&utm_content=bd5e&utm_term=e37765e73c85) in the Sandbox category on [Stripe Insiders](https://insiders.stripe.dev/?utm_medium=marketing-email&utm_source=a421&utm_campaign=GLOBAL_49b4&utm_content=96e6&utm_term=f613e0d7ad64). — Nilofer Rajpurkar Product Manager, Stripe ![](/images/2024-06-dev-digest/sandboxes.png) ### Updates **VS Code extension GitHub Copilot preview:** Stripe is one of the first GitHub Copilot Extensions. We’re bringing the knowledge of Stripe Docs—along with the ability to update, create, and understand your codebase—into the most widely adopted AI developer tools. Join the [beta](https://docs.google.com/forms/d/e/1FAIpQLSfJBbS_WQi7X-dd2CtQ6AUAJJPQV3mOXA3AbpofLw5chsCLjA/viewform). **Apps on Devices (AoD) general availability:** For all Terminal users in 23 countries, Apps on Devices is now [generally available](https://docs.stripe.com/terminal/features/apps-on-devices/overview?utm_medium=marketing-email&utm_source=121a&utm_campaign=GLOBAL_47df&utm_content=88c8&utm_term=13bacee40cbe). You can now run custom Android-based POS (or other compatible Android applications) directly on the Stripe Reader S700. **Onchain Summer Buildathon:** Stripe is sponsoring the Payments track for Coinbase’s [Onchain Summer Buildathon](https://wallet.coinbase.com/nft/mint/buildathon). [Get involved](https://base.mirror.xyz/iYQH5yxgH976gUmrYfoeyVpe5SJtiR8r2t10Psr1_-U) from now until June 30 to help demonstrate how easy it is for anyone to get on chain. **Stripe’s database infrastructure:** Learn more about the [technical details](https://stripe.com/blog/how-stripes-document-databases-supported-99.999-uptime-with-zero-downtime-data-migrations?utm_medium=marketing-email&utm_source=fd10&utm_campaign=US/CA_44e7&utm_content=92ee&utm_term=0382e52de5bf) of Stripe’s database infrastructure, which is the key foundation supporting API uptime greater than 99.999%. ![](/images/2024-06-dev-digest/db-infra.png) **Community** We recently met some of you in San Francisco, Dublin, and London, and we have another [meetup](https://lu.ma/ph5wyetr) scheduled for June 20 in Berlin. Beyond that, we’re putting together an ambitious schedule of community events for the second half of this year. More details to follow, and we’re excited to meet many more of you in person. We’re also working on open-sourcing the demos we showed at [Stripe Sessions](https://www.youtube.com/watch?v=Q1ZStXOXAFo), so you can get access to sample code and tinker with different use cases that might help with your own implementations. Finally, please join the conversation on [Stripe Insiders](https://insiders.stripe.dev/?utm_medium=marketing-email&utm_source=a421&utm_campaign=GLOBAL_49b4&utm_content=96e6&utm_term=f613e0d7ad64)—we’d love your feedback on our updated [webhooks experience](https://insiders.stripe.dev/t/feedback-request-updated-webhooks-experience/667?utm_medium=marketing-email&utm_source=97b8&utm_campaign=GLOBAL_4115&utm_content=82fb&utm_term=90319e409c1b), and our design approach to a new [Replay API](https://insiders.stripe.dev/t/give-the-team-your-feedback-we-are-designing-a-new-replay-api-for-webhook-events/1024?utm_medium=marketing-email&utm_source=fb65&utm_campaign=GLOBAL_4b13&utm_content=bfe3&utm_term=1306ad57e94e) for webhook events. — The Stripe team In 2023, Stripe processed $1 trillion in total payments volume, all while maintaining an uptime of 99.999%. We obsess over reliability. As engineers on the database infrastructure team, we provide a database-as-a-service (DBaaS) called DocDB as a foundation layer for our APIs. Stripe’s DocDB is an extension of MongoDB Community—a popular open-source database—and consists of a set of services that we built in-house. It serves over five million queries per second from Stripe’s product applications. Our deployment is also highly customized to provide low latency and diverse access, with 10,000+ distinct query shapes over petabytes of important financial data that lives in 5,000+ collections distributed over 2,000+ database shards. We chose to build DocDB on top of MongoDB Community because of the flexibility of its document model and its ability to handle massive volumes of real-time data at scale. MongoDB Atlas didn’t exist in 2011, so we built a self-managed cluster of MongoDB instances running in the cloud. At the heart of DocDB is the Data Movement Platform. Built originally as a horizontal scaling solution to overcome vertical scaling limits of MongoDB compute and storage, we customized it to serve multiple purposes: merging underutilized database shards for improved utilization and efficiency, upgrading the major version of the database engine in our fleet for reliability, and transitioning databases from a multitenant arrangement to single tenancy for large users. The Data Movement Platform enabled our transition from running a small number of database shards (each with tens of terabytes of data) to thousands of database shards (each with a fraction of the original data). It also provides client-transparent migrations with zero downtime, which makes it possible to build a highly elastic DBaaS offering. DocDB can split database shards during traffic surges and consolidate thousands of databases through bin packing when traffic is low. In this blog post we’ll share an overview of Stripe’s database infrastructure, and discuss the design and application of the Data Movement Platform. ### How we built our database infrastructure When Stripe launched in 2011, we chose MongoDB as our online database because it offered better developer productivity than standard relational databases. On top of MongoDB, we wanted to operate a robust database infrastructure that prioritized the reliability of our APIs, but we could not find an off-the-shelf DBaaS that met our requirements: - Meeting the highest standards of availability, durability, and performance - Exposing a minimal set of database functions to avert self-inflicted issues due to suboptimal queries from client applications - Supporting horizontal scalability with sharding - Offering first-class support for multitenancy with enforced quotas - Providing strong security through enforcement of authorization policies The solution was to build DocDB—with MongoDB as the underlying storage engine—a truly elastic and scalable DBaaS, with online data migrations at its core. Product applications at Stripe access data in their database through a fleet of database proxy servers, which we developed in-house in Go to enforce concerns of reliability, scalability, admission control, and access control. As a mechanism to horizontally scale, we made the key architectural decision to employ sharding. (If you want to learn more about database sharding, this is a helpful [primer](https://www.mongodb.com/resources/products/capabilities/database-sharding-explained).) Thousands of database shards, each housing a small chunk of the cumulative data, now underlie all of Stripe’s products. When an application sends a query to a database proxy server, it parses the query, routes it to one or more shards, combines the results from the shards, and returns them back to the application. But how do database proxy servers know which among thousands of shards to route the query to? They rely on a chunk metadata service that maps chunks to database shards, making it easy to look up the relevant shards for a given query. In line with typical database infrastructure stacks, change events resulting from writes to the database are transported to streaming software systems, and eventually archived in an object store via the change data capture (CDC) pipeline. ![Blog > Document databases > Image 1](/images/how-stripes-document-databases-supported-99.999-uptime-with-zero-downtime-data-migrations/image-0.png) > High-level overview of Stripe’s database infrastructure At the product application level, teams at Stripe use the in-house document database control plane to provision a logical container for their data—referred to as a logical database—housing one or more DocDB collections, and each comprising documents that have a related purpose. Data in these DocDB collections is distributed across several databases (referred to as physical databases), each of which is home to a small chunk of the collection. Physical databases on DocDB live on shards deployed as replica sets that comprise a primary node and several secondary nodes with replication and automated failover. ![Blog > Document databases > Image 2](/images/how-stripes-document-databases-supported-99.999-uptime-with-zero-downtime-data-migrations/image-1.png) > A sharded collection ### How we designed the Data Movement Platform In order to build a DBaaS offering that is horizontally scalable and highly elastic—one that can scale in and out with the needs of the product applications—we needed the ability to migrate data across database shards in a client-transparent manner with zero downtime. This is a complex distributed systems problem, one that is further compounded by the unique requirements of important financial data: - **Data consistency and completeness:** We need to ensure that the data being migrated remains consistent and complete across both the source and target shards. - **Availability:** Prolonged downtime during data migration is unacceptable, as millions of businesses count on Stripe to accept payments from their customers 24 hours a day. Our goal is to keep the key phase of the migration process shorter than the duration of a planned database primary failover—typically lasting a few seconds, and in line with the retry budget of our product applications. - **Granularity and adaptability:** At Stripe’s scale, we need to support the migration of an arbitrary number of chunks of data from any number of sources to target shards—with no restrictions on the number of in-flight database chunk migrations in the fleet, and no restrictions on the number of migrations any given shard can participate in at any point in time. We also need to accommodate the migration of chunks of varying sizes at a high throughput, as several of our database shards contain terabytes of data. - **No performance impact to source shard:** When we migrate database chunks across shards, our goal is to preserve the performance and throughput of the source shard to preclude any adverse impact on performance and available throughput for user queries. To address these requirements, we built the Data Movement Platform to manage online data migrations across database shards by invoking purpose-built services. ![Blog > Document databases > Image 3](/images/how-stripes-document-databases-supported-99.999-uptime-with-zero-downtime-data-migrations/image-2.png) > Data Movement Platform within our database infrastructure stack The Coordinator component in the Data Movement Platform is responsible for orchestrating the various steps involved in online data migrations—it invokes the relevant services to accomplish each of the constituent steps outlined below: #### Step 1: Chunk migration registration First we register the intent to migrate database chunks from their source shards to arbitrary target shards in the chunk metadata service. Subsequently, we build indexes on the target shards for the chunks being migrated. #### Step 2: Bulk data import Next, we use a snapshot of the chunks on the source shards at a specific time, denoted as time T, to load the data onto one or more database shards. The service responsible for performing bulk data import accepts various data filters, and only imports the chunks of data that satisfy the filtering criteria. While this step appeared simple at first, we encountered throughput limitations when bulk loading data onto a DocDB shard. Despite attempts to address this by batching writes and adjusting DocDB engine parameters for optimal bulk data ingestion, we had little success. However, we achieved a significant breakthrough when we explored methods to optimize our insertion order, taking advantage of the fact that DocDB arranges its data using a B-tree data structure. By sorting the data based on the most common index attributes in the collections and inserting it in sorted order, we significantly enhanced the proximity of writes—boosting write throughput by 10x. #### Step 3: Async replication Once we have imported the data onto the target shard, we begin replicating writes starting at time T from the source to the target shard for the database chunks being migrated. Our async replication systems read the mutations resulting from writes on the source shards from the CDC systems and issue writes to the target shards. The operations log, or oplog, is a special collection on each DocDB shard that keeps a record of all the operations that mutate data in databases on that shard. We transport the oplog from every DocDB shard to Kafka, an event streaming platform, and then archive it to a cloud object storage service such as Amazon S3. (If you want to learn more about oplog, this is a helpful [primer](https://www.mongodb.com/docs/manual/core/replica-set-oplog/).) We built a service to replicate mutations from one or more source DocDB shards to one or more target DocDB shards using the oplog events in Kafka and Amazon S3. We relied on the oplog events from our CDC systems to ensure that we didn’t slow user queries by consuming read throughput that would otherwise be available to user queries on the source shard, and to avoid being constrained by the size of the oplog on the source shard. We designed the service to be resilient to target shard unavailability, and to support starting, pausing, and resuming synchronization from a checkpoint at any point in time. The replication service also exposes the functionality to fetch the replication lag. Mutations of the chunks under migration get replicated bidirectionally—from the source shards to the target shards and vice versa—and the replication service tags the writes it issues to avert cyclical asynchronous replication. We made this design choice to provide the flexibility to revert traffic to the source shards if any issues emerge when directing traffic to the target shards. #### Step 4: Correctness check After the replication syncs between the source and target shard, we conduct a comprehensive check for data completeness and correctness by comparing point-in-time snapshots—a deliberate design choice we made in order to avoid impacting shard throughput. #### Step 5: Traffic switch Once the data in a chunk is imported from the source to the target shard—and mutations are actively replicated—a traffic switch is orchestrated by the Coordinator. In order to reroute reads and writes to the chunk of data being migrated, we need to first: stop the traffic on the source shard for a brief period of time, update the routes in the chunk metadata service, and have the proxy servers redirect reads and writes to the target shards. The traffic switch protocol is based on the idea of versioned gating. In steady state, each proxy server annotates requests to DocDB shards with a version token number. We added a custom patch to MongoDB that allows a shard to enforce that the version token number it receives on requests from the proxy servers is newer than the version token number it knows of—and only serve requests that satisfy this criterion. To update the route for a chunk, we use the Coordinator to execute the following steps: - First, we bump up the version token number on the source DocDB shard. The version token number is stored in a document in a special collection in DocDB, and all reads and writes on the chunk on the source shard are rejected at this point. - Then, we wait for the replication service to replicate any outstanding writes on the source shard. - Lastly, we update the route for the chunk to point to the target shard and the version token number in the chunk metadata service. ![Document Database 4 v3](/images/how-stripes-document-databases-supported-99.999-uptime-with-zero-downtime-data-migrations/image-3.png) > Traffic switch process Upon completion, the proxy servers fetch the updated routes for the chunk and the most up-to-date version token number from the chunk metadata service. Using the updated routes for the chunk, the proxy servers route reads and writes for the chunk to the target shard. The entire traffic switch protocol takes less than two seconds to execute, and all failed reads and writes directed to the source shard succeed on retries. #### Step 6: Chunk migration deregistration Finally, we conclude the migration process by marking the migration as complete in the chunk metadata service and subsequently dropping the chunk data from the source shard. ### Applications of the Data Movement Platform The ability to migrate chunks of data across DocDB shards in an online manner helps us horizontally scale our database infrastructure to keep pace with the growth of Stripe. Engineers on the database infrastructure team are able to split DocDB shards for size and throughput with a click of a button, freeing up database storage and throughput headroom for product teams. In 2023, we used the Data Movement Platform to improve the utilization of our database infrastructure. Concretely, we bin-packed thousands of underutilized databases by migrating 1.5 petabytes of data transparent to product applications, and reduced the total number of underlying DocDB shards by approximately three quarters. We also used the Data Movement Platform to upgrade our database infrastructure fleet by fork-lifting data to a later version of MongoDB in one step—without going through intermediate major and minor versions with an in-place upgrade strategy. The database infrastructure team at Stripe is focused on building a robust and reliable foundation that scales with the growth of the internet economy. We are currently prototyping a heat management system that proactively balances data across shards based on size and throughput, and investing in shard autoscaling that dynamically responds to changes in traffic patterns. At Stripe, we’re excited to solve hard distributed systems problems. If you are too, consider [joining our engineering team](https://stripe.com/jobs/search?query=engineer). Stripe Billing allows businesses to manage customer relationships with recurring payments, usage triggers, and other customizable features. These are key processes for any business, and for that reason businesses need to validate that their Stripe Billing integrations behave as they expect. But integrations are often error prone due to [common misconceptions about time](https://gist.github.com/timvisee/fcda9bbdff88d45cc9061606b4b923ca): days always have 24 hours (not when we change the clocks twice a year), February always has 28 days (true, except for leap years), timestamps will always be in the same format (yyyy-mm-dd hh:mm:ss is the default, but it’s not universal), system clocks are always set to the right time, and so on. Billing integrations are also difficult to test. Historically, the only way to run a test was to wait for time to pass—typically by creating test configurations with shorter subscription cycles than real production systems, or running 10-second trials to force subscriptions to cycle—and then look for any bugs that might surface in the course of normal business. Of course, doing anything that is not a perfect mirror of your production system is a shaky foundation to build on. We sought to address these challenges with the launch of test clocks, which allow users to simulate the passage of time in Billing scenarios without waiting for actual seconds to tick by in the real world. A test clock, when associated with `Customer` objects, allows users to associate a time reference with each `Customer` and its associated Billing resources. When the test clock runs, the `Subscription` and `Invoice` objects will behave as if time has actually passed, changing states and triggering webhooks. With a test clock, users can—for example—perform the leap-year test with just a few API calls or clicks in the Dashboard. This blog discusses the technical details of how we built test clocks in Billing, and how we updated Stripe systems to account for the different ways that time passes. ### Conceptualizing a hybrid logical clock We often think about time as we see it on a real-world clock or a calendar—seconds, minutes, days, months, and years pass by in steady succession. We say that time “flows,” much like a boat down a river. But we could also think of time as advancing through a sequence of events, each of which happens to occur at a particular timestamp. This combination of physical timestamps from real-world clocks with ordered and meaningful events from logical clocks creates a hybrid logical clock. ![Hybrid Logical Clock (edited)](/images/test-clocks-how-we-made-it-easier-to-test-stripe-billing-integrations/image-0.png) This hybrid logical clock is based on a concept of time that is useful for any system in a test environment, because it makes it easy to fast-forward to the most important future moments in a billing system. Instead of advancing through 30 days of normal clock time, which requires traversing all the seconds in between the current time and that future time, you can just advance your clock to the next “event”—the next monthly billing date. Rather than flowing down the river, the boat can teleport directly to a meaningful event. As a result, the computational cost of advancing the clock is significantly reduced. ![Blog > Test clocks > Now](/images/test-clocks-how-we-made-it-easier-to-test-stripe-billing-integrations/image-1.png) ### Building a hybrid logical clock One challenge in building a hybrid logical clock is that it’s difficult to know beforehand the total set of meaningful events, and the order in which they will occur, because any event can trigger state changes. For example, in a scenario where customers are on a monthly recurring plan, and the business suddenly decides to credit the first 10 days free, the system needs to be flexible enough to accommodate this change in state. It is equally possible that the business may want to maintain the subscription cycle, or they may want to advance the subscription cycle by 10 days—and change the time for issuing invoices. This needs to be taken into account when figuring out the next meaningful event. So when a user advances the time of a test clock, we repeat an “advance” function under the hood: 1. Given a test clock, compute the `next meaningful time` for all of the objects that use it. For example, this might be the next date to `Invoice` for each `Subscription` associated with the clock. 2. If the `next meaningful time` is after the `target time`, update the `frozen time` of the test clock to the `target time`, and stop advancing. 3. If the `next meaningful time` is before the `target time`, execute the actions that occur at the `next meaningful time` and update the `frozen time` of the test clock to the `next meaningful time`. Then return to step 1. ![Event 2a (v3)](/images/test-clocks-how-we-made-it-easier-to-test-stripe-billing-integrations/image-2.png) In the above diagram, the test clock starts at 19:00 (the “frozen time”) with a target time of 06:30 the next day. We start by taking action on Event 2, and set the time to 00:00—processing Event 2 also causes the new Event 2A to be scheduled for 01:30, and we process this as a normal event at 01:30. Since we haven’t reached the target time, we go through the loop again, take action on Event 3, and set the time to 03:00. In the final loop, we notice that Event 4 is past the target time, so we set the clock to 06:30, and stop advancing. Since test clocks affect only an object’s understanding of the “current” time, they execute the same exact logic that would occur in real time for each meaningful action. Test clocks can thus be used to safely and rigorously test integrations—and we use them internally to test all new features on Billing. ### Updating Stripe systems to understand test clocks We made a no-op change to our internal logic to remove dependencies on real-world time, and instead retrieve timestamps from an abstract “time provider” backed either by a real-world clock or a test clock. This approach means that there is no semantic change in the presentation of Billing objects in the API, and it allows both developers and internal systems to continue relying on existing business logic without changes in behavior. After we changed the basis for retrieving timestamps, we needed to ensure that time-dependent operations were not triggered by the passage of real time for objects with test clocks attached. To do that, we used a scheduling service that looks for database records meeting certain criteria, and which triggers certain events when it finds them. Consider the example of generating an `Invoice` for a `Subscription` that cycles at the start of the month. When a new month begins, the `Subscription` gets picked up by a part of the scheduling service that looks for `Subscriptions` whose billing periods have just ended, and triggers the creation of a new `Invoice`. Objects with an associated test clock, on the other hand, are explicitly filtered out from any database scans done by the asynchronous scheduling service. Instead, we give the test clock full control over orchestration and scheduling. ### Using test clocks in Billing With test clocks, you can confidently validate and deploy your business model in a much shorter time, allowing you to get to market faster. Test clocks allow you to safely and quickly validate integrations and can be used for any combination of scenarios within Billing: recurring subscriptions, trials that convert into paid subscriptions, prorations, renewal-payment failures, past-due subscriptions, timed discounts, subscription schedules, and so on. To get started, simply create a test clock through the API and attach customers to it. (You can also work with test clocks in the Dashboard.) Any Billing object created under that customer will then be controlled by the test clock, and you can advance time to observe any effects on Billing objects. For more details, check out our [documentation](https://stripe.com/docs/billing/testing/test-clocks). And if you’re interested in building financial infrastructure at Stripe—including products such as Billing—consider joining our [engineering team](https://stripe.com/jobs/search?query=engineer). Machine learning (ML) is a foundation underlying nearly every facet of Stripe’s global operations, optimizing everything from backend processing to user interfaces. Applications of ML at Stripe add hundreds of millions of dollars to the internet economy each year, benefiting millions of businesses and customers worldwide. Developing and deploying ML models is a complex multistage process, and one of the hardest steps is feature engineering. Before a feature—an input to an ML model—can be deployed into production, it typically goes through multiple iterations of ideation, prototyping, and evaluation. This is particularly challenging at Stripe’s scale, where features have to be identified among hundreds of terabytes of raw data. As an engineer on the ML Features team, my goal is to build infrastructure and tooling to streamline ML feature development. The ideal platform needs to power ML feature development across huge datasets while meeting strict latency and freshness requirements. In 2022 we began a partnership with Airbnb to adapt and implement its platform, [Chronon](https://chronon.ai/), as the foundation for Shepherd—our next-generation ML feature engineering platform—with a view to open sourcing it. We’ve already used it to build a new production model for fraud detection with over 200 features, and so far the Shepherd-enabled model has outperformed our previous model, blocking tens of millions of dollars of additional fraud per year. While our work building Shepherd was specific to Stripe, we are generalizing the approach by contributing optimizations and new functionality to Chronon that anyone can use. This blog discusses the technical details of how we built Shepherd and how we are expanding the capabilities of Chronon to meet Stripe’s scale. ### ML feature engineering at Stripe scale In a [previous blog post](https://stripe.com/blog/how-we-built-it-stripe-radar), we described how ML powers Stripe Radar, which allows good charges through while blocking bad ones. Fraud detection is adversarial, and Stripe needs to improve models quickly—fraud patterns change as malicious actors evolve their attacks, and Stripe needs to move even faster. ML feature development is the process of defining the inputs (features) that a model uses to make its predictions. For example, a feature for a fraud prediction model could be the total number of charges processed by a business on Stripe over the last seven days. To identify and deploy new features that would address rapidly changing fraud trends, we needed a feature engineering platform that would allow us to move quickly through the lifecycle of feature development. ![Blog > Shepherd > Feature lifecycle](/images/shepherd-how-stripe-adapted-chronon-to-scale-ml-feature-development/image-0.png) Effectively deploying ML models in the Stripe environment also requires meeting strict latency and feature freshness requirements. - **Latency:** A measure of the time required to retrieve features during model inference. This is important because models such as the ones powering Radar are also used in processing payments, and the time required to retrieve features directly impacts the overall payment API latency—lower latency means faster payments and a better overall customer experience for businesses. - **Feature freshness:** A measure of the time required to update the value of features. This is important because Stripe needs to react quickly to changes in fraud patterns. For example, if there is an unusual spike in transactions for one business, feature values must quickly be updated to reflect the pattern so models can incorporate the new information in their predictions for other businesses. There are trade-offs between latency and feature freshness. For example, we can improve latency at the expense of freshness by performing more precomputation when new data arrives, while we can prioritize freshness over latency by performing more of the feature computation during serving. Stripe’s strict requirements for both low latency and feature freshness across the billions of transactions we process create a unique set of constraints on our feature platform. ### Shepherd: Stripe’s next-generation ML feature platform As Stripe grew, so did our ambitions for applying ML to hard problems. To accelerate our feature engineering work, we evaluated several options, including revamping our existing platform, building from scratch, and implementing proprietary or open-source options. One particularly appealing option was an invitation we received from Airbnb to become early external adopters of Chronon, which Airbnb had developed to power its ML use cases. Airbnb wanted to integrate the platform with an external partner prior to open sourcing, and Chronon met all of our requirements: an intuitive Python- and SQL-based API, efficient windowed aggregations, support for online and offline computation of features, and built-in consistency monitoring. At the same time, we couldn’t just use it off-the-shelf. We knew we would need to adapt Chronon to Stripe’s unique scale, where training data can include thousands of features and billions of rows. It was going to be a significant engineering challenge, but we were confident that it was a strong foundational building block. #### Adapting Chronon Chronon supports batch and streaming features in both online and offline contexts. To be able to use Chronon as the foundation for Shepherd, we needed to make sure the offline, online, and streaming components could all meet Stripe’s scale. ![Blog > Shepherd > Shepherd overview image](/images/shepherd-how-stripe-adapted-chronon-to-scale-ml-feature-development/image-1.png) ML engineers use Chronon to define their features with a Python- and SQL-based API, and Chronon provides the offline, streaming, and online components to compute and serve the features. Integrating with Chronon involves setting up each of these components and providing an implementation for the key-value (KV) store used to store feature data for serving. When integrating with Chronon, we needed to make sure each of the components could meet our feature freshness and latency requirements. #### KV store implementation The KV store is responsible for storing data required to serve features. Offline jobs compute and write historical feature data to the store, and streaming jobs write feature updates. To cost-efficiently scale our KV store, we split it into two implementations: a lower-cost store optimized for bulk uploads that is write-once and read-many, and a higher-cost distributed memcache-based store that is optimized for write-many and read-many. With this dual KV store implementation, we lowered the cost of storing and serving data while still meeting our latency and feature freshness requirements. #### Streaming jobs Chronon streaming jobs consume event streams and write the events to the KV store. The events can be thought of as updates to features. The default Chronon implementation writes events into the KV store with no preaggregation. Storing individual events into the KV store would not allow us to meet our latency requirements for features with a large number of events. We needed to choose a streaming platform that could achieve low latency updates and allow us to implement a more scalable write pattern. We chose Flink as the streaming platform because of its low latency stateful processing. Since the Chronon API is a combination of Python and Spark SQL, maintaining consistency between offline and online computation meant we needed a way to run Spark SQL expressions in Flink. Fortunately, the Spark SQL expressions used in Chronon’s feature definitions only require maps and filters. These are narrow transformations—with no shuffling of data—and can be applied to individual rows. We implemented support for Spark SQL expressions applied to Flink rows. With Flink now powering our feature updates, we achieved p99 feature freshness of 150ms. **Untiled Architecture** ![Blog > Shepherd > Untiled Architecture](/images/shepherd-how-stripe-adapted-chronon-to-scale-ml-feature-development/image-2.png) **Tiled Architecture** ![Blog > Shepherd > Tiled Architecture](/images/shepherd-how-stripe-adapted-chronon-to-scale-ml-feature-development/image-3.png) Flink-based streaming architecture allowed us to meet our feature freshness requirements; that left latency targets. To achieve those, we needed to modify how Chronon stores events in the KV store. When events are stored individually, computing features requires retrieving events for the feature and aggregating them together. If there are a large number of events for the feature, this is time-consuming and increases latency. Rather than store individual events, we decided to maintain the state of preaggregated feature values in the Flink app, and periodically flush those values out to the KV store. We call each of these preaggregated values a “tile.” With tiling, computing a feature only requires retrieving and aggregating the tiles for the feature rather than all the individual events. For features with a large number of events, this is a much smaller amount of data and significantly decreases latency. We contributed both the Flink and tiling implementations back to Chronon, along with documentation on how to get started with them. #### Meeting Stripe’s offline requirements The Chronon offline algorithm produces both offline training data for models and batch-only use cases. Offline jobs are also required to compute historical data used for serving GroupBys. The offline jobs are configured using the same Python- and Spark SQL-based API as the online jobs, allowing developers to define their features once and compute both online and offline features. Stripe’s scale for offline jobs is larger than previous use cases of Chronon, just as it was for streaming and online components. Although the offline algorithm is designed to be robust, with support for handling skewed data, we needed to verify that it would scale to the size of Stripe’s training sets. As a first step to integrating with Chronon’s offline jobs, we performed benchmarks of training dataset generation and found the algorithm to be scalable with predictable tuning knobs. After verifying its scalability, we needed to integrate Chronon’s offline jobs with Stripe’s data orchestration system. We built a custom integration for scheduling and running jobs that worked with our highly customized Airflow setup. We designed the integration so users only need to mark their GroupBys as online or set an offline schedule in their Join definitions, after which the required offline jobs are automatically scheduled. We also needed to integrate Chronon with Stripe’s data warehouse. Chronon assumes data sources are all partitioned Hive tables. Not all data sources at Stripe meet these requirements. For example, many of the data sources required for batch features are unpartitioned snapshot tables. We built support into our Chronon integration for defining features with a wider variety of data sources, and for writing features to Stripe’s data warehouse using customized Iceberg writers. Fully integrating with our data warehouse provides feature engineers the flexibility to define features using any data source, and to consume features in downstream batch jobs for use cases including model training and batch scoring. Our implementation for more flexible data source support was Stripe-specific, but we plan to generalize the approach and contribute it to Chronon. ### Building a SEPA fraud model on Shepherd Our first use case for Shepherd was a partnership with our Local Payment Methods (LPM) team to create an updated ML model for detecting SEPA fraud. SEPA, which stands for Single Euro Payments Area, enables people and businesses to make cashless euro payments—via credit transfer and direct debit—anywhere in the European Union. The LPM team initially planned on combining new Shepherd-created features with existing features from our legacy feature platform, but found development on Shepherd so easy that they created all new features and launched a Shepherd-only model. Our new SEPA fraud model consists of over 200 features, including a combination of batch-only and streaming features. As we built the model, we also developed support for modeling delay in the offline training data so we could accurately represent the delay of batch data in training data to avoid training-serving skew—when the feature values that a model is trained on are not reflective of the feature values used to make predictions. As part of the new SEPA fraud model, we also built monitoring and alerting for Shepherd—including integrating with Chronon’s [online offline consistency](https://chronon.ai/test_deploy_serve/Online_Offline_Consistency.html) monitoring. As we mentioned at the start of this post, the new model blocks tens of millions of dollars of additional fraud a year. ### Supporting the Chronon community As a co-maintainer of Chronon with Airbnb, we’re excited to grow and support this open-source community while continuing to expand the capabilities of the project. We also designed the new Chronon logo, a subtle nod to the fabric of time. ![Chronon Logo](/images/shepherd-how-stripe-adapted-chronon-to-scale-ml-feature-development/image-4.png) Over the coming months, we’ll contribute new functionality and additional optimizations to Chronon, and we’ll share more details about how teams at Stripe are adopting Shepherd. To get started with Chronon, check out the [GitHub repository](https://github.com/airbnb/chronon), read the documentation at [Chronon.ai](https://chronon.ai/), and drop into our [community Discord channel](https://discord.gg/GbmGATNqqP). And if you’re interested in building ML infrastructure at Stripe—or developing ML features for Stripe products—consider joining our [engineering team](https://stripe.com/jobs/search?query=engineer). Last Black Friday to Cyber Monday, Stripe processed 300 million transactions with a total payment volume of $18.6B—and the Stripe API maintained greater than 99.999% availability. Underlying these metrics is our Global Payments and Treasury Network (GPTN) that manages the complexity of accepting payments, money storage, and money movement. Today, Stripe supports more than 135 currencies and payment methods through partnerships with local banks and financial networks in 185 countries. These entities provide different interfaces, data models, and behaviors, and Stripe continually manages this complexity so developers can quickly integrate the GPTN into their businesses. Internally, Stripe needs to guarantee that what we expect to happen during payment processing actually happens for internal customers and external auditors of our data. We built Ledger, an immutable and auditable log, as a trustworthy system of record for all of our financial data. Ledger standardizes our representation of money movement, and it serves as the scalable foundation for our automated Data Quality (DQ) Platform—guaranteeing Stripe faithfully manages money for users. Many existing systems provide primitives for accurate accounting, but the real world is imperfect, incomplete, and constantly changing. We witness basic and obvious failures like malformed reports or propagated errors from banking or network partners, and also broad macroeconomic changes such as currencies ceasing to exist or large banks collapsing overnight. While we aspire to an orderly ideal, at Stripe scale, that’s impossible—instead we built a system that keeps these imperfections manageable and bounded. Ledger models internal data-producing systems with common patterns, and it relies on proactive alerting to surface issues and proposed solutions. Each day, Ledger sees five billion events and 99.99% of our dollar volume is fully ingested and verified within four days. Of that activity, 99.999% is monitored, categorized, and triaged through rich investigative tooling—while the remaining long-tail is reliably handled through manual analysis. Together, Ledger and the DQ Platform ensure over 99.9999% explainability of money movement, even as Stripe’s data volume has grown 10x. In this blog post, we’ll share technical details on how we built this state-of-the-art money movement tracking system, and describe how teams at Stripe interact with the data quality metrics that underlie our global payments network. ![Blog > Ledger > 5 billion events per day](/images/ledger-stripe-system-for-tracking-and-validating-money-movement/image-0.png) ### How Stripe processes payments The GPTN in part is a payment processing network consisting of customer business calls to Stripe’s API and Stripe’s interactions with a variety of banks and payment methods. There is complexity in tracking the requests Stripe makes to partners, the physical money movement between financial partners, and the reporting Stripe receives back. We make this multifaceted problem tractable by segmenting the Stripe platform into discrete services, databases, and APIs/gRPC interfaces, which lets us solve individual problems without getting overwhelmed by the broader system. The challenge with this approach is that there is no intrinsic mechanism forcing these systems to represent or deliver data in the same way. Some might operate in real time, while others may operate on a monthly cadence with vastly different data volumes; some producers generate billions of events per day, while others may only generate a few hundred. Moreover, each system might have its own definitions of correctness or reliability. We require a mechanism that can deal with these variations and prove that these individual systems are collectively modeling our financials correctly. ![Blog > Ledger > Stripe's interactions with external entities](/images/ledger-stripe-system-for-tracking-and-validating-money-movement/image-1.png) A simplified summary view of Stripe’s interactions with external entities ### How we designed Ledger The Stripe services mentioned above have independent responsibilities, but they collaborate to solve a large federated problem. An ideal solution provides a mental model for correctness—supported by trustworthy statistics—that easily generalizes to new use cases. Further, we want to represent all activity on the Stripe platform in a common data structure that can be analyzed by a single system. This is the way we approach it: - Ledger encodes a state machine representation of producer systems, and models its behavior as a logical fund flow—the movement of balances (events) between accounts (states). - Ledger computes all account balances to evaluate the health of the system, grouped by various subdivisions to generate comprehensive statistics. This approach abstracts individual differences between underlying systems and provides mathematical evidence that they are functioning correctly. #### Ledger as a semantic data store Ledger is a faithful representation of the underlying state of all payment processes on the Stripe platform. Instead of computing a derived dataset based on incoming data pipelines, Ledger models the actual work of producer systems, recording each operation as a transaction. Ledger modeling may diverge from upstream data, but we guard against these cases explicitly with data completeness checks. Combined with our other data quality metrics, we can safely rely on Ledger’s data representation to monitor external systems. If we instrument Ledger, we indirectly instrument the data-producing pipelines. And, if we identify a problem, we alert our internal users to which part of their data pipeline is broken—and exactly how they can fix it. ![Blog > Ledger > Processing a charge](/images/ledger-stripe-system-for-tracking-and-validating-money-movement/image-2.png) Processing a charge with a creation event for a pending charge, and a release event for completion Inside of Ledger, we represent this activity as a movement of balances between two discrete states (creation and release), turning the above process into an observable state machine. ![Blog > Ledger > Processing a charge in Ledger](/images/ledger-stripe-system-for-tracking-and-validating-money-movement/image-3.png) Processing a charge in Ledger, represented by a creation event for a pending charge and a release event for completion #### System abstraction Ledger also abstracts producer systems. Instead of separately monitoring handoffs between data pipelines, we model systems as connected fund flows moving money between accounts. Because Ledger is a transaction-level system of record, we can prove that even complex multisystem pipelines with multiple stages of handoff are working correctly. We also model data consistency between otherwise disconnected systems, and we track individual transactions through their entire lifecycle. We call this tracing, and, at our scale, this totals to billions of daily transactions. #### Unifying separate systems with fund flows Consider an abstract end-to-end fund flow: for example, a business adding funds to its balance. This requires moving funds between banks, reconciling money movement with third-party reporting, and matching regulatory reporting with financial reporting. The fund flow spans multiple internal team boundaries, with discrete events published to different systems at different times. If we model this fund flow with logical constructs, Ledger can unify this data across separate systems and monitor its correctness. ![Blog > Ledger > Funds flows](/images/ledger-stripe-system-for-tracking-and-validating-money-movement/image-4.png) #### Immutability At its core, Ledger is an immutable log of events. Transactions previously published into Ledger cannot be deleted or modified, and we can always reconstruct past state by processing all events up to that point. All constructs—balances, fund flows, data quality controls, and so on—are transformations of the static underlying structure. Ledger’s immutability ensures we can audit and reproduce any data point at any time. Immutability justifies our data quality measures by guaranteeing that we can explain and analyze the exact problematic data. ### How we designed the Data Quality (DQ) Platform Ledger is the foundation for our Data Quality (DQ) Platform, which unifies detection of money movement issues and response tooling. Empirically, the DQ Platform ensures reliable and timely reporting across Stripe’s key lines of business: we maintained a 99.999% readiness target, even as data volume grew 10x. Transaction-level fund flows give us powerful tools to reason about complex interconnected subcomponents. We analyze these abstractions with a set of trustworthy DQ metrics that measure the health of a fund flow. These metrics are based on a common set of questions across all fund flows. For a specific cross-section of data, evaluated at time X, we look at: - **Clearing:** Did the fund flow complete correctly? - **Timeliness:** Did the data arrive on time? - **Completeness:** Do we have a complete representation of the underlying data system? We then compose DQ metrics on individual fund flows to provide scoring and targeted guidance for technical experts. These measurements roll up to create a unified DQ score—a system with a 99.99% data quality score is extremely unlikely to hide major problems—turning a complex distributed analysis problem into a straightforward tabulation exercise. Technical users can likewise trust that improving DQ scores reflect true improvement in underlying system behavior and accuracy. #### Clearing Ledger is based on double-entry bookkeeping, a standard method for guaranteeing that all money in a system is fully accounted for by balancing credits and debits. Grounding our analysis in this construct gives us a mathematical proof of correctness. If you’ve never encountered this term before, a helpful explainer is [“An Engineer’s Guide to Double-Entry Bookkeeping.”](https://anvil.works/blog/double-entry-accounting-for-engineers) Using double-entry bookkeeping to validate money movement is similar to analyzing a flow of water through a network of pipes (processes) ending in reservoirs (balance sheets). At steady state, terminal (nonclearing) reservoirs are full, and intermediate (clearing) pipes are empty. If there is water stuck in the pipes, then you have a problem—in other words, unresolved balances on the balance sheet. Traditionally, bookkeeping is purely an accounting construct, but we apply these ideas in a novel way. Rather than just tabulating cash flow in and out, we’re simultaneously modeling internal data system behaviors that may have nothing to do with physical movement of money—for example, currency conversion, report parsing, estimation, or billing analysis. We can use the same bookkeeping concepts to reason about those systems and evaluate their correctness in a much more general way. #### Detecting problems Clearing measures the fraction of Ledger that is appropriately zeroed out at steady state. Consider an example that models two steps of a flow: `charge creation` (potential money movement) and `release` (funds becoming available). As you follow the flow, keep in mind these definitions: - **Accounts** are buckets of money distinguished by their type (e.g., `charge_unsubmitted`) and properties (e.g.,`id`, `business`). - **Events** move money between accounts (e.g., `charge.creation` and `charge.release`). ![Blog > Ledger > T0 and T1](/images/ledger-stripe-system-for-tracking-and-validating-money-movement/image-5.png) At time `T0`, the `charge.creation` event sets up a balance in the undisbursed account; then at `T1`, `charge.release` completes the flow and moves the funds to the `business_balance` account. It is important to note that the `creation` and `release` events are completely independent. Even if they arrive out of order, or are created by different sources, Ledger maintains accurate fund flows through the identifier for `business` and `id`. But, if the `release` event is never published or has the wrong `id`, Ledger would not clear the balance in the associated `charge_undisbursed` account, and it would instead hold the balance in a different instance of `charge_undisbursed`. #### Example clearing issue Consider next how a wrong value (`business: B` vs. `business: A`) results in two clearing accounts with nonzero balance. Instead of having one reservoir of money for `business: A`, we wind up with two—one for `business: A` and one for `business: B`. ![Blog > Ledger > T1 missing event](/images/ledger-stripe-system-for-tracking-and-validating-money-movement/image-6.png) Generalizing from this example, we repeat this process for every fund flow, account type, and property-based subdivision inside of Ledger. Even when we have billions of transactions, a single missing, late, or incorrect transaction immediately creates a detectable accuracy issue with a simple query—for example, “*Find the clearing Accounts with nonzero balance.”* #### Timeliness Clearing prevents persistent problems, but we also need to guarantee data arrives on time for time-sensitive functions such as monthly report generation. Producers create time stamps when integrating with Ledger, and we measure the delta between when data first enters the Stripe platform and when it reaches Ledger. We set a hard threshold on the data delivery window, and we create headroom for subsequent reporting, analysis, and manipulations to guarantee 99.999% timeliness. #### Completeness We guarantee data completeness and guard against missing data from upstream systems with explicit cross-system checks alongside automated anomaly detection. For example, we ensure that every ID in a producer database has a matching Ledger event. We also run statistical modeling on data availability. We have models for every account type that use historical trends to calculate expected data arrival time and, if events do not appear, we interpret this as potentially missing data. ### How teams at Stripe explore DQ metrics On top of the DQ Platform, we built hierarchical automated alerting and rich tooling. We combine interactive metric displays with analysis and guidance. The experience for internal leaders and team members focuses on proactive feedback, simple manipulation of data, and meaningful metrics. We also provide use-case-specific context that depends on which part of the business is using it. For example, consider how we show team-level DQ metrics for our periodic financial reporting, which we call Accounting Close. Note: some details are blocked out for privacy. ![Blog > Ledger > Accounting Close](/images/ledger-stripe-system-for-tracking-and-validating-money-movement/image-7.png) The topline view is generally in a good state, but there are areas for improvement at the team level within the Payment Engineering group. For example, the 50% score for Aging Balances means that some clearing issues have persisted over time: ![Blog > Ledger > Data quality metrics](/images/ledger-stripe-system-for-tracking-and-validating-money-movement/image-8.png) A single team-level view of data quality metrics This team-level view shows DQ metrics alongside a call to action including auto-generated tickets, relevant resources, and tool links—everything required for self-service. For leaders, this view provides the exact dollar impact of DQ issues. #### Tactical views DQ scores drop when a problem is observed in Ledger. Although Ledger is a projection of underlying systems, Ledger problems are not usually problems of transcription or data modeling in Ledger. They primarily reveal real problems with system implementations, integrations, or physical money movement. In these cases, we provide tactical views to trace issues back to their root cause inside Stripe platforms or external systems. Consider an uncleared balance of a specific account type—a processing fee that must be invoiced and paid. At steady state, the invoice should be paid and the balance is zero, but over time we observe a nonclearing balance. ![Blog > Ledger > Breakdown](/images/ledger-stripe-system-for-tracking-and-validating-money-movement/image-9.png) #### Investigation and attribution Clicking on a point in the graph generates SQL queries in Presto (our ad-hoc SQL query engine) and surfaces relevant data: reference keys, metadata, ownership, and tips. If a Ledger user is unable to debug and publish a correction—perhaps because the root cause is related to an infrastructure or third-party incident outside their control—they can reassign ownership to the right internal stakeholders and exclude it from alerting. When issues are attributed to a known incident, we can retroactively analyze the impact to DQ metrics across teams to fully understand how Stripe was affected: ![Blog > Ledger > Live Clearing](/images/ledger-stripe-system-for-tracking-and-validating-money-movement/image-10.png) ![Blog > Ledger > Data Quality Artifacts](/images/ledger-stripe-system-for-tracking-and-validating-money-movement/image-11.png) Combined, we have the ability to measure and analyze data quality, identify root-cause problems, and flexibly interact with the underlying data constructs to manage our problem load over time. In this case, fixing problems in Ledger may involve republishing data from source systems. #### Data correction Ledger is our system of record and must remain an evergreen representation of truth. Persistent problems reduce visibility into new problems and may result in incorrect reporting or derived datasets. Because Ledger is an immutable log of events, we can’t run simple queries to mutate the state; instead, we have to revert and reprocess prior operations. If an incident occurs, we need a tool for correcting data at scale. We built a supporting utility to create and safely execute migrations, protected by a data quality tool that generates out-of-band reports on the production impact of proposed changes. Together, these tools approximate a CI pipeline for ad-hoc data repair operations. All operations must go through a two-phase review and commit of the data—and its associated DQ impact. ![Blog > Ledger > Data Pipeline Health Summary](/images/ledger-stripe-system-for-tracking-and-validating-money-movement/image-12.png) ### Fewer data problems, more reliable reporting Our systems need to operate within a messy reality, but the innovations described in this blog post drive us towards a trustworthy and explainable operational model. Likewise, as businesses and mechanisms for money movement inevitably evolve, Stripe is empowered to keep pace with that change. The DQ Platform ensures reliable and timely reporting across all Stripe business lines. The combination of clearing, timeliness, and completeness metrics ensures that internal stakeholders can make sound judgments about the correctness of underlying data systems without worrying about maintaining complex specialized knowledge. The digital economy will continue to accelerate, and our focus is on building robust and scalable systems to power it. In the future, we want to improve timeliness to minute-level analysis and response—offering lower latency processing, which will strengthen fraud detection and increase available response time to address possible financial problems. We are also investing in advanced enrichment capabilities that allow us to declaratively compose new datasets and reporting interfaces while guaranteeing that they meet our data quality bar. This work safely evolves the complexity of our internal systems alongside Stripe’s growth. We’re excited to continue to solve hard, important problems. If you are too, consider joining our [engineering team](https://stripe.com/jobs/search?query=engineer). As an engineer on Stripe’s fraud prevention team, I obsess about a single moment that lasts just a fraction of a second. It begins when someone clicks “purchase,” and it ends when their transaction is confirmed. In that brief interval, [Stripe Radar](https://stripe.com/radar) goes to work. Radar is Stripe’s fraud prevention solution. It assesses more than 1,000 characteristics of a potential transaction in order to determine the likelihood that it’s fraudulent, letting good transactions through and either blocking risky transactions or diverting them to additional security checks. It makes this decision, accurately, in less than 100 milliseconds. Out of the billions of legitimate payments made on Stripe, Radar incorrectly blocks just 0.1%. Online payment fraud is a hard problem to solve. Any effective tool needs to be accurate, fast, and inexpensive to run for each transaction. It needs to balance blocking bad transactions against false positives (good payments that are blocked), which hurt consumers and our users’ bottom lines. The challenge is compounded by the fact that fraud is rare—on the order of 1 out of every 1,000 payments. To identify fraudulent transactions, we rely on the breadth of the Stripe network—our biggest strength. We’ve done so by improving our machine learning (ML) architecture while enhancing the way we communicate with users about the reasons behind fraud decisions. In this post, we want to share what makes Radar so powerful and take you through some of the key decisions we’ve made—and lessons we’ve learned—over the almost seven years we’ve been building it. ### Lesson 1: Don’t get too comfortable with your ML architecture We started with relatively simple ML models (e.g., logistic regression) and over time have advanced to more complex ones (e.g., deep neural networks), as the Stripe network has grown and ML technology has advanced. With each architectural jump, we have observed an equivalent leap-size improvement in model performance. Our most recent architecture evolution occurred in mid-2022 when we migrated from an ensemble “[Wide & Deep model](https://arxiv.org/abs/1606.07792),” composed of an [XGBoost model](https://xgboost.readthedocs.io/en/stable/) and a deep neural network (DNN), to a pure DNN-only model. The result was a model that trains faster, scales better, and is more adaptable to the most cutting-edge ML techniques. ![Before and after combined](/images/how-we-built-it-stripe-radar/image-0.png) The previous architecture combined the power of memorization (the wide part, powered by XGBoost) with generalization (the deep part, powered by a DNN). It worked well, but limited the rate at which we could improve. XGBoost was incompatible at scale with more advanced ML techniques we wanted to take advantage of (e.g., transfer learning, embeddings, long training times) and also slowed the rate at which we could retrain the model because an XGBoost model is not very parallelizable—which inhibited the experimentation velocity of the many engineers who worked on the model each day. We could have just removed the XGBoost component, but that would have caused a 1.5% drop in [recall](https://en.wikipedia.org/wiki/Precision_and_recall)—an unacceptably large regression in performance. While XGBoost is not a deep-learning method or a cutting-edge technique these days, it still provided unique value to our model’s performance. To replace it, we looked for ways to build a DNN-only architecture that added the memorization power we’d been getting from XGBoost, without compromising the DNN’s ability to generalize. A straightforward way of improving both memorization and generalization is to increase the DNN’s size—both its depth and width. However, achieving a more-performant model wasn’t as easy as that. Increasing the model’s size immediately improved the representational capacity of the model to learn features at both the abstract level (e.g., payment velocity and “unusual volume on a card”) and the fine-grained level (e.g., correlations between features). However, increasing depth too much ran the risk of overfitting, causing the model to memorize random noise in the features. So, in order to build a DNN-only architecture, we had to find the sweet spot that maximized a representational capacity to learn various levels while remaining resistant to overfitting. We decided to read up on [popular publications](https://arxiv.org/pdf/1611.05431.pdf) about DNN architecture and adopted a multi-branch DNN-only architecture inspired by ResNeXt. ResNeXt’s architecture adopts a “Network-in-Neuron” strategy. It splits a computation into distinct threads, or branches, where a branch can be thought of as a small network. The outputs from the branches are then summed to produce a final output. Aggregating branches has the benefit of enriching the learned features by expanding a new dimension of feature representation. It does this in a way that is more effective than the brute-force approach of merely increasing depth or width to improve accuracy. By removing the XGBoost component of the architecture, we reduced the time to train our model by over 85% (to less than two hours). Experiments that previously required running jobs late into the night could now be completed multiple times in a single working day, a massive shift in our ability to prototype new ideas. The improvements were a good reminder to not get too comfortable with the way we were currently doing ML and to ask ourselves: If we were starting over today, what kind of model would we build? Asking those questions is allowing us to take on even more ambitious initiatives for our next year of work. These include incorporating more advanced ML techniques like transfer learning, embeddings, and multi-task learning, all of which we are actively exploring in 2023. ### Lesson 2: Never stop searching for new ML features In addition to evolving our model architectures, we also want to ensure our models are incorporating the richest signals. By carefully noting the common behaviors of fraud attempts, Radar has been able to compile a deep understanding of fraudulent activity and trends. This gives Radar an important advantage when put to work: Each increase in the size of Radar’s training data set creates outsized improvements in model quality, which wasn’t the case with XGBoost. One of the biggest levers we have to make model improvements is through feature engineering. Some features could likely have an outsized impact on model performance, but first we need to identify and implement them. To do this effectively, we’ve created several processes to enable ML engineers. We review past fraud attacks in exacting detail, building investigation reports that attempt to get into the minds of the fraudulent actors. We look for signals in the payments, like a common pattern for throwaway emails (e.g., 123test@cactuspractice.com) that might be used by fraudulent actors to quickly set up multiple accounts. We then broaden our search across the Stripe network to look for correlations in timing and signals that could connect to previous fraud attacks. Every week, the Radar team also meets to discuss new fraud trends that emerge from research into activity on the dark web. We gather all of this information and ideate features that target the specific contours of each attack. We come up with a prioritized list, quickly implement each feature, then prototype each one to understand the impact on our model’s performance. Sometimes we strike gold. Other times, even our most promising features don’t pan out. This happened once when we introduced a Boolean feature capturing whether the business was currently under a distributed fraud attack. This feature didn’t improve our model’s performance as much as we’d anticipated. As it turned out, our ML was already incorporating these patterns, even though we never expected it to. This reflects the fact that the current version of Radar is built on top of years of work by many generations of engineers. Besides developing new features, another method we explore for increasing model performance is increasing the size of our training data. With the success of ML models like ChatGPT, and large language models generally, we wanted to see if we could achieve a similar feat with Radar: Could we start with a relatively simple DNN-only architecture and get large improvements in model performance just by increasing the amount of training data? The primary impediment to doing this was that the time to train increases linearly with the size of the training data. But thanks to the training-speed improvements we made when we switched to a DNN-only architecture, this was less of an issue. We ran some experiments using more transaction data and got encouraging results: We made a 10x increase in training transaction data and still found significant model improvements. We’re currently working on a 100x version to generalize the results even further. ![Increases in performance from more training data](/images/how-we-built-it-stripe-radar/image-1.png) In a future post, we will dive deeper into new techniques we’re exploring to further use the power of the Stripe network and our ability to apply these insights to fight fraud, even after a payment has already occurred. ### Lesson 3: Explanation matters as much as detection Building a great fraud-detection product is about more than just identifying fraud. There’s a large personal dimension to it, too. When a good transaction is flagged—or a fraudulent one gets through—our users want to know why, because false positives hurt their bottom line and frustrate their customers. Explaining fraud decisions is an area in which we’ve made a lot of investments in recent years. And it’s a challenge. All ML models are black boxes to an extent, and deep neural networks even more so than other types of models. It’s hard to explain to users why Radar scores transactions the way it does. This is another tradeoff we came to accept when deciding to use DNNs over simpler, more traditional ML techniques. But our engineers know the system well and have developed a range of ways to help users understand what’s going on. In 2020 we built our [risk insights](https://stripe.com/docs/radar/reviews/risk-insights) feature, which lets users see which features of a transaction contributed to a transaction being declined. These can include whether the cardholder’s name matches the provided email and the number of cards previously associated with an IP address. A high number of cards may indicate suspicious behavior, such as a bad actor trying out multiple stolen credit cards. However, there may also be legitimate reasons for this, and our model evaluates this feature in the context of all our signals, understanding the correlations that may exist between them to accurately distinguish between fraudulent and good payments. Recent improvements to risk insights include displaying maps to users with the locations of purchase and shipping addresses and using Elasticsearch to quickly share related transactions, which further helps users put a specific decline in context. ![Risk insights image](/images/how-we-built-it-stripe-radar/image-2.png) In addition to providing users with insight into fraud decisions, we have been working on more sophisticated techniques for gaining deeper understanding of our ML model. This tooling includes a simple table view that displays the exact features that contributed the most to raising and lowering a transaction’s fraud score. Our engineers are actively using these solutions internally to debug support cases, and we are working on plans for sharing these insights with our users as well. Explaining Radar’s ML outcomes as clearly as possible helps users understand the relative risk of a given payment, which fraud signals may have contributed to that risk score, and how a given payment compares to others. They can then take actions to [improve the quality of data](https://stripe.com/docs/radar/integration) they are sending (in order to generate more accurate fraud decisions) or create [custom allow or block rules](https://stripe.com/docs/radar/rules) to tailor Radar for their specific business needs. ### Evolving strategies, constant focus Radar is a very different product than it was when we started. We’ve overhauled the models we use, the way we employ transaction data from the Stripe network, and the way we interact with users. Over that same period fraud patterns have changed considerably, too, from primarily stolen credit card fraud to a growing mix of traditional card fraud and high-velocity [card testing attacks](https://stripe.com/docs/disputes/prevention/card-testing) today. But in the ways that matter most, the goals of the Radar team are the same. We’re still working to create an environment in which businesses and customers can transact with confidence, and we’re still focused on optimizing that brief moment we hope customers don’t even notice: the last step in a checkout, the split second we have to detect fraud before a transaction is confirmed. We’re excited to continue innovating on ML to solve hard, important problems. If you are, too, consider [joining our engineering team](https://stripe.com/jobs/search?query=engineer). At Stripe, our [product docs](https://stripe.com/docs) are designed to feel like an application rather than a traditional user manual. For example, we incorporate a user’s own API test key into code samples, making it possible to copy and paste code that seamlessly works with the user’s own account. We have client-side interactivity, like checklists and collapsible sections. We tailor the content to the individual user, conditionally displaying content based on their location or the Stripe features they use. These features result in a high-quality user experience that reduces friction and contributes to the success of developers. For these capabilities to have the desired impact we have to make it easy for writers to use them in their content. Delivering a good user experience without compromising the authoring experience required us to develop an authoring format that enables writers to express interactivity and simple page logic without mixing code and content. Over several years, we learned how to balance interactivity, customization, and authoring productivity while undertaking a major overhaul of our documentation platform. ### Past is prologue To understand how we got here it’s important to understand where we started. The legacy documentation platform that we replaced was a monolithic Ruby application built with [ERB templates](https://github.com/ruby/erb/blob/master/README.md) and Sinatra routing. The content freely mixed HTML, Markdown, Ruby, and ERB helper functions. Mixing code and content provided a natural way to programmatically tailor the docs to the developer, but it posed serious challenges to quality and maintainability when the body of content grew to hundreds of pages. Alongside the technical burden of maintaining code within the content, the behavior of the code can make the content itself harder to understand and manipulate safely, particularly when used by many different teams with different objectives, timetables, and areas of expertise. Content authoring effectively became software development, and with that became subject to the same technical complexity and overhead. We wanted to introduce new content formats with significantly more interactivity and more sophisticated frontend logic, but we knew that the limitations of a code-first approach would prevent us from using these features widely. For example, our [integration builder](https://stripe.com/docs/payments/quickstart) format, which was originally created as a React application with content authored in JSON, became much easier for technical writers to reproduce and maintain when it was migrated to use Markdoc for the authoring experience. ### Designing Markdoc When we began building our current documentation platform, we wanted to simplify our authoring experience by adopting an intuitive format like [Markdown](https://daringfireball.net/projects/markdown/). Although Markdown is significantly easier to read and reason about than ERB templates, its simplicity also imposes limitations that make it challenging to use for rich content like our product docs. Markdown is a relatively flat format that isn’t designed to express complex structure or hierarchy. It offers a small number of formatting features and provides limited control over presentation. It does not have exotic templating features like support for custom page logic, variables, conditionals, or content reuse. Markdown’s enduring success and relative ubiquity are largely due to its intentionally narrow scope and the restraint exercised in its design. It is easy and enjoyable to use because it prioritizes readability and leans heavily on intuitive plain-text authoring conventions. Our custom authoring format, called [Markdoc](https://markdoc.dev/), was designed to decouple code and content while enforcing proper discipline at the boundaries. Instead of allowing each page to be treated like an open-ended application, it imposes constraints on styling and programming, providing prescriptive rails for content extensibility. It extends Markdown with [custom syntax](https://markdoc.dev/docs/syntax) that meets the needs of our documentation platform without sacrificing Markdown’s simplicity, familiarity, or ease of use for writing prose. Following the ethos and design sensibility of Markdown, Markdoc keeps the overall surface area of new features small by adding a few highly-composable primitives that can be used together to express all the functionality we need. Markdoc provides an extensible system for [defining custom tags](https://markdoc.dev/docs/tags) that can be used seamlessly in Markdown content. Using the custom tag syntax, we’re able to support features like conditional content, content inclusion, and variable interpolation. ```md # This is a heading {% #section %} {% callout type="info" %} This is a paragraph with \*formatted\* text inside the callout {% /callout %} {% if $condition %} This content shows if `$condition` is true. {% /if %} ``` The features we decided to leave out of Markdoc in order to protect content maintainability are a critical aspect of its design. For example, when deciding what built-in flow control to include in Markdoc, we deliberately chose not to include looping. We wanted to discourage writers from performing procedural content generation from inside of a document, forcing them to move it outside of the system for better encapsulation. We also decided to leave out variable assignment in order to ensure that the content is fully stateless, thus eliminating an entire class of potential bugs. > I like Markdoc because it lets us still do anything we want with code in the docs without bogging down the content authoring experience. If we need some new component, designers and engineers can whip that up. So as a writer, I can work in the docs content and stay focused. ### React integration Markdoc has a modular rendering system that supports multiple output formats. Using Markdoc’s React renderer, a Markdoc document can be rendered to a React virtual DOM. Custom Markdoc tags can be configured to [output React components](https://markdoc.dev/docs/render#react), passing through tag attributes as React props. Markdoc also supports assigning custom React components to [standard Markdown document nodes](https://markdoc.dev/docs/nodes) such as headings and paragraphs. Defining custom Markdoc tags that output React components makes it possible to include interactive features, like tab switchers and collapsible content sections, inside of documents. Using custom tags to express these features helps create a writer-friendly interface for the functionality. The React ecosystem also has a wealth of useful and interesting libraries that we can incorporate into our documentation to enrich presentation. For example, we're using the [React Flow](https://reactflow.dev/) library to create interactive diagrams in our documentation. We defined a set of Markdoc tags for expressing the contents of a diagram, making it easy for writers to build beautiful and consistent visual representations of APIs and technical concepts from a set of composable elements. ![markdoc-graph-1](/images/markdoc/image-0.png) ```md {% diagram type="sequence" description="Usage-based billing" %} {% node #customer icon="customer" %} Customer {% /node %} {% node #typographic icon="platform" %} Typographic {% /node %} {% node #stripe icon="stripe" %} Stripe {% /node %} {% edge from="customer" to="typographic" %} Select plan {% /edge %} {% edge from="typographic" to="typographic" %} Create [usage records](/docs/api/usage\_records) {% /edge %} ``` Unlike static images, the diagrams that are built with React Flow can easily incorporate interactivity and clickable links. They are also easier to localize and can be restyled universally. Moving our documentation frontend to React was an important goal of our platform overhaul. Stripe already used React across many parts of the user experience, including our API reference docs and user dashboard. Enabling integration and cross-pollination between those surfaces and the product docs opens up a lot of exciting opportunities for future innovation, like showing API reference overlays when the reader hovers their cursor over a function or parameter in a code example. Sharing a common set of components from Stripe’s internal design pattern library helps improve cohesion. React also offers some compelling technical advantages. The implementation of interactive frontend components in our legacy stack was split between markup ERB templates and logic written in JavaScript which made it difficult to properly encapsulate, extend, and reuse functionality—a set of problems that modern component-based frontend frameworks address in a more satisfying way. Markdoc comes with two distinct React renderers: a renderer that dynamically builds the React virtual DOM tree on the client side, and a static renderer that transpiles the document to JavaScript code. We use the dynamic renderer in our documentation platform at Stripe, but the static renderer is useful in cases where you want to treat a piece of Markdoc content as though it is a React component or JavaScript module. For example, the static renderer makes it possible to implement a Markdoc loader for Webpack in only five lines of code. ```ts const Markdoc = require('@markdoc/markdoc'); module.exports = function (source) { const {schema} = this.getOptions() || {}; const ast = Markdoc.parse(source); const transformed = Markdoc.transform(ast, schema); const output = Markdoc.renderers.reactStatic(transformed); return `import React from 'react'; export default ${output}`; }; ``` ### Modular rendering Alongside the React renderers, Markdoc also includes a string-based HTML renderer that can be used for conventional server-side rendering or [integration with standards-based Web Components](https://markdoc.io/docs/examples/html). Markdoc’s modular rendering architecture makes it possible for third parties to build custom renderers for additional frameworks and systems. Markdoc content is entirely agonistic with respect to the technology used to present the rendered document. Fully decoupling rendering from the document format gives us the flexibility to present the same content in radically different ways in the future—like incorporating it into a native mobile application or generating a print-ready output format such as a PDF. I even used Markdoc to make the slide deck for my [presentation](https://www.writethedocs.org/videos/portland/2020/documentation-as-an-application-enabling-interactive-content-that-is-tailored-to-the-user-ryan-paul/) at the Write the Docs conference back in 2020. The Markdoc community has already started bringing support to other frameworks, including [Vue](https://github.com/wobsoriano/vue-markdoc) and [Svelte](https://github.com/joshnuss/svelte-markdoc). ![ markdoc-slides1](/images/markdoc/image-1.png) Ensuring that rendering implementation details don’t bleed into the content also helps to improve the authoring experience, avoiding complexity and simplifying maintainability. ### Documentation as data Markdoc’s fully declarative syntax parses to an [Abstract Syntax Tree (AST)](https://markdoc.io/sandbox?mode=ast), a data structure that represents the content of the document. We can take advantage of the AST to perform advanced static analysis and programmatically manipulate our content. Markdoc lets us treat our documentation like data, writing simple scripts to programmatically inspect the content. If we want to perform tasks like identifying all of the fenced code blocks that contain a specific string or all of the places where we have a heading nested inside of a callout, we can do that robustly with the AST instead of relying on text scraping and regular expressions. We are building automated refactoring tools that use the AST, making it possible to perform complex edits across our entire body of content with a higher degree of robustness than old-fashioned find-and-replace. One of the most important ways that we use the AST today is for [validation](https://markdoc.io/docs/validation). For every Markdoc tag and document node type, there’s a schema definition specifying the names and types of the attributes it accepts, what kind of document nodes can be nested inside of it as children, and other relevant metadata. The Markdoc validator uses this information to verify the correctness of a given Markdoc document. Schemas can also include arbitrary logic that analyzes the document nodes and returns custom errors. We use this to support features like link validation, checking to make sure that every link between pages within our documentation points to a valid route. It can also be useful for enforcing certain style guidelines that relate to the document structure, like preventing authors from using the wrong heading levels in certain places. We run the Markdoc validator in our continuous integration system to ensure correctness at build time, but we also have an internal Visual Studio Code extension that exposes validation errors in real time while the user is typing. > Markdoc makes it easy for me to build rich, interactive experiences around documentation, then surface that capability to other authors through a simple declarative interface. ### Under the hood Markdoc’s parser is written in JavaScript and built on top of a popular open-source Markdown library called [markdown-it](https://github.com/markdown-it/markdown-it). Markdoc is relatively lightweight—the markdown-it library is its only direct dependency. It is intended to run in Node.js and similar server-side JavaScript environments, but it can also be bundled for use in the browser. Markdoc uses markdown-it as a tokenizer, building its AST from the array of tokens emitted by markdown-it. Parsing logic for Markdoc’s custom tag syntax is generated from a [peg.js](https://pegjs.org/) grammar and integrates with markdown-it via a plugin. Markdoc has its own dedicated rendering architecture rather than relying on markdown-it to generate its output. Developing an independent rendering system was necessary in order to handle Markdoc’s custom tags and support multiple output formats. Markdoc rendering is performed in several phases. First, the variable resolution step converts all of the variables in the document into their corresponding values. Next, the transformation step recursively walks through the document nodes in the AST and uses the node and tag schema definitions to generate a tree of renderable document nodes—a data structure that corresponds with the shape of the rendered output. Finally, the tree of renderable document nodes is passed into the desired renderer, which emits the actual rendered output. ![Markdoc rendering flow graph](/images/markdoc/image-2.png) Markdoc document’s AST can be serialized to JSON and cached for later use, improving performance by obviating the need to parse the document every time it is rendered. Our product documentation platform at Stripe maintains an in-memory cache of the AST at runtime, but we are considering moving to an architecture where we serialize the AST at build time in order to eliminate runtime Markdoc parsing entirely. > When I first started using Markdoc at Stripe, I was delighted by how easy it was to structure docs exactly as I envisioned them. With other authoring tools, useful visual elements like collapsible sections, asides, tabs, tables, multiple-language code samples, and many more often required heavy customization or new development. With Markdoc, I have a full palette ready to use. After using Markdoc, it's hard to imagine going back to another authoring tool. ### May the source be with you Our team at Stripe spends a lot of time thinking about the authoring experience and how to get it right. In many ways, Markdoc is the embodiment of our obsession with building a better authoring experience. It’s our way of bottling up everything we have learned about this topic and sharing it in a reproducible way. After migrating all of our content to Markdoc and seeing the advantages fully realized in production, we set out to make Markdoc available under an MIT license so that others could benefit from our efforts. We [released Markdoc](https://markdoc.dev/) to the public in May, publishing a [package](https://www.npmjs.com/package/@markdoc/markdoc) on npm. We also published a [draft specification](https://markdoc.dev/spec) that formally describes the Markdoc tag syntax, with the aim of making it easier for developers to incorporate support for Markdoc tags into other Markdoc parsing libraries. Markdoc is hardly the final word on content authoring, but we hope that our contribution to the dialog will inspire others and help elevate discussion about the importance of the authoring experience in documentation. Interested in using Markdoc at work? [Let us know](https://github.com/markdoc/markdoc/discussions) how we can help. On Sunday March 6, we migrated Stripe’s largest JavaScript codebase (powering the Stripe Dashboard) from Flow to TypeScript. In a single pull request, we converted more than 3.7 million lines of code. The next day, hundreds of engineers came in to start writing TypeScript for their projects. > Seriously unreal. I remember a short time ago laughing at the idea of typescript ever landing at Stripe, and then I woke up Christmas Monday morning and it was here. TypeScript is the de facto standard for JavaScript type checking, and our engineers have been overjoyed by this migration. [We’re sharing our TypeScript conversion tool on GitHub](https://github.com/stripe-archive/flow-to-typescript-codemod) to help others perform similar migrations. #### A brief history of JavaScript type checking at Stripe Stripe has built large-scale frontend applications since 2012, including [stripe.com](https://stripe.com/), [Stripe JS](https://stripe.com/docs/js), and [the Stripe Dashboard](https://dashboard.stripe.com/). As our company grew, we increased the quality and reliability of our products by type checking our JS code. In 2016, we were an early adopter of [Flow](https://flow.org/), an optional type system for JavaScript developed at Meta (then Facebook). Since then, Flow has provided type safety for the majority of our frontend applications. ![Flow-API-example](/images/migrating-to-typescript/image-0.png) Example of a generated Flow type for an API resource and associated endpoints. However, engineers had trouble working with Flow. The type checker’s memory usage would lock up laptops, and the in-editor integration was frequently slow and unreliable. Meanwhile TypeScript, an alternative type system developed at Microsoft, exploded in popularity thanks to its tooling and robust community. TypeScript availability became a top request among engineers at Stripe. Stripe’s developer productivity team aims to provide our engineers with the most productive development environment of their careers, and delight in our tools is crucial for that. We work hard to identify the most pressing issues affecting developers; for example, we’ve built integrations into all of our development tools for reporting friction, which is quickly routed to the responsible teams and prioritized. TypeScript support was one such pressing issue and teams supporting frontend engineers began to plan out supporting TypeScript across the company. #### Choosing the right migration strategy Our largest frontend codebase powers the Stripe Dashboard and other user-facing products. The Dashboard codebase has tight coupling between disparate components and no cleanly factored dependency graph. An incremental migration to TypeScript would force developers to work in both languages to accomplish common tasks. We would also need an interoperability layer to sync type definitions between both languages and keep them consistent throughout the development process. In late 2020, we formed a new horizontal JavaScript Infrastructure team: a group of engineers solely focused on elevating the experience of writing JS at Stripe. One of the team’s first challenges was to replace Flow with TypeScript without a long and uncertain migration. We began by speaking to companies who had run similar migrations and read articles from [Airtable](https://medium.com/airtable-eng/the-continual-evolution-of-airtables-codebase-migrating-a-million-lines-of-code-to-typescript-612c008baf5c) and [Zapier](https://medium.com/@michaelsholty/migrating-500k-lines-of-flow-code-to-typescript-15a8cad43fec) describing their experiences. These companies developed automated scripts to convert one language to another, ran them over their entire codebases, and merged the output as a single commit. Airtable had published their conversion script to GitHub as a source-to-source conversion tool, or “codemod,” that would parse Flow code and generate TypeScript. Migrating in this way would greatly reduce the cognitive overhead for engineers, who would not need to handle both type systems for the same product behavior. We could have a clean break between Flow and TypeScript. #### Planning, preparation, and iteration We were really impressed by the quality of Airtable’s conversion code and decided to use that as the basis for our migration efforts. Many thanks to the team at Airtable for building this out and sharing their work—the open source community benefits a ton from examples like this. We began by copying Airtable’s codemod to Stripe’s monorepo to run against our internal code. Our JavaScript projects make heavy use of Sail, a shared design system of strictly typed React components, so that was our initial area of focus. We generated TypeScript definitions for Sail, rather than converting the code to TypeScript, as it would continue supporting applications written in Flow. To safely support both type systems, we wrote tests to verify the TypeScript definitions against any changes to the underlying Flow code. This approach would be too cumbersome for a large codebase, but thankfully the Sail component interface is explicit and quite rigid. The core of the codemod was solid but not comprehensive: for many files, it would crash or generate imperfect output. Over several months we iterated to handle more syntactic and semantic edge cases. For one simple example, JavaScript arrow functions can return a single expression without a return statement, such as the following: `const linesOfCode = () => 7;` JavaScript object literals use braces to wrap property definitions. Because braces are also used to delineate blocks of statements, returning an object literal from an arrow function requires an additional set of parentheses to disambiguate: `const currencyMap = () => ({ca:'CAD', us:'USD'});` We noticed that the codemod was incorrectly stripping the extra parentheses from these arrow functions, but only in the case of a generic function (a function that takes a type argument), which is syntax not available in standard JavaScript: `​​// bad!` `const wrapper = (arg: T) => {wrapped: arg};` We were able to fix this issue and add tests to prevent further regressions: There were dozens of similar syntactic fixes we made to handle the breadth of our codebases. Once Sail was usable from TypeScript, we worked on a couple of internal applications containing hundreds of JS modules. We also added a second pass to the codemod to suppress errors in the generated code, using TypeScript’s [@ts-expect-error comment](https://www.typescriptlang.org/docs/handbook/release-notes/typescript-3-9.html#-ts-expect-error-comments) to tag these errors. Rather than resolving every error ahead of time, we focused on eliminating Flow as soon as possible, tracking TypeScript error suppressions to address after the conversion. An initial pass on the Dashboard codebase created over 97,000 error suppressions. With our iterative approach to updating the codemod, we were able to get that number down to 37,000, or about one per thousand lines of code. For comparison, the Flow code had about 5,000 [error suppressions](https://flow.org/en/docs/errors/). Both [Flow](https://flow.org/en/docs/cli/coverage/) and [TypeScript](https://github.com/plantain-00/type-coverage) support measuring type coverage, and we were pleasantly surprised that TypeScript reported higher coverage than Flow even with these suppressions. We attribute that to an increase in the number and quality of third-party type definitions available in TypeScript, the lack of which was a large contributor to poor type coverage in Flow. As we moved onto the Dashboard with its tens of thousands of modules, our approach created significant memory pressure on the TypeScript compiler. Our primary tool to address this was [TypeScript project references](https://www.typescriptlang.org/docs/handbook/project-references.html): Although the Dashboard is not structured as distinct modules, we could infer a module structure and create project references based on that. This approach gave us the headroom to run TypeScript over the codebase without refactoring large chunks of application code. #### Going live Hundreds of engineers contribute to the Dashboard each week. Such a sweeping change would be exceptionally challenging to merge on a normal working day. Our team decided to commit to a date—March 6, a Sunday—where we would lock the Stripe monorepo and land our branch. In the week before merging, we focused on passing a build through our CI system and deploying it to our QA environment. Although TypeScript could successfully check the project, other tools that process our source code (ESLint, Jest, Webpack, Metro) would also need updates. One particular pain point was [Jest snapshot testing](https://jestjs.io/docs/snapshot-testing): Jest generates snapshot files with a hardcoded reference to the test file that generated them. Since the codemod would generate either `.ts` or `.tsx` extensions for TypeScript files, the snapshot files would have invalid references back to their test sources. We simplified this by switching the generation to only use `.tsx`. This meant we could rewrite the snapshots in bulk and keep 100% of those tests passing. In some cases we recognized that fixing the code for TypeScript compatibility would add weeks to our schedule. One set of cases was our custom ESLint rules: We had a rule to reorder imports to enforce consistency between files, but the rule was written against Babel’s Flow parser, which generated a subtly different abstract syntax tree from the TypeScript parser. In cases like this, we opted to disable some checks and do the work to restore them after the conversion. With a passing build in hand, we reached out to product teams with user-facing functionality in the Dashboard. Although the Dashboard has extensive unit and functional testing, it has limited end-to-end test coverage. This made manual tests by product stakeholders crucial. Those tests highlighted some minor bugs, which we resolved during the final week: In one case, we were failing to load any translations for non-English Dashboard users, due to a hardcoded `.js` extension in the translation loading code. This process gave us high confidence, but there is always uncertainty with a change this large: Although we had a firm grasp on our developer tooling and build processes, we were mutating every file in the codebase. Subtle errors in our conversion scripts (for example, removing an empty field from an object shared between multiple components) could cause user-facing errors, without being covered by any of our existing automated tests. These failures could manifest in a number of ways, from downstream dev tooling issues to builds that fail. We leaned on our deploy automation and ambient monitoring to make us aware of any unexpected problems, and created a Slack channel to coordinate the rollout so user-facing teams could quickly escalate any reports they would receive. On Saturday, March 5 the team generated a new migration branch and ran our automated scripts. We then deployed that branch to QA and repeated our validation process, including the manual tests suggested by product teams. We found no new issues. We were ready for the day of the merge. Early on the morning of Sunday, March 6, we locked the Stripe monorepo, took one more QA pass over our migration branch, and submitted the change. It merged cleanly and our automated tests passed. We kicked off the deployment to ship TypeScript into production. Thanks to the care and rigor of the previous year of work, we had no unpleasant surprises as we shifted traffic to the new code. We unlocked the repository and let developers know that the Dashboard was now in TypeScript. > When I was interviewing, I heard the migration from Flow to TypeScript was underway. > > I was admittedly skeptical, seeing prior teams struggle with the complexity and effort of even small codebases. > > The fact that I was back to normal in a few minutes [on] Monday was humbling. The immediate response was overwhelming. Engineers were impressed by the completeness of the migration: one described it as the single biggest developer productivity boost in their time at Stripe. We were happy to have the year of work pay off with such a clear and dramatic improvement to Stripe’s codebase. #### TypeScript… two months later The conversion was not perfect. Over the subsequent weeks our JS Infra team addressed issues as they arose. One example we didn’t anticipate was engineers reporting inconsistency between CI and local TypeScript runs. In TypeScript we are able to use many third-party type definitions installed from npm, and if those are updated, engineers will need to install the new versions. This was different from our Flow configuration, where dependency updates rarely changed types, so we had to educate engineers to try running `yarn install` as a debugging step. There is still more work to be done: We know performance could improve further with more granular project references, and better caching could speed up our CI runs. However, the benefits have far outweighed the bumps along the road. Engineers enjoy features such as automatic dependency imports and code completion, as well as the TypeScript community’s extensive corpus of third-party type definitions and integrations. When new engineers join Stripe to write frontend code, from day one they can be successful in a language with which they’re more likely to be comfortable and familiar. ![An example of the TypeScript VSCode integration automatically importing a logging library in a TypeScript file.](/images/migrating-to-typescript/image-1.gif) With the work on the Dashboard complete, the JS Infra team has continued to increase TypeScript’s adoption across the company. We’ve used the same tools to convert many other codebases, including all of our Payments UIs, such as Stripe Checkout. Stripe frontend engineers will soon write TypeScript for whichever project they develop. When we first [shared the story](https://twitter.com/alunny/status/1501261144341680130) of our migration publicly, the response was equally enthusiastic. Developers from across the industry reached out to learn more and apply the same improvements to their own codebases. To support these developers, [we’re sharing our TypeScript conversion code on GitHub](https://github.com/stripe-archive/flow-to-typescript-codemod) for teams to adapt to their own projects. Aside from the particulars of JavaScript or Flow or TypeScript, our big lesson from this migration is that dramatic improvements to large codebases are possible with diligence, commitment, and optimism. We will apply that mindset to other opportunities to make our engineers more effective and hope others do the same. From data pipelines written in Scala and Python to infrastructure defined in Terraform, Stripe engineers interact with many different programming languages daily. We rely on complex build pipelines to convert Go source code into native binaries, Java into bytecode, and TypeScript into transpiled bundles for the Stripe Dashboard. Even in interpreted languages like Ruby, our code-generation process creates hundreds of thousands of Ruby files containing everything from gRPC service definitions to GraphQL bindings. Our continuous integration (CI) system is responsible for orchestrating these build pipelines and executing the tens of thousands of test suites that our engineers depend on to validate their changes. Keeping CI performant is crucial for providing our engineers with a delightful development experience. Since our CI system also produces artifacts that ultimately process billions of dollars each day, it's vital that it meets an exceptionally high security bar. At Stripe, we lean on a combination of open-source technologies and novel engineering to deliver a CI system that meets both of these requirements. #### **A common framework for defining builds** As our codebase grows in volume and variety, Stripe leverages [Bazel](https://bazel.build/) to manage our build and test pipelines. Bazel provides a multi-language and multi-platform framework to define [rules](https://bazel.build/rules/rules)—recipes for how to build and test code in a specific stack. Many of the rules we use are maintained by the open-source community: [rules\_docker](https://github.com/bazelbuild/rules_docker), [rules\_go](https://github.com/bazelbuild/rules_go) and Java rules [built directly into Bazel](https://bazel.build/reference/be/java) to name a few. Our infrastructure teams build on Bazel’s headline support for custom rulesets to define internal rulesets for Ruby, JavaScript, and Terraform. Our engineers build and test their libraries and services by using these rulesets to declare “[targets](https://docs.bazel.build/versions/main/glossary.html#target)” specific to their code. Each target instantiates a rule with a set of input files and other attributes. For example, a `java_library` rule could define a `greeter` target. The greeter target builds a `libgreeter.jar` file by invoking various “[actions](https://docs.bazel.build/versions/main/glossary.html#action)” defined by the rule. In this case, the `java_library` rule creates an action which invokes the Java compiler (`javac`). ![remote-builds-blog-image-1](/images/fast-secure-builds-choose-two/image-0.png) After engineers define their targets, Bazel is responsible for executing all the necessary actions to build and test a change. However, this execution phase is far from trivial. At Stripe’s scale, building our rapidly growing Java codebase requires executing upwards of two hundred thousand actions.[1](#remote-builds-monorepo-footnote-detail) Running all these actions from scratch on a single machine would take several hours*,* even on the largest commodity EC2 instances. Bazel offers two features to address this challenge: [remote caching](https://bazel.build/docs/remote-caching) and [remote execution](https://bazel.build/docs/remote-execution). Remote caching allows Bazel to reuse outputs from an action’s earlier execution. Remote execution allows Bazel to distribute actions across multiple machines. ![remote-builds-blog-image-2](/images/fast-secure-builds-choose-two/image-1.png) #### **Scaling Bazel with remote caching and execution** Bazel’s remote caching and execution subsystems provide compelling opportunities to improve the performance and efficiency of our CI system. Our engineers consistently identify blazing fast builds as a force multiplier in their workflows. Keeping builds performant (e.g. sub-5 minutes) is core to keeping our engineers productive. Over the years, we’ve dedicated significant engineering resources to building a platform for remote caching and execution that delivers performance and efficiency wins without trading off security or reliability. To illustrate the risks associated with a naive implementation, consider the implications of allowing any CI build to [write](https://github.com/bazelbuild/remote-apis/blob/04784f4a830cc0df1f419a492cde9fc323f728db/build/bazel/remote/execution/v2/remote_execution.proto#L180) to a remote cache. A malicious actor could then replace a business-critical binary trusted to securely handle invoice billing for Stripe customers with a corrupted version that reroutes funds to a personal bank account! Protecting ourselves from action cache poisoning requires that we only allow writes to the cache from trusted sources. A trusted source must faithfully execute actions and upload their true outputs. Fortunately, remote execution comes to the rescue by allowing Bazel to delegate action execution to a trusted source. The trusted sources are exclusively authorized to upload action results to the remote cache. ![remote-builds-blog-image-3](/images/fast-secure-builds-choose-two/image-2.png) Creating trusted build workers is easier said than done. Having our trusted worker run Bazel actions implies that we’re evaluating arbitrary untrusted code on our trusted machine. It’s critical that untrusted actions are prevented from writing directly to the action cache or otherwise influencing other co-tenant actions. Our initial implementation of the [remote execution service](https://github.com/bazelbuild/remote-apis/blob/main/build/bazel/remote/execution/v2/remote_execution.proto#L44) used [gVisor](https://gvisor.dev/), an open-source implementation of the Linux kernel in user space. We coupled it with [containerd](https://containerd.io/) to manage the container images in which actions execute. Our gVisor-driven sandbox ensured that we were resilient to not only privilege escalations, but also bugs in the Linux kernel. We were able to rest easy knowing that shipping malicious code to our production services would require breaching multiple strong layers of protection. While gVisor performed admirably for our initial workload, building our Go codebase, it faltered when faced with new workloads. JavaScript bundling, Ruby code generation and Java compilation all showed significant performance penalties in gVisor. In particular, we identified that the [filesystem emulation](https://gvisor.dev/docs/architecture_guide/performance/#file-system) in gVisor adds prohibitive overhead. Unlike Go compilation, which is primarily bound by user space CPU computation, common workloads in the new stacks issue thousands of filesystem syscalls. This behavior is largely attributable to how Ruby and Java import code by searching through a list of tens or hundreds of directories (`$LOAD_PATH` and `CLASSPATH` respectively). For instance, running an empty Ruby unit test suite[2](#suite-load-time-footnote-remote-builds-detail) issues over 600,000 filesystem syscalls over the course of 5.5 seconds while searching a `$LOAD_PATH` with over 500 directories! ![remote-builds-image-4](/images/fast-secure-builds-choose-two/image-3.png) Readout of execution time of a Ruby unit test file with a single no-op test, which immediately succeeds. #### **The search for a blazing fast sandbox** With application kernels like gVisor imposing a high overhead, and OS-level virtualization primitives like Linux containers lacking a robust enough security barrier, we started exploring hardware virtualization. Our performance goals led us towards [Firecracker](https://firecracker-microvm.github.io/), a KVM-based microVM solution that features startup times in the 100s of milliseconds and substantially reduces I/O overhead. KVM allows the Linux kernel to act as a hypervisor and run virtual machines (VMs) using hardware virtualization. Our initial experimentation showed promising results, but Firecracker was far from a drop-in solution. Our most interesting challenge was providing actions with their input files. Before, with our gVisor sandbox, we’d execute actions in an [OverlayFS](https://www.kernel.org/doc/html/latest/filesystems/overlayfs.html) filesystem containing a fixed container image at its base and another directory above it (the “[execroot](https://bazel.build/docs/sandboxing)”) with the actions’ inputs, e.g. the test files to execute. Unbeknownst to the action, the execroot consisted entirely of hard links to a local “blobcache” (a directory that held all our input files). This design minimized filesystem setup overhead. For instance, consider running many JavaScript actions where each action requires the same 150K JavaScript files, comprising 2.5GiB, in its `node_modules` directory. Rather than repeatedly copying 2.5GiB of data for each action, we downloaded each file once into the blobcache. Then, each action received an independent `node_modules` directory composed of 150K hard links. ![remote-builds-blog-5](/images/fast-secure-builds-choose-two/image-4.png) However, Firecracker (or KVM in general) doesn't support an analogous design that depends on OverlayFS to share directories. Instead, KVM exposes a [virtio-based API](http://www.linux-kvm.org/page/Virtio) that only allows attaching entire block devices to the guest VM. Since hard links are only valid across the same filesystem, we’d have to directly attach the block device with the blobcache to each microVM. While that might work with a single concurrent microVM, physical block devices, especially ones receiving concurrent writes, can’t be safely mounted more than once. A naive approach of copying from the blobcache for each action would incur a steep performance penalty. We needed an alternative that would allow our remote execution service to binpack dozens of concurrent actions on a single machine. Fortunately, Linux’s Logical Volume Manager (LVM) provides a compelling solution. Our remote execution service now relies on LVM to orchestrate the execution process: 1. First, we continue to download action inputs into the blobcache. We concurrently boot our Firecracker microVM[3](#julia-evans-footnote-detail) with empty placeholder disks and an optimized build of the Linux kernel. 2. Then, using LVM’s [snapshotting](https://documentation.suse.com/sles/15-GA/html/SLES-all/cha-lvm-snapshots.html) capability we create a copy-on-write snapshot of the blobcache’s logical volume. This snapshot occupies almost no physical disk space. 3. The blobcache snapshot provides us with a logical block device that we attach to the booted Firecracker microVM using its RESTful API. 4. With the [containerd devmapper snapshotter](https://pkg.go.dev/github.com/containerd/containerd/snapshots/devmapper#section-readme) (built on the same underlying technology that LVM snapshots abstract over), we create and attach a block device for the action’s container image. 5. Then, we send our custom `init` process a gRPC request over a [VM socket](https://github.com/firecracker-microvm/firecracker/blob/main/docs/vsock.md), instructing it to mount both block devices and execute the action. The action executes within a [chroot](https://en.wikipedia.org/wiki/Chroot) that exposes a minimal filesystem built using OverlayFS. 6. Finally, the blobcache snapshot serves a dual purpose, allowing the execution service access to the action’s outputs after the microVM’s termination. ![remote-builds-blog-6](/images/fast-secure-builds-choose-two/image-5.png) #### **Diving into an ocean of opportunities** This novel sandboxing strategy is only one of the myriad techniques our remote build system leverages to improve performance. Our remote cache service responds to [`GetTree`](https://github.com/bazelbuild/remote-apis/blob/main/build/bazel/remote/execution/v2/remote_execution.proto#L407) RPCs by returning a recursively flattened list of files and directories from a given root directory. The flattening process can be very expensive for large directories full of third-party dependencies. Since these directories rarely change, our remote cache service itself caches the flattening results in a bespoke “TreeCache.” Then, our `GetTree` handler walks the children of each level of the directory tree in parallel, fetching from the TreeCache when possible to short-circuit evaluation of a cached branch. ![remote-builds-image-7](/images/fast-secure-builds-choose-two/image-6.png) In this example, an isolated change to the src/climate/components/Badge.tsx file allows us to fetch >99.9% of the GetTree response from our TreeCache. Branches that are unchanged and thus cached are denoted with green dashes. On the topic of large directories, we’ve started experimenting with an alternative strategy where actions depend on a [SquashFS](https://en.wikipedia.org/wiki/SquashFS) image that bundles action dependencies which don’t change often. For example, changes to a `package.json` (the primary input to a large `node_modules` directory) are few and far between. This has led to observed performance improvements across the board: the Bazel client spends less time building an action digest, our cache service spends less time in the `GetTree` RPC, and our execution service creates *orders of magnitude* fewer hard links. Our remote execution service has a couple other tricks up its sleeve. For example, when our distribution layer schedules an action on an executor, it checks if another executor is already running an identical action. If so, rather than reserving resources and executing the action itself, the second executor blocks on completion of the first execution and re-uses its results. Action merging consistently helps improve build performance and efficiency, especially for particularly lengthy actions. Since the Bazel client never checks the remote cache after starting an action, this optimization relies on our remote execution service. ![remote-builds-image-8](/images/fast-secure-builds-choose-two/image-7.png) We’re constantly on the lookout for new techniques to improve the performance, reliability and efficiency of our remote build services. For instance, we recently investigated [NILFS](https://en.wikipedia.org/wiki/NILFS), a log-structured filesystem that could rival LVM’s snapshotting performance. As our system grows, we’re exploring new strategies for load balancing in a highly heterogeneous environment, essentially solving a low-latency distributed scheduling problem. We’re eager to explore Firecracker’s [snapshotting support](https://github.com/firecracker-microvm/firecracker/blob/main/docs/snapshotting/snapshot-support.md) which could help drive down latency in workloads where JVM startup is significant. For example, we could speed up Java compilation by scheduling actions on a microVM that has already started a JVM. Providing our engineers with a CI system that delivers rapid feedback on their changes and tightening the development loop is a top priority for Stripe. Our solution wouldn’t be possible without Bazel. Its primitives give our engineers and platform teams a foundation for expressing rich, domain-specific build and test pipelines. Engineers across the organization benefit from a shared vocabulary and toolkit that not only streamlines their support experience, but also provides our productivity teams with a single point of extraordinarily high leverage. In particular, features like cached build results and distributed build execution are table stakes as we strive to support thousands of engineers. Rather than spreading our investment across bespoke caching and distribution models for every language’s build/test toolchain, we’ve invested deeply in implementing Bazel’s remote caching and execution APIs. Building remote caching and execution services that can delight everyone, from the Stripes testing their Subscriptions API change to the Stripes evaluating our infrastructure’s security posture, is a significant task. Our approach relies on a unique combination of technologies to meet its performance goals while balancing security. We’re far from done. Each morning, we’re invigorated by the opportunity to raise the bar of engineering productivity at Stripe. By 2017, Stripe had grown to the point where hundreds of engineers had written millions of lines of code. Most of that code was—and still is—written in Ruby, which is famous for helping engineers iterate quickly (if somewhat notorious for encouraging inscrutable code). Unfortunately we were starting to see Ruby come apart at the seams: new engineers found it hard to learn the codebase, and existing engineers were scared to make sweeping changes. Everyone faced a constant tradeoff: run the fast, local tests which might not catch many breakages, or run all the tests, even the slow ones. Ruby was becoming a source of friction more than a source of productivity. We set out to change that, with two goals in mind: make it easier to understand the code, while doubling down on what makes Ruby productive and delightful. This was the backdrop against which we decided to create and open source [Sorbet](https://sorbet.org/), a fast, powerful type checker designed for Ruby. Sorbet statically analyzes a codebase, builds up an understanding of how each piece of code relates to every other piece, and then exposes that knowledge to the programmer via type errors, autocompletion results, documentation on hover, or jumps between definitions and usages. Today Sorbet runs over Stripe’s entire Ruby codebase, **currently amounting to over 15 million lines of code spread across 150,000 files**. We can't take credit for pioneering the idea of adding static types to a dynamically typed language—Microsoft and Facebook popularized the approach with TypeScript and Hack, respectively. However, we thought it was worth sharing how Sorbet has not just met but exceeded our goals in the almost four years since we first enabled it on our Ruby codebase. Sorbet reinforces the delightful bits of Ruby while making engineers more productive. Not only has it made code easier to understand, it’s even helped shape and reinforce Stripe's engineering culture as we've grown. But before we dive into what makes Sorbet… Sorbet, let’s take a short step back in time to its origins at Stripe. #### A brief history of Sorbet inside Stripe Type annotations arrived in Stripe's Ruby codebase as early as November 2016, almost a full year before work began on Sorbet. These annotations were born out of a desire to encourage engineers to write modular units with clear public interfaces. Here's an example test case from the pull request that introduced type annotations: ![Blog > Sorbet > Declare method syntax image](https://images.stripeassets.com/fzn2n1nzq965/30W43dgvJa6iyZHKPvqsrs/97a4dcc22ba70f3e8348ccd4a41583bc/01-declare-method-syntax.png?w=1078&q=80) Neither Sorbet nor any other static type checker existed to consume these type annotations yet; they existed only at runtime. The `declare_method` call above acted like a decorator on the `def call` method: it would check that the `msg` argument given to `call` was a `String` and that `call` returned a `String` on every invocation. Throughout the next year, these runtime-only annotations spread throughout Stripe's codebase. Months prior we had added [Flow](https://flow.org/), a static type checker for JavaScript, to our frontend codebase. Ruby developers quickly grew envious and kept asking us what it would take to get the same features for Ruby. We staffed an effort to figure out what it would take to either adopt one of the two in-progress Ruby type checkers—RDL and TypedRuby—or to build our own. RDL proved to be powerful, but too slow[1](#rld-ruby-type-checker-detail). TypedRuby was faster, but had bugs that would have required a near-rewrite to solve[2](#typedruby-type-checker-detail). So in November 2017, we began writing Sorbet from scratch. Six months later, in May 2018, Sorbet type checking became required in Stripe’s automated test suite. After another year of internal adoption, [we released Sorbet to the world](https://sorbet.org/blog/2019/06/20/open-sourcing-sorbet) in June 2019. In all that time a lot has changed—Sorbet has far more features today than we ever imagined back then. But there's been one constant driving force behind the project: building tools that make engineers working in Ruby more productive. #### Supercharged productivity in Ruby When we ask how Sorbet makes people more productive they tell us all sorts of things, but the most common theme is raw speed. Sorbet gives near-instantaneous feedback while editing: for 80% of edits, it can finish reporting type errors in milliseconds, even in our multi-million line codebase. The longest error reporting wait times measure in seconds. Types aren't a replacement for tests, but few test suites are fast enough to run on every edit like Sorbet. But there's more to it than just speed: Sorbet takes the toil out of understanding how code fits together. On the day we rolled out the [Sorbet-powered VS Code extension](https://sorbet.org/blog/2022/01/06/open-sourcing-sorbet-vscode) for Ruby, Justin Duke described the feeling better than anyone: > Having just spent the past few minutes clicking around VSCode like a kid on Christmas morning, I don't think it's an exaggeration to say that this might be the single largest improvement in my pay-server [Stripe's Ruby codebase] productivity since joining Stripe. In a large codebase, Ruby can be uniquely hard to understand, even among other dynamically typed languages. What's worse is that it's hard to just, say, lint against the features that make Ruby hard to understand, because many of them are Ruby's most *loved* features. Here are some of the features that can make a Ruby codebase hard to unravel: **Ruby lacks import statements** (like those in Python or JavaScript), which bind global names to file-scoped names. Instead, Ruby provides `require` statements, which merely run other Ruby code. This mechanism works kind of like `#include` statements in C and C++: a single `require` statement might hide implicit calls to hundreds of other `require` statements. But this feature enables Rails’ famous “convention over configuration” approach to project layouts, which many people love about it, you don't *have* to import files in Rails, you can just reference the code you want to reference. **Ruby encourages factoring code into modules**, which can then be mixed into classes or even other modules. When used well, modules can help organize code into composable, testable units. But on the other hand, overuse of modules obscures where a method is defined behind a deep ancestor hierarchy. New Stripe engineers working in our codebase frequently struggled to find a method’s definition when it came into scope from behind multiple layers of modules. **Ruby embraces metaprogramming**, which is when methods and objects are dynamically created by code itself, instead of directly by the programmer. Concretely, this means that while some methods are written literally like `def invoices; ...; end`, others are defined dynamically by calling a library function like `has_many(:invoices)`. Metaprogramming as a way to share code is one of the biggest reasons why projects like Rails have been so successful. Unfortunately, metaprogramming is very opaque. It prevents simple regular expression searches from surfacing method definitions. Once a definition is found, the programmer still has to trace through code to know things like what arguments the method takes. We built Sorbet to make it easy to navigate and understand a codebase without having to give up these features people love about Ruby. The key, more than just reporting type errors quickly, is to offer a powerful editor extension, which provides ever-present answers to common questions. The answer to “where is this class defined?” is a click away, not hidden behind multiple `require` statements. “How am I supposed to use this method?” fades as a flick of the cursor reveals the method's types and documentation, replacing a lengthy crawl through a class's transitive mixins. Instant responses from Sorbet mean less time toiling and more time discovering. Building Sorbet in a way where it delivers type errors and IDE responses so fast comes from a set of design choices we made early on in its development. First, Sorbet is written in C++, not Ruby. To quote Nelson Elhage, one of the founding members of the team, "Writing in C++ doesn't automatically make your program fast, and a program does not need to be written in C++ to be fast. However, using C++ well gives an experienced team a fairly unique set of tools to write high-performance software." C++ gives us great baseline performance and a lot of headroom for further improvement when we decide that it's critical to make a given component of Sorbet fast. Another key element of why Sorbet is fast is that we deliberately chose a simple type inference algorithm. Specifically, Sorbet only does local type inference, so the result of type checking one method never affects the result of type checking another method. This inference algorithm is a pure function of the code inside a method and Sorbet's immutable indexes of what's defined where. Put this all together, and Sorbet's inference algorithm is embarrassingly parallel, scaling to as many cores as the machine has available while being able to use fast shared memory instead of copying large data structures. #### A bedrock for engineering values In addition to the productivity boost, an unintentional benefit to come out of adopting Sorbet has been its cultural impact. In a fast-growing company, communicating and codifying cultural norms can be a full time job on its own! Sorbet lends concrete structure to some of Stripe's engineering norms. Consider the cultural norm “Stripe should grow **more** reliable over time.” Despite our best efforts, production incidents happen—our goal when an incident happens is to make sure the same one doesn't happen again. After years of using Sorbet, Stripe engineers reflexively reach for type annotations as a preventative tool when doing incident remediations. As an aside, it's interesting to reflect on the classes of problems that simply don't happen at Stripe anymore (or if they do, they happen exceedingly rarely). For example: typos that used to manifest as `NameError: uninitialized constant` exceptions in production have been entirely replaced by static type errors. But even some more subtle problems are absent, like this one: ```rb def update_invoice(invoice, paid) # ... end update_invoice('in_1KZ7eP2eZvKYlo2C3B98SLc9', true) # ??? ) ``` Does this method need to be passed a string invoice ID, or a full invoice object? Scanning the implementation for context clues can sometimes help, but type annotations replace guesswork with machine-checked assurances: ```rb sig {params(invoice: Invoice, paid: T::Boolean).void} def update_invoice(invoice, paid) # ... end # error: Expected `Invoice` but found `String` for argument `invoice` update_invoice('in_1KZ7eP2eZvKYlo2C3B98SLc9', true) ``` [View in the Sorbet Playground →](https://sorbet.run/#%23%20typed%3A%20true%0Aextend%20T%3A%3ASig%0A%0Aclass%20Invoice%0A%20%20%23%20...%0Aend%0A%0Asig%20%7Bparams%28invoice%3A%20Invoice%2C%20paid%3A%20T%3A%3ABoolean%29.void%7D%0Adef%20update_invoice%28invoice%2C%20paid%29%0A%20%20%23%20...%0Aend%0A%0A%23%20error%3A%20Expected%20%60Invoice%60%20but%20found%20%60String%60%20for%20argument%20%60invoice%60%0Aupdate_invoice%28'in_1KZ7eP2eZvKYlo2C3B98SLc9'%2C%20true%29) This brings up another norm: “public interfaces should have up-to-date documentation.” For this we use a clever trick about how Sorbet's [strictness levels](https://sorbet.org/docs/type-annotations#type-annotations-and-strictness-levels) work. Sorbet activates in files with `# typed: true` comments at the top of the file, but only in a “best-effort” mode: type annotations aren't required and all methods behave as though their arguments were annotated with `T.untyped`. But by trading up to `# typed: strict`, Sorbet stops assuming `T.untyped` and instead requires signatures for all methods. To encourage this, Stripe’s continuous integration (CI) system looks through all code changes and leaves a “Stripe code quality score” in a comment on the pull request, like this one: ![Blog > Sorbet > Code quality image](https://images.stripeassets.com/fzn2n1nzq965/5m2hOHqiIl1pEo2OO4eh6x/36ef24d2ee31911f1c03cc9ae956266a/03-code-quality-comment.png?w=1616&q=80) The score is reported as a weighted sum of signals, where a smaller score is better. There are a lot of inputs to the score, and we hide the ones that don’t change in a given pull request, but the one relevant to Sorbet in the picture above reads, “Number of non-test files which are not strictly typed (typed below `strict`).” This means both the author and reviewer get a heads up when new files aren't using `# typed: strict`, reminding them that at Stripe we really prefer all Ruby code to be type-annotated. After almost 4 years of Sorbet at Stripe, 85% of all non-test files opt into `# typed: strict` (and for that matter, over 95% of all files are `# typed: true`). We often say that most of Stripe's engineers haven't been hired yet. Tooling like Sorbet encodes lessons learned over the years and helps teach these lessons to new engineers in a hands-on environment. As we continue to grow, especially distributed around the globe, Sorbet will continue to serve as a concrete reference point for new and old coworkers to align on shared engineering values. Ruby fits in alongside a handful of other languages in use at Stripe. Stripe is also deeply investing in building new product backends in Java, building delightful frontend experiences with TypeScript, and various pieces of infrastructure in Go. Stripe commits to staffing high quality development experiences across all of these languages, not just Ruby. Making strategic investments in tooling ensures engineers at Stripe write code that is safe and fast as we scale. After all this time, Sorbet is still gaining features, performance improvements, and bug fixes. We love that Sorbet lets us enhance Ruby's natural productivity while helping shape Stripe's code to be resilient and understandable as we grow. As we approach 5 years since Sorbet's conception, we can't wait to see where the next 5 years will lead! Sorbet is written in C++ and compiles to WebAssembly, which means you can [try it out in your browser.](https://sorbet.run/) Below you’ll find a link to the Sorbet Playground. A few years ago, Bloomberg Businessweek published a feature story on Stripe. Four words spanned the center of the cover: “seven lines of code,” suggesting that’s all it took for a business to power payments on Stripe. The assertion was bold—and became a theme and meme for us. To this day, it’s not entirely clear which seven lines the article referenced. The prevailing theory is that it’s the roughly seven lines of [curl](https://en.wikipedia.org/wiki/CURL) it took to create a `Charge`. In 2011, the code snippet featured on our landing page was nine lines long. But remove the optional `description` and `card[cvc]`, and there are visually seven lines: ![blog-payment-api-design-screenshot](/images/payment-api-design/image-0.jpg) A partial screenshot of [Stripe.com](https://stripe.com/), circa 2011. Courtesy of [the Internet Archive Wayback Machine](https://archive.org/web/). However, a search for *the* seven lines of code ultimately misses the point: the ability to open up a terminal, run this curl snippet, then *immediately* see a successful credit card payment *felt like* seven lines of code. It’s unlikely that a developer believed a production-ready [payments integration](https://stripe.com/guides/how-to-evaluate-billing-software) involved literally only seven lines of code. But taking something as complex as credit card processing and reducing the integration to only a few lines of code that, when run, immediately returns a successful `Charge` object is really quite magical. Abstracting away the complexity of payments has driven the evolution of our APIs over the last decade. This post provides the context, inflection points, and conceptual frameworks behind our API design. It’s the extreme exception that our approach to APIs makes the cover of a business magazine. This post shares a bit more of how we’ve grown around and beyond those seven lines. ### A condensed history of Stripe’s payments APIs Successful products tend to organically expand over time, resulting in product debt. Similar to tech debt, product debt accumulates gradually, making the product harder to understand for users and change for product teams. For API products, it’s particularly tempting to accrue product debt because it’s hard to get your users to fundamentally restructure their integration; it’s much easier to get them to add a parameter or two to their existing API requests. In retrospect, we see clearly how our APIs have evolved—and which decisions were pivotal in shaping them. Here are the milestones that defined our payments APIs and led to the [PaymentIntents API](https://stripe.com/docs/payments/payment-intents). #### Supporting card payments in the US (2011-2015) We first launched the Stripe API in the US, where credit cards were—and still are—the predominant payment method. The “seven lines of code” largely sufficed, but reality was only a *tiny* bit more complicated. We also created [Stripe.js](https://stripe.com/docs/js), a JavaScript library to collect card payment details from the browser and securely store them with Stripe, represented as a `Token` which can later be used to create a `Charge`. This helped users avoid tedious PCI compliance requirements. ![payment api diagram 1](/images/payment-api-design/image-1.svg) > A `Token` is created client-side and sent to the server. A `Charge` is then created server-side using that `Token`. This payment flow follows a very common pattern in traditional web applications. The JavaScript client uses a publishable API key to create a `Token` and sends both to the server when customers submit the payment form (along with other form data about the order). The server synchronously creates a `Charge` using that `Token` and a secret API key; orders can optionally be fulfilled based on the outcome of the payment. The `Charge` and the `Token` became foundational concepts in our payment API. #### Adding ACH and Bitcoin (2015) When we first created `Charges` and `Tokens`, they only supported credit card payments. As we expanded to more countries and types of users, we needed to add more [payment methods](https://stripe.com/guides/payment-methods-guide) to the API. In 2015, we added: - **ACH debit**, a common payment method in the US since the 1970s. ACH is used when moving money between US bank accounts, and supports both crediting and debiting bank accounts. - **Bitcoin**, which was just gaining mindshare in the early 2010s. An increasing number of businesses were experimenting with accepting Bitcoin as a payment method. We describe payments as “finalized” when a user has sufficient confidence the funds are guaranteed. (Of course, even finalized payments can be reversed later due to fraud or subsequent refunds.) In most cases, upon finalization, users release shipment of goods. While payments processed on card networks are initiated by the merchant and can be immediately finalized, these two payment methods are quite different from cards. Payments processed on the ACH network are finalized *days* later. With Bitcoin, customers (rather than the merchant) determine *when* a Bitcoin transaction is created. Like ACH payments, Bitcoin payments are also not finalized immediately. While the merchant will know that the customer has created the Bitcoin transaction once it is picked up by a block, it still requires 6 blocks—or about an hour—to finalize the transaction. | | Payment is immediately finalized | Payment is finalized later | | --- | --- | --- | | **No customer action required**
To initiate money movement | | | | **Customer action required**
To initiate money movement | | | The Charges API supported cards, ACH debit, and Bitcoin as payment methods. Each of these first three payment methods differ in how the payment is initiated and when funds are guaranteed. This made the task of creating APIs that abstract over their differences quite challenging. Here’s what we did: **ACH debit**. Since card payments and ACH debit payments both require only static information from the customer (i.e., card number or bank account number), we expanded the `Token` resource to represent both card details and bank account details. A user still created a `Charge` from either type of `Token`, but we added a `pending` state to the `Charge` to represent that an ACH debit `Charge` isn’t immediately finalized and could still fail. Users ran their order fulfillment logic days later, when they received a webhook indicating that the `Charge` had succeeded. ![payment api diagram 2](/images/payment-api-design/image-2.svg) > A new `pending` state was added to the `Charge` to represent payments that finalize asynchronously. **Bitcoin**. As Bitcoin didn’t fit into our abstractions, we had to introduce a new `BitcoinReceiver` API to facilitate the client-side action we needed the customer to take in the online payment flow. Particular to Stripe, a “receiver” was a temporary receptacle for funds. It had a very simple state machine that described the status of the receiver: a boolean, `filled`, that was either true or false. Once the receiver was filled, the user could create a `Charge` using that `BitcoinReceiver` object instead of a `Token` object. This would virtually move the funds from the receiver to the user’s balance. If a user didn’t create the `Charge` within a certain time frame, the money in the receiver would be refunded to the customer. Like ACH debit Charges, Bitcoin Charges started in the `pending` state and succeeded asynchronously. ![payment api diagram 3](/images/payment-api-design/image-3.svg) > We introduced the BitcoinReceiver resource to represent that the customer needed to take an action to complete the payment. With ACH debit and Bitcoin, the integration grew more complex. It now involved dealing with asynchronous payment finalization, and in Bitcoin’s case, it involved managing two state machines to complete payment: `BitcoinReceiver` on the client and `Charge` on the server. #### Seeking a simpler payments API (2015 - 2017) Over the next two years, we added more payment methods. Most of them were more like Bitcoin than cards—they required customer action to initiate a payment. We discovered that it wouldn’t be developer-friendly to introduce a brand new `BitcoinReceiver`-like resource for each of these—it would simply introduce too many new Stripe-specific concepts to reason about in the API. We aspired to design a simpler payments API and began exploring how to unify these payment methods on one integration path: the [Sources API](https://stripe.com/docs/sources). | | Payment is immediately finalized | Payment is finalized later | | --- | --- | --- | | **No customer action required**
To initiate money movement | | | | **Customer action required**
To initiate money movement | | | The Sources API was designed to be a single client-side API that could represent multiple payment methods. We combined the two client-side abstractions we’d previously designed (`Tokens` and `BitcoinReceivers`) into a client-driven state machine called a Source. Upon creation, a Source could be immediately `chargeable` (e.g., for card payments) or `pending` (e.g., for payment methods that require customer action). The server-side integration remained a single HTTP request that used a secret key to create a `Charge`. ![payment api diagram 4](/images/payment-api-design/image-4.svg) > We combined the functionality of `Tokens` and receivers into a single client-side API: `Sources`. The payment flow for every payment method relied on the same two API abstractions: a `Source` and a `Charge`. This seems conceptually simple at first glance, as it resembled a card integration in the U.S. However, once we understood how this flow integrated into users’ applications, we discovered many rough edges. For example, when users added a payment method that doesn’t finalize immediately, they could no longer fulfill their customers’ orders immediately after the `Charge` was created. Instead, they’d have to wait until the `Charge` transitioned to `succeeded` before shipping goods. This usually involved adding a webhook integration that listens for `charge.succeeded` and moving fulfillment logic there. `Sources` and `Charges` were still more complex for other payment methods—and integration issues could lead to lost revenue. For example, with [iDEAL](https://stripe.com/payments/payment-methods-guide#ideal), the predominant payment solution in the Netherlands, the customer initiates the payment after they’re redirected to their bank’s website or mobile app. If the client-side application creates a `Source` and the browser then loses connectivity with the server, the next request to create a `Charge` wouldn’t make it through, even though the customer believes they paid. (The browser could lose connectivity for any number of reasons: the customer closes their tab after they pay on their bank’s site, the payment method requires a redirect that the customer never returns from, or the customer has a flaky internet connection.) Because the server never created a `Charge`, we’d refund the money associated with the `Source` after a few hours. This is a conversion nightmare. To reduce the chance of this occurring, we recommended that users either poll the Stripe API from their server until the `Source` became `chargeable` or listen for the `source.chargeable` webhook event to create the `Charge`. But, if a user’s payment application goes down and they use `Sources` and `Charges`, these webhooks aren’t delivered and the server won’t create the `Charge`. We’ll return the customer’s money and users have to get them back on their site to pay again. Even if the user implements and maintains this best practice correctly, there’s still complexity around the different possible states of `Sources` and `Charges` and the paths and requirements for different payment method types. ![payment api diagram 5](/images/payment-api-design/image-5.svg) > There are many ways to actually create a `Charge` from the `Source`, depending on the payment method. Some `Sources`—like cards and bank accounts—are *synchronously chargeable* and can be charged immediately on the server after the online payment form is submitted, while others are *asynchronous* and can only be charged hours or days later. Users often built parallel integrations using both synchronous HTTP requests and event-driven webhook handlers to support each type. This means users now have multiple places where they’re creating a `Charge` and fulfilling their order. The code branching factor deepens for payment methods like OXXO, where the customer prints out a physical voucher and brings it to an OXXO store to pay for it in cash. Money is paid entirely out-of-band, making our best practice recommendation of listening for the `source.chargeable` webhook event absolutely *required* for these payment methods. Finally, users must track both the Charge ID and Source ID for each order. If two `Sources` become chargeable for the same order (e.g., the customer decides to switch their payment method mid-payment) they can ensure they don’t double-charge for the order. This effort demands more bookkeeping and conceptual understanding from developers than “seven lines of code” did. Our users *needed* to grok all of these edge cases in order to build a functioning Stripe integration. Imagine the confusion caused by reasoning about these two state machines, with varying definitions of each state depending on the payment solution. Developers must manage the success, failure, and pending states of two state machines—whose states may differ across different payment methods—in order to complete a single payment. ![payment api diagram 7](/images/payment-api-design/image-6.svg) > Users must manage two different state machines that span client and server to complete a payment. Let’s refer back to the table of payment methods. You may notice that cards are the only payment method in the top left quadrant: they finalize immediately and don’t require customer action to complete a payment. This means we built support for new payment methods on top of a set of abstractions that were designed for the simplest payment method of them all: cards. Naturally, abstractions designed for cards were not going to be great at representing these more complex payment flows. | | Payment is immediately finalized | Payment is finalized later | | --- | --- | --- | | **No customer action required**
To initiate money movement | | | | **Customer action required**
To initiate money movement | | | > Global payment methods aren’t different; cards are! Introducing additional states and expanding on the definition of resources that were created for a specific, narrow use case resulted in a confusing integration and an overloaded set of API abstractions. It’s as if we were trying to build a spaceship by adding parts to a car until it had the functionality of a spaceship: a difficult *and* likely doomed proposition. `Charges` and `Tokens` were foundational in the API because they were the first APIs we had, not because they were the right abstraction for global payments. We needed to fundamentally rethink our payments abstractions. #### Designing a unified payments API (*late 2017 - early 2018)* We were able to start designing the APIs we wanted when we set aside further changes to `Sources` and `Charges`. It was much easier *because* we had a chance to learn from users over the years, and deeply understood the issues they encountered with our existing integration paths. We also accumulated payments domain expertise, having had years of experience iterating on our APIs. Taken together, our API design had a better chance to not repeat past mistakes. We locked ourselves in a conference room for three months with the goal of designing a truly unified payments API. If successful, a developer would only need to understand a few basic concepts in order to build a payments integration. Even if they hadn’t heard of the payment method, they should be able to just add a few parameters to a few specific points in their integration. To enable this, the states and guarantees of our APIs had to be extremely predictable and consistent. There shouldn’t be an array of caveats and exceptions scattered throughout our docs. A team of five people—four engineers and a PM—walked through every payment method we supported and we could imagine supporting in the future. We iterated on an API design that would be able to model all of them. We ignored all existing abstractions and thought about the problem from first principles. ![Payments API conference room](/images/payment-api-design/image-7.jpg) ![Payments API conference room](/images/payment-api-design/image-8.jpg) We did early work on our unified payments API in a conference room named Lynx. It’s hard to remember now exactly what happened each day, but some rules and routines really helped us: - **Close laptops**. When working together in the same room, we found the fastest way to be fully present and attentive was to close our computers. When we did, we felt more listened to and could more clearly and easily explain our reasoning to each other. - **Pace your questions**. Start each session with a set of questions you want to answer. Write down any new questions that arise in a working session for the *next* session. Try to avoid discussing them in the moment. In the time between sessions, you’ll get some distance from those questions, collect new information, and meditate more on the topic. End each session with clear answers and questions to explore in the next session. - **Use colors and shapes**. Early on, lean on simple representations for complex, nascent concepts, rather than try to give them concrete names. We exhausted the available set of marker colors and drew many shapes on the whiteboard. This tack helped us avoid anchoring on specific definitions for the concepts that we were trying to shape—and helped us avoid naming bikesheds prematurely. - **Focus on enabling real user integrations.** In API design, it’s common to get caught up with pursuing perfect invariants, airtight theories, or intellectually pure solutions, but none of that is useful if it doesn’t enable a real user integration. One of our primary design tools was writing hypothetical integration guides to validate our concepts and to make sure we didn’t introduce old or new pits of failure. We wrote these for every payment method we could list—and even for some payment methods we made up, like sending cash via carrier pigeon. - **Question** ***every*** **assumption underpinning existing APIs**. We specifically designed the first API to make card payments extremely easy, and it grew relatively organically from there. We needed to reason from first principles at every turn. Looking back, we probably could have done it even more. - **Invite domain experts as guests.** Import know-how for discussions with a specific topic in mind. Elevate the conversation with expertise. - **Make decisions quickly knowing you might change your mind.** New observations or data would either further reinforce our initial decision or lead us to make a better choice. In every case, it was more efficient to make *a* decision early and avoid stasis, even if we later reversed that decision. > We frequently felt like we were brute-forcing the problem space, but the enemy of any large design project is not making decisions quickly enough because no option feels perfect. #### Introducing PaymentIntents and PaymentMethods (2018) We ended up with two new concepts: [PaymentIntents](https://stripe.com/docs/payments/payment-intents) and [PaymentMethods](https://stripe.com/docs/payments/payment-methods). By packaging these two concepts, we finally managed to create a single integration for all payment methods. **PaymentMethods**, like the original `Tokens`, represent static information about the payment method that the customer wants to use. It includes the payment scheme and the credentials needed to move money, like card information or the customer’s name or email. For some methods, like Alipay, only the payment method name is required because the payment method itself handles collecting further information after you redirect to their site. Unlike a `Source`, there is no state or data specific to the particular transaction type captured on a PaymentMethod object—you can think of it as an object that specifies *how* to process a payment request. **PaymentIntents**, on the other hand, capture transaction-specific data such as how much to charge and is the stateful object that tracks the customer’s attempt to pay with various payment methods. Combine a PaymentMethod (the “how”) and a PaymentIntent (the “what”) and payment can be attempted. If one payment attempt fails, the customer can try again with a different PaymentMethod. A PaymentIntent has the [following states](https://stripe.com/docs/payments/intents), summarized quickly here: - **requires\_payment\_method:** Specify the PaymentMethod to use. - **requires\_confirmation:** “Confirm” basically means “make money go!” Sometimes you want to pause between collecting payment method details and actually making the money go, and this (optional) state makes that possible. - **requires\_action:** Please perform the specified action. This can be anything from a generic `redirect_to_url` (self-explanatory) to a very payment-method-specific action like `oxxo_display_details`, which provides information for you to generate an OXXO voucher. - **processing:** You’re waiting on us to process the payment. - **succeeded:** The payment has been finalized. Funds are guaranteed. - **failed:** There’s no failed state because if a single payment attempt fails, the PaymentIntent goes back to the `requires_payment_method` state so that the customer can try again with a different payment method. This is convenient because the same object created server-side can be used repeatedly on the client. With `Charges` and `Sources`, a “best practice” payments integration for cards, iDEAL, and ACH debit required managing two webhook handlers (one that is time-sensitive and in the critical path to collecting money correctly), dealing with three different times a `Charge` could succeed, handling two paths to failure, and dealing with two stateful objects. With PaymentIntents and PaymentMethods, the integration is the same across all payment method types: start by creating a PaymentIntent on your server for the amount and currency to collect for an order. Pass the secret embedded on the PaymentIntent to the client. Collect the customer’s preferred payment method and confirm the PaymentIntent using the secret and payment method information. The PaymentIntent instructs what to do next when it’s in the `requires_action` state. Actions are standardized and predictable per payment method; for example, the [3D Secure](https://stripe.com/docs/payments/3d-secure) authentication flow is managed via a set of actions. Lastly, listen for the `payment_intent.succeeded` webhook or wait for the PaymentIntent to enter the `succeeded` state to know when funds are guaranteed and when to fulfill a customer’s order. This is wholly managed by one predictable state machine. Importantly for conversion, the sole webhook handler that users must implement isn’t in the critical path to collecting money. ![payment api diagram 6](/images/payment-api-design/image-9.svg) > A PaymentIntents integration. #### Launching PaymentIntents and PaymentMethods (*2018 - 2020)* The design of a set of APIs that would work across all payment gateway methods globally with a single integration was the hard but fun part. The implementation of a beta, production-ready version of the API was also relatively straightforward. But launching a new payment API that replaces a foundational, established API doesn’t stop at just writing the code to spec—rolling out this change took *almost two years*. ##### Connecting the design to reality Introducing a new set of abstractions to an existing public API is much harder than updating internal interfaces. No matter the size of the company, sufficient tenacity and planning can drive teams to upgrade their dependencies. However, for an API *product*, there’s no forcing developers to migrate, nor breaking their integration. > A great API product stays out of the developer’s way for as long as possible. If it is possible to make small changes to an existing API to accommodate new use cases, try that first so developers don’t have to rewrite their integration. In our case, we already knew from experience that just adding more parameters and states to the existing API resources wasn’t working. Even if the resource had the same name, the payment flow would look completely different. That said, the alternative—building new, entirely independent APIs which required developers to migrate everything at once—also felt daunting. After talking to many users, we identified common patterns in their integrations. One integration *created* Stripe objects in the payment solution. Other integrations *consumed* Stripe objects for analytics, support, or reporting—potentially syncing these objects to their own database. For some users, these integrations were even owned by different teams. Given a core feature of Stripe’s APIs is that developers don’t have to touch their integration for years, we had to figure out a way to motivate users to migrate their payment flow. One way to do this was to make sure that any changes to the payment flow don’t break their other integrations. To accomplish this, we decided to layer over the legacy APIs and create a `Charge` object for each payment attempted by the PaymentIntent. This way, users could migrate their payment flow to the PaymentIntents API while their analytics and reporting integrations still chugged along on an unchanged `Charge` resource. (This is also a good reason to not just reuse the `Charge` abstraction with changes to conceptually behave more like PaymentIntents. Lots of users and extensions make assumptions about what a `Charge` means, and changing its state machine drastically would break those assumptions.) We didn’t like how cluttered the `Charge` resource had become over the last seven years, so this was not ideal. Between 2011 and 2018, the `Charge` resource grew from having 11 properties to 36 properties and `Charge` creation grew from accepting 5 parameters to 14 parameters! To make sure we don’t make the problem worse as we add more payment methods, we introduced [payment\_method\_details](https://stripe.com/docs/api/charges/object#charge_object-payment_method_details), a polymorphic, typed hash on the `Charge` that contains payment-method-specific data. This approach helps us keep the top-level `Charge` resource simple, while making payment details easy to find and identify for details such as a partner reference ID or a payment-method-specific verification status: ```ts { payment_method_details: { type: PaymentMethodType, [PaymentMethodType]: { // Payment-method-specific details about the transaction. // For cards, maybe it’s the CVC verification information. // For OXXO, maybe it’s the voucher information. } } } ``` Over time, we’ve standardized this design pattern and have applied it to other resources in the API. Layering over the Charges API is just one example of a design compromise we had to make for the sake of migration. There were many other smaller challenges, but ultimately they all had *some* least-bad solution we could pursue, so it wasn’t too dire. The *hardest* part of realizing the PaymentIntent migration was not a technical challenge, but a perception challenge: The new APIs didn’t feel like “seven lines of code” anymore. ### Keep it simple, Stripe In normalizing the API across all payment methods, card payments became more complicated to integrate by introducing webhook events and by flipping the order of the client and server requests in the payment flow. These choices are not intuitive for those familiar with card payments, nor are they easy to implement for developers building traditional web applications. ![blog-payment-api-design-diagram-before-after](/images/payment-api-design/image-10.svg) ![blog-payment-api-design-diagram-before-after](/images/payment-api-design/image-11.svg) > Compared to a simple card payments integration on Charges, a PaymentIntents integration requires flipping the client and server API calls and dealing with a webhook. This change to card payments was a challenge for one of our most important types of users: the [eager developer](https://increment.com/apis/api-design-for-eager-discerning-developers/) at a startup who wants to get up and running with card payments for checkout as soon as possible. Before, their seven lines of code pasted in a terminal would result in a successful charge. This new payment processing flow relies on asynchronous events, so the magic becomes much less tangible. PaymentIntents is also objectively a harder integration for users who *only* care about accepting card payments in the US and Canada. We flipped the order of the client and server calls, which is difficult for traditional web applications to handle, and webhooks are often more than a little bit annoying to set up, test, and debug. (We later developed the [Stripe CLI](https://stripe.com/docs/stripe-cli) to make developing with webhooks simpler for users.) The power-to-effort curve looks different between the Charges integration and the new PaymentIntents integration. Each incremental PaymentMethod is cheap to add to a PaymentIntents integration. However, speed is key for startups who want to get started quickly. With `Charges`, getting cards running was intuitive and low-effort—a compelling combination for startups. ![payment api design graph 1](/images/payment-api-design/image-12.svg) > A PaymentIntents integration requires more effort up front, but each incremental payment method requires little incremental work to understand and add. On the other hand, a Charges integration is very low-effort for cards in the US and Canada, but becomes tedious and unpredictable for each subsequent payment method. Our first attempt at launching PaymentIntents without overwhelming existing users was to show both the PaymentIntents and Charges integration guides in our documentation, switching which one we showed first depending on the user’s location. The idea was that *most* users in the US did not need these non-card payment methods, and thus would feel overwhelmed by the idea of payments as a state machine. In reality, this branching between two completely different integrations was *tremendously* confusing. Many US businesses *do* want to go global, and folks aren’t always coding from the locale of the business they want to run. If a developer for a EU-based business ended up following the Charges integration guide, they’d eventually realize that they would have to start from scratch. This happened a few times, and was always a costly and painful experience. It was not user-centric thinking to assuage our own worries about this big API change by recommending two incompatible integration paths. Our ultimate solution to this problem was to add a *convenient* *packaging* of the API that caters to the hypothetical user that would turn away from our APIs if they had to use webhooks up front. We called the default integration the “global payments integration” and named the new integration “[card payments without bank authentication](https://stripe.com/docs/payments/without-card-authentication).” We put the implications of this integration front and center in the documentation: with this simpler flow, you won’t be able to easily add new payment methods. The way this conceptual packaging actually manifests in the API is a special parameter called `error_on_requires_action`. This parameter tells the PaymentIntent to error if further action is required to complete the payment. A user who wants a simple payment flow like `Charges` won’t be able handle any actions required by the PaymentIntent state machine. ```bash # Our packaging made PaymentIntents seven lines of code. curl https://api.stripe.com/v1/payment\_intents \ -u sk\_test\_xxx: \ -d amount=1099 \ -d currency=usd \ -d confirm=true \ -d payment\_method="{{PAYMENT\_METHOD\_ID}}" \ -d error\_on\_requires\_action=true ``` The parameter name makes it *very* clear what users are choosing. Additionally, this approach allows us to easily track how often users choose this integration path, which would not be possible if we’d just recommended that U.S. users *ignore* PaymentIntent states they couldn’t handle. Someday that eager developer will have the time to build out a webhooks integration or will need to add a new payment method. When that day comes, it’s clear what they need to do: remove the parameter from the integration to start handling the `requires_action` state. Developers using this *packaging* of PaymentIntents don’t have to change the core resources at play, even when they upgrade to the global integration. ![payment api design graph 2](/images/payment-api-design/image-13.svg) > Our simple packaging of PaymentIntents for U.S. and Canadian card payments requires the same amount of effort to integrate as `Charges`. With this packaging, we were able to provide a low-effort integration similar to `Charges` for users who had no interest in doing a global-payments-ready integration up front. > Keeping things simple doesn’t just mean reducing the number of resources or parameters. Two overloaded API abstractions are not simpler and are definitely not more flexible and powerful than three or four clearly-defined abstractions. Keeping things simple means making sure your APIs are consistent and predictable—and that you’re creating the right packages to gradually reveal the power of your API as your users need it. It also means not underestimating your user. It’s tempting to abstract away too much in service of “keeping things simple,” but users will often quickly discover that they need more control. ### An API product is more than just the API There has—and will always be—many lines of code propping up the vaunted “seven lines of code.” It’s reliably the case with APIs. They don’t happen without a lot of work that isn’t designing or building the actual API. Much of the effort required is unglamorous and tedious, like tracking down every piece of documentation, support article, and canned response that references the old APIs, reaching out to folks who have made community content and asking them to update it, and planning and recording many tutorials for users and user-facing teams. There’s also the teams that appear on the periphery, but are instrumental in the success of APIs. There’s the [documentation](https://stripe.com/docs/payments/integration-builder) and developer products that supplement the integration experience. [Stripe CLI](https://stripe.com/docs/stripe-cli)’s launch made webhooks much less daunting. A redesign of the information architecture of our documentation made relevant guides easier to find. [Stripe Samples](https://github.com/stripe-samples) allows developers who prefer to learn by example rather than prose to just start with some working code. A redesign of the payments view in the Stripe Dashboard allows developers to more easily debug and understand the PaymentIntent state machine. The care, choices, and effort of Stripes past and present from across the company contributed to our most recent two-year effort to design and launch our new payments APIs. The more we grow, the more we realize that we must continue to build and rebuild deliberately and thoughtfully. These are still early days. [Come join us](https://stripe.com/jobs/search?t=engineering).
## Events **September 30, 2026 — Tokyo** — https://stripetour.com/ja-JP/tokyo We invite you to join us at Stripe Tour Tokyo. It's a fantastic opportunity to experience firsthand the cutting edge of payments and financial technology. You'll deepen your connections with the business community through networking with industry experts and rapidly growing companies. Gain practical insights to drive business growth, adapt to changing markets, and build lasting customer relationships, which will serve as a driving force for your future business operations. **September 24, 2026 — Shanghai** — https://luma.com/kq8irpgg ​​Join the Stripe founder community for a day of hands-on building and coworking with the Stripe team. Whether you’re looking for a chance to connect with other founders, 1:1 guidance from the Stripe team, or just a change of scenery, we’d love to have you join. **September 23, 2026 — Shanghai** — https://stripe.events/tourshanghai Join business leaders and industry pioneers at Stripe Tour Shanghai to explore the latest trends in payments and fintech, expand your local business network, and hear insights from industry experts and leading companies. Here, you'll gain practical growth strategies, methods for responding to changing global market trends, and ideas for building lasting customer loyalty. **September 22, 2026 — San Francisco** — https://luma.com/ntusn7f5 Join us on September 22nd for the very first Stripe San Francisco developer meetup at the Stripe office in Oyster Point. This is an in-person event for anyone building with Stripe. An evening focused on Stripe user experiences, product insights, best practices, and community. **August 25, 2026 — Singapore** — https://stripetour.com/singapore Join fellow business leaders and builders at Stripe Tour Singapore to explore the latest in payments and financial technology. Connect with the local business community while learning from industry experts and growing companies. **August 25, 2026 — Singapore** — https://luma.com/BuildDaySG ​​Join the Stripe founder community for a day of hands-on building and coworking with the Stripe team. Whether you’re looking for a chance to connect with other founders, 1:1 guidance from the Stripe team, or just a change of scenery, we’d love to have you join. **August 19, 2026 — Sydney** — https://stripetour.com/sydney Join fellow business leaders and builders at Stripe Tour Sydney to explore the latest in payments and financial technology. Connect with the local business community while learning from industry experts and growing companies. **August 19, 2026 — Mexico City** — https://luma.com/tsxethoy ​​Join the Stripe founder community for a day of hands-on building and coworking with the Stripe team. Whether you’re looking for a chance to connect with other founders, 1:1 guidance from the Stripe team, or just a change of scenery, we’d love to have you join. **August 18, 2026 — Sydney** — https://luma.com/SydneyBuildDay ​​Join the Stripe founder community for a day of hands-on building and coworking with the Stripe team. Whether you’re looking for a chance to connect with other founders, 1:1 guidance from the Stripe team, or just a change of scenery, we’d love to have you join. **June 30, 2026 — Berlin** — https://stripetour.com/berlin Join fellow business leaders and builders at Stripe Tour Berlin to explore the latest in payments and financial technology. Connect with the local business community while learning from industry experts and growing companies. **June 16, 2026 — Paris** — https://stripetour.com/paris Join fellow business leaders and builders to celebrate 10 years in France at Stripe Tour Paris. Connect with the local business community while learning from industry experts and growing companies. **June 10, 2026 — London** — https://stripetour.com/london Join fellow business leaders and builders at Stripe Tour London to explore the latest in payments and financial technology. Connect with the UK business community while learning from industry experts and growing companies. **May 28, 2026 — Toronto** — https://luma.com/5hr44wnx ​Join us for a day of hands-on building with the Stripe team. Whether you’re looking for technical integration support from Stripe, a chance to connect with fellow founders, or a change of scenery, we’ll have you covered. **April 14, 2026 — London** — https://www.meetup.com/stripe-london/events/313852834/ Join us for a hands-on workshop where you'll build an agentic commerce solution and explore how AI agents can discover products and complete payments using Stripe. **March 12, 2026 — Europe** — https://luma.com/fw7d6s8w ​Join us for a day of hands-on building with the Stripe team. Whether you’re looking for technical integration support from Stripe, a chance to connect with fellow founders, or a change of scenery, we’ll have you covered.